- WPF Tutorial
- WPF - Home
- WPF - Overview
- WPF - Environment Setup
- WPF - Hello World
- WPF - XAML Overview
- WPF - Elements Tree
- WPF - Dependency Properties
- WPF - Routed Events
- WPF - Controls
- WPF - Layouts
- WPF - Nesting Of Layout
- WPF - Input
- WPF - Command Line
- WPF - Data Binding
- WPF - Resources
- WPF - Templates
- WPF - Styles
- WPF - Triggers
- WPF - Debugging
- WPF - Custom Controls
- WPF - Exception Handling
- WPF - Localization
- WPF - Interaction
- WPF - 2D Graphics
- WPF - 3D Graphics
- WPF - Multimedia
- WPF Useful Resources
- WPF - Quick Guide
- WPF - Useful Resources
- WPF - Discussion
WPF - Multimedia
WPF applications support video and audio using MediaElement. It allows you to integrate audio and video into an application. The MediaElement class works in a similar way as Image class. You just point it at the media and it renders it. The main difference is that it will be a moving image, but if you point it to the file that contains just audio and no video such as an MP3, it will play that without showing anything on the screen.
WPF supports all types of video/audio format depending on the machine configuration. If a media file plays a Media Player, it will also work in WPF on the same machine.
Example
Let’s take an example to understand how to integrate multimedia in your application.
Create a new WPF project with the name WPFMultimedia.
The following XAML code creates a media element and three buttons, and initializes them with some properties.
<Window x:Class = "WPFMultimedia.MainWindow"
   xmlns = "http://schemas.microsoft.com/winfx/2006/xaml/presentation"
   xmlns:x = "http://schemas.microsoft.com/winfx/2006/xaml"
   xmlns:d = "http://schemas.microsoft.com/expression/blend/2008"
   xmlns:mc = "http://schemas.openxmlformats.org/markup-compatibility/2006"
   xmlns:local = "clr-namespace:WPFMultimedia"
   mc:Ignorable = "d" Title = "MainWindow" Height = "350" Width = "604">

   <Grid>
      <StackPanel HorizontalAlignment = "Center" VerticalAlignment = "Center">
         <MediaElement Name = "myMedia" Source = "D:\MicrosoftMVA.mp4"
            LoadedBehavior = "Manual" Width = "591" Height = "274" />
         <StackPanel Orientation = "Horizontal" Margin = "0,10,0,0">
            <Button Content = "Play" Margin = "0,0,10,0" Padding = "5" Click = "mediaPlay" />
            <Button Content = "Pause" Margin = "0,0,10,0" Padding = "5" Click = "mediaPause" />
            <Button x:Name = "muteButt" Content = "Mute" Padding = "5" Click = "mediaMute" />
         </StackPanel>
      </StackPanel>
   </Grid>

</Window>
Here is the Click events implementation in C# for different buttons.
using System;
using System.Windows;

namespace WPFMultimedia {

   public partial class MainWindow : Window {

      public MainWindow() {
         InitializeComponent();
         myMedia.Volume = 100;
         myMedia.Play();
      }

      void mediaPlay(Object sender, EventArgs e) {
         myMedia.Play();
      }

      void mediaPause(Object sender, EventArgs e) {
         myMedia.Pause();
      }

      void mediaMute(Object sender, EventArgs e) {

         if (myMedia.Volume == 100) {
            myMedia.Volume = 0;
            muteButt.Content = "Listen";
         }
         else {
            myMedia.Volume = 100;
            muteButt.Content = "Mute";
         }
      }
   }
}
When you compile and execute the above code, it will produce the following window. You can play the video and control its playback with the three buttons.
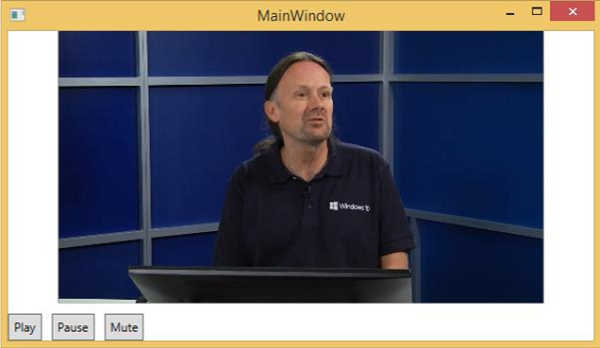
With the buttons you can pause, mute, and play the video.
Speech Synthesizer
WPF has features to convert text to speech. This API is included in System.Speech namespace. SpeechSynthesizer class transforms text into spoken words.
Example
Let’s have a look at a simple example.
Create a new WPF project with the name WPFTextToSpeech.
We will need System.Speech assembly to add as reference for SpeechSynthesizer class to work.
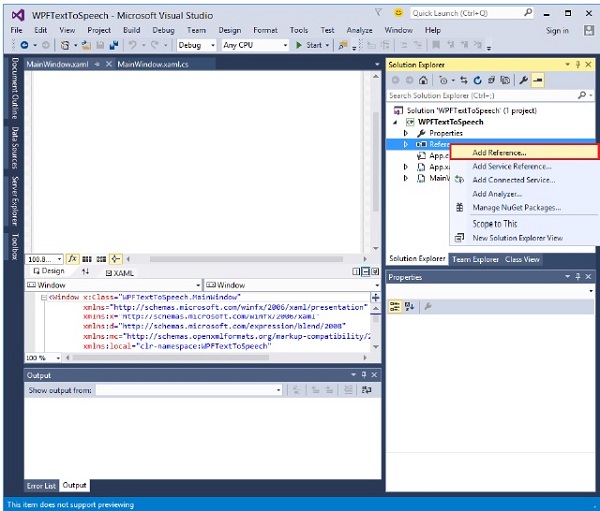
Right click on References and Select Add Reference.
Reference Manager dialog will open. Now check the System.Speech check box
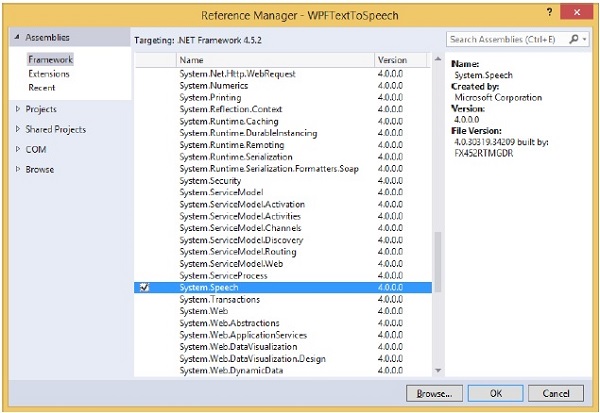
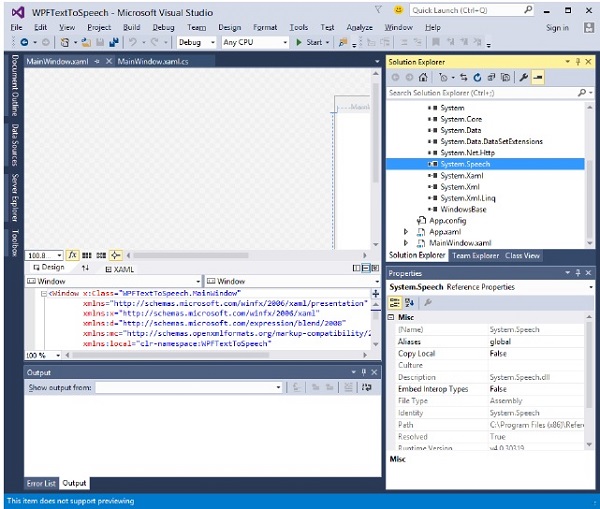
Click the Ok button. You can see the System.Speech assembly in your References.
Now drag a button and a textbox into the design window from the toolbox.
The following XAML code creates a button and a textbox, and initializes them with some properties.
<Window x:Class = "WPFTextToSpeech.MainWindow"
   xmlns = "http://schemas.microsoft.com/winfx/2006/xaml/presentation"
   xmlns:x = "http://schemas.microsoft.com/winfx/2006/xaml"
   xmlns:d = "http://schemas.microsoft.com/expression/blend/2008"
   xmlns:mc = "http://schemas.openxmlformats.org/markup-compatibility/2006"
   xmlns:local = "clr-namespace:WPFTextToSpeech"
   mc:Ignorable = "d" Title = "MainWindow" Height = "350" Width = "604">

   <Grid>
      <Button x:Name = "button" Content = "Speak"
         HorizontalAlignment = "Left" Margin = "218,176,0,0"
         VerticalAlignment = "Top" Width = "75"/>

      <TextBox x:Name = "textBox" HorizontalAlignment = "Left"
         Height = "23" Margin = "60,104,0,0" TextWrapping = "Wrap"
         VerticalAlignment = "Top" Width = "418"/>
   </Grid>

</Window>
Here is the simple implementation in C# which will convert the Text inside the textbox into spoken words.
using System.Speech.Synthesis;
using System.Windows;
namespace WPFTextToSpeech {
/// <summary>
/// Interaction logic for MainWindow.xaml
/// </summary>
public partial class MainWindow : Window {
public MainWindow() {
InitializeComponent();
}
private void button_Click(object sender, RoutedEventArgs e) {
if (textBox.Text != "") {
SpeechSynthesizer speechSynthesizer = new SpeechSynthesizer();
speechSynthesizer.Speak(textBox.Text);
}
else {
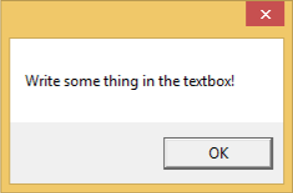
MessageBox.Show("Write some thing in the textbox!");
}
}
}
}
When you compile and execute the above code, it will produce the following window. Now, type Hello World inside the textbox and click the Speak button.
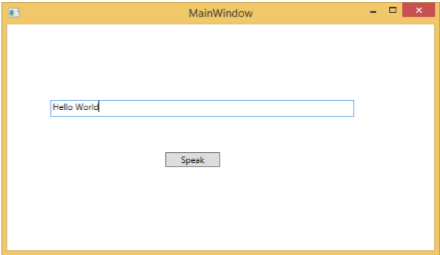
It will produce the sound "Hello World". If you don’t type anything in the textbox, then it will flash the following message.
We recommend that you execute the above examples.