- VueJS Tutorial
- VueJS - Home
- VueJS - Overview
- VueJS - Environment Setup
- VueJS - Introduction
- VueJS - Instances
- VueJS - Template
- VueJS - Components
- VueJS - Computed Properties
- VueJS - Watch Property
- VueJS - Binding
- VueJS - Events
- VueJS - Rendering
- VueJS - Transition & Animation
- VueJS - Directives
- VueJS - Routing
- VueJS - Mixins
- VueJS - Render Function
- VueJS - Reactive Interface
- VueJS - Examples
- VueJS Useful Resources
- VueJS - Quick Guide
- VueJS - Useful Resources
- VueJS - Discussion
VueJS - Events
v-on is the attribute added to the DOM elements to listen to the events in VueJS.
Click Event
Example
<html>
   <head>
      <title>VueJs Instance</title>
      <script type = "text/javascript" src = "js/vue.js"></script>
   </head>
   <body>
      <div id = "databinding">
         <button v-on:click = "displaynumbers">Click ME</button>
         <h2> Add Number 100 + 200 = {{total}}</h2>
      </div>
      <script type = "text/javascript">
         var vm = new Vue({
            el: '#databinding',
            data: {
               num1: 100,
               num2 : 200,
               total : ''
            },
            methods : {
               displaynumbers : function(event) {
                  console.log(event);
                  return this.total =  this.num1+ this.num2;
               }
            },
         });
      </script>
   </body>
</html>
Output
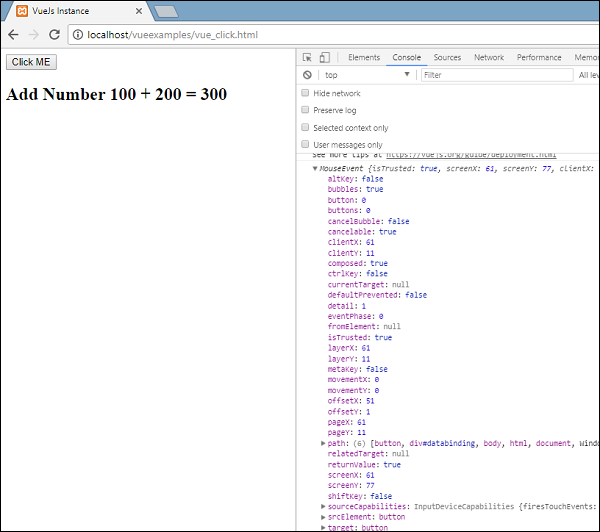
The following code is used to assign a click event for the DOM element.
<button v-on:click = "displaynumbers">Click ME</button>
There is a shorthand for v-on, which means we can also call the event as follows −
<button @click = "displaynumbers">Click ME</button>
On the click of the button, it will call the method ‘displaynumbers’, which takes in the event and we have consoled the same in the browser as shown above.
We will now check one more event mouseover mouseout.
Example
<html>
<head>
<title>VueJs Instance</title>
<script type = "text/javascript" src = "js/vue.js"></script>
</head>
<body>
<div id = "databinding">
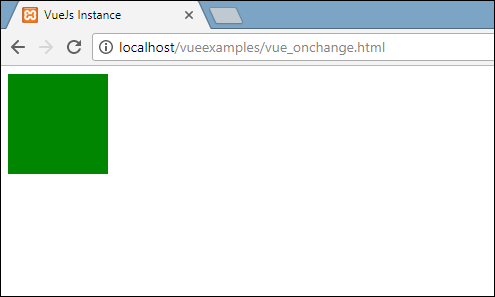
<div v-bind:style = "styleobj" v-on:mouseover = "changebgcolor" v-on:mouseout = "originalcolor"></div>
</div>
<script type = "text/javascript">
var vm = new Vue({
el: '#databinding',
data: {
num1: 100,
num2 : 200,
total : '',
styleobj : {
width:"100px",
height:"100px",
backgroundColor:"red"
}
},
methods : {
changebgcolor : function() {
this.styleobj.backgroundColor = "green";
},
originalcolor : function() {
this.styleobj.backgroundColor = "red";
}
},
});
</script>
</body>
</html>
In the above example, we have created a div with width and height as 100px. It has been given a background color red. On mouseover, we are changing the color to green, and on mouseout we are changing the color back to red.
Hence, during mouseover, a method is called changebgcolor and once we move the mouse out of the div, a method is called originalcolor.
This is done as follows −
<div v-bind:style = "styleobj" v-on:mouseover = "changebgcolor" v-on:mouseout = "originalcolor"></div>
Two events - mouseover and mouseout - is assigned to the div as shown above. We have created a styleobj variable and given the required style to be assigned to the div. The same variable is binded to the div using v-bind:style = ”styleobj”
In changebgcolor, we are changing the color to green using the following code.
changebgcolor : function() {
   this.styleobj.backgroundColor = "green";
}
Using the stylobj variable, we are changing the color to green.
Similarly, the following code is used to change it back to the original color.
originalcolor : function() {
   this.styleobj.backgroundColor = "red";
}
This is what we see in the browser.
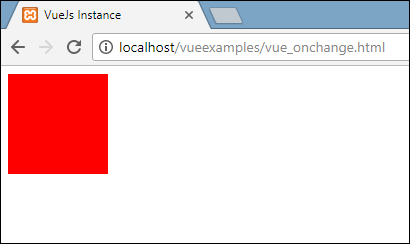
When we mouseover, the color will change to green as shown in the following screenshot.
Event Modifiers
Vue has event modifiers available on v-on attribute. Following are the modifiers available −
.once
Allows the event to execute only once.
Syntax
<button v-on:click.once = "buttonclicked">Click Once</button>
We need to add dot operator while calling the modifiers as shown in the syntax above. Let us use it in an example and understand the working of the once modifier.
Example
<html>
   <head>
      <title>VueJs Instance</title>
      <script type = "text/javascript" src = "js/vue.js"></script>
   </head>
   <body>
      <div id = "databinding">
         <button v-on:click.once = "buttonclickedonce" v-bind:style = "styleobj">Click Once</button>
         Output:{{clicknum}}
         <br/><br/>
         <button v-on:click = "buttonclicked"  v-bind:style = "styleobj">Click Me</button>
         Output:{{clicknum1}}
      </div>
      <script type = "text/javascript">
         var vm = new Vue({
            el: '#databinding',
            data: {
               clicknum : 0,
               clicknum1 :0,
               styleobj: {
                  backgroundColor: '#2196F3!important',
                  cursor: 'pointer',
                  padding: '8px 16px',
                  verticalAlign: 'middle',
               }
            },
            methods : {
               buttonclickedonce : function() {
                  this.clicknum++;
               },
               buttonclicked : function() {
                  this.clicknum1++;
               }
            }
         });
      </script>
   </body>
</html>
Output
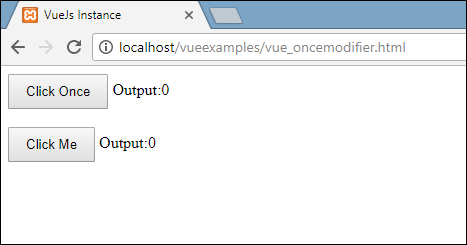
In the above example, we have created two butttons. The button with Click Once label has added the once modifier and the other button is without any modifier. This is the way the buttons are defined.
<button v-on:click.once = "buttonclickedonce" v-bind:style = "styleobj">Click Once</button>
<button v-on:click = "buttonclicked"  v-bind:style = "styleobj">Click Me</button>
The first button calls the method “buttonclickedonce” and the second button calls the method “buttonclicked”.
buttonclickedonce : function() {
   this.clicknum++;
},
buttonclicked : function() {
   this.clicknum1++;
}
There are two variables defined in the clicknum and clicknum1. Both are incremented when the button is clicked. Both the variables are initialized to 0 and the display is seen in the output above.
On the click of the first button, the variable clicknum increments by 1. On the second click, the number is not incremented as the modifier prevents it from executing or performing any action item assigned on the click of the button.
On the click of the second button, the same action is carried out, i.e. the variable is incremented. On every click, the value is incremented and displayed.
Following is the output we get in the browser.

.prevent
Syntax
<a href = "http://www.google.com" v-on:click.prevent = "clickme">Click Me</a>
Example
<html>
   <head>
      <title>VueJs Instance</title>
      <script type = "text/javascript" src = "js/vue.js"></script>
   </head>
   <body>
      <div id = "databinding">
         <a href = "http://www.google.com" v-on:click = "clickme" target = "_blank" v-bind:style = "styleobj">Click Me</a>
      </div>
      <script type = "text/javascript">
         var vm = new Vue({
            el: '#databinding',
            data: {
               clicknum : 0,
               clicknum1 :0,
               styleobj: {
                  color: '#4CAF50',
                  marginLeft: '20px',
                  fontSize: '30px'
               }
            },
            methods : {
               clickme : function() {
                  alert("Anchor tag is clicked");
               }
            }
         });
      </script>
   </body>
</html>
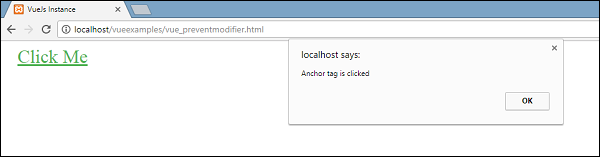
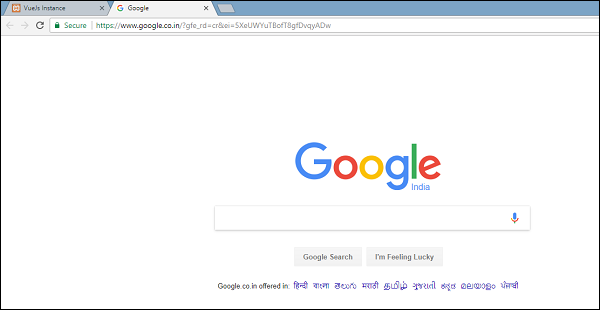
Output
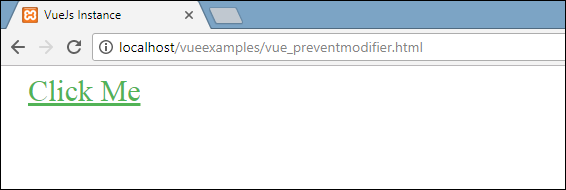
If we click the clickme link, it will send an alert as “Anchor tag is clicked” and it will open the link https://www.google.com in a new tab as shown in the following screenshots.
Now this works as a normal way, i.e. the link opens up as we want. In case we don’t want the link to open up, we need to add a modifier ‘prevent’ to the event as shown in the following code.
<a href = "http://www.google.com" v-on:click.prevent = "clickme" target = "_blank" v-bind:style = "styleobj">Click Me</a>
Once added, if we click on the button, it will send an alert message and will not open the link anymore. The prevent modifier prevents the link from opening and only executes the method assigned to the tag.
Example
<html>
   <head>
      <title>VueJs Instance</title>
      <script type = "text/javascript" src = "js/vue.js"></script>
   </head>
   <body>
      <div id = "databinding">
         <a href = "http://www.google.com" v-on:click.prevent = "clickme" target = "_blank" v-bind:style = "styleobj">Click Me</a>
      </div>
      <script type = "text/javascript">
         var vm = new Vue({
            el: '#databinding',
            data: {
               clicknum : 0,
               clicknum1 :0,
               styleobj: {
                  color: '#4CAF50',
                  marginLeft: '20px',
                  fontSize: '30px'
               }
            },
            methods : {
               clickme : function() {
                  alert("Anchor tag is clicked");
               }
            }
         });
      </script>
   </body>
</html>
Output
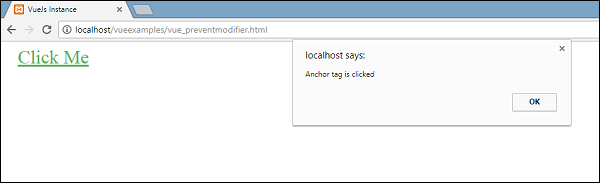
On the click of the link, it will display the alert message and does not open the url anymore.
Event - Key Modifiers
VueJS offers key modifiers based on which we can control the event handling. Consider we have a textbox and we want the method to be called only when we press Enter. We can do so by adding key modifiers to the events as follows.
Syntax
<input type = "text" v-on:keyup.enter = "showinputvalue"/>
The key that we want to apply to our event is V-on.eventname.keyname (as shown above)
We can make use of multiple keynames. For example, V-on.keyup.ctrl.enter
Example
<html>
   <head>
      <title>VueJs Instance</title>
      <script type = "text/javascript" src = "js/vue.js"></script>
   </head>
   <body>
      <div id = "databinding">
         <input type = "text" v-on:keyup.enter = "showinputvalue" v-bind:style = "styleobj" placeholder = "Enter your name"/>
         <h3> {{name}}</h3>
      </div>
      <script type = "text/javascript">
         var vm = new Vue({
            el: '#databinding',
            data: {
               name:'',
               styleobj: {
                  width: "30%",
                  padding: "12px 20px",
                  margin: "8px 0",
                  boxSizing: "border-box"
               }
            },
            methods : {
               showinputvalue : function(event) {
                  this.name=event.target.value;
               }
            }
         });
      </script>
   </body>
</html>
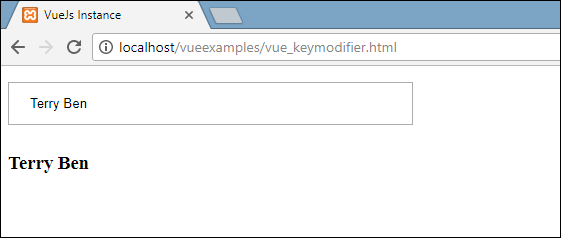
Output
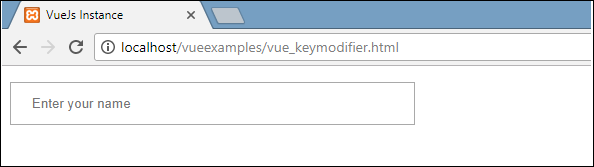
Type something in the textbox and we will see it is displayed only when we press Enter.
Custom Events
Parent can pass data to its component using the prop attribute, however, we need to tell the parent when there are changes in the child component. For this, we can use custom events.
The parent component can listen to the child component event using v-on attribute.
Example
<html>
<head>
<title>VueJs Instance</title>
<script type = "text/javascript" src = "js/vue.js"></script>
</head>
<body>
<div id = "databinding">
<div id = "counter-event-example">
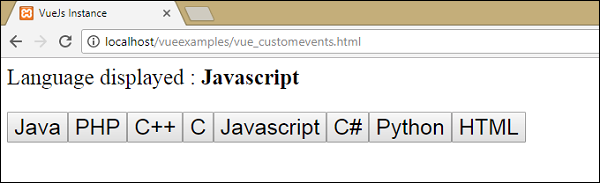
<p style = "font-size:25px;">Language displayed : <b>{{ languageclicked }}</b></p>
<button-counter
v-for = "(item, index) in languages"
v-bind:item = "item"
v-bind:index = "index"
v-on:showlanguage = "languagedisp"></button-counter>
</div>
</div>
<script type = "text/javascript">
Vue.component('button-counter', {
template: '<button v-on:click = "displayLanguage(item)"><span style = "font-size:25px;">{{ item }}</span></button>',
data: function () {
return {
counter: 0
}
},
props:['item'],
methods: {
displayLanguage: function (lng) {
console.log(lng);
this.$emit('showlanguage', lng);
}
},
});
var vm = new Vue({
el: '#databinding',
data: {
languageclicked: "",
languages : ["Java", "PHP", "C++", "C", "Javascript", "C#", "Python", "HTML"]
},
methods: {
languagedisp: function (a) {
this.languageclicked = a;
}
}
})
</script>
</body>
</html>
Output
The above code shows the data transfer between the parent component and the child component.
The component is created using the following code.
<button-counter
   v-for = "(item, index) in languages"
   v-bind:item = "item"
   v-bind:index = "index"
   v-on:showlanguage = "languagedisp">
</button-counter>
There is a v-for attribute, which will loop with the languages array. The array has a list of languages in it. We need to send the details to the child component. The values of the array are stored in the item and the index.
v-bind:item = "item"
v-bind:index = "index"
To refer to the values of the array, we need to bind it first to a variable and the varaiable is referred using props property as follows.
Vue.component('button-counter', {
   template: '<button v-on:click = "displayLanguage(item)"><span style = "font-size:25px;">{{ item }}</span></button>',
   data: function () {
      return {
         counter: 0
      }
   },
   props:['item'],
   methods: {
      displayLanguage: function (lng) {
         console.log(lng);
         this.$emit('showlanguage', lng);
      }
   },
});
The props property contains the item in an array form. We can also refer to the index as −
props:[‘item’, ‘index’]
There is also an event added to the component as follows −
<button-counter
   v-for = "(item, index) in languages"
   v-bind:item = "item"
   v-bind:index = "index"
   v-on:showlanguage = "languagedisp">
</button-counter>
The name of the event is showlanguage and it calls a method called languagedisp which is defined in the Vue instance.
In the component, the template is defined as follows −
template: '<button v-on:click = "displayLanguage(item)"><span style = "font-size:25px;">{{ item }}</span></button>',
There is a button created. The button will get created with as many count in the language array. On the click of the button, there is a method called displayLanguage and the button clicked item is passed as a param to the function. Now the component needs to send the clicked element to the parent component for display which is done as follows −
Vue.component('button-counter', {
   template: '<button v-on:click = "displayLanguage(item)"><span style = "font-size:25px;">{{ item }}</span></button>',
   data: function () {
      return {
         counter: 0
      }
   },
   props:['item'],
   methods: {
      displayLanguage: function (lng) {
         console.log(lng);
         this.$emit('showlanguage', lng);
      }
   },
});
The method displayLanguage calls this.$emit(‘showlanguage’, lng);
$emit is used to call the parent component method. The method showlanguage is the event name given on the component with v-on.
<button-counter
   v-for = "(item, index) in languages"
   v-bind:item = "item"
   v-bind:index = "index"
   v-on:showlanguage = "languagedisp">
</button-counter>
We are passing a parameter, i.e. the name of the language clicked to the method of the main parent Vue instance which is defined as follows.
var vm = new Vue({
   el: '#databinding',
   data: {
      languageclicked: "",
      languages : ["Java", "PHP", "C++", "C", "Javascript", "C#", "Python", "HTML"]
   },
   methods: {
      languagedisp: function (a) {
         this.languageclicked = a;
      }
   }
})
Here, the emit triggers showlanguage which in turn calls languagedisp from the Vue instance methods. It assigns the language clicked value to the variable languageclicked and the same is displayed in the browser as shown in the following screenshot.
<p style = "font-size:25px;">Language displayed : <b>{{ languageclicked }}</b></p>
Following is the output we get in the browser.
