- TurboGears Tutorial
- TurboGears - Home
- TurboGears - Overview
- TurboGears - Environment
- TurboGears - First Program
- TurboGears - Dependencies
- TurboGears - Serving Templates
- TurboGears - HTTP Methods
- Genshi Template Language
- TurboGears - Includes
- TurboGears - JSON Rendering
- TurboGears - URL Hierarchy
- TurboGears - Toscawidgets Forms
- TurboGears - Validation
- TurboGears - Flash Messages
- TurboGears - Cookies and Sessions
- TurboGears - Caching
- TurboGears - Sqlalchemy
- TurboGears - Creating Models
- TurboGears - Crud Operations
- TurboGears - DataGrid
- TurboGears - Pagination
- TurboGears - Admin Access
- Authorization & Authentication
- TurboGears - Using MongoDB
- TurboGears - Scaffolding
- TurboGears - Hooks
- TurboGears - Writing Extensions
- TurboGears - Pluggable Applications
- TurboGears - Restful Applications
- TurboGears - Deployment
- TurboGears Useful Resources
- TurboGears - Quick Guide
- TurboGears - Useful Resources
- TurboGears - Discussion
Turbogears - Quick Guide
TurboGears - Overview
What is Web Framework?
Web Application Framework or simply Web Framework represents a collection of libraries and modules, which enables a web application developer to write applications, without having to bother about low level details such as protocols, thread management, etc.
What is TurboGears?
TurboGears is a web application framework written in Python. Originally created by Kevin Dangoor in 2005, its latest version TurboGears (ver 2.3.7) is managed by a group of developers led by Mark Ramm and Florent Aide.
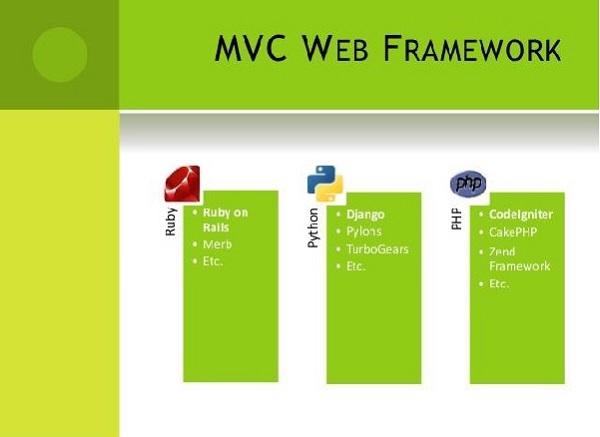
TurboGears follows the Model-View-Controller paradigm as do most modern web frameworks like Rails, Django, Struts, etc.
Model View Controller
MVC is a software design pattern for developing web applications. A Model View Controller pattern is made up of three parts −
Model − The lowest level of the pattern is responsible for maintaining data.
View − This is responsible for displaying all or a portion of data to the user.
Controller − Software Code that controls the interactions between the Model and View.
MVC is popular as it isolates the application logic from the user interface layer and supports separation of concerns. Here, the Controller receives all requests for the application and then works with the Model to prepare any data needed by the View. The View then uses the data prepared by the Controller to generate a final presentable response. The MVC abstraction can be graphically represented as follows −

The Model
The Model is responsible for managing the data of the application. It responds to the request from the view and it also responds to instructions from the controller to update itself.
The View
A presentation of data in a particular format, triggered by a controller's decision to present the data. They are script based templating systems very easy to integrate with AJAX technology.
The Controller
The controller is responsible for responding to the user input and perform interactions on the data model objects. The Controller receives the input, it validates the input and then performs the business operation that modifies the state of the data model.
TurboGears is built on top of a number of libraries and tools. These tools have changed between different versions of TurboGears. The components of current version (ver 2.3.7) are listed below.
SQLAlchemy
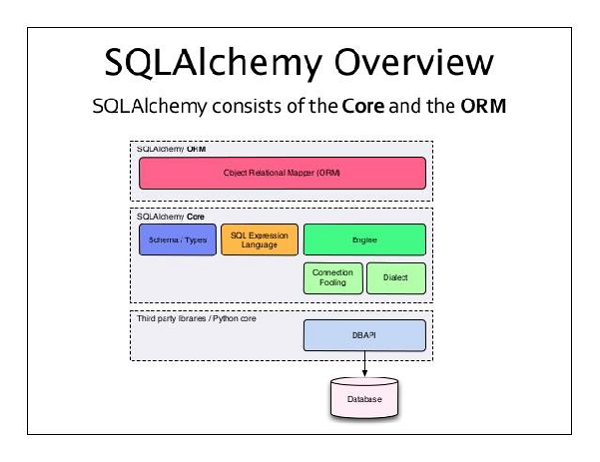
It is an open source SQL kit that provides Object relation mapping (ORM) for Python code.
Genshi
This templating engine is used to construct the front-end of TG applications. A web templating system combines a template with a certain data source to render dynamic web pages.
ToscaWidgets
It is a widget library for generating HTML forms with server side controls. Tosca also acts as a middleware to connect with JavaScript widgets and toolkits.
Gearbox
It provides a set of commands to manage projects and server TurboGears applications. TurboGears applications can be deployed on any WSGI compliant web server.
The Web Server Gateway Interface (WSGI) has been adopted as a standard for Python web application development. WSGI is a specification for universal interface between web server and web applications. The wsgiref package is a reference implementation of WSGI. It is used to add WSGI support to web TurboGears web framework. The simple_server module in this package implements a simple HTTP server that serves WSGI applications. We shall be using it to test applications developed during this tutorial.
TurboGears - Environment
Prerequisite
Python 2.6 or higher. Earlier versions of TurboGears were not compliant with Python 3.X. Latest version claims to work well on Python 3.X. However, official documentation of TurboGears is still based on Python 2.7 environment.
The following command installs virtualenv −
pip install virtualenv
This command needs administrator privileges. Add sudo before pip on Linux/Mac OS. If you are on Windows, log in as Administrator. On Ubuntu virtualenv may be installed using its package manager.
Sudo apt-get install virtualenv
Once installed, the new virtual environment is created in a folder.
mkdir newproj
cd newproj
virtualenv venv
To activate corresponding environment, on Linux/OS X
venv/bin/activate
on Windows
venv\scripts\activate
We are now ready to install TurboGears in this environment. A minimal installation of TurboGears is done by following command −
pip install TurboGears2
The above command can be run directly without virtual environment for system wide installation.
To install TurboGears along with development tools, use following command −
pip install tg.devtools
TurboGears - First Program
TurboGears has a minimal mode that makes it possible to create single file applications quickly. Simple examples and services can be built quickly with minimal set of dependencies.
Application class in a TG application is inherited from TGController class. Methods in this class are available for access by @expose decorator from tg module. In our first application, index() method is mapped as root of our application. The TGController class also needs to be imported from tg module.
from tg import expose, TGController
class MyController(TGController):
   @expose()
   def index(self):
      return 'Hello World turbogears'
Next, set the application’s configuration and declare application object. AppConfig class constructor here takes two parameters – minimal attribute set to true and the controller class.
config = AppConfig(minimal = True, root_controller = RootController())
application = config.make_wsgi_app()
The make_wsgi_app() function here constructs application object.
In order to serve this application, we now need to start the HTTP server. As mentioned earlier, we shall use simple_server module in wsgiref package to set up and start it. This module has make_server() method which requires port number and application object as arguments.
from wsgiref.simple_server import make_server
server = make_server('', 8080, application)
server.serve_forever()
It means that our application is going to be served at port number 8080 of localhost.
The following is the complete code of our first TurboGears application −
app.py
from wsgiref.simple_server import make_server
from tg import expose, TGController, AppConfig

class MyController(TGController):

   @expose()
   def index(self):
      return 'Hello World TurboGears'

config = AppConfig(minimal = True, root_controller = MyController())
application = config.make_wsgi_app()

print "Serving on port 8080..."
server = make_server('', 8080, application)
server.serve_forever()
Run the above script from Python shell.
Python app.py
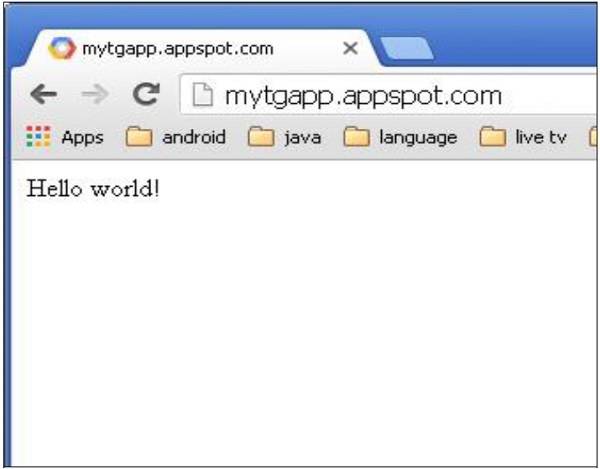
Enter http://localhost:8080 in browser’s address bar to view ‘Hello World TurboGears’ message.
The tg.devtools of TurboGears contains Gearbox. It is a set of commands, which are useful for management of more complex TG projects. Full stack projects can be quickly created by the following Gearbox command −
gearbox quickstart HelloWorld
This will create a project called HelloWorld.
TurboGears - Dependencies
A TurboGears project contains the following directories −
Config − Where project setup and configuration relies
Controllers − All the project controllers, the logic of web application
i018n − Translation files for the languages supported
Lib − Utility python functions and classes
Model − Database models
Public Static Files − CSS, JavaScript and images
Templates − Templates exposed by our controllers.
Tests − The set of Tests done.
Websetup − Functions to execute at application setup.
How to Install a project
This project now needs to be installed. A setup.py is already provided in project’s base directory. Project dependencies get installed when this script is executed.
Python setup.py develop
By default, following dependencies are installed at the time of project set up −
- Beaker
- Genshi
- zope.sqlalchemy
- sqlalchemy
- alembic
- repoze.who
- tw2.forms
- tgext.admin ≥ 0.6.1
- WebHelpers2
- babel
After installation, start serving the project on development server by issuing following command in shell −
Gearbox serve –reload –debug
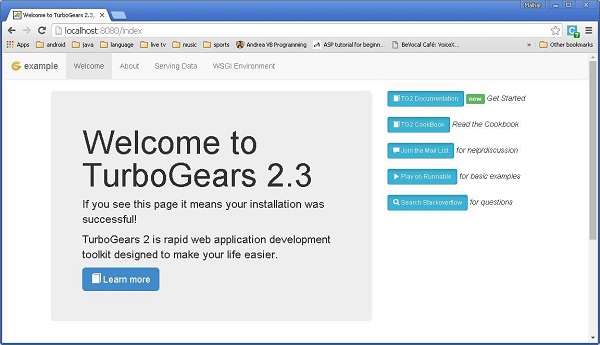
Follow the above mentioned command to serve a pre-built example project. Open http://localhost:8080 in browser. This readymade sample application gives a brief introduction about TurboGears framework itself.
In this Hello project, the default controller is created in controllers directory as Hello/hello/controllers.root.py. Let us modify root.py with following code −
from hello.lib.base import BaseController
from tg import expose, flash

class RootController(BaseController):
   movie = MovieController()
   @expose()
   def index(self):
      return "<h1>Hello World</h1>"

   @expose()
   def _default(self, *args, **kw):
      return "This page is not ready"
Once a basic working application is ready, more views can be added in the controller class. In the Mycontroller class above, a new method sayHello() is added. The @expose() decorator attaches /sayHello URL to it. This function is designed to accept a name as a parameter from the URL.
After starting server through ‘gearbox serve’ command, http://localhost:8080. Hello World message will be displayed in the browser, even if the following URLs are entered −
http://localhost:8080/
http://localhost:8080/index
All these URLs are mapped to RootController.index() method. This class also has _default() method that will be invoked, whenever a URL is not mapped to any specific function. Response to URL is mapped to a function by @expose() decorator.
It is possible to send a parameter to an exposed function from the URL. The following function reads the name parameter from URL.
@expose()
def sayHello(self, name):
   return '<h3>Hello %s</h3>' %name
The following output will be seen in the browser as response to the URL − http://localhost:8080/?name=MVL
Hello MVL
TurboGears automatically maps URL parameters to function arguments. Our RootController class is inherited from BaseController. This is defined as base.py in the lib folder of application.
Its code is as follow −
from tg import TGController, tmpl_context
from tg import request

__all__ = ['BaseController']

def __call__(self, environ, context):
   tmpl_context.identity = request.identity
   return TGController.__call__(self, environ, context)
TGController.__call__ dispatches to the Controller method the request is routed to.
TurboGears - Serving Templates
An Event though HTML content can be returned to the browser, for more advanced output, the use of template engine is always preferred. In a full stack project ‘quickstarted’ by gearbox, Genshi is enabled as the default template renderer. In a minimal application, however Genshi (or any other template engine, such as jinja) needs to be installed and enabled. Genshi template engine permits to write templates in pure xhtml and validates them to detect issues at compile time and prevent serving broken pages.
Templates are referred to by using a dotted notation. In our Hello project a templates directory is provided to store template web pages. Hence sample.html will be referred as hello.templates.sample (extension not mentioned). TurboGears renders this template through an expose decorator to link controller method to it by tg.render_template() function.
The exposed controller function returns a Python dictionary object. This dictionary object is in turn passed on to the linked template. Placeholders in template are filled with dictionary values.
To begin with, let us display a web page with plain html script. The exposed controller returns a null dictionary object as we do not intend to send any data to be parsed inside the HTML script.
How to Creat a Sample HTML
Our sample.html is given below. Ensure that it is stored in templates directory of project.
<html>
<head>
<title>TurboGears Templating Example</title>
</head>
<body>
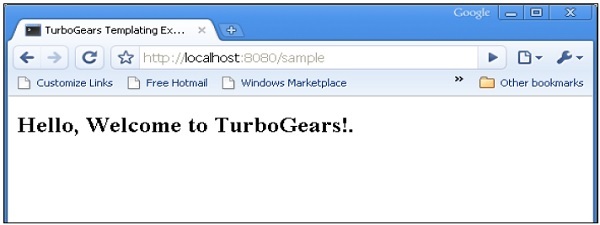
<h2>Hello, Welcome to TurboGears!.</h2>
</body>
</html>
Add sample() function in root.py and expose sample.html through it.
@expose("hello.templates.sample")
   def sample(self):
      return {}
The following result will be displayed in the browser when a URL http://localhost:8080/sample is entered after starting the web server.
As mentioned above, a dictionary object is sent as collection of parameters to a Genshi template. This template contains ‘place holders’, which are dynamically filled with parameters received from the controller.
Let us change the sample() function to send a dictionary object to the sample template.
@expose("hello.templates.sample")
   def sample(self,name):
      mydata = {'person':name}
      return mydata
Create sample.html in templates folder (templates\sample.html)
<html>
<head>
<title>TurboGears Templating Example</title>
</head>
<body>
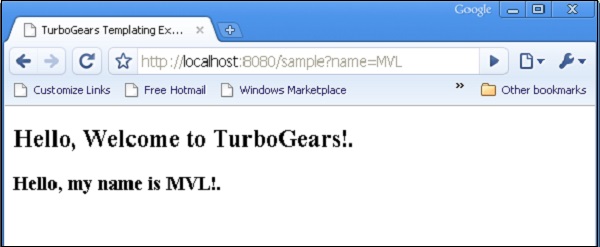
<h2>Hello, my name is ${person}!.</h2>
</body>
</html>
In the above HTML code, ${person} is the placeholder. Enter http://localhost:8080/sample?name=MVL as URL in the browser. This URL is mapped to sample() method in our root controller. It returns a dictionary object. This is picked by linked template page sample.html in templates directory. The ${person} is then substituted by MVL in the web page.
It is also possible to access the HTML form data in a controller function. HTML form uses to send form data.
TurboGears - HTTP Methods
Http Protocol is the foundation of data communication in world wide web. Different methods of data retrieval from specified URL are defined in this protocol. Following table summarizes different http methods −
| Sr.No. | HTTP Methods & Description |
|---|---|
| 1 | GET Sends data in unencrypted form to the server. Most common method. |
| 2 | HEAD Same as GET, but without response body |
| 3 | POST Used to send HTML form data to server. Data received by POST method is not cached by server. |
| 4 | PUT Replaces all current representations of the target resource with the uploaded content. |
| 5 | DELETE Removes all current representations of the target resource given by a URL |
Creating an HTML Form
Let us create an HTML Form and send form data to a URL. Save the following script as login.html
<html>
   <body>
      <form action = "http://localhost:8080/login" method = "get">
         <p>Enter Name:</p>
         <p><input type = "text" name = "nm" /></p>
         <p><input type = "submit" value = "submit" /></p>
      </form>
   </body>
</html>
Data entered in this form is to be submitted to ‘/login’ URL. Now create a controller function loginpage() and expose the above html page to it.
@expose("hello.templates.login")
   def loginpage(self):
      return {}
In order to receive the form data, provide a login() controller, which has form attributes as its parameters. Here ‘nm’ is name of text input field in login form, the same is used as a parameter of login() function.
@expose("hello.templates.sample")
   def login(self, nm):
      name = nm
      return {'person':name}
As it can be seen, data received from login form is being sent to sample.html template (used earlier). It is parsed by a Genshi template engine to generate the following output −

POST Method
When HTML form uses POST method to dispatch data to the URL in action attribute, the form data is not exposed in URL. The encoded data is received in a dict argument by the controller function. The **kw argument below is the dictionary object holding for data.
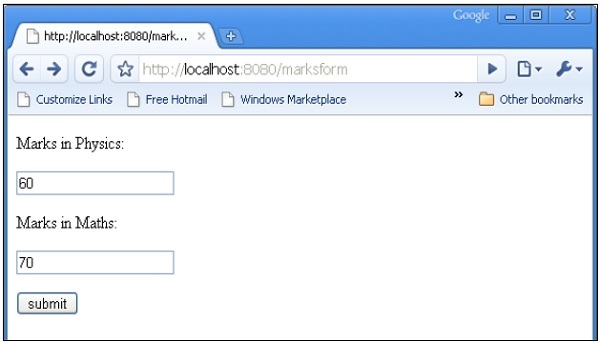
HTML form contains two input text fields.
<html>
   <body>

      <form action = "http://localhost:8080/marks" method = "post">
         <p>Marks in Physics:</p>
         <p><input type = "text" name = "phy" /></p>
         <p>Marks in Maths:</p>
         <p><input type = "text" name = "maths" /></p>
         <p><input type = "submit" value = "submit" /></p>
      </form>

   </body>
</html>
The marks() controller receives form data and sends it to sample.html template. Code for root.py is as follows −
from hello.lib.base import BaseController
from tg import expose, request

class RootController(BaseController):
   @expose("hello.templates.marks")
   def marksform(self):
      return {}

   @expose("hello.templates.sample")
   def marks(self, **kw):
      phy = kw['phy']
      maths = kw['maths']
      ttl = int(phy)+int(maths)
      mydata = {'phy':phy, 'maths':maths, 'total':ttl}
      return mydata
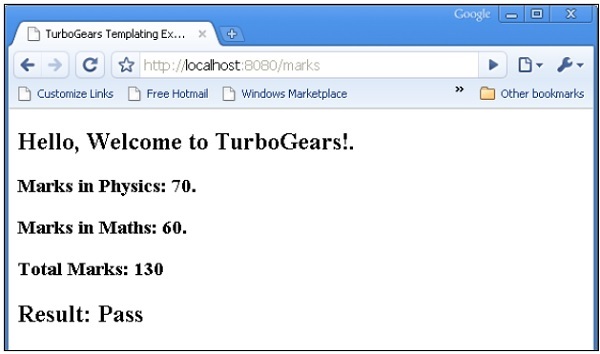
Finally, the sample.html template is as follows −
<html>
   <head>
      <title>TurboGears Templating Example</title>
   </head>

   <body>
      <h2>Hello, Welcome to TurboGears!.</h2>
      <h3>Marks in Physics: ${phy}.</h3>
      <h3>Marks in Maths: ${maths}.</h3>
      <h3>Total Marks: ${total}</h3>
   </body>

</html>
Start the server (if not already running)
Gearbox server –reload –debug
Enter http://localhost::8080/marksform in browser
The sample.html will render following output −

TurboGears - Genshi Template Language
Genshi is a XML based template language. It is similar to Kid, which used to be the template engine for earlier versions of TurboGears. Genshi as well as Kid are inspired by other well-known template languages like HSLT, TAL and PHP.
A Genshi template consists of processing directives. These Directives are elements and attributes in a template. Genshi directives are defined in a namespace http://genshi.edgewall.org/ . Hence this namespace needs to be declared in the root element of template.
<html xmlns = "http://www.w3.org/1999/xhtml"
   xmlns:py = "http://genshi.edgewall.org/"
   lang = "en">
...
</html>
Above declaration means that default namespace is set to XHTML and Genshi directives have ‘py’ prefix.
Genshi Directives
A number of directives are defined in Genshi. Following list enumerates Genshi directives −
- py:if
- py:choose
- py:for
- py:def
- py:match
- py:with
- py:replace
- py:content
- py:attrs
- py:strip
Conditional Sections
Genshi provides two directives for conditional rendering of content− py:if and py:choose.
py:if
The contents of this directive’s element will be rendered only if the expression in if clause evaluates to true. Assuming that data in the template context is {‘foo’:True, ‘bar’:’Hello’}, the following directive −
<div>
   <b py:if = "foo">${bar}</b>
</div>
will result in
Hello
This output, however would not be rendered if ‘foo’ is set to False.
This directive can also be used as element. In this case <py:if> must be closed by corresponding </py:if>
<div>
   <py:if test = "foo">
      <b>${bar}</b>
   </py:if>
</div>
py:choose
The advanced conditional processing is possible with the use of py:choose in combination with py:when and py:otherwise directives. This feature is similar to switch – case construct in C/C++.
Expression in py:choose directive is checked with different values identified with py:when alternatives and corresponding contents will be rendered. A default alternative can be provided in the form of py:otherwise directive.
<div py:choose = "foo”>
   <span py:when = "0">0</span>
   <span py:when = "1">1</span>
   <span py:otherwise = "">2</span>
</div>
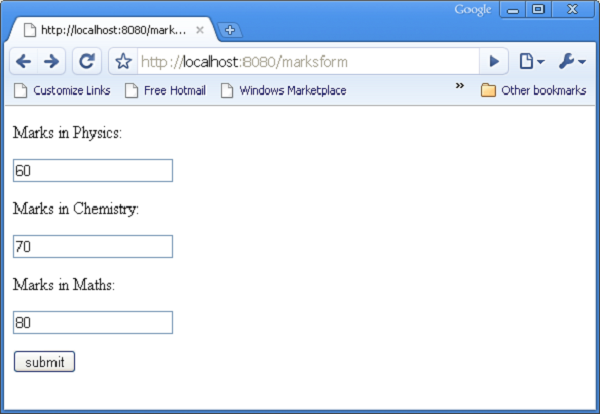
The following example illustrates use of py:choose and py:when directives. The HTML form posts data to /marks URL. The marks() function redirects marks and results in the form of a dictionary object to total.html template. The conditional display of result Pass/Fail is achieved by using py:choose and py:when directives.
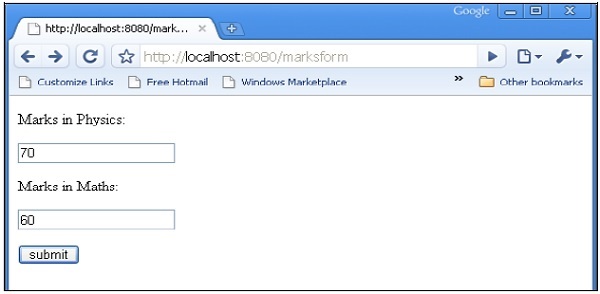
HTML script of entering marks (marks.html) is as follows −
<html>
   <body>
      <form action = "http://localhost:8080/marks" method = "post">
         <p>Marks in Physics:</p>
         <p><input type = "text" name = "phy" /></p>
         <p>Marks in Maths:</p>
         <p><input type = "text" name = "maths" /></p>
         <p><input type = "submit" value = "submit" /></p>
      </form>
   </body>
</html>
The complete code of root.py is as follows. The marks() controller is sending marks and result to total.html template −
from hello.lib.base import BaseController
from tg import expose, request

class RootController(BaseController):
   @expose("hello.templates.marks")
      def marksform(self):
      return {}

   @expose("hello.templates.total")
      def marks(self, **kw):
      phy = kw['phy']
      maths = kw['maths']
      ttl = int(phy)+int(maths)
      avg = ttl/2

      if avg ≥ 50:
         mydata = {'phy':phy, 'maths':maths, 'total':ttl, 'result':2}
      else:
         mydata = {'phy':phy, 'maths':maths, 'total':ttl,'result':1}

      return mydata
The total.html in templates folder receives dictionary data and parses it in html output conditionally as follows −
<html xmlns = "http://www.w3.org/1999/xhtml"
   xmlns:py = "http://genshi.edgewall.org/"
   lang = "en">

   <head>
      <title>TurboGears Templating Example</title>
   </head>

   <body>
      <h2>Hello, Welcome to TurboGears!.</h2>
      <h3>Marks in Physics: ${phy}.</h3>
      <h3>Marks in Maths: ${maths}.</h3>
      <h3>Total Marks: ${total}</h3>

      <div py:choose = "result">
         <span py:when = "1"><h2>Result: Fail</h2></span>
         <span py:when = "2"><h2>Result: Pass</h2></span>
      </div>

   </body>
</html>
Start the server (if not already running)
Gearbox server –reload –debug
Enter http://localhost::8080/marksform in browser −
The total.html will render following output −
py:for
Element in py:for directive is repeated for each item in an iterable, typically a Python List object. If items = [1,2,3] is present in a template context, it can be iterated upon by following py:for directive −
<ul>
   <li py:for = "item in items">${item}</li>
</ul>
The following output will be rendered −
1
2
3
The following example shows HTML form data rendered in total.html template using py:for directive can also be used as follows −
<py:for each = "item in items">
   <li>${item}</li>
</py:for>
HTML Form Script
<html>
   <body>

      <form action = "http://localhost:8080/loop" method="post">
         <p>Marks in Physics:</p>
         <p><input type = "text" name = "phy" /></p>
         <p>Marks in Chemistry:</p>
         <p><input type = "text" name = "che" /></p>
         <p>Marks in Maths:</p>
         <p><input type = "text" name = "maths" /></p>
         <p><input type = "submit" value = "submit" /></p>
      </form>

   </body>
</html>
The loop() controller reads form data and sends it to total.template in the form of a list object.
from hello.lib.base import BaseController
from tg import expose, request

class RootController(BaseController):
   @expose("hello.templates.marks")
   def marksform(self):
   return {}

   @expose("hello.templates.temp")
   def loop(self, **kw):
      phy = kw['phy']
      maths = kw['maths']
      che = kw['che']
      l1 = []
      l1.append(phy)
      l1.append(che)
      l1.append(maths)

   return ({'subjects':['physics', 'Chemistry', 'Mathematics'], 'marks':l1})
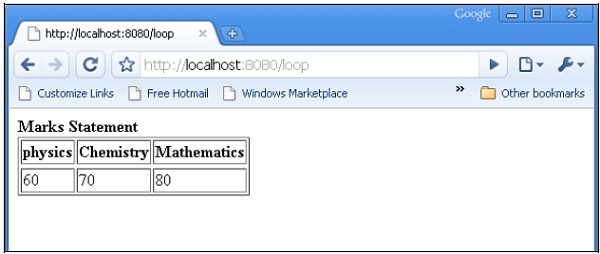
The temp.html template uses py:for loop to render contents of dict object in the form of a table.
<html xmlns = "http://www.w3.org/1999/xhtml"
   xmlns:py = "http://genshi.edgewall.org/" lang = "en">

   <body>
      <b>Marks Statement</b>
      <table border = '1'>
         <thead>
            <py:for each = "key in subjects"><th>${key}</th></py:for>
         </thead>
         <tr>
            <py:for each = "key in marks"><td>${key}</td></py:for>
         </tr>
      </table>
   </body>
</html>
Start the server (if not already running)
gearbox server –reload –debug
Enter http://localhost::8080/marksform in the browser.
The following output will be displayed in the browser when the above form is submitted.
py:def
This directive is used to create a macro. A macro is a reusable snippet of template code. Much like a Python function, it has a name and can optionally have parameters. Output of this macro can be inserted at any place in a template.
The py:def directive follows the following syntax −
<p py:def = "greeting(name)">
   Hello, ${name}!
</p>
This macro can be rendered with a variable value to ‘name’ parameter.
${greeting('world')}
${greeting('everybody)}
This directive can also be used with another version of syntax as follows −
<py:def function = "greeting(name)">
   <p>Hello, ${name}! </p>
</py:def>
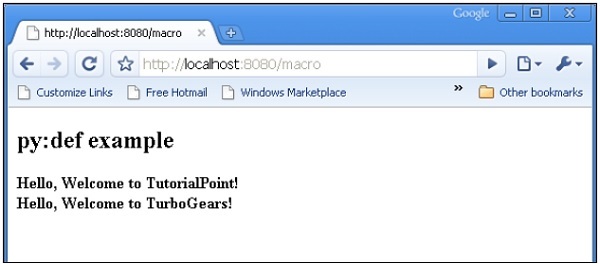
In following example, macro() controller in root.py sends a dict object with two keys name1 and name2 to macro.html template.
from hello.lib.base import BaseController
from tg import expose, request

class RootController(BaseController):
   @expose('hello.templates.macro')
   def macro(self):
      return {'name1':'TutorialPoint', 'name2':'TurboGears'}
This macro.html template contains definition of a macro called greeting. It is used to generate greeting message for data received from controller.
<html xmlns = "http://www.w3.org/1999/xhtml"
   xmlns:py = "http://genshi.edgewall.org/"
   lang = "en">

   <body>
      <h2>py:def example</h2>

      <div>
         <div py:def = "greeting(name)">
            Hello, Welcome to ${name}!
         </div>

         <b>
            ${greeting(name1)}
            ${greeting(name2)}
         </b>

      </div>
   </body>
</html>
Start the server using gearbox
gearbox serve –reload –debug
Invoke macro() controller by entering following URL in browser −
http://localhost:8080/macro
Following output will be rendered in the browser −
py:with
This directive lets you assign expressions to local variables. These local variables make expression inside less verbose and more efficient.
Assuming that x = 50 is given in context data for a template, following will be the py:with directive −
<div>
   <span py:with = "y = 50; z = x+y">$x $y $z</span>
</div>
It will result in the following output −
50 50 100
An alternative version for py:with directive is also available −
<div>
   <py:with = "y = 50; z = x+y">$x $y $z</py:with>
</div>
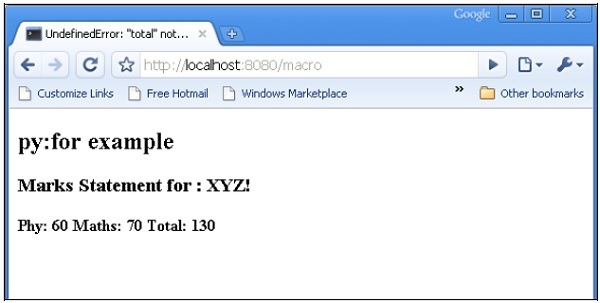
In the following example, macro() controller returns a dict object with name, phy and maths keys.
from hello.lib.base import BaseController
from tg import expose, request

class RootController(BaseController):
   @expose('hello.templates.macro')
   def macro(self):
      return {'name':'XYZ', 'phy':60, 'maths':70}
The template macro.html adds values of phy and maths keys using py:with directive.
<html xmlns = "http://www.w3.org/1999/xhtml"
   xmlns:py = "http://genshi.edgewall.org/"
   lang = "en">

   <body>
      <h2>py:with example</h2>
      <h3>Marks Statement for : ${name}!</h3>

      <b>Phy: $phy Maths: $maths
         <span py:with = "ttl = phy+maths">Total: $ttl</span>
      </b>

   </body>

</html>
The browser will render the following output in response to the URL http://localhost:8080/macro
Structure Manipulation Directives
The py:attrs directive adds, modifies or removes attributes from the element.
<ul>
   <li py:attrs = "foo">Bar</li>
</ul>
If foo = {‘class’:’collapse’} is present in a template context, which the above snippet will render.
<ul>
   <li class = "collapse">Bar</li>
</ul>
The py:content directive replaces any nested content with the result of evaluating the expression −
<ul>
   <li py:content = "bar">Hello</li>
</ul>
Given bar = ’Bye’ in the context data, this would produce
<ul>
   <li>Bye</li>
</ul>
The py:replace directive replaces the element itself with the result of evaluating the expression −
<div>
   <span py:replace = "bar">Hello</span>
</div>
Given bar = ’Bye’ in the context data, it would produce
<div>
   Bye
</div>
TurboGears - Includes
Contents of another XML document (especially HTML document) can be included by using inclusion tags in the current document. In order to enable such an inclusion, XInclude namespace must be declared in the root element of the HTML document.
<html xmlns = "http://www.w3.org/1999/xhtml" xmlns:xi = "http://www.w3.org/2001/XInclude >
The above declaration specifies that include directive contains ‘xi’ prefix. To add contents of another html page in the current document, use xi:include directive as follows −
<xi:include href = "somepage.html" />
In the following example, root.py contains include() controller, which exposes include.html.
from hello.lib.base import BaseController
from tg import expose, request

class RootController(BaseController):
   @expose('hello.templates.include')
   def include(self):
      return {}
Heading and Footer HTML
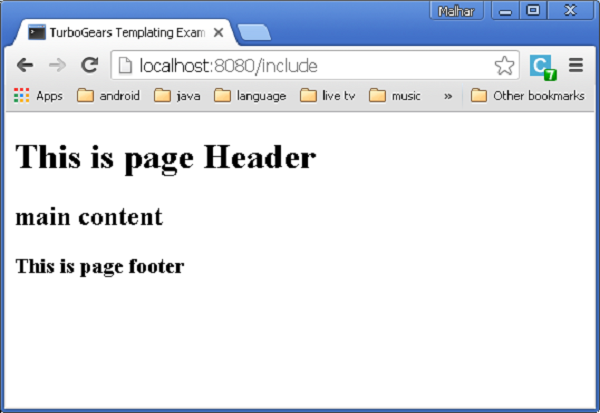
In include.html, include namespace is declared and contents of heading.html and footer.html are added. Here is the HTML script of templates\include.html −
<html xmlns = "http://www.w3.org/1999/xhtml"
   xmlns:xi = "http://www.w3.org/2001/XInclude">

   <head>
      <title>TurboGears Templating Example</title>
   </head>

   <body>
      <xi:include href = "heading.html" />
      <h2>main content </h2>
      <xi:include href = "footer.html" />
   </body>

</html>
Here is the templates\heading.html code −
<html>
   <head>
      <title>TurboGears Templating Example</title>
   </head>

   <body>
      <h1>This is page Header</h1>
   </body>
</html>
The following is the templates\footer.html
<html>
   <head>
      <title>TurboGears Templating Example</title>
   </head>

   <body>
      <h3>This is page footer</h3>
   </body>
</html>
Start the development using a gearbox and enter http://localhost:8080/include in the browser. The output rendered will be as shown below −
This way the modular construction of views can be achieved. If the resource mentioned in xi:include directive is not available, an error will be raised. In such a case an alternative resource may be loaded by using xi:fallback.
<xi:include href = “main.html”>
   <xi:fallback href = ”default.html”/>
</xi.include>
Inclusion of content can be made dynamic as href attribute that can contain expressions.
Add following controller in root.py.
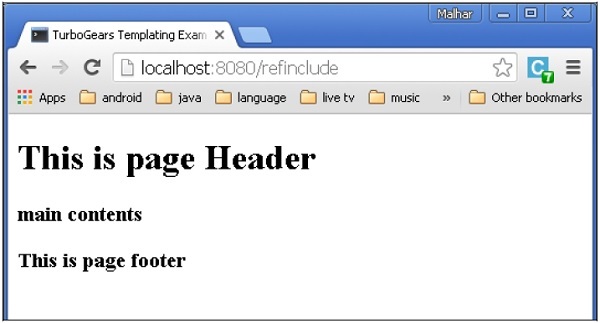
@expose('hello.templates.ref-include')
   def refinclude(self):
      return {'pages':['heading','main','footer']}
Save following code as ref-include.html in templates folder.
<html xmlns = "http://www.w3.org/1999/xhtml"
   xmlns:py = "http://genshi.edgewall.org/"
   xmlns:xi = "http://www.w3.org/2001/XInclude">

   <head>
      <title>TurboGears Templating Example</title>
   </head>

   <body>
      <xi:include href = "${name}.html" py:for = "name in pages" />
   </body>

</html>
Before starting the server make sure that templates folder has a heading.html, main.html and footer.html. Enter http://localhost:8082/refinclude in the browser to get the following output
TurboGears - JSON Rendering
The @expose() decorator by default renders html content. However, this can be set to json content type. TurboGears supports json rendering through tg.jsonify.JSONEncoder (**kwargs) class. To render json data simply pass json as content type to expose decorator.
@expose('json')
def jsondata(self, **kwargs):
   return dict(hello = 'World')
If '/jsondata' URL is entered in browser, it will respond by showing −
{"hello": "World"}
jsonp Rendering
jsonp stands for json with padding. It works similar to json output except for the fact that it provides an application/javascript response with a call to a javascript function providing all the values returned by the controller as function arguments.
To enable jsonp rendering you must first append it to the list of required engines inside your application – config/app_cfg.py −
base_config.renderers.append('jsonp')
Write your expose decorator as follows −
@expose('json')
@expose('jsonp')
def jsonpdata (self, **kwargs):
   return dict(hello = 'World')
When accessing /jsonpdata?callback = callme, you should see −
callme({"hello": "World"});
TurboGears - URL Hierarchy
Sometimes, a web application may require a URL structure that is having more than one level. TurboGears can traverse object hierarchy to find appropriate method that can handle your request.
A project ‘quickstarted’ with gearbox has a BaseController class in project’s lib folder. It is available as ‘Hello/hello/lib/base.py’. It serves as base class for all sub controllers. In order to add a sub level of URL in application, design a sub class called BlogController derived from BaseController.
This BlogController has two controller functions, index() and post(). Both are designed to expose a template each, blog.html and post.html.
Note − These templates are put inside a sub folder − templates/blog
class BlogController(BaseController):

   @expose('hello.templates.blog.blog')
   def index(self):
      return {}

   @expose('hello.templates.blog.post')
   def post(self):
      from datetime import date
      now = date.today().strftime("%d-%m-%y")
      return {'date':now}
Now declare an object of this class in RootController class (in root.py) as follows −
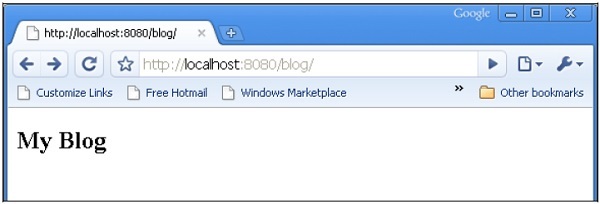
class RootController(BaseController):
   blog = BlogController()
Other controller functions for top level URLs will be there in this class as earlier.
When a URL http://localhost:8080/blog/ is entered, it will be mapped to index() controller function inside BlogController class. Similarly, http://localhost:8080/blog/post will invoke post() function.
The code for blog.html and post.html is as below −
Blog.html
<html>
<body>
<h2>My Blog</h2>
</body>
</html>
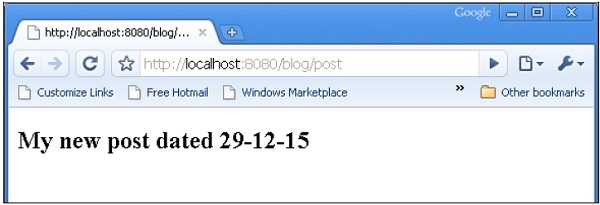
post.html
<html>
<body>
<h2>My new post dated $date</h2>
</body>
</html>
When a URL http://localhost:8080/blog/ is entered, it will produce the following output −
When a URL http://localhost:8080/blog/post is entered, it will produce the following output −
TurboGears – ToscaWidgets Forms
One of the most essential aspect of any web application is to present the user interface for a user. HTML provides a <form> tag which is used to design an interface. Form’s elements such as text input, radio, select etc. can be appropriately used. Data entered by the user is submitted in the form of Http request message to server side script by either GET or POST method.
Server side script has to recreate the form elements from http request data. So in this effect, the form elements have to be defined twice – once in HTML and again in server side script.
Another disadvantage of using HTML form is that it is difficult (if not impossible) to render the form elements dynamically. HTML itself provides no way to validate user’s input.
ToscaWidgets2
TurboGears relies on ToscaWidgets2, a flexible form rendering and validation library. Using ToscaWidgets, we can define the form fields in our Python script and render them using a HTML template. It is also possible to apply validation to tw2 field.
ToscaWidgets library is a collection of many modules. Some important modules are listed below −
tw2.core − It provides core functionality. Widgets in this module are not meant to be available for end-user.
tw2.forms − This is a basic forms library. It contains widgets for fields, fieldsets and forms.
tw2.dynforms − This contains dynamic forms functionality.
tw2.sqla − This is an interface for SQLAlchemy database.
tw2.forms
It contains a Form class, which acts as a base for custom forms. There is a TableForm class that is useful in rendering fields in a two column table. ListForm presents its fields in an unordered list.
| Sr.No. | Fields & Description |
|---|---|
| 1 | TextField A single line text input field |
| 2 | TextArea Multi-line text input field |
| 3 | CheckBox Presents a checkable rectangular box with label |
| 4 | CheckBoxList Multi-selectable group pf check boxes |
| 5 | RadioButton A toggle button to select/deselect |
| 6 | RadioButtonList Group of mutually exclusive Radio buttons |
| 7 | PasswordField Similar to Textfield but input keys are not revealed |
| 8 | CalendarDatePicker Lets the user to choose a date |
| 9 | SubmitButton Button to submit a form |
| 10 | ImageButton Clickable button with an image on top |
| 11 | SingleSelectField Enables selection of single item from a list |
| 12 | MultipleSelectField Enables selection of multiple items from the list |
| 13 | FileField Field for uploading file |
| 14 | EmailField An email input field |
| 15 | URLField An input field to enter URL |
| 16 | NumberField A number spinbox |
| 17 | RangeField A number slider |
In the following example, a form using some of these widgets is constructed. While most of these widgets are defined in tw2.forms, CalendarDateField is defined in tw2.Dynforms module. Hence both these modules along with tw2.core are imported in the beginning −
import tw2.core as twc
import tw2.forms as twf
import tw2.dynforms as twd
A ToscaWidgets form is a class derived from tw2.forms.form base class. The required widgets are placed inside a Layout object. In this example, TableLayout is used. The Widgets are rendered in a two column table. First column shows the caption and second column shows the input or selection field.
A TextField object is created using the following constructor −
twf.TextField(size, value = None)
If not mentioned TextField object takes a default size and is initially blank. While declaring TextArea object, the number of rows and columns may be mentioned.
twf.TextArea("",rows = 5, cols = 30)
The NumberField object is a TextField which can accept only digits. Up and down arrows are generated on the right border to increase or decrease the number inside it. Initial value can also be specified as an argument in the constructor.
twf.NumberField(value)
Just to the right of a CalendarDatePicker box, a calendar button is displayed. When pressed a date selector pops up. The user can manually type a date in the box or select from the date selector.
twd.CalendarDatePicker()
EmailField object presents a TextField, but the text in it must be in email format.
EmailID = twf.EmailField()
The following form also has a RadioButtonList. The constructor of this class contains a List object as a value of options parameter. A Radio Button for each option will be rendered. Default selection is specified with the value parameter.
twf.RadioButtonList(options = ["option1","option2"],value = option1)
The CheckBoxList renders check boxes for each option in the list.
twf.CheckBoxList(options = [option1, option2, option3])
The dropdown list is called as a SingleSelectfield in this ToscaWidgets library. Items in a List object corresponding to options parameter form the drop down list. Visible caption is set as a value of prompt_text parameter.
twf.SingleSelectField(prompt_text = 'text', options=['item1', 'item2', 'item3'])
By default, the form displays a Submit button with its caption as ‘save’. In order to display another caption, create a SubmitButton object and specify it as value parameter.
twf.SubmitButton(value = 'Submit')
The form is submitted to a URL, which is specified as a value of action parameter of the form. By default, the form data is submitted by http POST method.
action = 'URL'
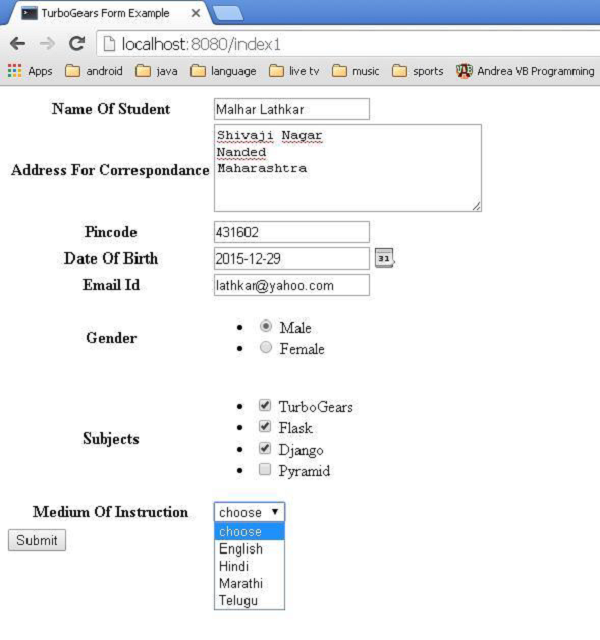
In following code, a form named as AdmissionForm is designed using the above explained widgets. Add this code in root.py before RootController class.
class AdmissionForm(twf.Form):
   class child(twf.TableLayout):
      NameOfStudent = twf.TextField(size = 20)
      AddressForCorrespondance = twf.TextArea("", rows = 5, cols = 30)
      PINCODE = twf.NumberField(value = 431602)
      DateOfBirth = twd.CalendarDatePicker()
      EmailID = twf.EmailField()
      Gender = twf.RadioButtonList(options = ["Male","Female"],value = 'Male')
      Subjects = twf.CheckBoxList(options = ['TurboGears', 'Flask', 'Django', 'Pyramid'])

      MediumOfInstruction = twf.SingleSelectField(prompt_text = 'choose',
         options = ['English', 'Hindi', 'Marathi', 'Telugu'])

      action = '/save_form'
      submit = twf.SubmitButton(value ='Submit')
Now save this code below as twform.html in templates directory −
<!DOCTYPE html>
<html xmlns = "http://www.w3.org/1999/xhtml"
   xmlns:py = "http://genshi.edgewall.org/"
   lang = "en">

   <head>
      <title>TurboGears Form Example</title>
   </head>

   <body>
      <div id = "tw form">
         ${form.display(value = dict(title = 'default title'))}
      </div>
   </body>

</html>
In RootController class (in root.py), add the following controller function −
@expose('hello.templates.twform')
def twform(self, *args, **kw):
   return dict(page = 'twform', form = MovieForm)
In the AdmissionForm class, we have stipulated/save_form as action URL. Hence add save_form() function in RootController.
@expose()
def save_movie(self, **kw):
   return str(kw)
Ensure that the server is running (using gearbox serve). Enter http://localhost:8080/twform in the browser.
Pressing the submit button will post this data to save_form() URL, which will display the form data in the form of a dictionary object.
{
   'EmailID': u'lathkar@yahoo.com',
   'NameOfStudent': u'Malhar Lathkar',
   'Gender': u'Male',
   'PINCODE': u'431602',
   'DateOfBirth': u'2015-12-29',
   'Subjects': [u'TurboGears', u'Flask', u'Django'],
   'MediumOfInstruction': u'',
   'AddressForCorrespondance': u'Shivaji Nagar\r\nNanded\r\nMaharashtra'
}
TurboGears – Validation
A good Forms widget library should have an input validation feature. For example, the user should be forced to enter data in a mandatory field, or verify if an email field contains a valid email, without resorting to any other programmatic means (like JavaScript function) for validation.
Early versions of ToscaWidgets Forms Library used to rely on FormEncode module for validation support. ToscaWidgets2 now has built-in validation support available in tw2.core module. However, it is still possible to use FormEncode validation techniques.
In order to subject a ToscaWidgets form to validation, @validate decorator is used.
@validate(form, error_handler, validators)
The ’form’ is the ToscaWidgets form object to be validated.
The ‘error-handler’ is the controller method used to handle form errors.
The ‘validators’ are a dictionary object containing FormEncode validators.
Types of Validators
The tw2.core module contains a validator class from which other validators are inherited. It is also possible to design a custom validator based on it. Some of the important validators are described below −
LengthValidator − Check whether a value has a prescribed length. Minimum and maximum limits are defined with min and max parameters. Custom messages for length below and above min and max can be specified as tooshort and toolong parameter.
tw2.core.LengthValidator(min = minval, max = maxval,
   msgs = { 'tooshort': (‘message for short length’),
   'toolong': (‘message for long length)})
RangeValidator − Usually used along with RangeField. It useful to validate value of a numeric field within minimum and maximum limits. Messages for tooshort and toolong parameters can be customized.
tw2.core.RangeValidator(min = minval, max = maxval,
   msgs = { 'tooshort': (‘message for short length’),
   'toolong': (‘message for long length)})
IntValidator − This class is derived from the RangeValidator. This is normally used to validate if input in a normal text field is containing integer data. Minimum and maximum limits as well as error messages can be set. Additionally, error message for non-integer input can be specified as ‘notint’ parameter.
tw2.core.IntValidator(msgs = {‘notint’:’Must be Integer’})
OneOfValidator − This validator forces the user to select a value from the available options in the list only.
tw2.core.OneOfValidator(values = [option1, option2,..],
   msgs = {‘notinlist’:’Not in List’}}
DateValidator − Very useful to ensure that user input is a valid date. Date format (default is Y-M-D) and error message are customizable. Minimum and maximum date limits can also be specified. DateTimeValidator is also available to verify object of DateTime class.
tw2.core.DateValidator(msgs = {format = ’%Y-%m-%d’,
   'baddatetime': ('baddate', ('Must follow date format $format_str'))}
EmailValidator − Validates user input against a valid email address. This class is inherited from a more general RegexValidator.
tw2.core.EmailValidator(msgs = {'badregex': ('bademail',
   ('Must be a valid email address')) }
UrlValidator − This class is also inherited from RegexValidator. It validates the user input for a valid URL.
tw2.core.UrlValidator(msgs = {'badregex': ('badurl', ('Must be a valid URL’)) }
MatchValidator − Confirms whether the value of one field is matched with the other. This is especially useful, where user is required to choose and confirm a password field. Typical usage of MatchValidator is shown below −
import tw2.core as twc
import tw2.forms as twf

  class AdmissionForm(twf.Form):
      class child(twf.TableLayout):
         validator = twc.MatchValidator('pw', 'pwconfirm')
         pw = twf.PasswordField()
         pwconfirm = twf.PasswordField()
It is also possible to construct a compound validator, where the validation is desired to succeed, if any one of checks pass. In other cases, you may want validation to succeed, only if the input passes all the checks. For this, tw2.core provides the Any and All validators, which are subclasses of the extendable CompoundValidator.
TurboGears – Flash Messages
TurboGears provides a very convenient messaging system for notifying information to user in a non-obtrusive way. TGFlash class in tg module provides support for flashing messages that are stored in a plain cookie. This class supports fetching flash messages on server side as well as client side through JavaScript.
The render() method of TGFlash class, when used from Python itself, can be invoked from template to render a flash message. If used on JavaScript, it provides a WebFlash object. It exposes payload() and render() methods to fetch current flash message and render it from JavaScript.
When a TurboGears project is created using ‘quickstart’, it has a Master.html template. It contains the definition of a variable of that flash object. Contents of this flash message received from the controller substitutes the marked placeholder in this template.
<py:with vars = "flash = tg.flash_obj.render('flash', use_js = False)">
   <div py:if = "flash" py:replace = "Markup(flash)" />
</py:with>
The tg.flash_obj is the WebFlash object, which is available inside any rendered template by including master.html template. This object permits to retrieve the current flash message and display it.
The Flash messages are stored in a cookie (whose name by default is webflash) by using tg.flash() method. The message and status parameters are then passed to it.
tg.flash('Message', 'status')
If the method that is called flash performs a redirect, then the flash will be visible inside the redirected page. If the method directly exposes a template, then the flash will be visible inside the template itself.
Appearance of flash message can be customized by applying CSS styling to status code. A ‘quickstarted’ project contains error, warning, info and ok status codes customized by a stylesheet public/css/style.css. More status codes with styles can also be added.
#flash > .warning {
   color: #c09853;
   background-color: #fcf8e3;
   border-color: #fbeed5;
}

#flash > .ok {
   color: #468847;
   background-color: #dff0d8;
   border-color: #d6e9c6;
}

#flash > .error {
   color: #b94a48;
   background-color: #f2dede;
   border-color: #eed3d7;
}

#flash > .info {
   color: #3a87ad;
   background-color: #d9edf7;
   border-color: #bce8f1;
}
This external style sheet needs to be included in the template −
<link rel = "stylesheet" type = "text/css" media = "screen"
   href = "${tg.url('/css/style.css')}" />
The configuration of any Flash message support can be achieved by setting parameters for configure() method of TGFlash object or in app_cfg.py (in config folder). The configurable parameters are −
| Sr.No. | Parameters & Description |
|---|---|
| 1 | flash.cookie_name Name of the cookie used to store flash messages. Default is webflash. |
| 2 | flash.default_status Default message status if not specified (ok by default) |
| 3 | flash.template Used as the flash template when rendered. |
| 4 | flash.allow_html Turns on/off escaping in flash messages, by default HTML is not allowed. |
| 5 | flash.js_call JavaScript code which will be run when displaying the flash from JavaScript. Default is webflash.render() |
| 6 | flash.js_template string.Template instance used to replace full JavaScript support for flash messages. |
pop_payload() − function fetches current flash message, status and related information. Getting the flash message will delete the cookie.
render(container_id, use_js=True) − Render the flash message inside template or provide Javascript support for them.
container_id is the DIV where the messages will be displayed, while use_js switches between rendering the flash as HTML or for JavaScript usage.
status − Get only current flash status, getting the flash status will delete the cookie.
message − Get only current flash message, getting the flash message will delete the cookie.
How to Make a Simple Flash Message?
In the following example, a flash() method is provided in the root controller class. It calls a flash() message which is rendered to the exposed template, flash.html
from hello.lib.base import BaseController
from tg import expose, flash, redirect, request

class RootController(BaseController):
   @expose('hello.templates.flash')
   def flash(self, user = None):

      if user:
         flash(message = "Welcome "+user,status = "ok")
      else:
         flash(message = "Welcome Guest",status = "info")
      return {}
The code for making flash.html in the templates folder is as follows
<html xmlns = "http://www.w3.org/1999/xhtml"
   xmlns:py = "http://genshi.edgewall.org/"
   xmlns:xi = "http://www.w3.org/2001/XInclude">

   <head>
      <title>TurboGears 2.3: Flash messages>/title>
      <link rel = "stylesheet" type = "text/css" media = "screen"
         href = "${tg.url('/css/style.css')}" />

      <py:with vars = "flash = tg.flash_obj.render('flash', use_js = False)">
         <div py:if = "flash" py:replace = "Markup(flash)" />
      </py:with>

   </head>

   <body>
      <h2>Hello TurboGears</h2>
   </body>

</html>
Start the server and enter http://localhost:8080/flash?user=MVL in the browser
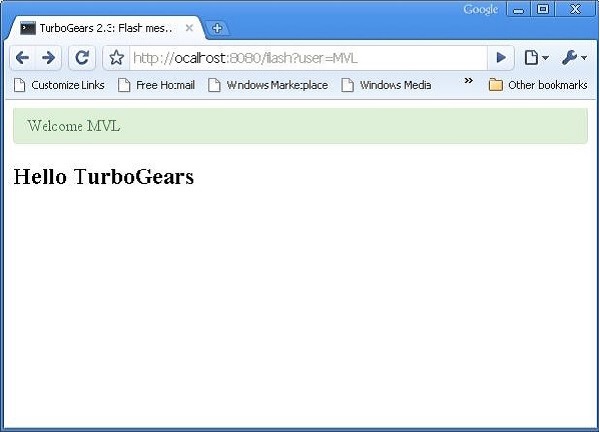
Change URL to http://localhost:8080/flash and see the flash message differently formatted as per definition in style.css

TurboGears – Cookies & Sessions
It is often required to hold simple browsing data attached to a user’s browser. Sessions are the most commonly used technique. Session represents data which need not be stored in a more persistent form like disk file or database.
However, sessiondata in TurboGears can be backed by filesystem, database or hashed cookie values. A small amount of session data is generally kept in cookies, but for the larger volume of session data MemCache is used.
MemCache is a system-level daemon. It provides fast access to cached data and is extremely scalable. However, it is intended for use only on secure servers, and hence must be maintained and secured by sysadmin.
Beaker in Session Management
TurboGears uses Beaker for session management. A project quickstarted by gearbox is by default configured to use hashed cookies to store session data.
Each time a client connects, the session middleware (Beaker) will inspect the cookie using the cookie name, which has been defined in the configuration file. If the cookie is not found, it will be set in the browser. On all subsequent visits, the middleware will find the cookie and make use of it.
In order to enable session management, session class should be incorporated in the project by following import statement −
from tg import session
To save the data in a session variable −
session[‘key’] = value
session.save()
To retrieve the session variable −
return session[‘key’]
Note that you need to explicitly save the session in order for your keys to be stored in that session.
The delete() method of the session object will erase all the user sessions −
session.delete()
Even though it’s not customary to delete all the user sessions on any given production environment, you will typically do it for cleaning up after usability or functional tests have been done.
Given below is a simple example to demonstrate sessions. RootController class has a setsession() method which sets a session variable.
from hello.lib.base import BaseController
from tg import expose, session
class RootController(BaseController):
@expose()
def setsession(self):
session['user'] = 'MVL'
session.save()
str = "<b>sessionVariable set to "+session['user']
str = str+"<br><a href = '/getsession'>click here to retrieve</a></b>"
return str
@expose()
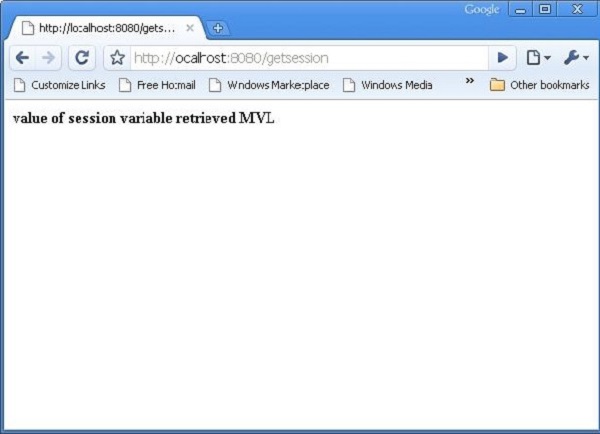
def getsession(self):
return "<b>value of session variable retrieved " +session['user'] +"</b>"
Enter http://localhost:8080/setsession
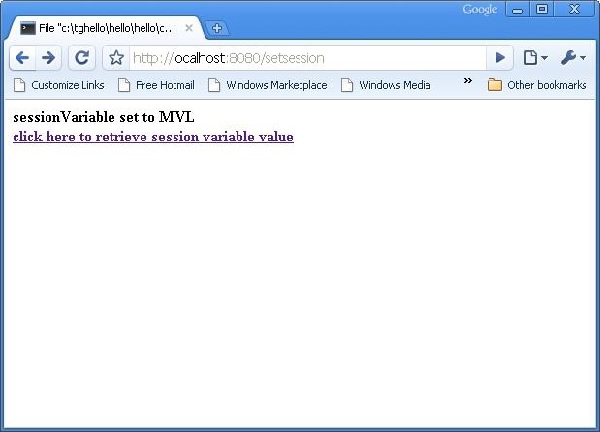
A link in the browser leads to http://localhost:8080/getsession which retrieves and displays the session variable −
TurboGears – Caching
In order to enhance the performance of a web application, especially if it is involved in lengthy operations, caching techniques are used. TurboGears provides two types of caching techniques −
Whole-page Caching
It works at the HTTP protocol level to avoid entire requests to the server by having either the user’s browser, or an intermediate proxy server (such as Squid) intercept the request and return a cached copy of the file.
Application-level Caching
This works within the application server to cache computed values, often the results of complex database queries, so that future requests can avoid needing to re-calculate the values. For web applications, application-level caching provides a flexible way to cache the results of complex queries so that the total load of a given controller method can be reduced to a few user-specific or case-specific queries and the rendering overhead of a template.
Application-level Caching
As mentioned earlier, ‘quickstarted’ TurboGears project is configured to enable Beaker package for caching support. Beaker supports the following back-ends used for cache storage −
memory − Used for per-process storage. It is extremely fast.
filesystem − per-process storage as well as multi-process.
DBM database − per-process, multi-process, fairly fast.
SQLAlchemy database − per-database-server storage. Slower compared to the above given options.
Memcached − multi-server memory based cache.
Controller Caching
For quick controller caching, a cached() decorator is available. The entire controller body is cached depending on various parameters of request. The definition of tg.decorators.cached() decorator is as follows
tg.decorators.cached(key, expire, type,
   query-args, cache_headers, invalidate_on_startup, cache_response)
The description of parameters is as follows −
| Sr.No. | Parameters & Description |
|---|---|
| 1 | key Specifies the controller parameters used to generate the cache key. |
| 2 | expire Time in seconds before cache expires, Defaults to “never”. |
| 3 | Type dbm, memory, file, memcached, or None. |
| 4 | cache_headers A tuple of header names indicating response headers. |
| 5 | invalidate_on_startup If True, cache is invalidated each time application starts or is restarted. |
| 6 | cache_response response should be cached or not, defaults to True. |
Following is an example of controller caching −
@cached(expire = 100, type = 'memory')
@expose()
def simple(self):
   return "This is a cached controller!"
Template Level Caching
The Genshi template engine retrieves template from a cache if its contents have not changed. The default size of this cache is 25. By default, automatic reloading of templates is true. In order to improve performance, the following settings can be made in app_cfg.py −
[app:main]
genshi.max_cache_size = 100
auto_reload_templates = false
To cache a template, you just have to return the tg_cache option from the controller that renders the cached template.
The tg_cache is a dictionary that accepts the following keys −
key − The cache key. Default: None.
expire − how long the cache must stay alive. Default: never expires
type − memory, dbm, memcached. Default: dbm.
The following example illustrates template caching −
@expose(hello.templates.user')
def user(self, username):
   return dict(user = username, tg_cache = dict(key = user, expire = 900))
TurboGears – SQLAlchemy
Although it is possible to use SQL in TurboGears application to perform CRUD operations on any relational database, it is advisable to use SQLAlchemy, a Python toolkit is a powerful Object Relation Mapper that gives application developers the full power and flexibility of SQL. In addition to support for SQL based databases through SQLAlchemy, TurboGears also supports MongoDB database though Ming. In this section, the functionality of SQLAlchemy is discussed.
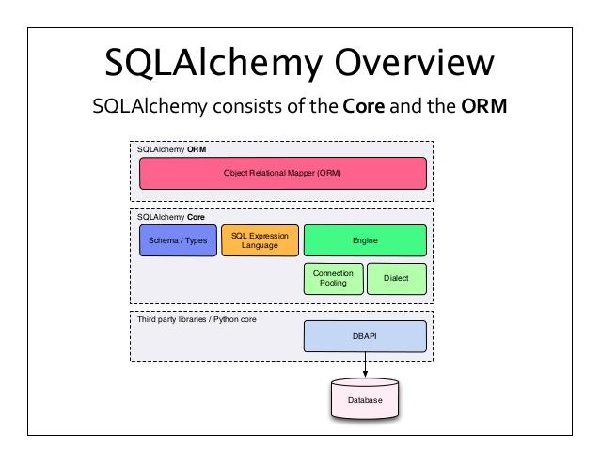
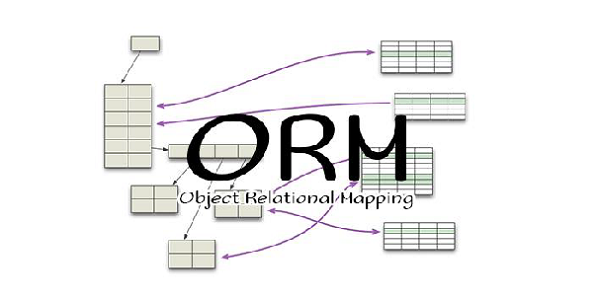
What is ORM (Object Relational Mapping)?
Most programming language platforms are object oriented. The data in RDBMS servers on the other hand is stored as tables. Object relation mapping is a technique of mapping object parameters to underlying RDBMS table structure. An ORM API provides methods to perform CRUD operations without having to write raw SQL statements.
When a TurboGears project is created using ‘quickstart’ command from gearbox toolkit, SQLAlchemy support is enabled by default by the following configuration settings −
config['use_sqlalchemy'] = True
config['sqlalchemy.url'] = 'sqlite:///devdata.db'
The ‘quickstarted’ project also creates a models package within it. For example, a ‘Hello’ project will have Hello\hello\model. The following files are created in this package −
__init__.py − This is where the database access is set up. The application’s model objects are imported in this module. It also has a DBSession - a global session manager and also a DeclarativeBase, which is a base class for all the model classes.
auth.py − This is where the models used by the authentication stack are defined. Additional database models are stored in this package, as a separate module, and added in the __init__.py.
TurboGears – Creating Models
Let us add a student model which will set up a student table in our sqlite database.
Hello\hello\model\student.py
from sqlalchemy import *
from sqlalchemy.orm import mapper, relation, relation, backref
from sqlalchemy import Table, ForeignKey, Column
from sqlalchemy.types import Integer, Unicode, DateTime

from hello.model import DeclarativeBase, metadata, DBSession
from datetime import datetime

class student(DeclarativeBase):
   __tablename__ = 'student'

   uid = Column(Integer, primary_key = True)
   name = Column(Unicode(20), nullable = False, default = '')
   city = Column(Unicode(20), nullable = False, default = '')
   address = Column(Unicode(100), nullable = False, default = '')
   pincode = Column(Unicode(10), nullable = False, default = '')
Now add this model in init_model() function inside __init__.py. This function already contains the auth model in it. Add our student model below it.
# Import your model modules here.
from hello.model.auth import User, Group, Permission
from hello.model.student import student
If you want the table to be initialized with some data at the time of setting up the models, add it in bootstrap.py in websetup package. Add the following statements in the bootstrap() function.
s1 = model.student()
s1.name = 'M.V.Lathkar'
s1.city = 'Nanded'
s1.address = 'Shivaji Nagar'
s1.pincode = '431602'

model.DBSession.add(s1)
model.DBSession.flush()
transaction.commit()
The Models are initialized by running setup-app command of gearbox −
gearbox setup-app
Session object of SQLAlchemy manages all persistence operations of ORM object.
TurboGears – CRUD Operations
The following session methods perform CRUD Operations −
DBSession.add(model object) − inserts a record into mapped table.
DBSession.delete(model object) − deletes record from the table.
DBSession.query(model).all() − retrieves all the records from table (corresponding to a SELECT query).
You can apply filter to the retrieved record set by using a filter attribute. For instance, in order to retrieve records with city = ’Hyderabad’ in students table, use the following statement −
DBSession.query(model.student).filter_by(city = ’Hyderabad’).all()
We shall now see how to interact with the models through controller URLs.
First let us design a ToscaWidgets form for entering the student’s data
Hello\hello\controllers.studentform.py
import tw2.core as twc
import tw2.forms as twf

class StudentForm(twf.Form):
   class child(twf.TableLayout):
      name = twf.TextField(size = 20)
      city = twf.TextField()
      address = twf.TextArea("",rows = 5, cols = 30)
      pincode = twf.NumberField()

   action = '/save_record'
   submit = twf.SubmitButton(value = 'Submit')
In the RootController (root.py of Hello application), add the following function mapping ‘/add’ URL −
from hello.controllers.studentform import StudentForm

class RootController(BaseController):
   @expose('hello.templates.studentform')
   def add(self, *args, **kw):
      return dict(page='studentform', form = StudentForm)
Save the following HTML code as studentform.html in the templates folder −
<!DOCTYPE html>
<html xmlns = "http://www.w3.org/1999/xhtml"
   xmlns:py = "http://genshi.edgewall.org/"
   lang = "en">

   <head>
      <title>Student Registration Form</title>
   </head>

   <body>
      <div id = "getting_started">
         ${form.display(value = dict(title = 'Enter data'))}
      </div>
   </body>

</html>
Enter http://localhost:8080/add in the browser after starting the server. The following Student information form will open up in the browser −
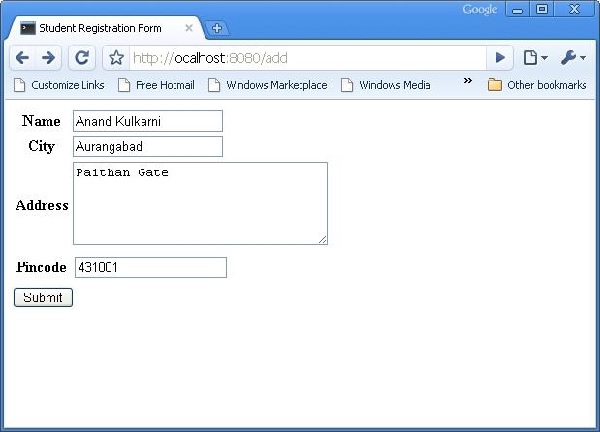
The above form is designed to be submitted to the ‘/save_record’ URL. Hence a save_record() function needs to be added in the root.py to expose it. The data from the studentform is received by this function as a dict() object. It is used to add a new record in the student table underlying student model.
@expose()
#@validate(form = AdmissionForm, error_handler = index1)
def save_record(self, **kw):
newstudent = student(name = kw['name'],city = kw['city'],
address = kw['address'], pincode = kw['pincode'])
DBSession.add(newstudent)
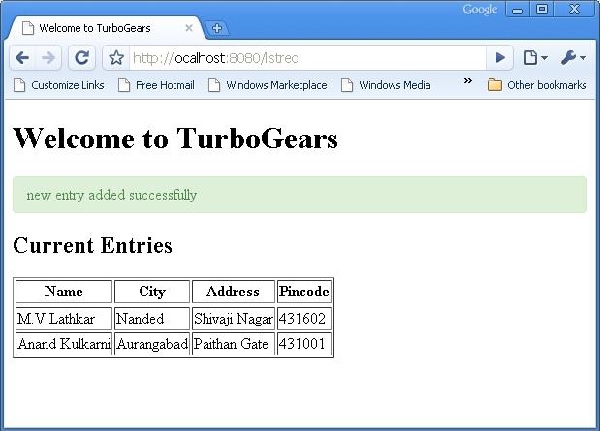
flash(message = "new entry added successfully")
redirect("/listrec")
Please note that after the successful addition, the browser will be redirected to ‘/listrec’ URL. This URL is exposed by a listrec() function. This function selects all records in the student table and sends them in the form of a dict object to the studentlist.html template. This listrec() function is as follows −
@expose ("hello.templates.studentlist")
def listrec(self):
   entries = DBSession.query(student).all()
   return dict(entries = entries)
The studentlist.html template iterates through the entries dictionary object using py:for directive. The studentlist.html template is as follows −
<html xmlns = "http://www.w3.org/1999/xhtml"
   xmlns:py = "http://genshi.edgewall.org/">

   <head>
      <link rel = "stylesheet" type = "text/css" media = "screen"
         href = "${tg.url('/css/style.css')}" />
      <title>Welcome to TurboGears</title>
   </head>

   <body>
      <h1>Welcome to TurboGears</h1>

      <py:with vars = "flash = tg.flash_obj.render('flash', use_js = False)">
         <div py:if = "flash" py:replace = "Markup(flash)" />
      </py:with>

      <h2>Current Entries</h2>

      <table border = '1'>
         <thead>
            <tr>
               <th>Name</th>
               <th>City</th>
               <th>Address</th>
               <th>Pincode</th>
            </tr>
         </thead>

         <tbody>
            <py:for each = "entry in entries">
               <tr>
                  <td>${entry.name}</td>
                  <td>${entry.city}</td>
                  <td>${entry.address}</td>
                  <td>${entry.pincode}</td>
               </tr>
            </py:for>
         </tbody>

      </table>

   </body>
</html>
Now revisit the http://localhost:8080/add and enter data in the form. By clicking on the submit button, it will take the browser to studentlist.html. It will also flash a ‘new record added successfully’ message.
TurboGears – DataGrid
The ToscaWidgets contains a DataGrid control which provides a quick way to present data in tabular form. The DataGrid object is declared as follows −
from tw2.forms import DataGrid
student_grid = DataGrid(fields = [('Name', 'name'),('City', 'city'),
   ('Address','address'), ('PINCODE', 'pincode')])
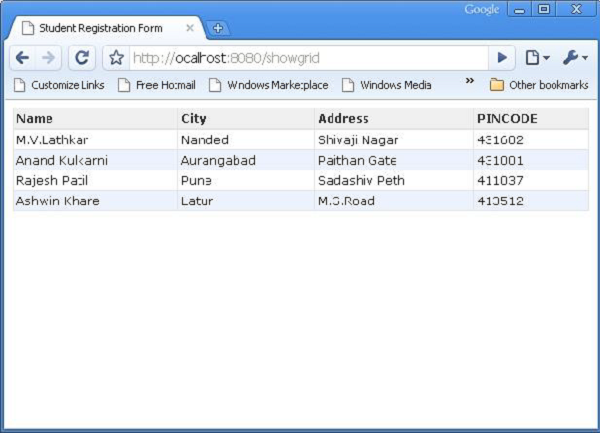
Now, showgrid() function retrieves all the records in student table and exposes the data to grid.html template. First the code for showgrid() function and then grid.html code is given below −
showgrid()
@expose('hello.templates.grid')
def showgrid(self):
   data = DBSession.query(student).all()
   return dict(page = 'grid', grid = student_grid, data = data)
grid.html
<!DOCTYPE html>
<html xmlns = "http://www.w3.org/1999/xhtml"
   xmlns:py = "http://genshi.edgewall.org/"
   lang = "en">

   <head>
      <title>Student Registration Form</title>
   </head>

   <body>
      <div id = "getting_started">
         <div>${grid.display(value = data)}</div>
      </div>
   </body>

</html>
The following tabular data will be displayed when http://localhost:8080/showlist URL is entered in the browser −
TurboGears – Pagination
TurboGears provides a convenient decorator called paginate() to divide output in the pages. This decorator is combined with the expose() decorator. The @Paginate() decorator takes the dictionary object of query result as argument. In addition, the number of records per page are decided by value of items_per_page attribute. Ensure that you import paginate function from tg.decorators into your code.
Rewrite listrec() function in root.py as follows −
from tg.decorators import paginate
class RootController(BaseController):
   @expose ("hello.templates.studentlist")
   @paginate("entries", items_per_page = 3)

   def listrec(self):
      entries = DBSession.query(student).all()
      return dict(entries = entries)
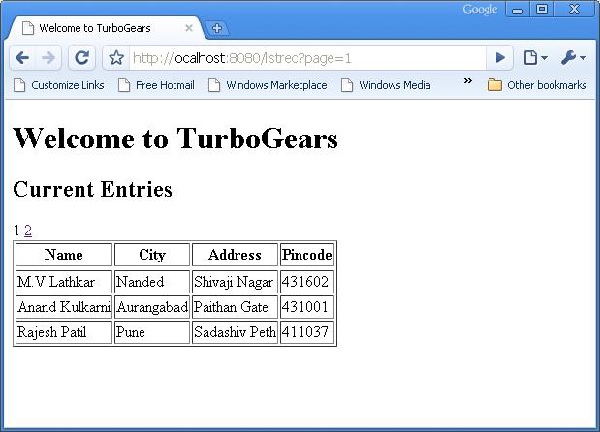
The items per page are set to be three.
In the studentlist.html template, page navigation is enabled by adding tmpl_context.paginators.entries.pager() below the py:for directive. The code for this template should be as below −
<html xmlns = "http://www.w3.org/1999/xhtml"
   xmlns:py = "http://genshi.edgewall.org/">

   <head>
      <link rel = "stylesheet" type = "text/css" media = "screen"
         href = "${tg.url('/css/style.css')}" />
      <title>Welcome to TurboGears</title>
   </head>

   <body>

      <h1>Welcome to TurboGears</h1>

      <py:with vars = "flash = tg.flash_obj.render('flash', use_js = False)">
         <div py:if = "flash" py:replace = "Markup(flash)" />
      </py:with>

      <h2>Current Entries</h2>

      <table border = '1'>
         <thead>
            <tr>
               <th>Name</th>
               <th>City</th>
               <th>Address</th>
               <th>Pincode</th>
            </tr>
         </thead>

         <tbody>
            <py:for each = "entry in entries">
               <tr>
                  <td>${entry.name}</td>
                  <td>${entry.city}</td>
                  <td>${entry.address}</td>
                  <td>${entry.pincode}</td>
               </tr>
            </py:for>

            <div>${tmpl_context.paginators.entries.pager()}</div>
         </tbody>

      </table>

   </body>

</html>
Enter http://localhost:8080/listrec in the browser. The first page of records in the table are displayed. On top of this table, links to page numbers are also seen.
How to Add Pagination Support to Datagrid
It is also possible to add pagination support to datagrid. In the following example, paginated datagrid is designed to display action button. In order to activate action button datagrid object is constructed with following code −
student_grid = DataGrid(fields = [('Name', 'name'),('City', 'city'),
   ('Address','address'), ('PINCODE', 'pincode'),
   ('Action', lambda obj:genshi.Markup('<a
      href = "%s">Edit</a>' % url('/edit',
      params = dict(name = obj.name)))) ])
Here the action button is linked to the name parameter of each row in the data grid.
Rewrite the showgrid() function as follows −
@expose('hello.templates.grid')
@paginate("data", items_per_page = 3)

def showgrid(self):
   data = DBSession.query(student).all()
   return dict(page = 'grid', grid = student_grid, data = data)
The browser shows paginated datagrid as follows −
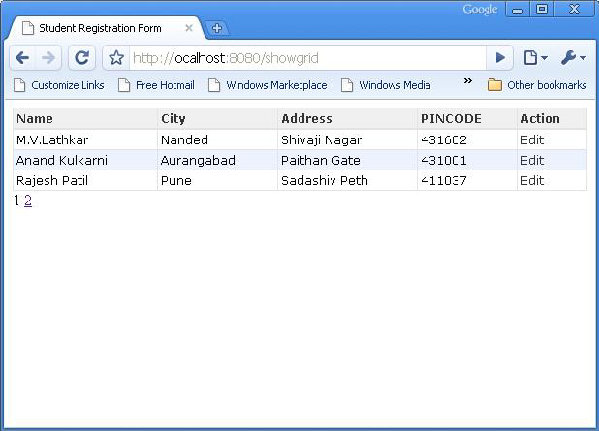
By clicking the Edit button in the third row, it will redirect to the following URL http://localhost:8080/edit?name=Rajesh+Patil
TurboGears – Admin Access
TurboGears provides the tgext.admin extension, which is powered by tgext.crud and sprox. This Sprox is a package used for the creation of web widgets directly from the database schema. This can be used to automatically create simple administration pages and is the toolkit powering the /admin page in the newly quickstarted applications.
By default, the admin will provide an autogenerated access to all the models imported in your project models/__init__.py.
How to Create TurboGears Admin
The default TurboGears admin is created as an object of AdminController class −
from tgext.admin.controller import AdminController

class RootController(BaseController):
   admin = AdminController(model, DBSession, config_type = TGAdminConfig)
This creates an admin for all the models with the default TurboGears admin configuration.
Through the manager, a user has been created during the setup phase. Now, it is possible to get access to the TurboGears Admin at http://localhost:8080/admin The first time this page is accessed, it will ask for authentication. You can simply provide the username and password of the user that the setup-app command created for us −
Username: manager
Password: managepass
In order to login to the quickstarted project, add the following functions to the RootController class (controllers/root.py).
from hello.lib.base import BaseController
from tg import expose, flash, redirect, request,url, lurl
from tg import redirect, validate
from hello import model
from hello.model import DBSession
from tgext.admin.tgadminconfig import BootstrapTGAdminConfig as TGAdminConfig
from tgext.admin.controller import AdminController
from tg.exceptions import HTTPFound

class RootController(BaseController):
   admin = AdminController(model, DBSession, config_type =  TGAdminConfig)

   @expose('hello.templates.index')
   def index(self):
      return dict(page = 'index')

   @expose('hello.templates.login')
   def login(self, came_from = lurl('/'), failure = None,    login = ''):

      if failure is not None:
         if failure == 'user-not-found':
            flash(_('User not found'), 'error')
         elif failure == 'invalid-password':
            flash(_('Invalid Password'), 'error')

      login_counter = request.environ.get('repoze.who.logins', 0)

      if failure is None and login_counter > 0:
         flash(_('Wrong credentials'), 'warning')

      return dict(page = 'login', login_counter = str(login_counter),
         came_from = came_from, login = login)
   @expose()

   def post_login(self, came_from = lurl('/')):
      if not request.identity:

         login_counter = request.environ.get('repoze.who.logins', 0) + 1
            redirect('/login', params = dict(came_from = came_from,
            __logins = login_counter))

         userid = request.identity['repoze.who.userid']
         flash(('Welcome back, %s!') % userid)

         return HTTPFound(location = came_from)
Login to the 'quickstarted' application after starting the server and by visiting http://localhost:8080/login and then enter the manager credentials as displayed above. The browser will display an admin page like the one shown below −
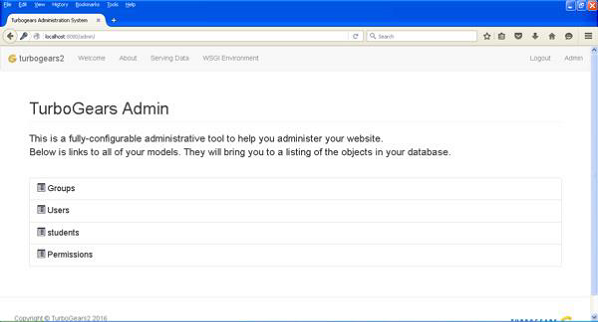
The page shows all the models created in this application. You can click any model to see the listing of entries in it −
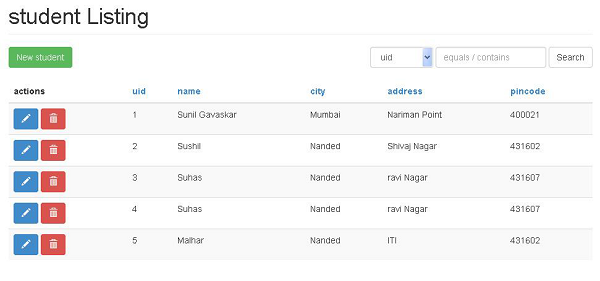
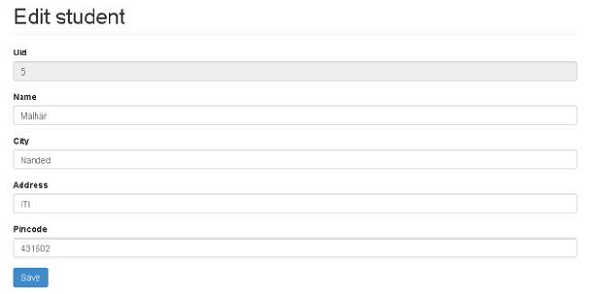
The 'New' button on top of this datagrid allows the record to be added. Similarly, action buttons for editing and deleting a record are also provided in actions column of this datagrid. A search box is also displayed to select records conditionally.
TurboGears – Authorization & Authentication
A TurboGears application is created by quickstart and setup-app options of the gearbox toolkit, which has the authorization and authentication support enabled by default. The models declared in auth.py are set up and initialized as per values assigned in bootstrap.py.
The following models are declared in auth.py −
User Model
The User model contains the design of a tg_user table. This table is used by the repose.who package. This repose.who package is a powerful as well as an extensible authentication library for WSGI applications. The structure of a user model is as follows −
class User(DeclarativeBase):

"""
   __tablename__ = 'tg_user'

   user_id = Column(Integer, autoincrement = True, primary_key=True)
   user_name = Column(Unicode(16), unique = True, nullable = False)
   email_address = Column(Unicode(255), unique = True,nullable=False)

   display_name = Column(Unicode(255))
   _password = Column('password', Unicode(128))
   created = Column(DateTime, default = datetime.now)
This group model contains the definition tg_group table. Its definition is given in auth.py as follows −
class Group(DeclarativeBase):
   __tablename__ = 'tg_group'

   group_id = Column(Integer, autoincrement = True,primary_key = True)
   group_name = Column(Unicode(16),unique = True,nullable = False)
   display_name = Column(Unicode(255))
   created = Column(DateTime, default = datetime.now)
Another model permission is also set up, which contains permission definition.
class Permission(DeclarativeBase):
   __tablename__ = 'tg_permission'

   permission_id = Column(Integer,autoincrement = True,primary_key = True)
   permission_name = Column(Unicode(63), unique = True, nullable = False)
   description = Column(Unicode(255))
At the time of setting up models, the following data is added in these tables −
u = model.User()
u.user_name = 'manager'
u.display_name = 'Example manager'
u.email_address = 'manager@somedomain.com'
u.password = 'managepass'

model.DBSession.add(u)
g = model.Group()
g.group_name = 'managers'
g.display_name = 'Managers Group'
g.users.append(u)

model.DBSession.add(g)
p = model.Permission()
p.permission_name = 'manage'
p.description = 'This permission gives an administrative right'
p.groups.append(g)

model.DBSession.add(p)
u1 = model.User()
u1.user_name = 'editor'
u1.display_name = 'Example editor'
u1.email_address = 'editor@somedomain.com'
u1.password = 'editpass'

model.DBSession.add(u1)
Predicate Model
The predicates module in tg package contains definitions for predicate checkers. A predicate is a condition that must be met for the user to be able to access the requested source. Such a predicate, or condition, may be made up of more predicates – those are called compound predicates. Action controllers, or controllers, may have only one predicate, be it single or compound.
If a user is not logged in, or does not have the proper permissions, this predicate checker throws a 401 (HTTP Unauthorized), which is caught by the repoze.who middleware to display the login page allowing the user to login, and redirecting the user back to the proper page when they are done.
The different conditions or predicates defined in tg.predicates module are −
| Sr.No. | tg.predicates module & Description |
|---|---|
| 1 | All Check if all predicates specified are met |
| 2 | Any Check if at least one of specified predicates are met |
| 3 | is_user Check that the authenticated user's username is the specified one |
| 4 | in_group Check that the user belongs to the specific group. |
| 5 | in_all_groups Check that the user belongs to all of the specified groups. |
| 6 | in_any_group Check that the user belongs to at least one of the specified groups. |
| 7 | is_anonymous Check that the current user is anonymous. |
| 8 | has_permission Check that the current user has the specified permission. |
| 9 | has_all_permissions Check that the current user has been granted all of the specified permissions. |
| 10 | has_any_permission Check that the user has at least one of the specified permissions. |
For example, if you have a predicate, which is grant access user belonging to customers group, then you can use the following built-in predicate checker −
from tg.predicates import in_group
p in_group(‘customers’)
The following predicate checker will grant access to ‘root’ user or anybody with ‘manage’ permission −
from tg.predicates import Any, is_user, has_permission
p = Any(is_user('root'), has_permission('manage'),
   sg = 'Only administrators can remove blog posts')
TurboGears - Using MongoDB
TurboGears also supports MongoDB document databases. It uses Ming, an Object Document Mapper API. Usage of Ming is very much similar to SQLAlchemy. Ming query language makes it possible to port SQLAlchemy based TurboGears project to Ming.
What is PyMongo
PyMongo is a Python distribution containing tools for working with MongoDB. Ming extends PyMongo providing −
- Declarative Models
- Schema Validation and Conversion
- Schema Evolution
- Pure InMemory MongoDB Implementation
- Unit of Work
- Identity Map
- One-To-Many, Many-To-One and Many-To-Many Relations
First of all, you need to download and install MongoDB. The latest distribution of MongoDB can be downloaded from https://www.mongodb.org/downloads
On Windows, start MongoDB server by providing -dbpath option −
C:\mongodb\bin>Mongod --dbpath d:\mongo
D:\mongo folder is designated to store MongoDB database. Server starts listening at http://localhost:27017. Now to start MongoDB shell use the following command −
C:\mongodb\bin>Mongo
Our MongoDB environment is now ready.
Now create a TurboGears project with -ming option −
gearbox quickstart --ming Hello
This quickstarted project will provide an authentication and authorization layer like the one that is provided for the SQLAlchemy version. This application will now try to connect to a server on port 27017 on the local machine. The development.ini file in project folder contains the following settings −
ming.url = mongodb://localhost:27017/
ming.db = hello
Setup the project using the following command −
Python setup.py develop
The project folder contains models subfolder which has the following files −
__init__.py − This is where the database access is set up. Your collections should be imported into this module. For example, we shall add student collection in this package.
session.py − This file defines the session of your database connection. You will need to import this each time you have to declare a MappedClass to specify the session to perform queries.
auth.py − This file will be created, if you have enabled authentication and authorization in the quickstart. It defines three collections repoze.who, which further relies on: User, Group, and Permission.
Defining Your Collection
By default, TurboGears configures Ming in a declarative mode. This is similar to the SQLAlchemy declarative support and needs each model to inherit from the MappedClass class.
The MappedClass requires that a __mongometa__ subclass is available inside, which further provides the details regarding the name of the collection storing the documents and the session used to store the documents.
MappedClass also contains definition of fields in the document. Ming’s odm module has definitions of different types of field properties −
- FieldProperty
- ForeignIdProperty
- RelationProperty
The ming.schema module defines the following data types −
- ming.schema.Anything
- ming.schema.Array
- ming.schema.Binary
- ming.schema.Bool
- ming.schema.Float
- ming.schema.Int
- ming.schema.ObjectId
- ming.schema.Scalar
- ming.schema.String
To add the student collection in this model, save the following code as student.py in hello/models folder.
Hello\models\student.py
from ming import schema
from ming.odm import MappedClass
from ming.odm import FieldProperty, ForeignIdProperty
from hello.model import DBSession

Class student(MappedClass):
   class __mongometa__:
      session = DBSession
      name = 'student'

   _id = FieldProperty(schema.ObjectId)
   name = FieldProperty(schema.String(required = True))
   city = FieldProperty(schema.String(if_missing = ''))
   address = FieldProperty(schema.String(if_missing = ''))
   pincode = FieldProperty(schema.String(if_missing = ''))
Finally, include this model in hello\models\__init__.py
# Import your model modules here.
from hello.model.auth import User, Group, Permission
from hello.model.student import student
To set up these models, run the following gearbox command −
Gearbox setup-app
Start the server with the following gearbox command −
Gearbox serve –reload –debug
Open the homepage of this application (http://localhost:8080/) and login with manager credentials. Admin page of this application will show the list of models set up. (login as manager, password managepass)
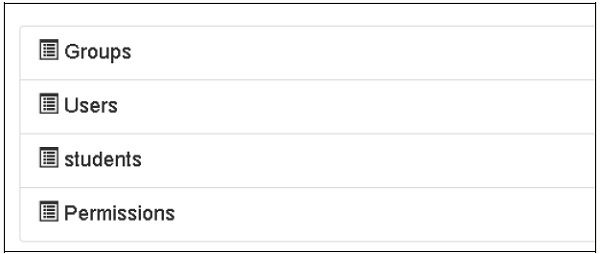
The creation of collections can also be verified in MongoDB web interface as well as the MongoDB shell.
The ODMSession is used to perform several database operations using the following functions −
- model.query.find()
- model.query.find_and_modify()
- model.remove()
- model.update()
- model.flush()
Designing a ToscoWidget Form
We shall now design a ToscoWidget form to enter student data and add it into the table underlying the student model.
Following is the code for creating a studentform.py −
Hello\controllers\studentform.py
import tw2.core as twc
import tw2.forms as twf

class StudentForm(twf.Form):

   class child(twf.TableLayout):
      name = twf.TextField(size = 20)
      city = twf.TextField()
      address = twf.TextArea("",rows = 5, cols = 30)
      pincode = twf.NumberField()

   action = '/save_record'
   submit = twf.SubmitButton(value = 'Submit')
In the application's Rootcontroller '/add' URL that calls add() function, which will open the above designed form in the browser. Its submit button then invokes save_record() function. It retrieves the form data and saves it in student table and redirects the application to '/listrec' URL, which exposes the studentlist template.
The root.py for this activity is as follows −
Hello/controllers/root.py
from hello.lib.base import BaseController
from tg import expose, flash, redirect, request,url, lurl
from tg import redirect, validate
from hello import model
from hello.model import DBSession
from hello.model.student import student

from hello.controllers.studentform import StudentForm

class RootController(BaseController):
   @expose()
   def index(self):
      return "<h1>Hello World</h1>"

   @expose ("hello.templates.studentlist")
   def listrec(self):
      entries = student.query.find()
      return dict(entries = entries)

   @expose('hello.templates.studentform')
   def add(self, *args, **kw):
      return dict(page = 'studentform', form = StudentForm)

   @expose()
   def save_record(self, **kw):
      newstudent = student(name = kw['name'],city = kw['city'],
         address = kw['address'], pincode = kw['pincode'])
      DBSession.flush()
      flash(message = "new entry added successfully")
      redirect("/listrec")
The following templates are created in the templates folder −
Hello\templates\studentform.html
<!DOCTYPE html>
<html xmlns = "http://www.w3.org/1999/xhtml"
   xmlns:py = "http://genshi.edgewall.org/" lang = "en">

   <head>
      <title>Student Registration Form</title>
   </head>


   <body>
      <div id = "getting_started">
         ${form.display(value = dict(title = 'Enter data'))}
      </div>
   </body>

</html>
Hello\templates\studentlist.html
<html xmlns = "http://www.w3.org/1999/xhtml"
   xmlns:py = "http://genshi.edgewall.org/">

   <head>
      <link rel = "stylesheet" type = "text/css" media = "screen"
         href = ${tg.url('/css/style.css')}" />
      <title>Welcome to TurboGears</title>
   </head>

   <body>
      <h1>Welcome to TurboGears</h1>

      <py:with vars = "flash = tg.flash_obj.render('flash', use_js = False)">
         <div py:if = "flash" py:replace = "Markup(flash)" />
      </py:with>

      <h2>Current Entries</h2>

      <table border = '1'>
         <thead>
            <tr>
               <th>Name</th>
               <th>City</th>
               <th>Address</th>
               <th>Pincode</th>
            </tr>
         </thead>

         <tbody>
            <py:for each = "entry in entries">
               <tr>
                  <td>${entry.name}</td>
                  <td>${entry.city}</td>
                  <td>${entry.address}</td>
                  <td>${entry.pincode}</td>
               </tr>
            </py:for>
         </tbody>
      </table>

   </body>

</html>
Restart the server and enter http://localhost:8080/add in the browser −
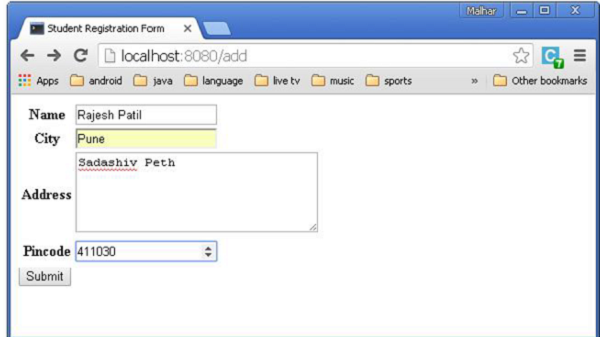
Each time the data is added and submit button is pressed, the list of current entries will be displayed.
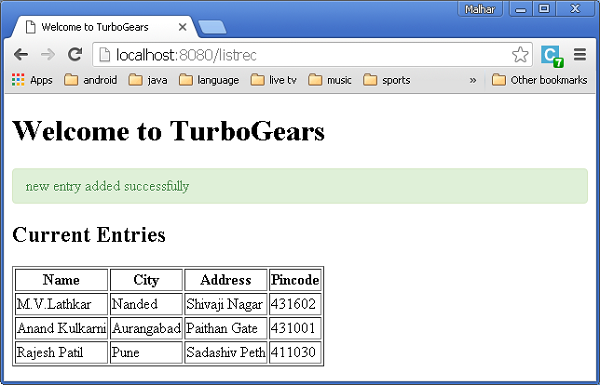
TurboGears – Scaffolding
Gearbox toolkit contains scaffold command, which is very useful to quickly create new components of TurboGears application. An application generated by quickstart command of gearbox has a skeleton template in the model folder (model.py.template), a templates folder (template.html.template) and a controllers folder (controller.py.template). These ‘.template’ files are used as basis for creating new scaffolds for an application
For example, in order to create a new model named mymodel, simply run the following command −
gearbox scaffold model mymodel
This command will generate model/mymodel.py with newmodel class defined in it.
# -*- coding: utf-8 -*-
"""Mymodel model module."""
from sqlalchemy import *
from sqlalchemy import Table, ForeignKey, Column
from sqlalchemy.types import Integer, Unicode, DateTime, LargeBinary
from sqlalchemy.orm import relationship, backref
from hello.model import DeclarativeBase, metadata, DBSession

class Mymodel(DeclarativeBase):
   __tablename__ = 'mymodels'

   uid = Column(Integer, primary_key = True)
   data = Column(Unicode(255), nullable = False)

   user_id = Column(Integer, ForeignKey('tg_user.user_id'), index = True)
   user = relationship('User', uselist = False,
      backref = backref('mymodels',cascade = 'all, delete-orphan'))
   __all__ = ['Mymodel']
The users can now make modifications in the table structure as per their requirement and then import it inside model/__init__.py to make the model available inside the application.
In order to create a model, a controller class to handle it and an index page all these three components can be created simultaneously by the following command.
gearbox scaffold model controller template mymodel
This command will result in controllers\mymodel.py in which the MymodelController class is duly defined.
# -*- coding: utf-8 -*-
"""Mymodel controller module"""

from tg import expose, redirect, validate, flash, url
# from tg.i18n import ugettext as _
# from tg import predicates

from hello.lib.base import BaseController
# from hello.model import DBSession

class MymodelController(BaseController):
   # Uncomment this line if your controller requires an authenticated user
   # allow_only = predicates.not_anonymous()

   @expose('hello.templates.mymodel')
   def index(self, **kw):
      return dict(page = 'mymodel-index')
To start using this controller, mount it inside your application RootController just to define an instance of MymodelController. Add these lines in the controllers\root.py −
From hello.controller.mymodel import MymodelController

class RootController(BaseController): mymodel = MymodelController()
A template scaffold templates\mymodel.html will also be created in the templates folder. It will act as an index page for ‘/mymodel’ URL.
The generated mymodel.html file in the templates folder will be as follows −
<html xmlns = "http://www.w3.org/1999/xhtml"
   xmlns:py = "http://genshi.edgewall.org/"
   xmlns:xi = "http://www.w3.org/2001/XInclude">

   <xi:include href = "master.html" />

   <head>
      <title>Mymodel</title>
   </head>

   <body>
      <div class = "row">
         <div class = "col-md-12">
            <h2>Mymodel</h2>
            <p>Template page for Mymodel</p>
         </div>
      </div>
   </body>

</html>
TurboGears – Hooks
There are three ways in TurboGears to plug behaviors inside the existing applications.
Hook − It is a mechanism by which it is possible to define an event, and notify registered listeners as and when the events are emitted.
Controller Wrapper − It sits between TurboGears and Controller, so that it is possible to extend controller like a decorator. Thus, it can be attached to any third-party controller application.
Application Wrapper − It is similar to any WSGI middleware, but works in TurboGears context only.
Here in this chapter, we will discuss how to use hooks inside an existing application.
Hooks
Hooks are events registered in the application’s configuration file app_cfg.py. Any controller is then hooked to these events by event decorators.
The following hooks are defined in TurboGears −
| Sr.No. | Hooks & Description |
|---|---|
| 1 | Startup() application wide only, called when the application starts. |
| 2 | shutdown() application wide only, called when the application exits. |
| 3 | configure_new_app new application got created by the application configurator. |
| 4 | before_config(app) application wide only, called right after creating application, but before setting up options and middleware |
| 5 | after_config(app) application wide only, called after finishing setting everything up. |
| 6 | before_validate Called before performing validation |
| 7 | before_call Called after validation, before calling the actual controller method. |
| 8 | before_render Called before rendering a controller template, output is the controller return value. |
| 9 | after_render Called after finishing rendering a controller template. |
Register a Hook
In order to register a Hook, create functions in app_cfg.py and then register them using the following code −
tg.hooks.register(hookane, function, controller)
In the following code, on_startup, on_shutdown and before_render hooks are registered in app_cfg.py.
def on_startup():
   print 'hello, startup world'

def on_shutdown():
   print 'hello, shutdown world'

def before_render(remainder, params, output):
   print 'system wide before render'

# ... (base_config init code)
tg.hooks.register('startup', on_startup)
tg.hooks.register('shutdown', on_shutdown)
tg.hooks.register('before_render', before_render)
The before_render hook is registered with a controller function in the Rootcontroller. Add the following code in controllers\root.py.
from tg.decorators import before_render

class RootController(BaseController):
   @expose('hello.templates.index')
   @before_render(before_render_cb)

   def index(self, *args, **kw):
      return dict(page = 'index')
When the application is served, start up message is displayed in the console.
hello, startup world
Starting Standard HTTP server on http://127.0.0.1:8080
When ‘/’ URL is entered in the browser, a message corresponding to the before_render hook is displayed on the console.
system wide before render
Going to render {'page': 'index'}
TurboGears - Writing Extensions
TurboGears extensions are identified by tgext.* package. A Gearbox toolkit provides tgext command to create a sample extension. For example −
gearbox tgext -n myextension
Other optional parameters for this command are −
--author − name of package author.
--email − email of package author.
--licence − licence used for package. Default is MIT.
--description − Description of package.
--keywords − Package keywords (default: turbogears2.extension).
This will create a tgext.myextension directory, which has a simple sample extension inside.
Run the setup.py inside the directory −
Python setup.py install
The _init_.py file inside tgext/myextension folder contains −
Plugme function − This is the entry point of extension.
SetupExtension class − extension initialization takes place here.
On_startup function − inside the class is a hook registered on __call__ function inside class.
Brief version of the tgext\myextension\__init__.py.
from tg import config
from tg import hooks
from tg.configuration import milestones

import logging
log = logging.getLogger('tgext.myextension')

def plugme(configurator, options = None):
   if options is None:
      options = {}
   log.info('Setting up tgext.myextension extension...')
   milestones.config_ready.register(SetupExtension(configurator))

   return dict(appid='tgext.myextension')

class SetupExtension(object):
   def __init__(self, configurator):
      self.configurator = configurator

   def __call__(self):
      log.info('>>> Public files path is %s' % config['paths']['static_files'])
      hooks.register('startup', self.on_startup)

   def echo_wrapper_factory(handler, config):
      def echo_wrapper(controller, environ, context):
         log.info('Serving: %s' % context.request.path)
         return handler(controller, environ, context)
      return echo_wrapper

   self.configurator.register_wrapper(echo_wrapper_factory)

   def on_startup(self):
      log.info('+ Application Running!')
Once the extension is installed, turn it on by making the following additions in the application's app_cfg.py configuration file.
from tgext.myextension import plugme

plugme(base_config)
If we launch the server using a gearbox server command, the notification of a newly registered extension can be viewed on the console by the following −
14:29:13,250 INFO [tgext.myextension] Setting up tgext.myextension extension...
14:29:13,453 INFO [tgext.myextension] >>> Public files path is c:\tghello\hello\hello\public
14:29:13,453 INFO [tgext.myextension] + Application Running!

Starting Standard HTTP server on http://127.0.0.1:8080
TurboGears - Pluggable Applications
If your extension needs to expose models and controllers, you probably want to have a look at the Pluggable Applications, which are meant to create reusable Turbogears applications that can be plugged inside other applications to extend their features.
Use the following gearbox command to create a pluggable application −
gearbox quickstart-pluggable plugtest
These pluggable applications can define their own −
Controllers − which will be automatically mounted, when the application is purged.
Models − which will be available inside and outside the plugged application.
Helpers − which can be automatically exposed in the ‘H’ object in an application template.
Bootstrap − which will be executed when setup-app is called.
Statics − which will be available at their own private path.
Install this plugtest application and mount the same by making the following modifications in app_cfg.py.
from tgext.pluggable import plug
plug(base_config, plugtest)
TurboGears – RESTful Applications
REST stands for REpresentational State Transfer. REST is web standards based architecture and uses HTTP Protocol for data communication. It revolves around a resource where every component is a resource and a resource is accessed by a common interface using HTTP standard methods. REST was first introduced by Roy Fielding in 2000.
What is a RestController
RestController in TurboGears provides a mechanism to access the request’s method, not just the URL. Standard HTTP verbiage includes: GET, POST, PUT, and DELETE. The RestController supports these, and also adds a few shortcuts for URL dispatch that makes displaying the data as forms and lists, a little easier for the user.
To explain how RESTful works with TurboGears, we are going to define a simple webservice that exposes a list of students.
The code for student model is given below −
model\student.py
# -* - coding: utf-8 -*-
from sqlalchemy import *

from sqlalchemy.orm import mapper, relation, relation, backref
from sqlalchemy import Table, ForeignKey, Column
from sqlalchemy.types import Integer, Unicode, DateTime
from hello.model import DeclarativeBase, metadata, DBSession
from datetime import datetime

class student(DeclarativeBase):
   __tablename__ = 'student'

   uid = Column(Integer, primary_key = True)
   name = Column(Unicode(20), nullable = False, default = '')
   city = Column(Unicode(20), nullable = False, default = '')
   address = Column(Unicode(100), nullable = False, default = '')
   pincode = Column(Unicode(10), nullable = False, default = '')
Now create a controller based on RestController and provide a view function to list out list of students in json format.
Controllers\student.py
from tg import RestController
from tg import expose
from hello import model
from hello.model import DBSession
from hello.model.student import student
from tg.decorators import with_trailing_slash

class StudentController(RestController):
   @expose('json')
   def get_all(self):
      students = DBSession.query(student).all()
      return dict(students=students)
Mount this StudentController in RootController of application by incorporating following lines in root.py −
from hello.controllers.student import StudentController

class RootController(BaseController):

   students = StudentController()
Going to the http://localhost:8080/students it will provide the list of our students encoded in json format.
We use the post method to define how we go about saving our student to the database. This method gets called whenever the http://localhost:8080/student url is accessed using a POST request −
@expose('json')
def post(self, name, city, address, pincode):
   newstudent = student(name = name, city = city, address = address, pincode = pincode)
   DBSession.add(newstudent)
   DBSession.flush()
   return dict(student = newstudent)
Using the get_one() method, we can display one item from the database to the user −
@expose('json')
def get_one(self, movie_id):
   newstudent = DBSession.query(student).get(uid)
   return dict(movie = movie)
PUT is the method used for updating an existing record using REST −
@expose('json')
def put(self, name = name, city = city, address =  address, pincode = pincode, **kw):
   newstudent = DBSession.query(student).get(name)
   newstudent.name = name
   newstudent.city = city
   newstudent.address = address
   newstudent.pincode = pincode
   return dict(student = newstudent)
The work-horse of delete is attached to the post_delete method. Here we actually remove the record from the database, and then redirect back to the listing page −
@expose('json')
def post_delete(self, uid, **kw):
   newstudent = DBSession.query(student).get(uid)
   DBSession.delete(newstudent)
   return dict(movie = newstudent.uid)
TurboGears - Deployment
To switch over from a development environment to a full-fledged production environment, application needs to be deployed on a real web server. Depending upon what you have, there are different options available to deploy a TurboGears web application.
Apache with mod_wsgi
The mod_wsgi is an Apache module developed by Graham Dumpleton. It allows WSGI programs to be served using the Apache web server.
Firstly, install Apache 2.X for your platform, if not done already. Once you have Apache installed, install mod_wsgi. Create and activate Python virtual environment on the server and install TurboGears in it.
Install your application within the application director, then create a script named app.wsgi.
Configure Apache installation as follows −
<VirtualHost *:80>
   ServerName www.site1.com
   WSGIProcessGroup www.site1.com
   WSGIDaemonProcess www.site1.com user = <username>
      group = www-data threads = 4 python-path = <pythonpath>
   WSGIScriptAlias myapp/app.wsgi

   #Serve static files directly without TurboGears
   Alias /images
   Alias /css
   Alias /js
   CustomLog
   ErrorLog
</VirtualHost>
Restart Apache
Type http://www.site1.com/ on a browser to access the application.
TurboGears under Circus and Chaussette
Circus is a process & socket manager. It can be used to monitor and control processes and sockets. When paired with the Chaussette WSGI server, it can become a powerful tool to deploy your application and manage any related process your applications need.
TurboGears - GoogleAppEngine
Install the Google AppEngine SDK for Python from the following URL − https://cloud.google.coms
Install the Google AppEngine on your system. Then open Google Developer console and sign in with your Google Account − https://console.developers.google.com/start
Create a new project called mytgapp −
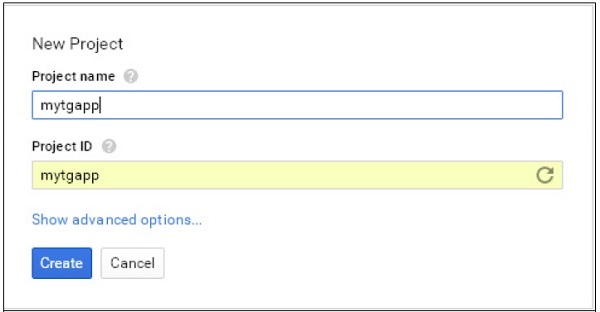
Using Google AppEngine Launcher, create a new application named mytgapp.
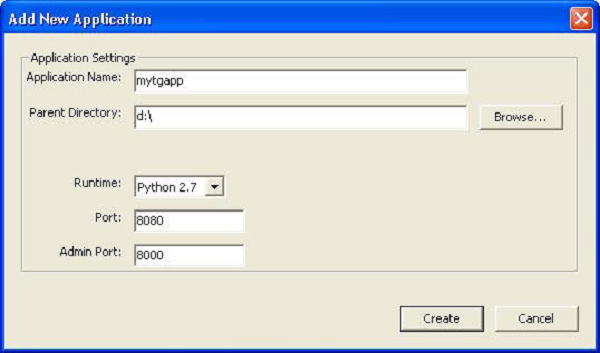
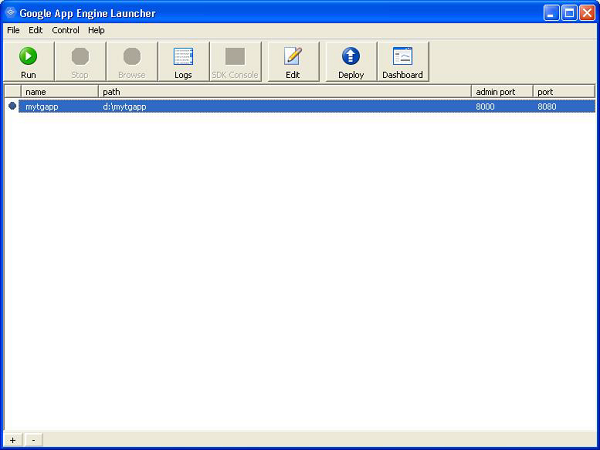
The following files will be created in the specified directory −
- app.yaml
- favicon.ico
- index.yaml
- main.py
By default,the created application relies on the Webapp2 framework. To remove this dependency, edit the app.yaml file and delete the following part −
libraries:
   - name: webapp2
   version: "2.5.2"
Create a temporary virtual environment in a directory named mytgapp and install TurboGears. Create a TurboGears application in it. Now we can proceed editing the main.py file which is started by AppEngine to run our application and actually write a TurboGears application there.
Add the following contents in main.py −
import os
import site
site.addsitedir(os.path.join(os.path.dirname(__file__), 'packages'))
from tg import expose, TGController, AppConfig

class RootController(TGController):
   @expose()
   def index(self):
      return "<h1>Hello World</h1>"

config = AppConfig(minimal = True, root_controller = RootController())
app = config.make_wsgi_app()
Now run the application from AppEngine Launcher and click on browse button to see that application works properly on the localhost.
We have already created a project named mytgapp in the developer console. Now click on the deploy button in the Launcher. After the deployment process is over, http://mytgapp.appspot.com/ visit to view our application online.