- Sublime Text Tutorial
- Sublime Text - Home
- Sublime Text – Introduction
- Sublime Text – Installation
- Sublime Text – Data Directory
- Creating First Document
- Editing First Text Document
- Patterns of Code Editing
- Sublime Text – Sublime Linter
- Sublime Text – Shortcuts
- Sublime Text – Snippets
- Sublime Text – Macros
- Sublime Text – Key Bindings
- Sublime Text – Column Selection
- Sublime Text – Indentation
- Sublime Text – Base Settings
- Sublime Text – Theme Management
- Understanding Vintage Mode
- Sublime Text – Vintage Commands
- Sublime Text – Testing Javascript
- Sublime Text – Testing Python Code
- Sublime Text – Spell Check
- Sublime Text – Packages
- Sublime Text – Menus
- Sublime Text – Sub Menus of Font
- Sublime Text – Developing Plugin
- Sublime Text – Command Palette
- Debugging PHP Application
- Debugging Javascript Application
- Sublime Text – Batch Processing
- Distraction Free Mode
- SublimeCodeIntel Plugin
- Sublime Text Useful Resources
- Sublime Text - Quick Guide
- Sublime Text - Useful Resources
- Sublime Text - Discussion
Sublime Text - Quick Guide
Sublime Text - Introduction
Sublime Text Editor is a full featured Text editor for editing local files or a code base. It includes various features for editing code base which helps developers to keep track of changes. Various features that are supported by Sublime are as follows −
- Syntax Highlight
- Auto Indentation
- File Type Recognition
- Sidebar with files of mentioned directory
- Macros
- Plug-in and Packages
Sublime Text editor is used as an Integrated Development Editor (IDE) like Visual Studio code and NetBeans. The current version of Sublime Text editor is 3.0 and is compatible with various operating systems like Windows, Linux and MacOS.
Why Sublime Text?
When you use a suitable Text editor, you can enjoy its rich beneficial features. Sublime Text offers its users the following benefits −
- Ability to solve linker errors.
- Keeping track of all files and folders to work with.
- Connectivity with version control systems like Git, Mercurial.
- Problem solving capabilities.
- Keeping color combination for syntax combination.
You can download Sublime Text from its official Website − www.sublimetext.com. In the next chapter, we will learn about installation procedure of Sublime Text editor in various operating systems.
Sublime Text - Installation
Sublime Text editor is supported by the following major operating systems −
- Windows
- Linux and its distributions
- OS X
You can download Sublime Text from its official website − www.sublimetext.com
In this chapter, you will learn about the installation of Sublime Text on various operating systems.
Installation on Windows
You will have to go follow the steps shown below to install Sublime Text on Windows −
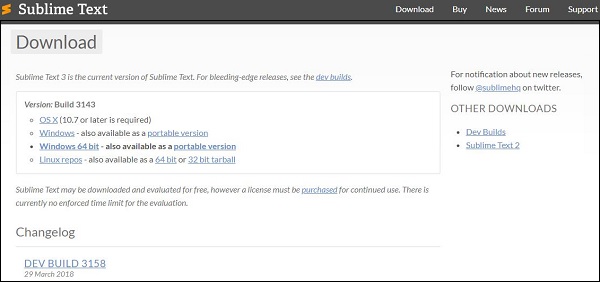
Step 1 − Download the .exe package from the official website as shown below −
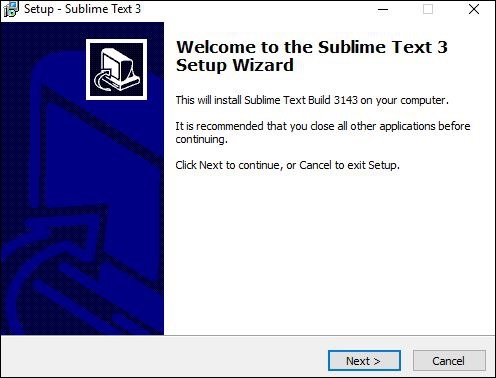
Step 2 − Now, run the executable file. This defines the environment variables. When you run the executable file, you can observe the following window on your screen. Click Next.
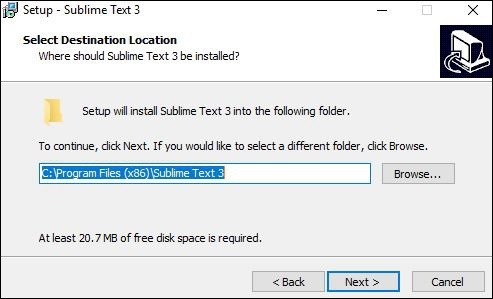
Step 3 − Now, choose a destination location to install Sublime Text3 and click Next.
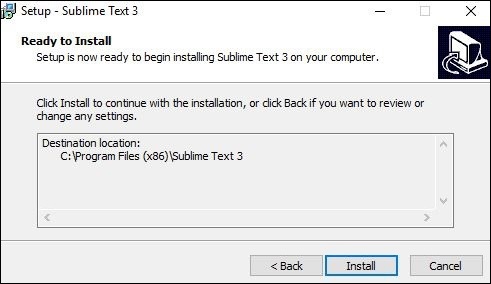
Step 4 − Verify the destination folder and click Install.
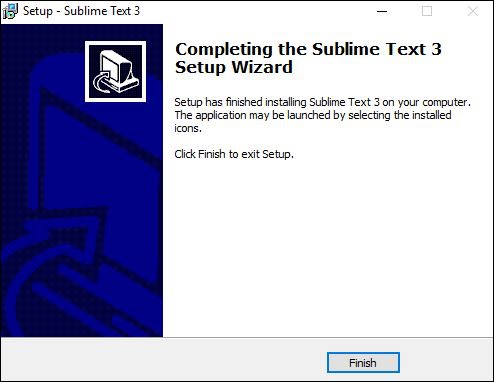
Step 5 − Now, click Finish to complete the installation.
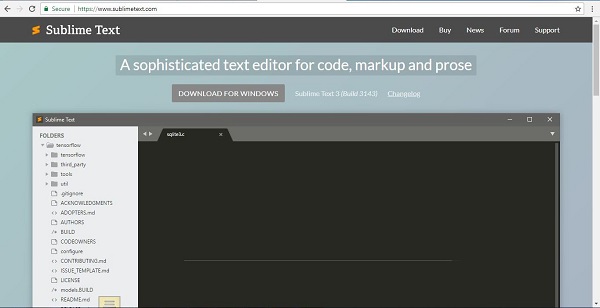
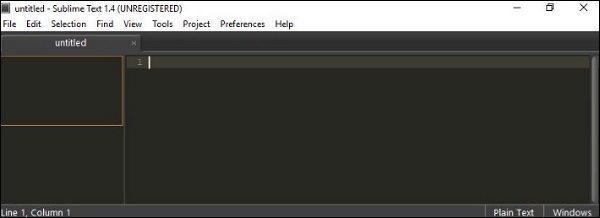
Step 6 − Upon a successful installation, your editor will appear as shown below −
Installation on Linux
You will have to follow the steps shown below to install Sublime Text on Linux distributions −
Step 1 − Using the command line terminal, install the packages for Sublime Text editor, using the command given below −
sudo add-apt-repository ppa:webupd8team/Sublime-Text-3
Step 2 − Update the packages using the following command −
sudo apt-get update
Step 3 − Install the Sublime Text repository using the following command −
sudo apt-get install Sublime-Text
After the successful execution of above mentioned commands, you will find that Sublime Text editor is installed on the system.
Installation on OSX
For OSX operating systems,
Download the .dmg file of Sublime Text Editor.
Open it and drag-and-drop in the Applications folder.
Follow the steps that you have seen in above two cases.
Launch the application.
Sublime Text - Data Directory
Throughout this tutorial, we will be focusing on using the subversion control system, Git and bit bucket in combination with Sublime Text editor.
As with any other Text editor, working on a specific repository is the key aspect of Sublime Text. It is shown in detail in the steps given below −
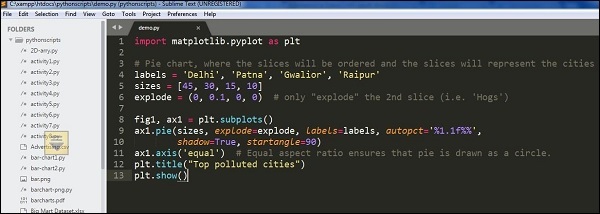
Step 1 − Consider a repository to be cloned from the bit bucket. Please note that we will be working with Python scripts throughout this tutorial.
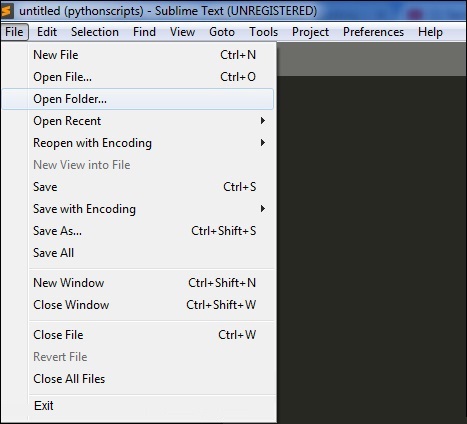
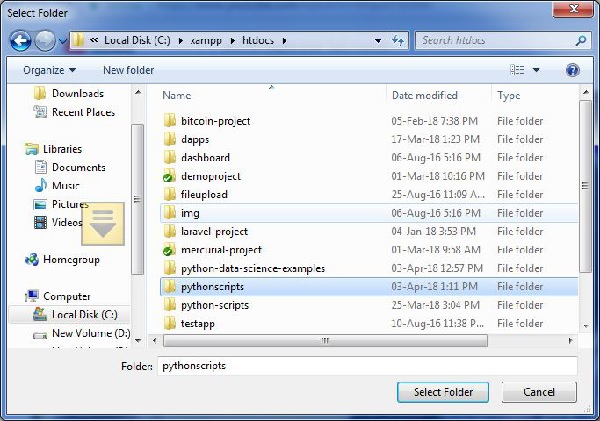
Step 2 − Include the repository in Sublime Text editor using the Open Folder option, as shown below.
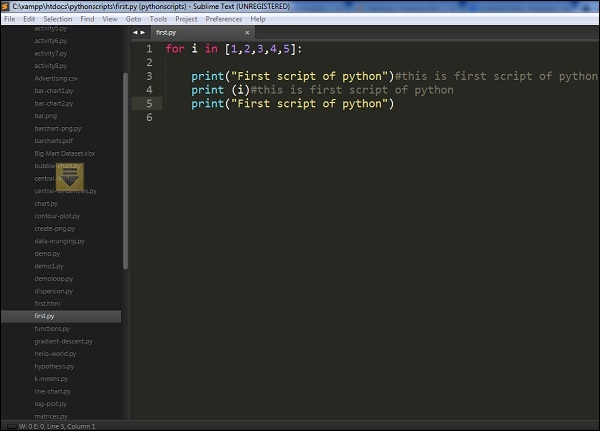
Step 3 − After including the repository, the screen of Sublime Text editor will be as shown below −
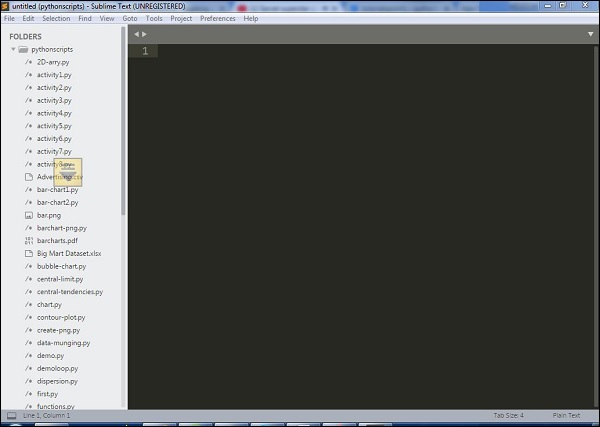
You can choose the file you wish to open from the list that is displayed in the left hand side of the screen, as shown in the image below −

Note that the color combination gives recognition of keywords and packages included in the code.
Sublime Text - Creating First Document
In this chapter, you will learn step by step how to create a file in Sublime Text.
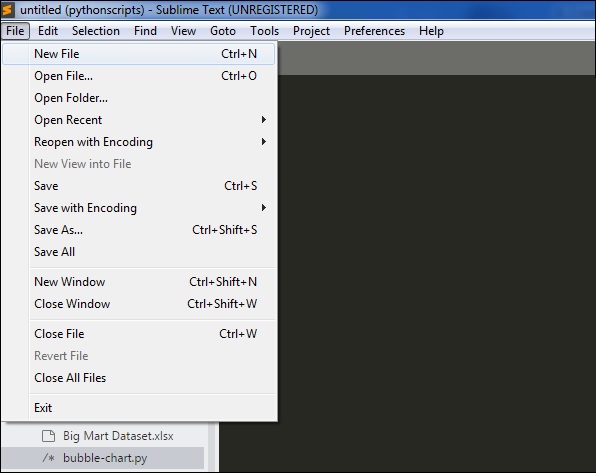
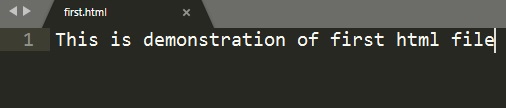
Step 1 − Use the option New File to create a file in Sublime Text editor.
Step 2 − Once the new file is available, you can insert the code, similar to any other text editor, and save the file in your working repository.
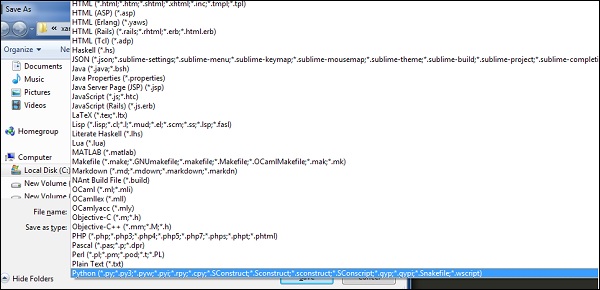
Step 3 − Once you save the associated file, Sublime Text editor provides a variety of options based on the type of file, for example .php for PHP scripts, .py for Python scripts and .java for Java code base.
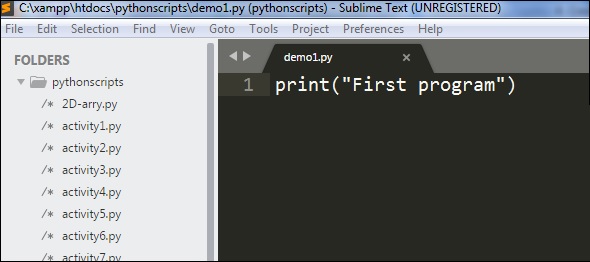
Step 4 − As our code repository is on Python project, we will save the file as demo1.py, as shown below −

Sublime Text - Editing First Text Document
Code editors allow the users to edit the code scripts and text documents with various shortcut keys. In this chapter, let us understand through various examples about editing options of first text document in Sublime Text.
Simultaneous Write-Up
In this example, you will see how to add print statements at two locations.
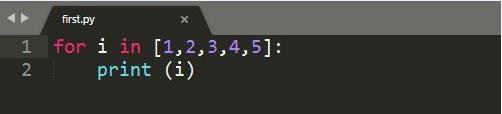
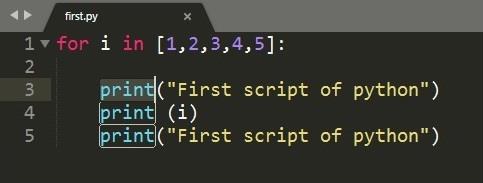
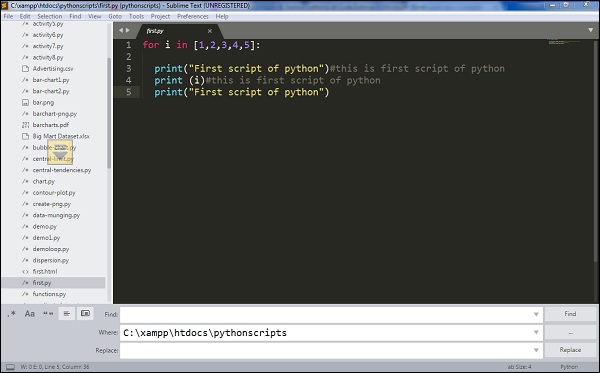
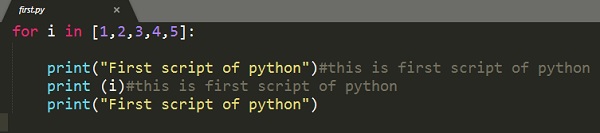
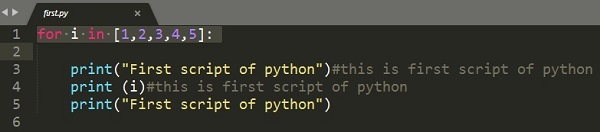
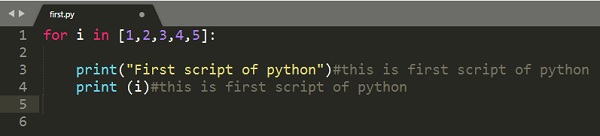
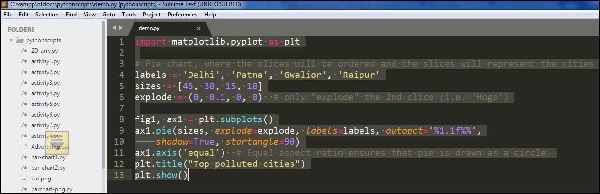
Step 1 − Consider the first script of Python with the following code in it −
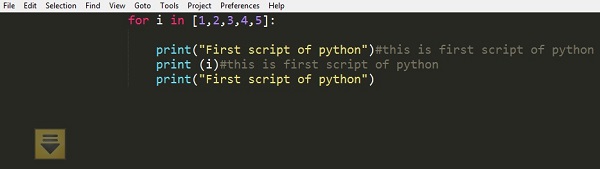
Step 2 − Let us suppose that, in the given script you want to mention the starting and ending points of the loop, using simple statements. You can write the print statement wherever required, however, in Sublime Text editor you can simultaneously add comments and statements in two places with a shortcut of Ctrl+cursor point for Windows or Linux, and Cmd+cursor point for Mac. Then, you can see the cursor points as mentioned below −
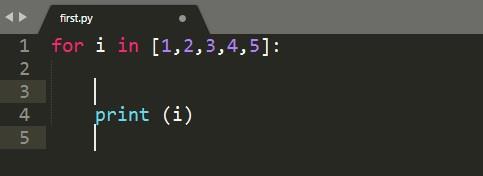
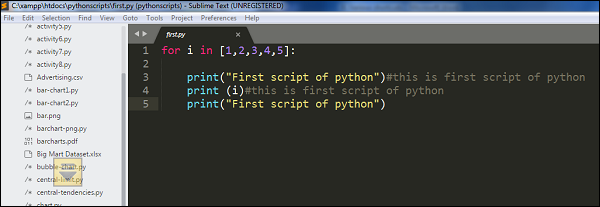
Step 3 − Now, you can insert the print statements at both the locations of the mentioned cursor points, as shown in the image below.

Finding Occurrences
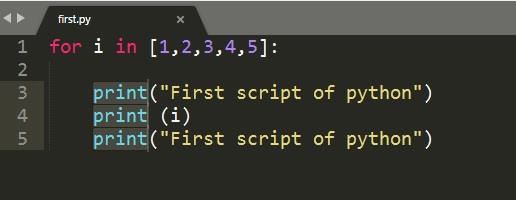
Sublime Text editor includes a feature to find the occurrences of the keywords included in the scripts. The shortcut key for finding occurrences of the keyword is Ctrl+D after highlighting the associated keyword.
If you want to search for a keyword, say print from the given code, you can use Ctrl+D or Cmd+D to get the count of occurrences of the associated keyword.
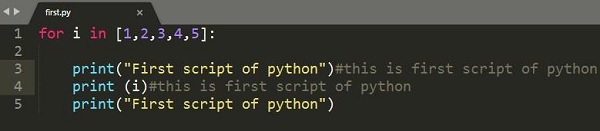
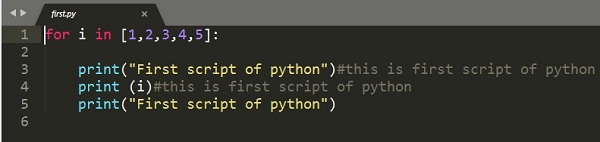
Appending Comments in Line
We can append comments at the end of line using the shortcut key Ctrl+Shift+L for Windows and Cmd+Shift+L for Mac operating system after selecting the code section where you actually need the comment.
Sublime Text - Patterns of Code Editing
There are various types of code editing and shortcut keys used in Sublime Text editor −
- Splitting the selection into lines
- Wrapping the complete paragraph in HTML file
- Finding all occurrences
This chapter discusses each of them in detail.
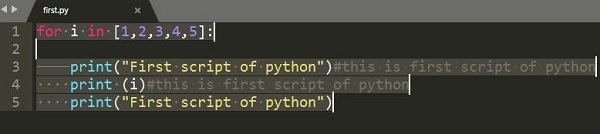
Splitting the Selection into Lines
The key combination Ctrl+Shift+L allows you to select the blocks of lines and split them, on Windows. The screenshot given below explains this −
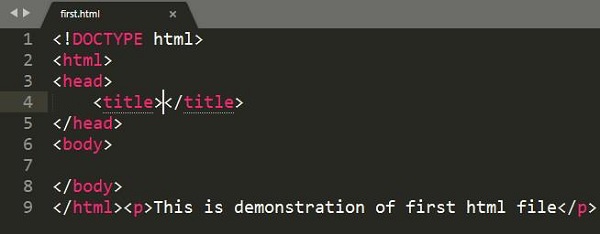
Wrapping Complete Paragraph in HTML File
The key combination Alt+Shift+w for Windows and Cmd+Shift+w for Mac, allows the user to split the sections of code and create various paragraphs. It is referred as a wrap selection with html tag. This also allows you to include HTML tags using Sublime editor.
The screenshot given below explains wrapping text with a HTML tag −
After wrapping the text, the text wrapped with a HTML tag will be seen as shown below −

Finding all Occurrences
The key pattern Ctrl+Shift+f allows you to find a keyword in a given project. The screenshot given below explains this −
The shortcut key opens a window with three options included in it, namely find, where and replace,
where,
find refers to the search of the particular keyword,
where mentions the section as to which repository is searched, and
replace mentions the keyword which is replaced instead of find keyword.
Sublime Text - Sublime Linter
Linting is the process of flagging suspicious constructs and likely to be bugs in any programming language.
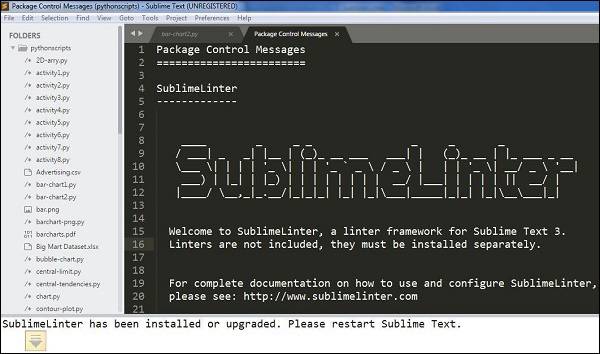
Sublime Linter is the package of Sublime Text that helps you to perform linting in Sublime. It helps in creating files in different modes for the manipulation of code base. It is not an in built package and you need to install it manually.
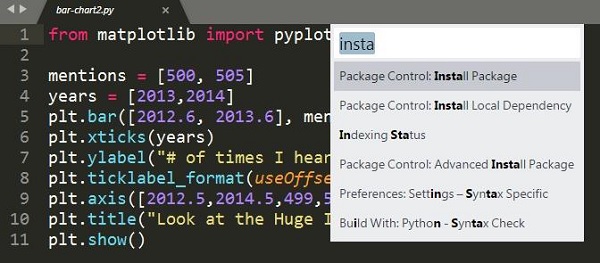
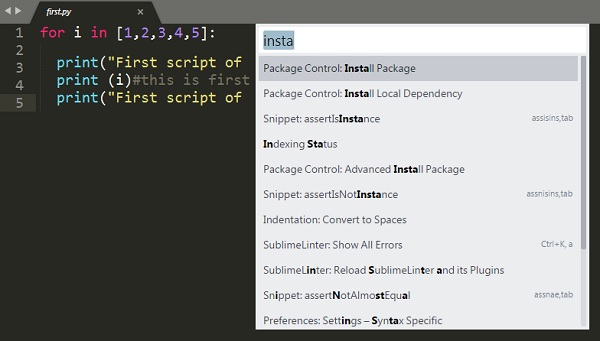
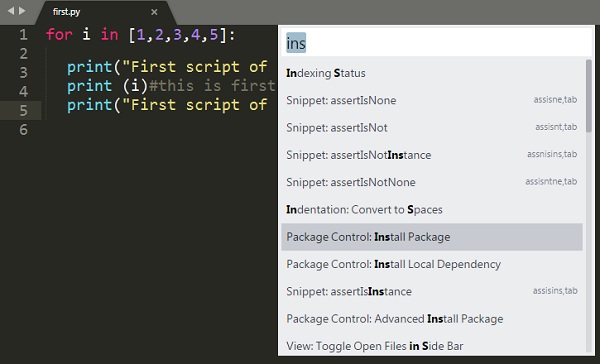
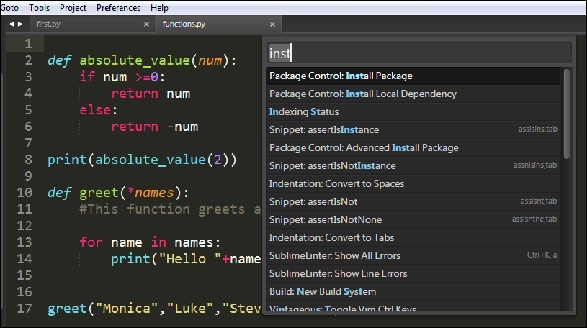
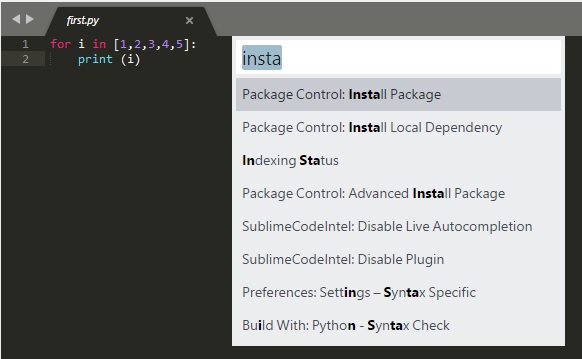
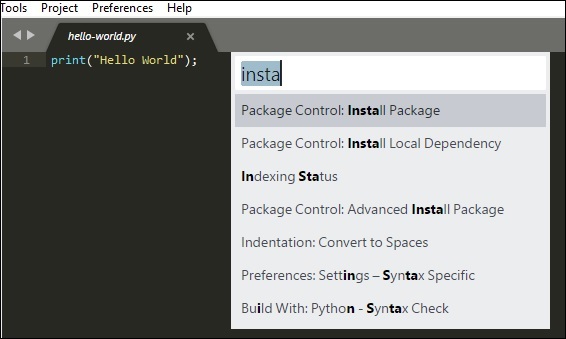
You can install any package control in Sublime Text editor using the shortcut key combination Ctrl+Shift+P, and selecting the Package Control: Install Package option.
Select the associated package to install in Sublime Text editor. To install Sublime Linter, you need to select the option of SublimeLinter plugin.
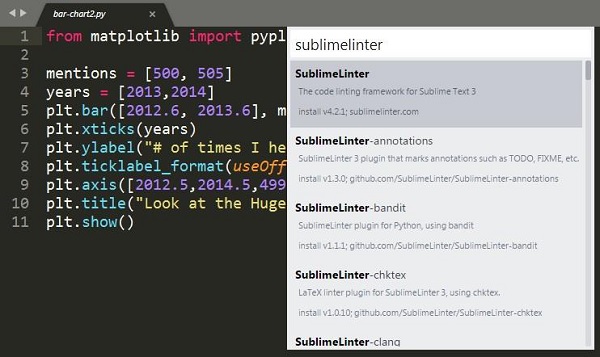
On successful installation, your screen will look as shown below −
Modes of Sublime Linter
Sublime Linter runs in four different modes as mentioned below −
Background Mode
When the Sublime Linter key is set to true, linting is performed in the background constantly each time the file is modified.
Load-Save Mode
When the Sublime Linter key is set to , linting load savewill be performed when a file is loaded from the repository.
Save-Only Mode
When the Sublime Linter key is set to save only mode, linting is performed while saving the particular file in working repository.
On Demand Mode
In the on-demand mode, the Sublime Linter will be set to true, using the shortcut Ctrl+Alt+L, which sets up the linter to detect bugs, if any present in the code.
Sublime Text - Shortcuts
Sublime Text editor includes shortcuts and methods for manipulating the output. This chapter discusses in detail about these shortcuts with the help of suitable illustrations.
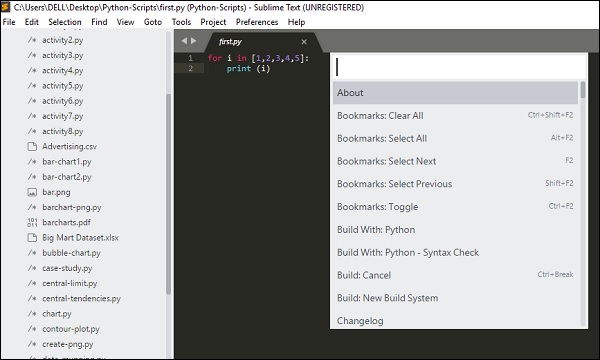
Opening the Command Palette
Command palette in Sublime Text editor includes options for installing packages and console. The shortcut key for this purpose is Ctrl+Shift+P for Windows and Cmd+Shift+P for Mac. The screenshot given below shows opening the command palette using this shortcut.
Toggle Side Bar
Sublime text editor includes a side bar which displays the scripts or the file names. You can use the shortcut key Ctrl+KB on Windows and Cmd+KB for Mac for this purpose.
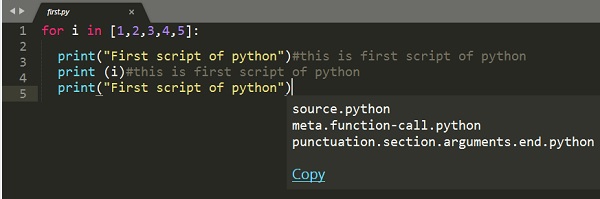
Display Scope in Status Bar
The shortcut key Ctrl+Shift+Alt+P for Windows and Ctrl+Shift+P for Mac displays scope in the status bar. The following screenshot shows an illustration of this shortcut.
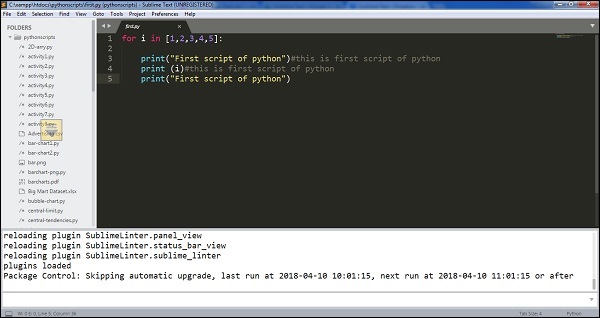
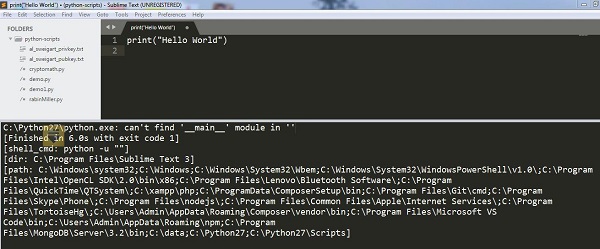
Python Console
When you are working with Python scripts using Sublime Text editor, you can use Ctrl+` for Windows or Control + ` for Windows, to operate the Python console.
New Window
With new windows, you can manage a number of projects simultaneously. You can use the shortcut key Ctrl+Shift+N on Windows and Cmd+Shift+N for Mac to create a new window on Sublime Text editor.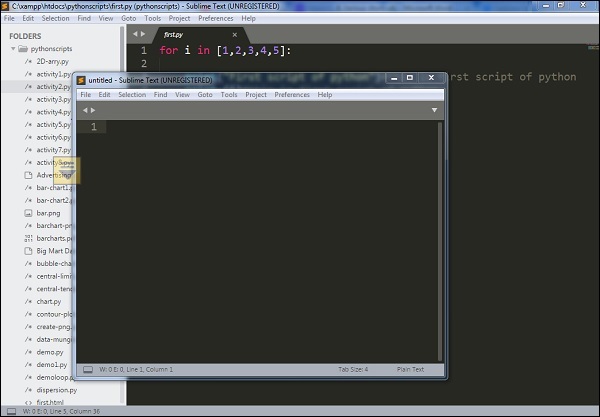
Sublime Text - Snippets
Snippets are the smart templates which can be reused whenever needed. Sublime text editor includes snippets feature for HTML templates. In this chapter, you will learn about them in detail.
Understanding Snippets
Snippets are simple XML supported files with various attributes. They include an extension called sublime-snippet. The root tag of XML element will be the <snippet> tag. Snippets created are saved in the Packages folder and are considered to live in this folder.
The file format and syntax of snippets are discussed in detail as follows −
Content −This section includes description of the snippet.
tabTrigger − It includes a sequence of characters which trigger when the snippet is written.
Scope − It defines the scope in which the snippet remains active.
Description − It includes all the meta description. It will be displayed when snippet’s menu is open.
Creating First Snippet
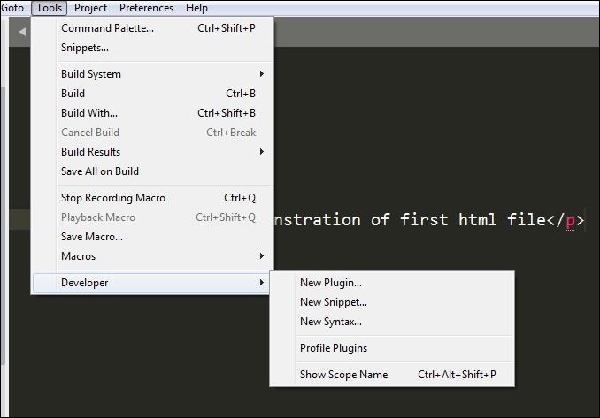
You can create the default snippet using Tools → Developer → Snippet option.
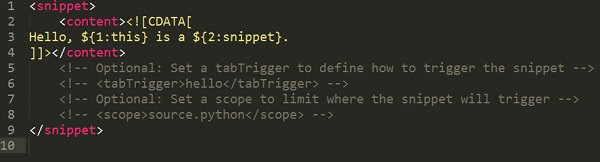
Then, a demo snippet with the associated tags will be created as shown below −
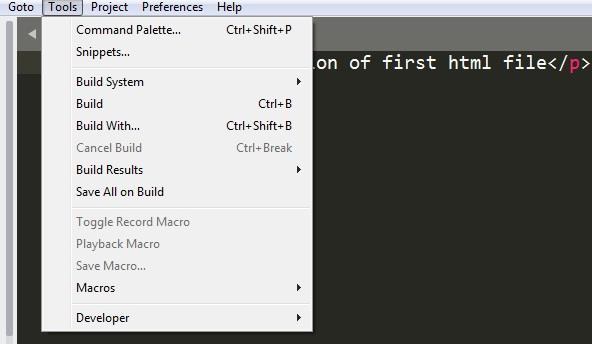
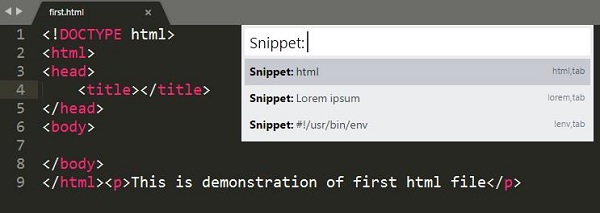
To create a first snippet in Sublime Text editor, click the Tools menu and select the Snippets option from the drop down window, as shown in the screenshot here.
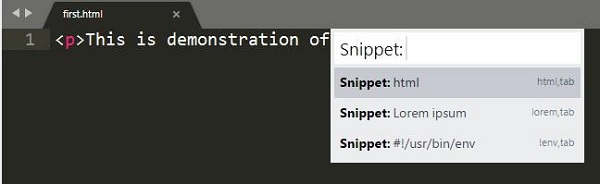
Now, choose Snippet:html from the options displayed.
This creates a default snippet on the specified html file as shown below.
Note that there are various snippets for different types of files. For html files in the code base, there are three snippets defined in Sublime Text editor, as shown below.
Package Control Snippets
Control snippets are primarily used for product development. With install packages option in Sublime editor, you can download any snippet needed for web development and install it.
You may need the following packages for web development −
- EverCodeLab Sublime supports for Ruby on Rails
- Additional PHP snippets for PHP
- HTML snippets for HTML files
- Twitter Bootstrap snippets for Twitter Bootstrap
- JavaScript snippets for JS files
- jQuery snippets pack for jQuery
Sublime Text - Macros
Macros are the basic automation facility that includes a sequence of commands. You can use macros whenever you need to perform an operation which includes same steps.
Macro files are JSON files with an extension called .sublime-micro and are considered to be very helpful.
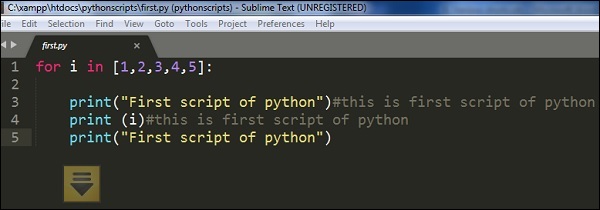
Recording a Macro
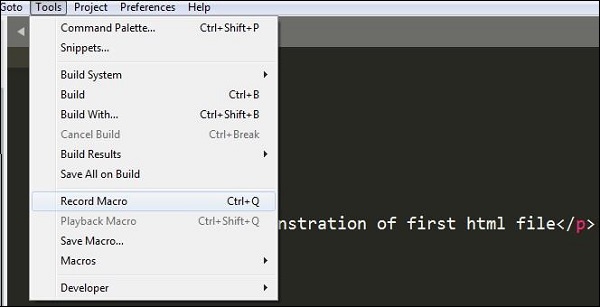
Recording a macro defines the procedure to keep a set of commands needed for the given file. You can record a macro in two ways −
Use the shortcut key Ctrl+Q for recording a macro in Windows and Cmd+Q in Mac.
Use the record option in Tools → Record Macro.
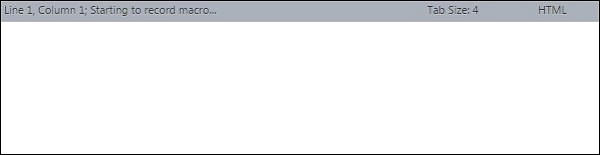
Once the macro has started recording, you can see the following message in Sublime Text editor −
Playing a Macro
You can use the shortcut key Ctrl+Shift+Q on Windows and Cmd+Shift+Q for Mac, to play a macro recorded by the user in Sublime Text. Note that this shortcut plays the last recorded macro in Sublime.
Saving a Macro
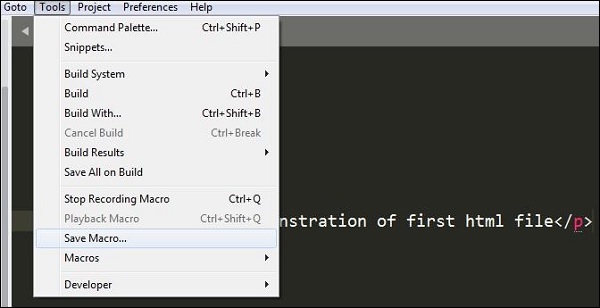
You can save a recorded macro using the option Tools → Save Macro. The following screenshot shows how to save a macro using this option.
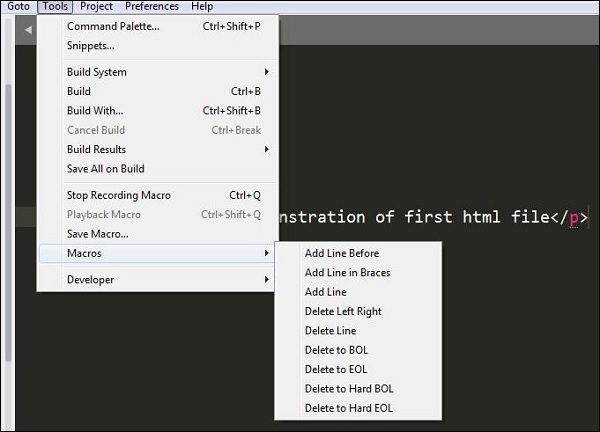
You can also redefine the macros using various options in Tool menu bar, as shown below −
Sublime Text - Key Bindings
Key bindings in Sublime Text helps a user to process and map the sequences of key presses to actions. They are defined in the JSON format and are stored in .sublime-keymap files.
For better integration, it is important to keep separate key map files for Linux, OSX and Windows. Key maps of the corresponding platform will be loaded in the Sublime Text editor.
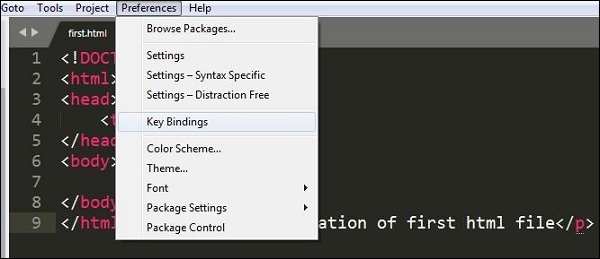
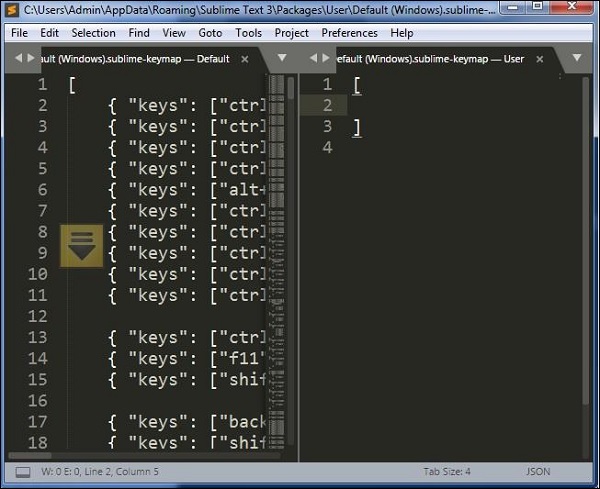
A user can open the keymap file or default key bindings using the option Preferences → Key Bindings.
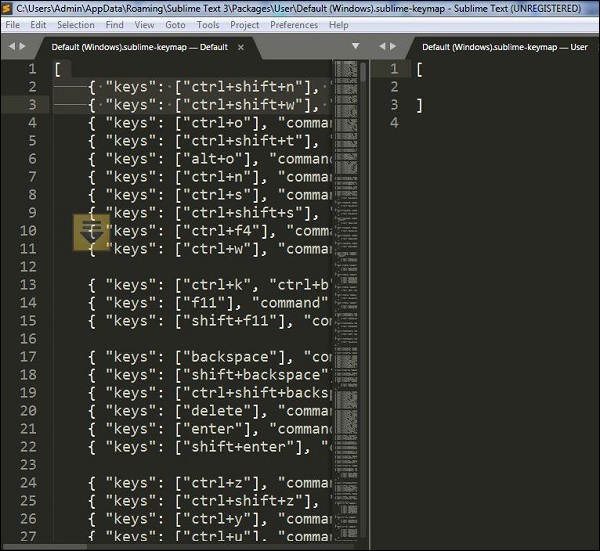
The following example shows how to perform key bindings in Windows −
[
   { "keys": ["ctrl+shift+n"], "command": "new_window" },
   { "keys": ["ctrl+shift+w"], "command": "close_window" }
]
Defining Key Bindings
Sublime Text editor includes an option to define a key map. The key bindings defined in the file .sublime-keymap includes all the key value combinations.
You can include the following key binding set into this file and save them to check the execution, with the help of the code shown below −
[
   {
      "keys": ["super+alt+;"], "command": "run_macro_file",
      "args":
      {"file": "Packages/User/semicolon.sublime-macro"}
   }
]
Here super is the Winkey in Windows or Linux, and a command on OSX operating system. Note that this code will run the macro that is located in Packages/User and is named semicolon.sublime-macro on pressing the Super+Alt+ keys.
Sublime Text - Column Selection
In this chapter, you will learn various shortcuts keys to move and select the columns of a file in Sublime Text.
Moving the Pointer to the Beginning of Code
You can use the shortcut Ctrl+Home to move the pointer to the beginning of the code in Sublime Text editor.
Observe the sample code shown here.
The screenshot given below shows the same code where the cursor is moved to its beginning.
Extending a Column
You can use the shortcut Ctrl+L to extend a specified column. This shortcut will select the column which includes the pointer. The following screenshot explains this in a detailed manner −
Trimming a column
You can use the shortcut Ctrl+K to trim the specified column of the file. For OSX, you will have to use the key combination Cmd+K for this purpose.
The example shown here displays the code where the line mentioned in the fifth column is trimmed.
Split a Block of Text
You can use the shortcut Ctrl+Shift+K to split a selected block of text into two selections.

Note − The difference in key combinations from the previous key combination is that columns are visible. Ctrl+Shift+K removes the column number from the specified code, whereas Ctrl+K keeps the column number intact after trimming the entire column.
Sublime Text - Indentation
Indentation is the process of maintaining the code blocks of programming languages to maintain a systematic structure. It helps to convey the developers a better structure of program. This chapter explains you in detail about indentation in Sublime Text editor.
Importance of Indentation
Indentation helps to maintain the code structure such that it is easily understood by anyone who accesses it. Proper indentation imparts the following features to the code −
- Readability
- User-friendliness
- Adaptability
- Ease of maintenance
Options for Indentation in Sublime Text
Sublime Text editor provides various options for code indentation as shown in the following screenshot −
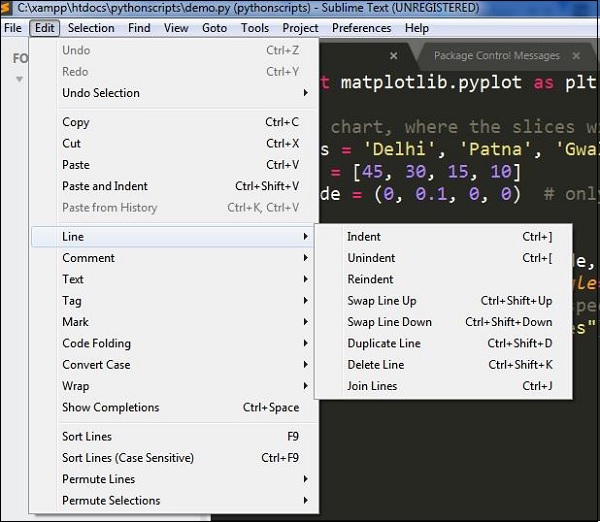
The usage of these options is discussed in detail here −
Indent Option
Indent option helps to create indentation of the specified code. You have to select the code specified and select the Indent option. You can also use the shortcut Ctrl+[ after selecting the required code that is to be indented. Refer to the following screenshot for a better understanding −

Unindent Option
Unindent option works in the reverse of indent procedure. The shortcut for the unindent option is Ctrl+]. Refer to the following screenshot for a better understanding −
Reindent Option
Reindent option is used to undo the unindent option and revert the code back to the same condition. Refer to the following screenshot for a better understanding −
Benefits of Indentation
Proper indentation offers various benefits to the code and developers. They are discussed below −
Code blocks will be visible without much effort.
Developer can focus on lines of code that are necessary and easily ignore the irrelevant ones.
A developer using the same kind of code structure multiple times need not focus on the start of block and end of block statements.
Any misplaced lines of code can be easily identified.
Sublime Text - Base Settings
Base settings of the Sublime Text editor are the configuration needed for editor such as font size, display of line numbers or color scheme of the editor.
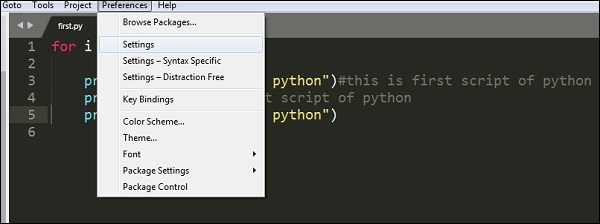
All the base settings are configured in JSON format. To view the list of settings, go to menu of Preferences -> Settings.
The settings include two types of configurations namely −
- Default
- User
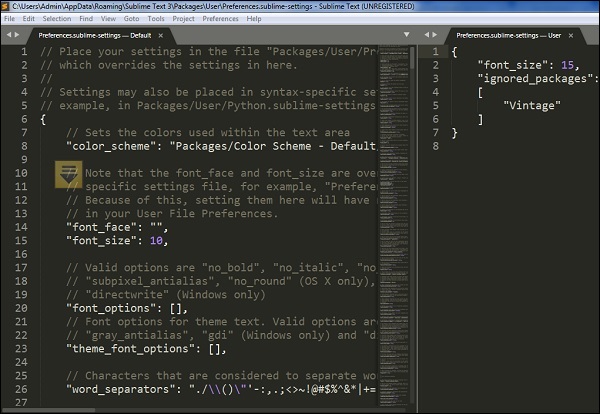
Default includes all the default configurations and user defines the customized settings for base settings.
For the scenario mentioned above, the customized settings are as mentioned below −
"font_size": 15,
   "ignored_packages":
   [
      "Vintage"
   ]
Categories of Settings
Various categories of the settings in Sublime Text are as follows −
Editor Settings
These include the basic settings for editing the files of the code base. Examples include font_face, font_size and tab_size. The settings are present in the default configuration.
User Interface Settings
These include the general settings which specifically focus on background, theme and various color combinations. These settings are appended in the second section of the default configuration.
Application Behavior
These settings focus on behavior of the application included in Sublime Text editor across open windows. These settings are included in the third section of default configuration settings.
Syntax - Specific Settings
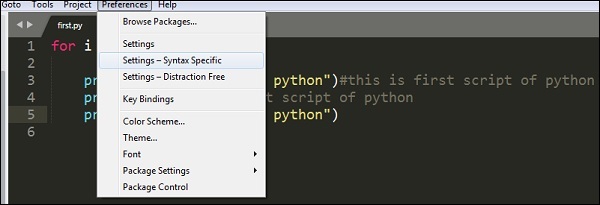
These settings are used for designing the syntax of Sublime Text editor. To get the list of syntax specific settings, the user needs to use option Preferences − Syntax-Specific.
Sublime Text - Theme Management
Theme management in Sublime text editor implies enhancing the appearance of editor with colors and attractive backgrounds. Themes are JSON formatted values with .sublime-theme extension and manage the appearance of the user interface of the editor by changing the colors of elements of the IDE.
Installing and Applying Themes
The following steps will guide you about installing and applying themes in Sublime Text editor −
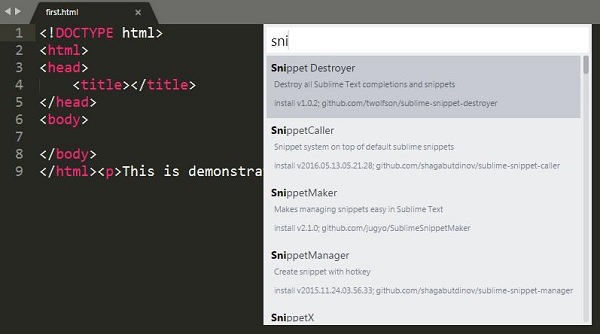
Step 1 − Use the Install Package of the Sublime Text to install package for themes, as shown in the screenshot here −
Step 2 − You can see a list of options with Install Package option and you can download them and install in Sublime Text editor.
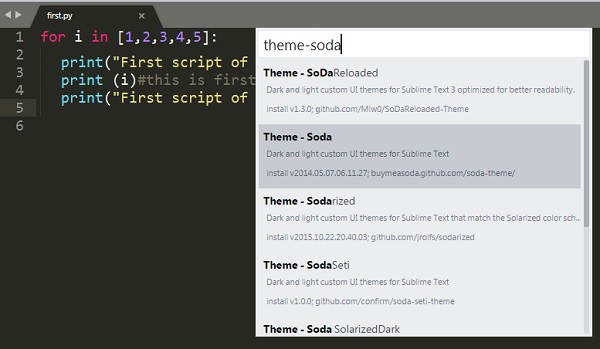
Step 3 − Once you select a theme, activate it.

Step 4 − Now select your desired theme from the list of installed theme list. This automatically changes the appearance of the editor.
Color Schemes
Color schemes are XML formatted files located at the Packages folder with color schemes. They are an awesome way for the customization of Sublime text colors, unlike themes which are specific to UI elements.
You can choose color schemes using option Preferences → Color Scheme. Refer to the following screenshot that shows the same.
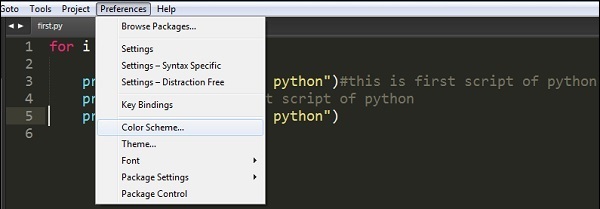

Color schemes include various options such as Breakers, Mariana, Monokai, and Sixteen. The appearance of the editor depends on the color scheme that you choose. Note that these patterns will only focus on color syntax.
Sublime Text - Understanding Vintage Mode
Vintage mode in Sublime text editor is a package that includes a combination of editing features of vi. Vintage Mode lets you to use a list of vi commands in the Sublime editor.
Vintage mode is an open source project and you can download it from the link −
https://github.com/sublimehq/Vintage
Understanding vi editor
Vi is a primitive and popularly used text editor. It was originally created for UNIX operating system and with basic functionality of scripts execution. It is a popularly used command line editor across various operating systems because it does not require mouse for operations.Sublime includes vim, which is an advanced section of vi editor, and includes customization of macros, snippets and plugins.
Enabling Vintage Mode
You can enable Vintage mode through the following steps −
Select the option Preferences → Settings
Edit the json file of the settings configuration with key name as ignored_packages. Vintage package is included in the ignored_packages section.

Remove the attribute of Vintage from the configurations to enable Vintage property in Sublime text editor.
"ignored_packages": []
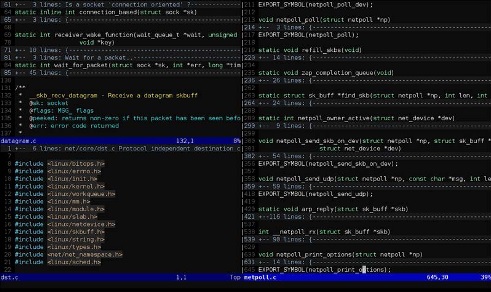
Your vintage mode editor will appear as shown in the following screenshot −
Sublime Text - Vintage Commands
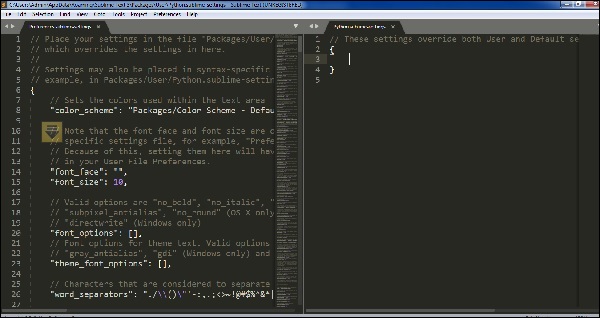
Vintage mode includes a variety of commands similar to the vi editor. This includes the basic settings of Sublime Text editor as shown in the code given below −
{
   "color_scheme": "Packages/Color Scheme - Default/Monokai.tmTheme",
   "font_size": 15,
   "ignored_packages":
   [

   ],
   "vintage_start_in_command_mode": true,
   "theme": "Soda Dark.sublime-theme"
}
| Mode | Description | Key |
|---|---|---|
| Command Mode | Waits for the user to enter a command | Esc |
| Insert Mode | Text can be inserted in different positions | i/I/a/A |
| Visual Mode | Select/highlight the text using the Movement Commands | V |
| Visual Line Mode | Select/highlight lines of text using the arrow keys | Shift + V |
Vintageous Mode
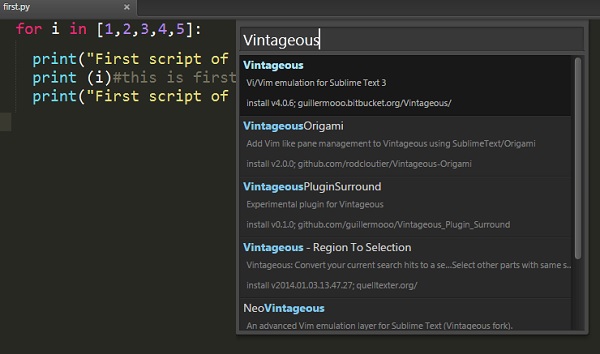
Vintageous is the package used for the descriptive analysis of vi editor. It can be downloaded using package control as mentioned below −
Once you successfully install the vintageous package, your screen will look like as shown in the following screenshot −
Sublime Text - Testing Javascript
Sublime Editor includes testing modules for various programming languages. This helps in unit testing of files and scripts and helps developers to analyze bugs, errors and issues, if any.
Sublime Text editor includes 3 modules which are necessary for testing and deployment of JavaScript. This chapter discusses them in detail.
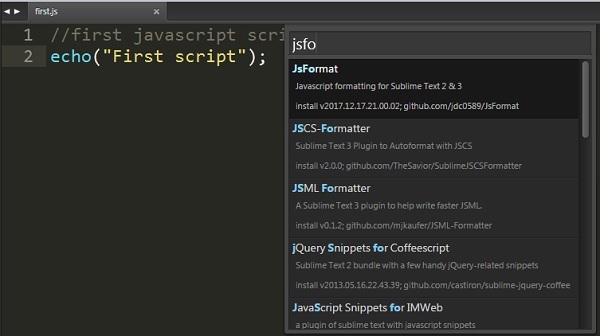
JsFormat
JsFormat is a JavaScript plugin used for formatting the script lines which eases the unit testing process. Behind the scenes, it uses JS beautifier (http://jsbeautifier.org/) to format the full JS or portions of JS files. JSFormat can be installed using the Install Package option of Sublime editor.
Features
JsFormat offers the following features to the script −
- Eases JS and JSON file formatting.
- Offers full text formatting and selected formatting.
- Provides customizable settings for formatting options.
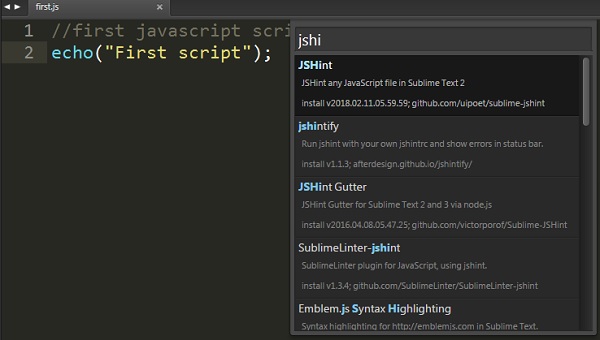
JSHint
JSHint is a community driven tool used for analyzing the mistakes through hints. This helps to detect errors and potential problems. JSHint is an open source package, simple and easy to understand. You can install JSHine in Sublime Text editor through Install Package mode.
To implement JSHint plugin in Sublime Text Editor, you can use the shortcut Alt+J on Windows and Cmd+j on OSX systems.
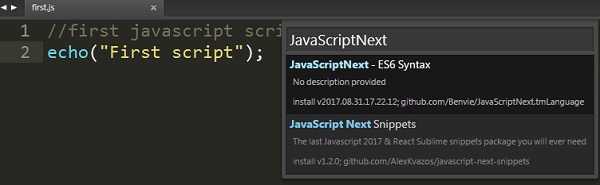
JavaScriptNext
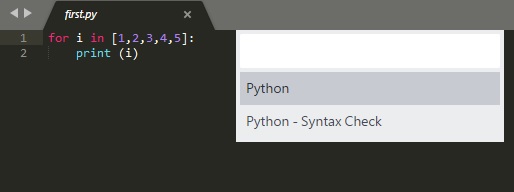
This script is used to highlight the syntax of JS file and its associated meaning. It includes a feature of syntax highlight with various modules, arrow functions, classes and generators.
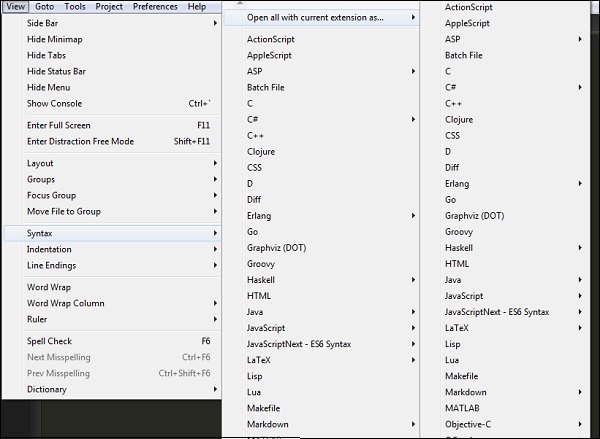
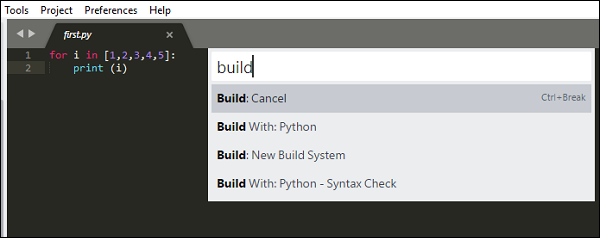
You can perform syntax check on a file using the syntax list as shown in the screenshot below −
Sublime Text - Testing Python Code
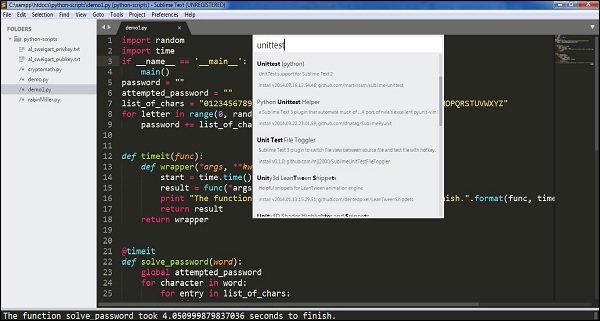
Python offers unittest, an official unit testing framework for unit testing the scripts designed before deployment. It is also called as PyUnit. Python unit tests used in Sublime Text editor are called as sublime-unittests and they are available in the following link −
https://github.com/martinsam/sublime-unittest
These unit tests contain a number of useful snippets to ease the writing of unit test cases.
Installation of UnitTest
The package control of Sublime manages the installation of unittests and the following steps describe it in detail −
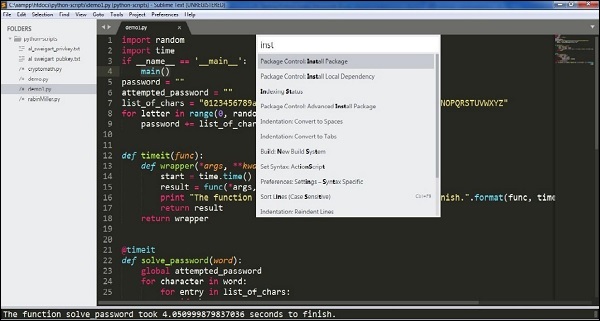
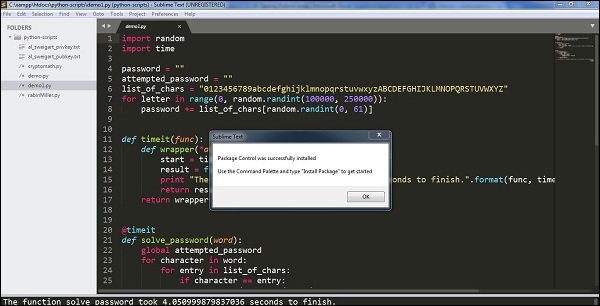
Step 1 − Use the command palette of Sublime Editor Ctrl+Shift+P for installation of the package, as shown in the screenshots given below −
Step 2 − The installed packages use the following two main snippets −
testclass which is used to create a new test class
testfunc which is used to create a new test function for us to fill out
Step 3 − The console computes test results as shown in the screenshot below. Note that the result depends on the success or failure of the test.
Success Result
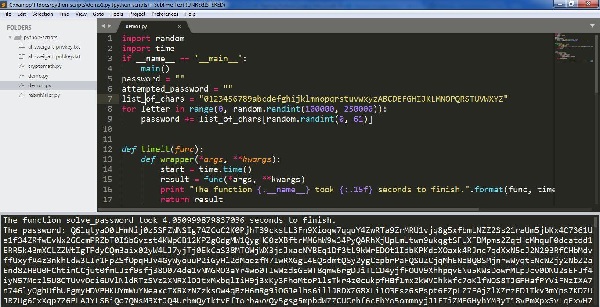
Failure Result
Note − Unit test cases work as a compiler for computing scripts in python.
Sublime Text - Spell Check
Sublime Text Editor uses Hunspell for spell checking process. Hunspell is the spell checker of LibreOffice, Mozilla Thunderbird, Google chrome and many proprietary packages. Sublime Text editor includes dictionary support for proper spell check of words.
Dictionaries
Sublime Text includes UTF-8 encoded dictionaries. To implement a dictionary with Sublime Text editor, it should be first converted into UTF-8. If the user has UTF-8 encoded dictionary, it can be installed using the Preferences option in Sublime Text editor.
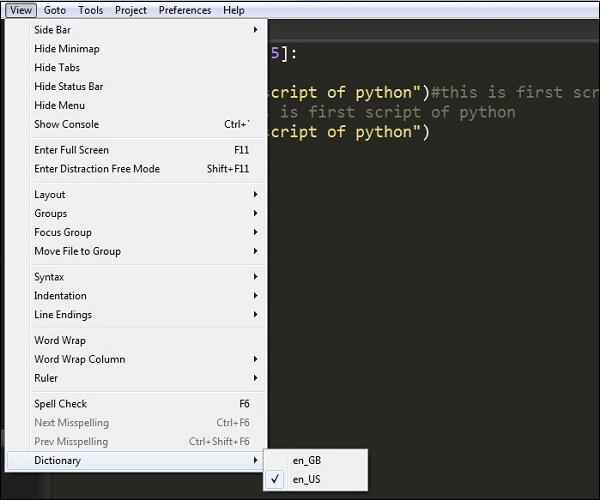
You can select the dictionary from View → Dictionary menu as shown in the given screenshot −
Settings for Dictionary
There are two settings defined for the spell check of Sublime Text Editor −
- Spell_check
- Dictionary
// Set to true to turn spell checking on by default
"spell_check": false,

// Word list to use for spell checking
"dictionary": "Packages/Language - English/en_US.dic"
These configurations are included in the settings file. Added and ignored words are stored in the user settings under the added_words and ignored_words keys, respectively.
Sublime Text - Packages
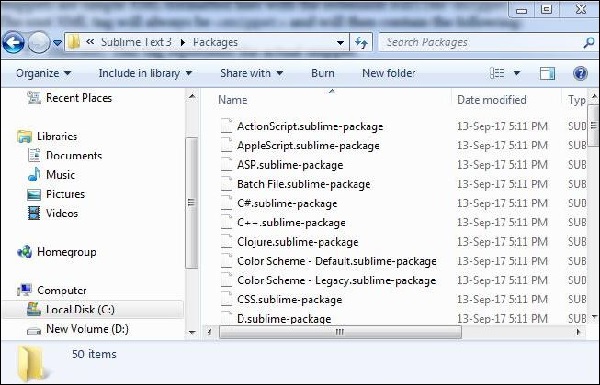
Software packages are installed in Sublime Text for additional functionalities. You can see the list of software packages through the shortcut key Ctrl+Shift+P on Windows and Cmd+Shift+P on Mac. Observe the following screenshots for a better understanding −
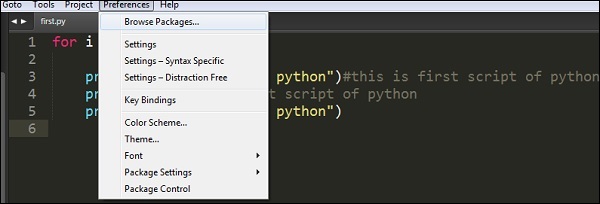
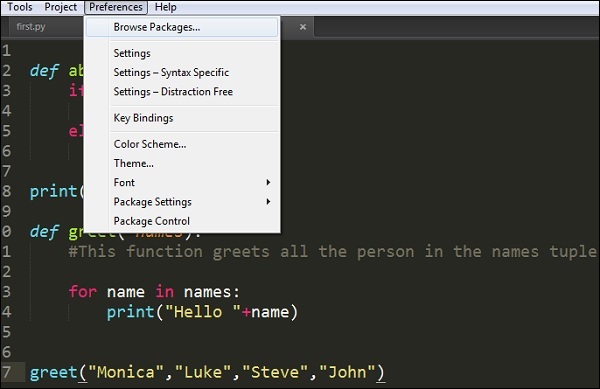
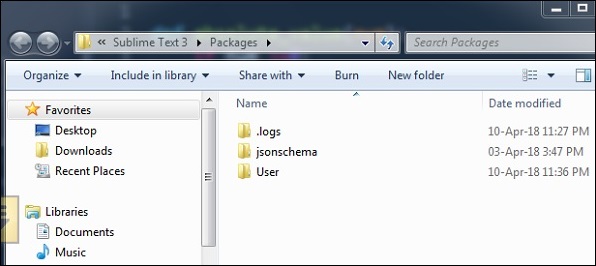
These packages are installed in the Packages → User directory which includes the entire necessary configuration. To browse the packages, select Preferences → Browse Packages option, as shown in the screenshot below −
These files are the customized configuration which can be changed as and when needed. The packages are created in JSON format.
Consider the sublime-keymap package created which includes following code −
[
   {
      "keys": ["super+alt+;"],
      "command": "run_macro_file",
      "args": {"file": "Packages/User/semicolon.sublime-macro"}
   }
]
Sublime Text - Menus
In this chapter, you will learn about the primary options of File, Edit and Goto menus of Sublime Text editor.
Save with Encoding
This option is included in the File menu which helps in saving the scripts and file with appropriate encoding. Sublime Text Editor includes a variety of options for encoding Python scripts, as shown in the following screenshot −
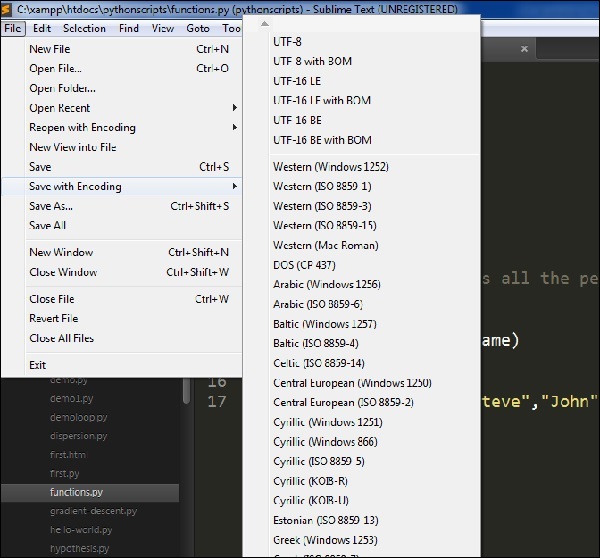
Encoding process helps the scripts to be secured from third-party attacks and allows the perceived item of use or interest which to be converted into a construct.
Convert Case
Convert case helps in the conversion of upper case to lower case and vice versa. Refer to the following screenshot for a better understanding −
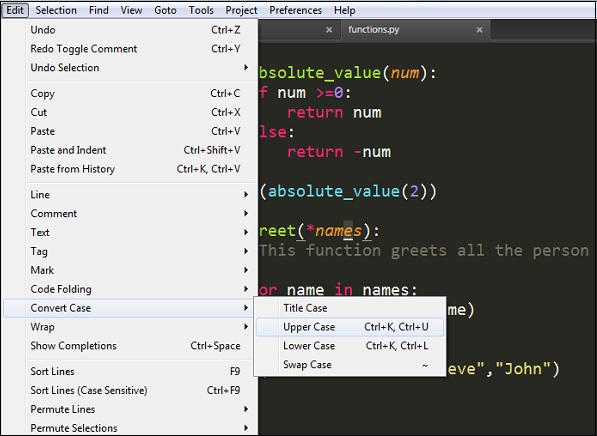
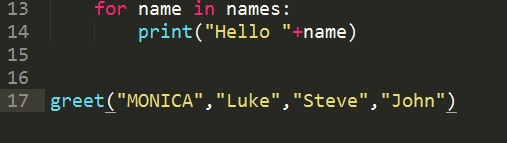
For example, consider a keyword Monica included in the file and let us convert it to uppercase. Refer to the following screenshot for a better understanding −
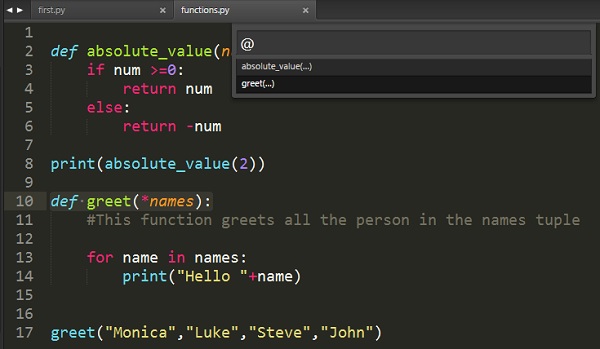
Goto Symbol
With this option, a user can search or get the appropriate keyword or any function. This option is very beneficial when we have more than 1000 lines of code and user got to search a unique line or annotation.
The following screenshot shows the demonstration of Goto Symbol −
Sublime Text - Sub Menus of Font
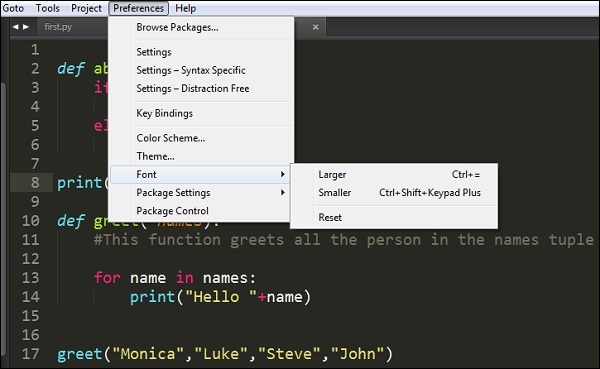
The previous chapters discussed various options related to the Preferences menu. In this chapter, you will learn in detail about the Font settings of Sublime Text editor.
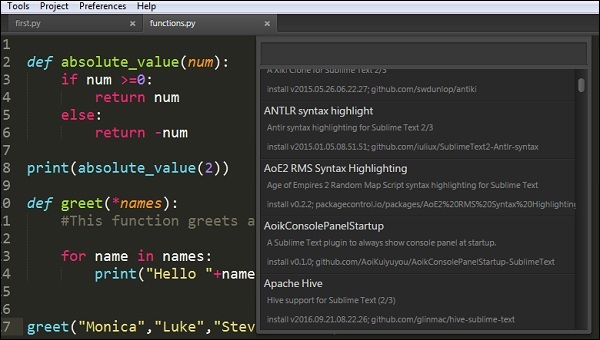
Sublime Editor offers three dimensions of font sizes − Larger, Smaller and Reset option to undo the particular changes made. Implementing the specified font is possible once the user selects the appropriate paragraph or text in editor.
Consider a selected text in the file functions.py where the you need to make desired changes −
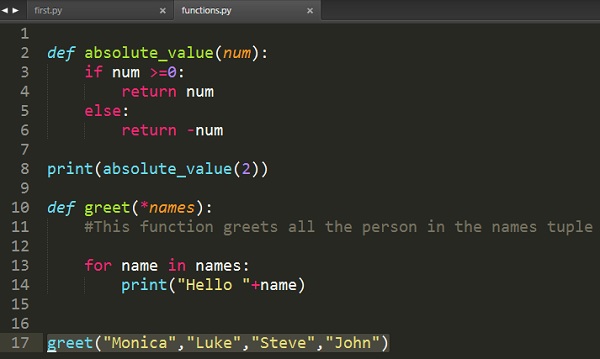
Observe that after the implementation of larger font, the dimensions and font size of the scripts will be automatically changed to larger dimension.

Sublime Text - Developing Plugin
Every editor includes plugin for the development, that triggers set of activities and default packages. Sublime Text editor includes a feature for developing your own customized plugin. This chapter discusses in detail about developing your own plugin in Sublime Text.
Developing Plugin
The following steps show you in detail how to develop a plugin in Sublime Text −
Step 1 − Select the New Plugin option by navigating through Tools → Developer → New Plugin as shown below −

Step 2 − The basic code of a plugin includes import of two main libraries: sublime and sublime_plugin.
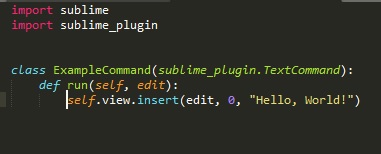
The code for the plugin is −
import sublime
import sublime_plugin
class ExampleCommand(sublime_plugin.TextCommand):
   def run(self, edit):
      self.view.insert(edit, 0, "Hello, World!")
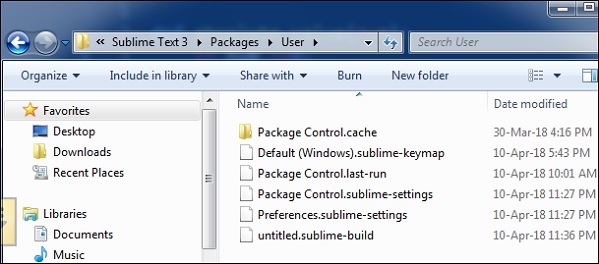
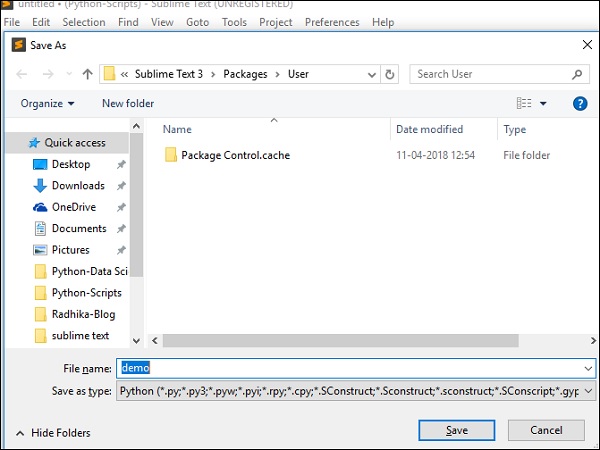
Step 3 − The customized plugins are saved in Packages → User folder. Refer to the following screenshot that gives you the complete understanding of the plugins saved in Sublime Text editor.
Running the plugin
When you have created a plugin and saved it, open the console using the shortcut key Ctrl+` on Windows and Cmd+` on OSX, and execute the command shown here −
view.run_command(plugin-name)
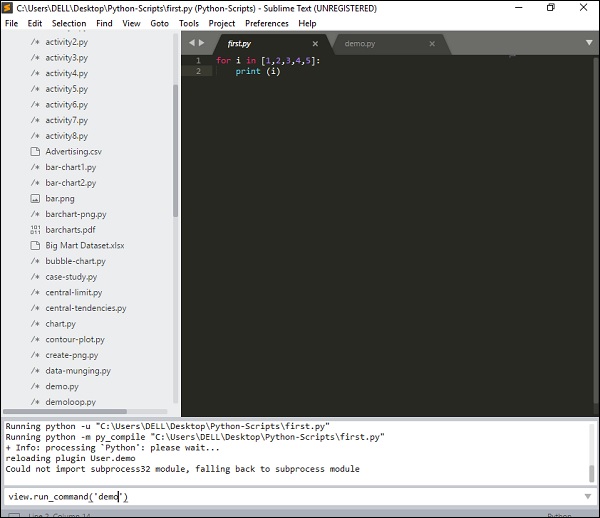
This command will execute the plugin defined by the user with the list of activities included in it.
Sublime Text - Command Palette
Command Palette includes a list of items or commands which are used frequently. The entries of commands are included in the .sublime-commands file.
Using Command Palette
To open a command palette in Sublime Text editor, you can use the shortcut key combination Ctrl+Shift+P on Windows and Cmd+Shift+P on OSX.
The commonly used commands from the palette are −
- Build with Python
- Install Packages
Build with Python
This will generate all the dependencies and build the specified code of a given Python file.
Install Packages
With this command, we get list of packages which can be installed which is not included earlier.
All the commands included in the command palette are stored in the Packages directory. The basic example of command declared inside the Default.sublime-commands file is shown in the code given below −
[
   { "caption": "Project: Save As", "command": "save_project_as" },

   { "caption": "Project: Close", "command": "close_project" },

   { "caption": "Project: Add Folder", "command": "prompt_add_folder" },
]
Note − The JSON file includes 3 main keys for every command −
- Name/Caption
- Location
- Content
Sublime Text - Debugging PHP Application
Debugging is the process of finding errors and bugs in the given code and fixing them. Sublime editor includes various plugins that have debugging features, which helps in finding errors easily.
In this chapter, you will learn how to debug a PHP web application. Sublime uses Sublime TestX debug plugin for this purpose. The features of this plugin are −
It is an extension used for debugging the PHP files and scripts.
Provides a list of debugging and profiling capabilities.
Maintains stack traces and real time parameters like display and functionalities.
Installation of Sublime Plugin
To install Sublime Text Xdebug plugin, you will have to take the following steps −
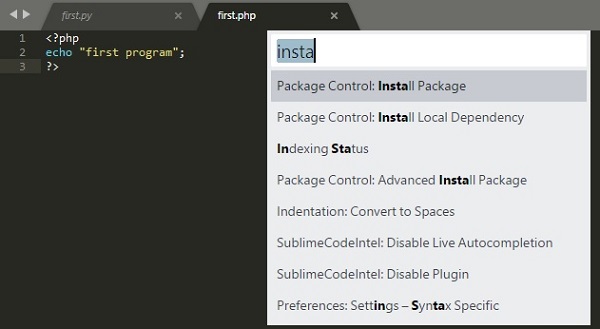
Step 1 − Install package control palette installation with the shortcut of Ctrl+Shift+P or Cmd+shift+P.

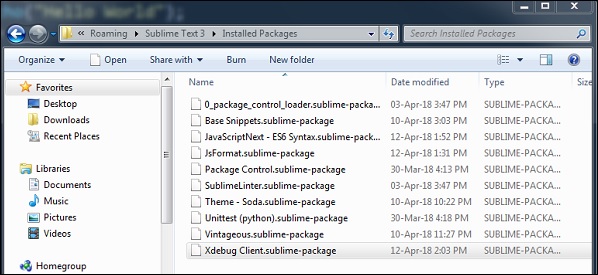
Step 2 − After the successful installation of Xdebug client, the configuration file will be kept in the Installed Packages folder. The configuration file is the JSON file which includes the parameters for debugging a PHP web application.
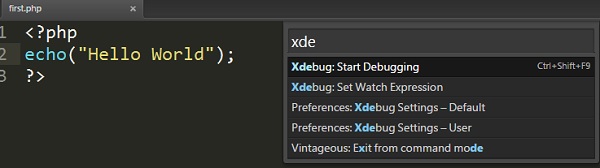
Step 3 − Start the debug session of PHP file using the shortcut Ctrl+F9. You can also do it using the Start Debug option using command palette.
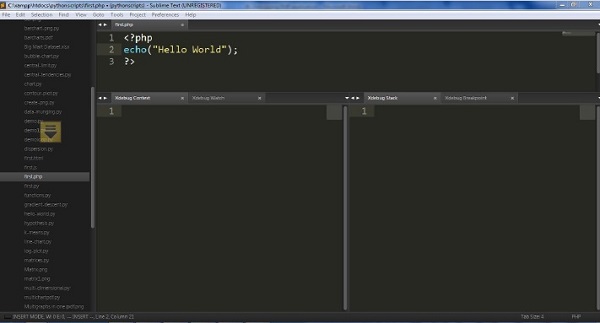
Step 4 − The split windows of XdebugClient will show the output of PHP file. It keeps a process of debugging code line by line. Refer to the following screenshot for a better understanding −
Debugging Javascript Application
Sublime Text Editor has a plugin Web Inspector for debugging JavaScript code. It helps us to set breakpoints, examine the console and evaluate sections of code. In this chapter, you will learn in detail about this plugin.
Installation of Sublime Web Inspector
The following steps show the installation of Sublime Web Inspector −
Step 1
Use the menu option Preferences → Browse Packages to get the path of installed packages as shown in the given screenshot.

Step 2
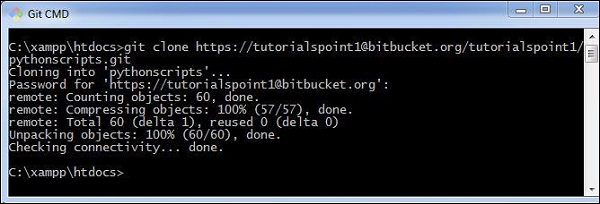
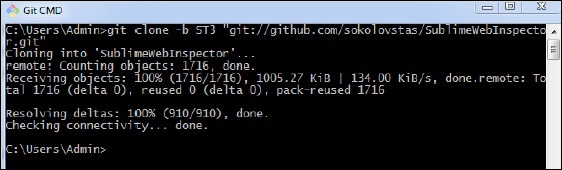
With the help of git command prompt, clone the packages of Debugging Javascript web application using the git repository, as shown in the command given below −
git clone -b ST3 "git://github.com/sokolovstas/SublimeWebInspector.git"
Step 3
To test the installation, open a command palette and start the web inspector. You can use the shortcut key for web inspector Ctrl+Shift+R on Windows and Cmd+Shift+R on OSX systems. You can see all the breakpoints needed for JavaScript application, as shown below −

Sublime Text - Batch Processing
Batch processing in Sublime Text also refers to Build systems. Build systems helps user to run files through external programs such as make, tidy and interpreters.
The following points are worth notable while working with Build systems −
They are JSON files and have the extension .sublime-build.
To initiate the build process, you can select the option Tools → Build or the shortcut Ctrl+B on Windows and Cmd+B for OSX system.
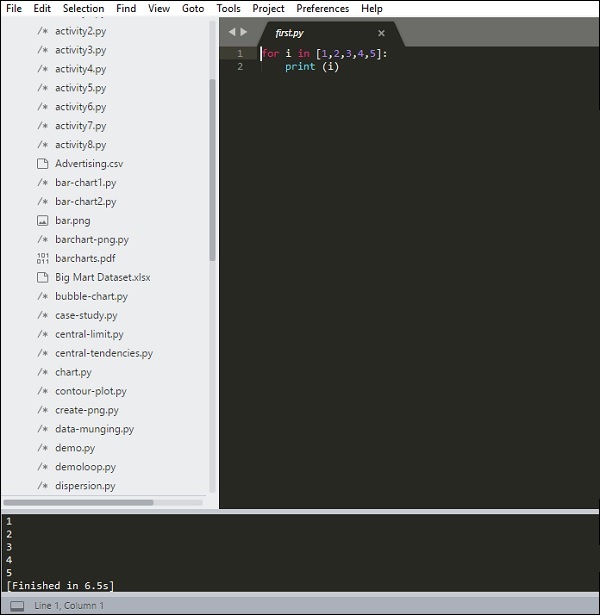
Recall that throughout this tutorial, we are focusing on Python files. Sublime text includes two build modes for python files.
Once the build for Python is completed, you can observe the following output on the editor −
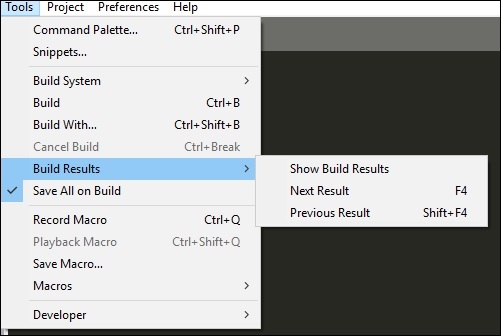
You can see the list of build results created for the specific project in Sublime Text editor using the option Tools → Build Results → Show Build Results.
Note that build systems and the complete files associated with batch processing must be located under the Packages folder (Packages/user). Many packages in Sublime Editor include their own build systems.
Sublime Text - Distraction Free Mode
Distraction Free Mode in Sublime Text editor allows displaying the code and files full screen. You can enter distraction free mode via option View → Enter distraction mode menu item.
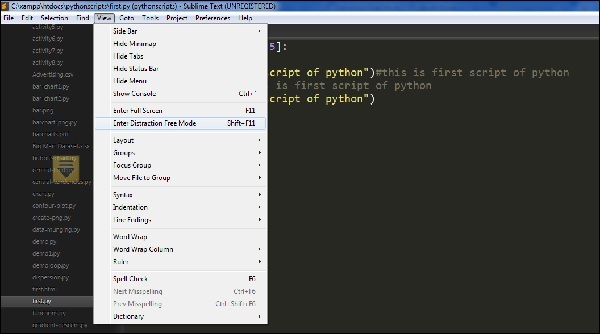
Once the distraction mode is enabled in the Sublime Text editor, the output will be visible as below −
All UI chrome accessible items are hidden, but accessible in distraction mode.
Customization
All the properties of customization of distraction free mode of Sublime Text editor are included in Distraction Free.sublime-settings JSON file as shown in the screenshot given below.
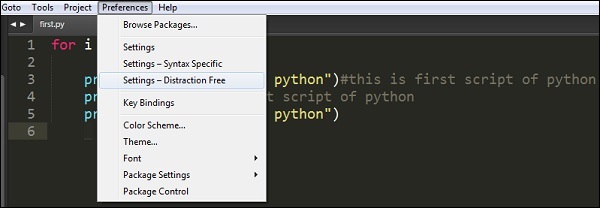
The following screenshot shows the properties included in Distraction free mode of Sublime editor −

Note that the attributes like line_numbers, gutter, draw_centered, wrap_width, word_wrap and scroll_past_end are such that they enable attractive distraction free mode.
Sublime Text - SublimeCodeIntel Plugin
SublimeCodeIntel is an important plugin for the Sublime Text editor. It offers the following features −
Jump to symbol feature, which helps the user to jump to the file and the specified line of the symbol.
Includes library of autocomplete and displays the modules/symbols in real time.
Tooltips display information in the status bar about the associated function.
Installation
You can install the SublimeCodeIntel plugin through the following steps −
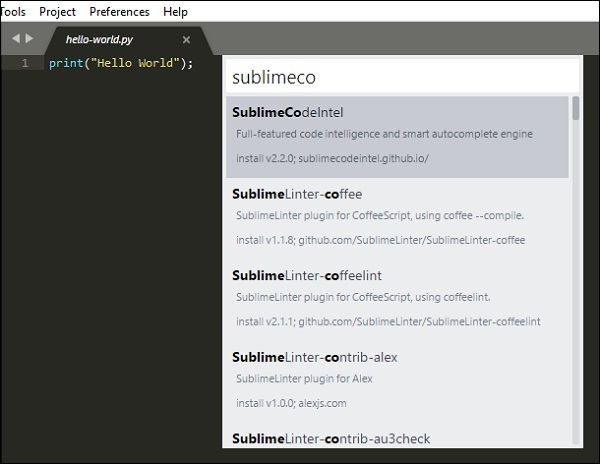
Step 1 − Get the install package functionality of Sublime Text editor using the shortcut Ctrl+Shift+P on Windows and Cmd+Shift+P for OSX system. Refer to the following screenshot for better understanding −
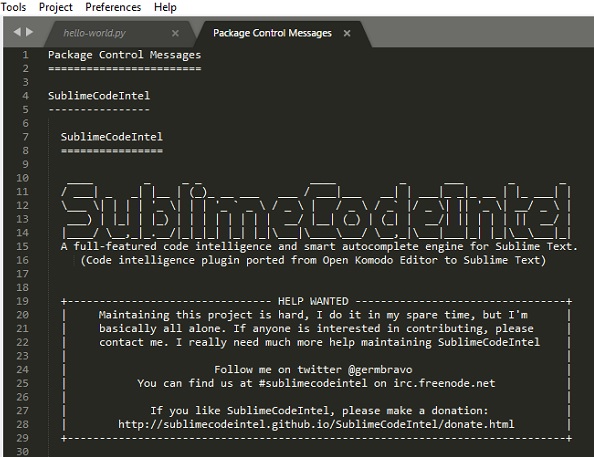
Step 2 − Now, select the plugin SublimeCodeIntel for installation and restart the Sublime Text editor.
Step 3 − On successful installation of SublimeCodeIntel plugin, your screen will look like this −
Configuration
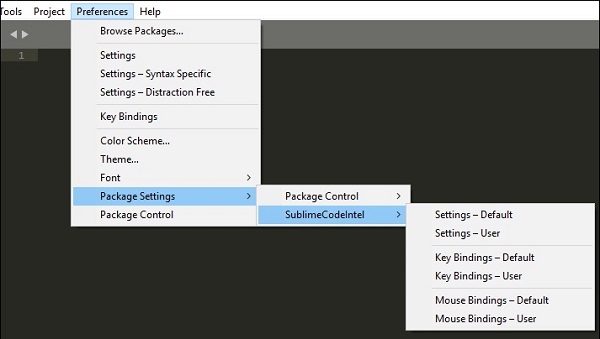
There are two in built configurations of SublimeCodeIntel −
- Settings − Default
- Settings − User
Refer to the following screenshot that shows these configurations −
The configuration for SublimeCodeIntel is included in the JSON file called SublimeCodeIntel.sublime-settings. The configuration needed for each language is included in SublimeCodeIntel plugin as below −
/*
   Defines a configuration for each language.
*/

"codeintel_language_settings": {
   "Python3": {
      "python3": "/usr/local/bin/python3.3",
      "codeintel_scan_extra_dir": [
         "/Applications/Sublime Text.app/Contents/MacOS",
         "~/Library/Application Support/Sublime Text 3/Packages/SublimeCodeIntel/arch",
         "~/Library/Application Support/Sublime Text 3/Packages/SublimeCodeIntel/libs"
      ],
      "codeintel_scan_files_in_project": true,
      "codeintel_selected_catalogs": []
   },

   "JavaScript": {
      "codeintel_scan_extra_dir": [],
      "codeintel_scan_exclude_dir":["/build/", "/min/"],
      "codeintel_scan_files_in_project": false,
      "codeintel_max_recursive_dir_depth": 2,
      "codeintel_selected_catalogs": ["jQuery"]
   },

   "PHP": {
      "php": "/Applications/MAMP/bin/php/php5.5.3/bin/php",
      "codeintel_scan_extra_dir": [],
      "codeintel_scan_files_in_project": true,
      "codeintel_max_recursive_dir_depth": 15,
      "codeintel_scan_exclude_dir":["/Applications/MAMP/bin/php/php5.5.3/"]
   }
}
These configurations can be customized as and when needed. It depends on the number of modules/libraries installed by the user with various parameters such as the size and complexity of the project a user is working on.