- Snowflake Tutorial
- Snowflake - Home
- Snowflake - Introduction
- Snowflake - Data Architecture
- Snowflake - Functional Architecture
- Snowflake - How to Access
- Snowflake - Editions
- Snowflake - Pricing Model
- Snowflake - Objects
- Snowflake - Table and View Types
- Snowflake - Login
- Snowflake - Warehouse
- Snowflake - Database
- Snowflake - Schema
- Snowflake - Table & Columns
- Snowflake - Load Data From Files
- Snowflake - Sample Useful Queries
- Snowflake - Monitor Usage and Storage
- Snowflake - Cache
- Unload Data from Snowflake to Local
- External Data Loading (from AWS S3)
- External Data Unloading (Into AWS S3)
- Snowflake Resources
- Snowflake - Quick Guide
- Snowflake - Useful Resources
- Snowflake - Discussion
Unload Data from Snowflake to Local
In a database, Schemas are created which are logical grouping of tables. Tables contains columns. Tables and columns are low level and most important objects of a database. Now, the most important function of table & columns is storing the data.
In this chapter, we will discuss about how to unload data from table and columns of Snowflake to local file. Snowflake provides the user two ways to unload the data into local file: Using User Interface and Using SQL query.
Unload Data into local file using Snowflake's UI
In this section, we will discuss about steps those should be followed to unload data into local file as csv or tsv. There is a limitation in UI that user can't save entire data directly into local directory.
To save data from UI, user needs to run the query first and then result can be saved as ".csv" or ".tsv" file. However, using SQL and SNOWSQL data can be saved directly into local drive without running the query. Later process we will discuss in next section.
Let's discuss the User Interface approach.
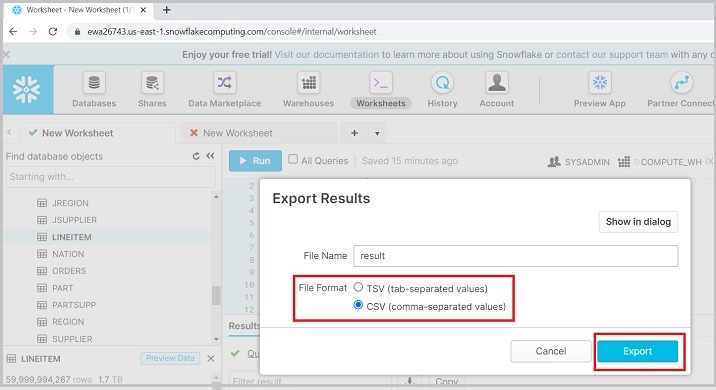
Login into Snowflake. Run a query based on data those required to save into local directory. Once the query runs successfully, click on Download icon as shown in below screenshot −
It populates a dialog box as shown in the below screenshot and ask to select File Format as CSV or TSV. After selecting, click Export. It will download a result file.
The following screenshot shows the unloading data functionality −
Unload Data into Tables and Columns using SQL
To unload data into a local file, first select a column whose data needs to be unloaded. Next, run the following query −
USE SCHEMA "TEST_DB"."TEST_SCHEMA_1";
COPY INTO @%TEST_TABLE
FROM (SELECT * FROM TEST_TABLE)
FILE_FORMAT=(FORMAT_NAME=TEST_DB.TEST_SCHEMA_1.CSV);
Note @% is used for default stage created by Snowflake. If you need to use your own internal stage, just pass as @<stage_name>
On successful execution of query, it means that data is copied into internal stage. Snowflake by default creates a table stage as @%<table_name> for all tables.
Now run the following query to confirm whether file is stored in internal stage or not.
LIST @%TEST_TABLE;
It displays all the files stored at internal stage even the files those are unsuccessful while loading the data.
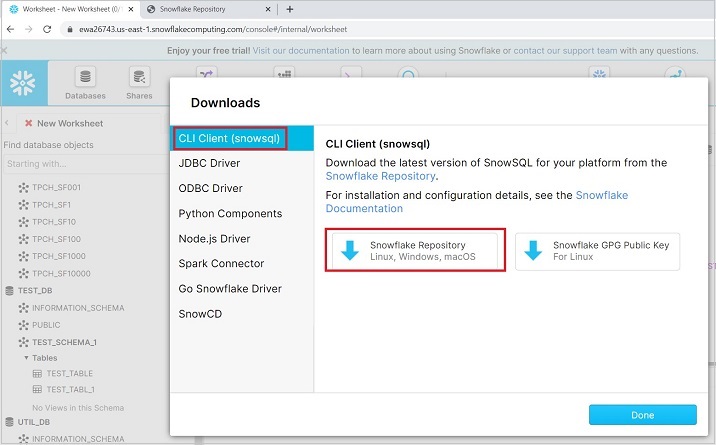
Now, to bring the file into local directory, we need to use snowsql. Make sure it is downloaded into the system. If it is not downloaded, then follow the steps as shown in the following screenshot to download it.
Click CLI Client (snowsql) and click the Snowflake Repository as shown in the following screenshot −
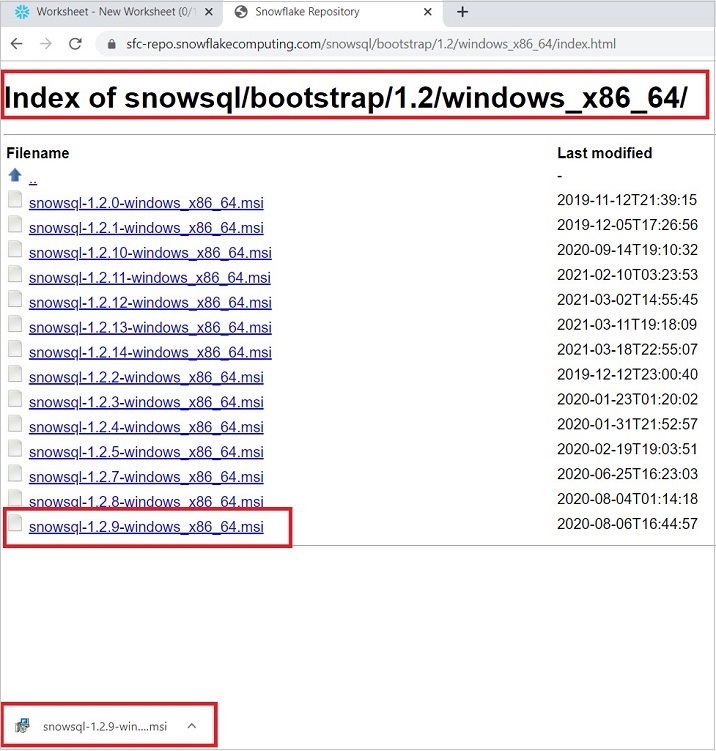
User can move to bootstrap → 1.2 → windows_x86_64 → click to download latest version. The following screenshot displays above step −
Now, install the downloaded plugin. After installation, open CMD in your system. Run the following command to check connection −
"snowsql -a <account_name> -u <username>"
It will ask for password. Enter your snowflake password. Enter the password and press ENTER. User will see successful connection. Now the command line shows as −
"<username>#<warehouse_name>@<db_name>.<schema_name>"
Now use the following command to upload the file into snowflake' stage −
"GET @%TEST_TABLE file://C:/Users/*******/Documents/"
Note @% is used for default stage created by Snowflake, if user wants to use their own internal stage just pass as @<stage_name>. Date will be unloaded into the local directory.