- Snowflake Tutorial
- Snowflake - Home
- Snowflake - Introduction
- Snowflake - Data Architecture
- Snowflake - Functional Architecture
- Snowflake - How to Access
- Snowflake - Editions
- Snowflake - Pricing Model
- Snowflake - Objects
- Snowflake - Table and View Types
- Snowflake - Login
- Snowflake - Warehouse
- Snowflake - Database
- Snowflake - Schema
- Snowflake - Table & Columns
- Snowflake - Load Data From Files
- Snowflake - Sample Useful Queries
- Snowflake - Monitor Usage and Storage
- Snowflake - Cache
- Unload Data from Snowflake to Local
- External Data Loading (from AWS S3)
- External Data Unloading (Into AWS S3)
- Snowflake Resources
- Snowflake - Quick Guide
- Snowflake - Useful Resources
- Snowflake - Discussion
Snowflake - Login
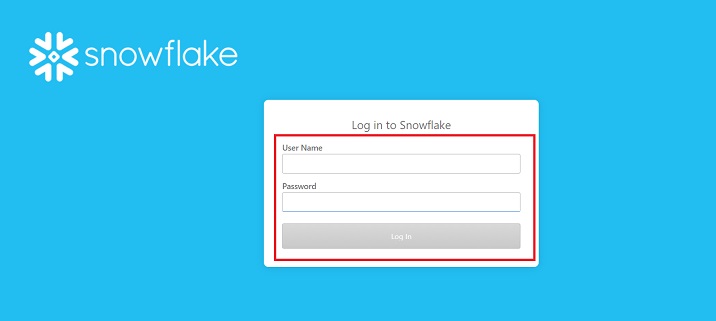
It is quite easy to login to Snowflake as it is a cloud-based platform. The following steps are required to login to Snowflake account −
Go to the email you received from Snowflake while registering and copy the unique url (unique for each user).
Go to the browser and navigate to the URL. It will navigate to the Login page.
Provide the username and password that you have set during registration. Finally, click the Login button.
The following screenshot shows the login screen −
A successful login navigates the users to the Snowflake data platform. Users can see their name at top-right corner as shown in the next screenshot. Along with name, they can see what role is assigned to them.
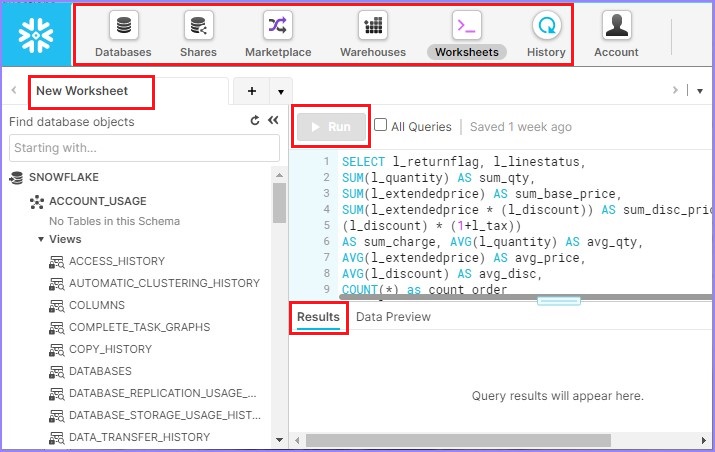
At the left-top corner, there are some icons like Databases, Shares, Data Marketplace, Warehouses, Worksheet, and History. Users can click there and see the details of those items.
In the left panel, few databases and schemas are provided by Snowflake for hands-on like "DEMO_DB, SNOWFLAKE_SAMPLE_DATA, UTILDB".
The blank white screen adjacent to the Database details are called Worksheet where the users can write queries and execute them using the Run button.
At the bottom, there is a Result panel. The results of a Query will appear here.
The following screenshot shows the different sections of the screen, after logging in −