- SAP Web Dynpro Tutorial
- SAP Web Dynpro - Home
- SAP Web Dynpro - Overview
- Configuration & Integration
- Architecture
- Navigation
- Component
- Mapping & Data Binding
- Event & Actions
- Application
- URL of an Application
- Creating an Application
- Component Interfaces
- Faceless Components
- Assistance Class
- Service Call In an Application
- Using a Service Call
- Debugging an Application
- Version Management
- Messages
- Integration Messages
- Personalization & Configuration
- Portal Integration
- Integrate WDA in Portal
- Interactive Forms
- SAP List Viewer(ALV)
- Administration
- Monitoring an Application
- SAP Web Dynpro Useful Resources
- Web Dynpro - Questions Answers
- SAP Web Dynpro - Quick Guide
- SAP Web Dynpro - Useful Resources
- SAP Web Dynpro - Discussion
SAP Web Dynpro - SAP List Viewer(ALV)
SAP List Viewer is used to add an ALV component and provides a flexible environment to display lists and tabular structure. A standard output consists of header, toolbar, and an output table. The user can adjust the settings to add column display, aggregations, and sorting options using additional dialog boxes.
Following are the key features of ALV −
It supports many properties of the table element as it is based on Web Dynpro table UI element.
ALV output can be filtered, sorted, or you can apply calculations.
The user can perform application specific functions using UI elements in the toolbar.
Allows the user to save the setting in different views.
Allows to configure special areas above and below ALV output.
Allows to define the extent to which ALV output can be edited.
How to Create an ALV?
Following are the steps to create an ALV.
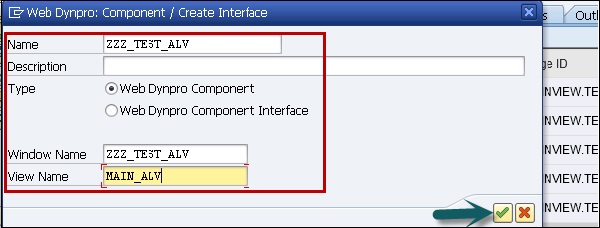
Step 1 − Use T-code: SE80. Select Web Dynpro comp/intf from the list and enter the name. Click on display. You will be prompted create the component. Click on Yes.

Step 2 − Select type as Web Dynpro component. Enter the Window name and the View name.
Step 3 − Click the tick mark.
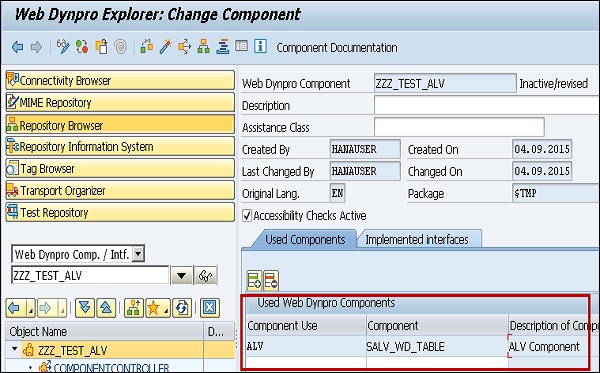
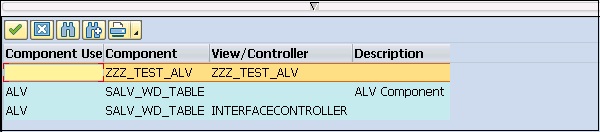
Step 4 − In the change window, enter the component use as ALV, component as SALV_WD_TABLE and description as ALV component.
Step 5 − Go to Component Controller and right-click the context. Then select Create Node MAKT with the dictionary structure MAKT.

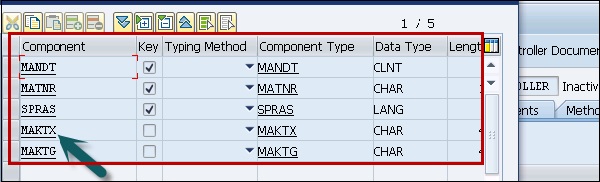
Step 6 − Select the required attributes from MAKT by using Add Attribute from Structure.
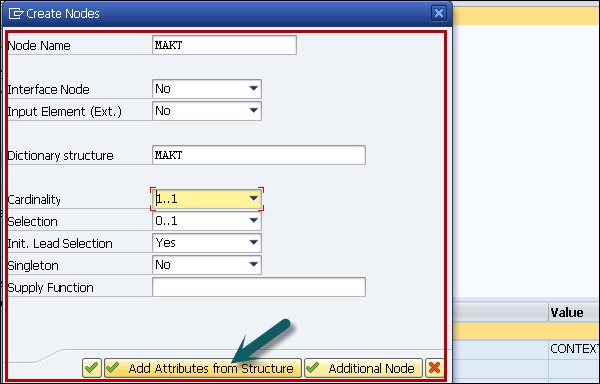
Step 7 − Remove the dictionary structure MAKT from the node MAKT and set the properties as follows (Cardinality, Lead selection, etc.)


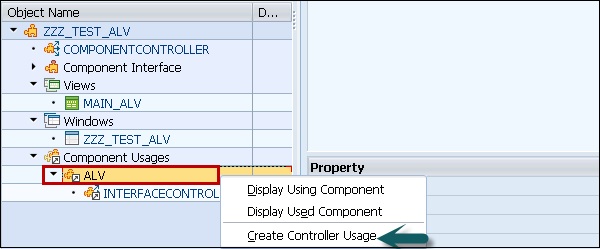
Step 8 − Right-click on Component usage in the Object tree → Create Controller Usage.
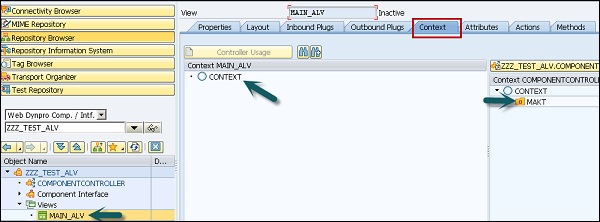
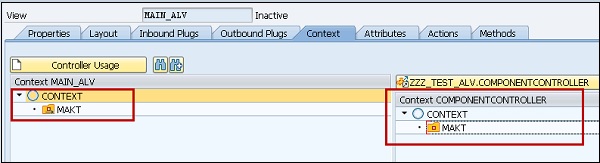
Step 9 − Go to View → Context tab and drag MAKT node to the view.
After mapping, it will appear as shown in the following screenshot.
Step 10 − Go to Layout and right-click Insert Element.
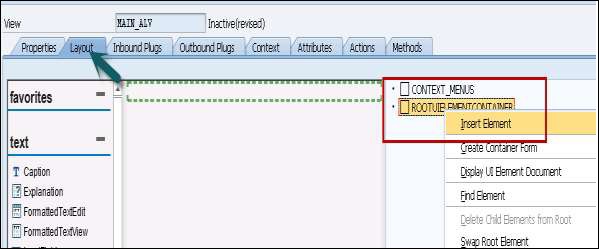
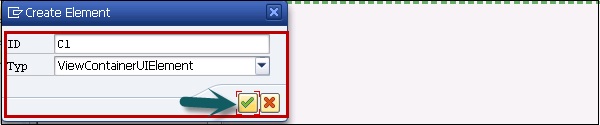
The layout will appear as shown in the following screenshot −
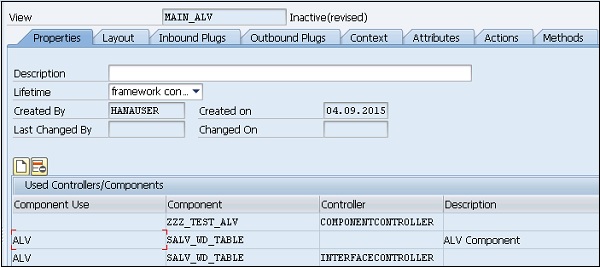
Step 11 − Go to Properties tab, click create controller usage to add the following to View.
Step 12 − Go to method, use WDDOINIT to write code.
Step 13 − Double-click on the method to enter the code. Enter the following code and initiate the used component ALV.

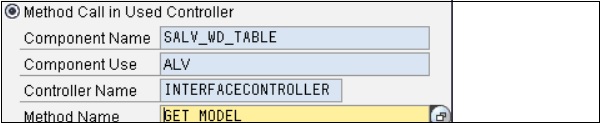
Use GET_MODEL method in the controller.
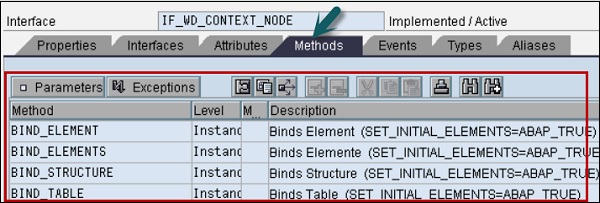
Step 14 − Bind the table to the context node using BIND_TABLE method as follows −
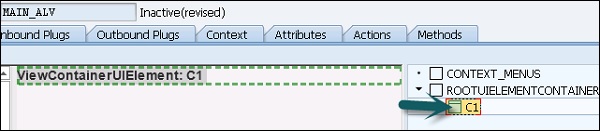
Step 15 − Go to Window in the Object tree and right-click C1 to embed ALV table to the view.

Once you embed the ALV table, it will appear like this −

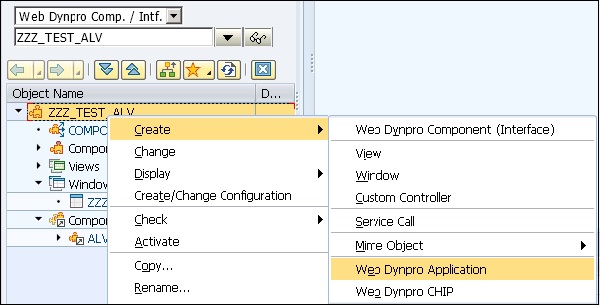
Step 16 − The last step is to create a Web Dynpro application under the object tree. Enter the name of the application.
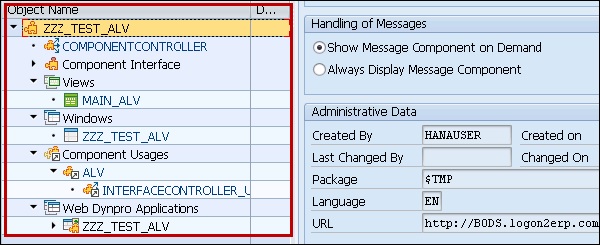
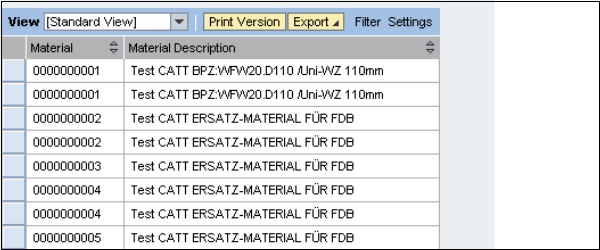
Step 17 − To execute application, double-click and you will see the output.
Using Filters in ALV Output
Using filters, you can limit the data in ALV output. You can create multiple number of filter conditions for each field. To create or delete a filter condition, you can use the method of interface class IF_SALV_WD_FILTER.
You can use the following methods for creating, getting, and deleting filter conditions −
| Function | Method |
|---|---|
| Get a specific filter condition | GET_FILTER_RULE |
| Get all filter Conditions of a field | GET_FILTER_RULES |
| Create filter condition | CREATE_FILTER_RULE |
| Delete a specific filter condition | DELETE_FILTER_RULE |