- SAP QM Tutorial
- SAP QM - Home
- SAP QM - Overview
- SAP QM - Components
- SAP QM - Integration
- SAP QM - Master Data
- SAP QM - Inspection Methods
- SAP QM - Sampling
- SAP QM - Inspection Plan
- SAP QM - Quality Info Records
- SAP QM - Lot Inspection
- SAP QM - Result Recording
- SAP QM - Usage Decision
- SAP QM - Listing Inspection Lot
- SAP QM - In-Process Inspection
- SAP QM - Final Inspection
- SAP QM - Defects Recording
- SAP QM - Quality Notification
- SAP QM - Benefits
- SAP QM - Tables
- Consultant Responsibilities
- SAP QM Useful Resources
- SAP QM - Questions Answers
- SAP QM - Quick Guide
- SAP QM - Useful Resources
- SAP QM - Discussion
SAP QM - Quality Notification
As mentioned in the previous topic, using Quality notification you can record different type of problems occurred due to poor quality of goods.
Quality notifications can be created for the following internal and external problems −
- Defect Analysis
- Customer Complaint
- Complaint against vendor
You can use SAP quality notification process to raise the following documentation −
To record the names of all individuals/ partners who are directly associated with the defect identified in goods delivery, production.
To record the individual defect items and analyze the root cause of the defected items.
To mention the corrective actions to be taken that are identified after doing the analysis of problem in detail.
To track corrective actions to be implemented using status management features of notification.
In quality notification, you capture all the activities and tasks that are performed as part of problem identification and to fix the issue.
You can generate various standard reports related to defects and quality notification in SAP system.
Completing Notification in SAP System
To release and complete the quality notification in SAP system −
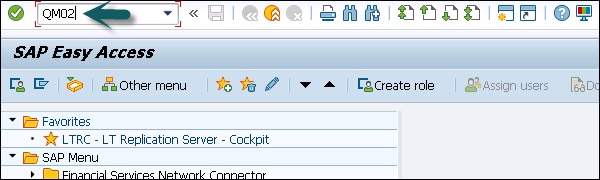
Step 1 − Use T-Code: QM02 as shown in the following image.
Step 2 − In the next screen, enter quality notification number created. Press ENTER to move to next screen.
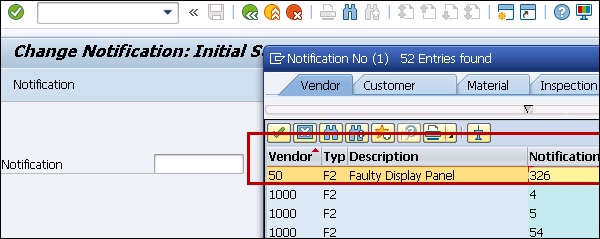
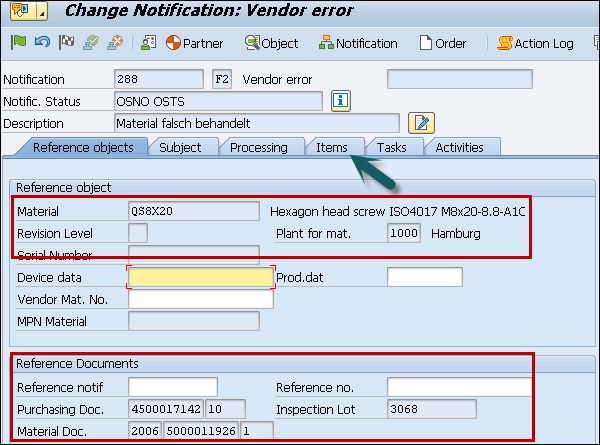
In the next window, you can find the following details −
- Purchase order number for which goods have been received.
- Inspection lot, which is linked with the purchase order number.
Step 3 − Go to the Items tab to move to the next SAP screen.
Step 4 − When you click the Item tab, you can see the defect type in the next screen.
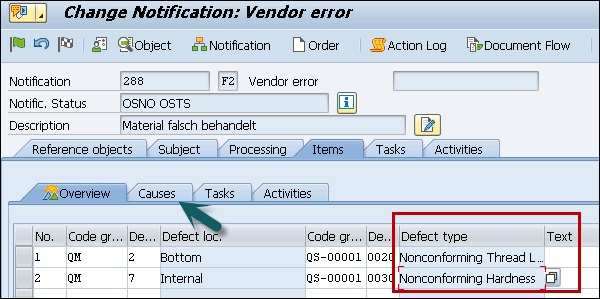
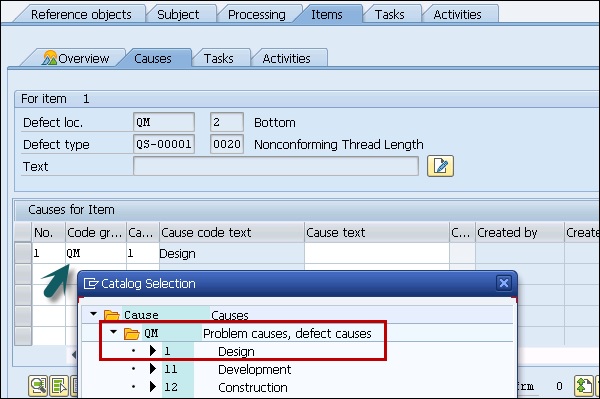
Step 5 − Select the item and click the Causes button to move to next screen to define cause of the problem.
Step 6 − Enter the code group QM for the cause means that this is design defect. These code groups are configured based upon the business requirements.
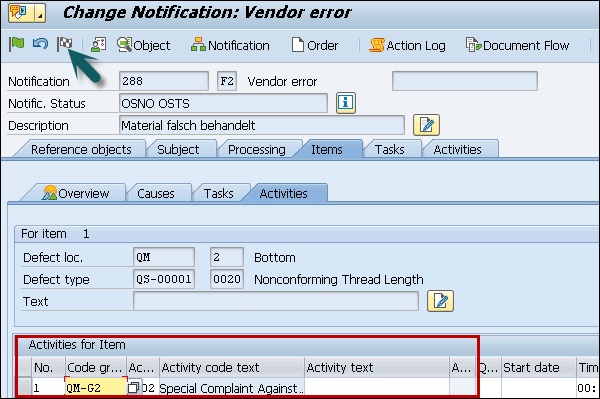
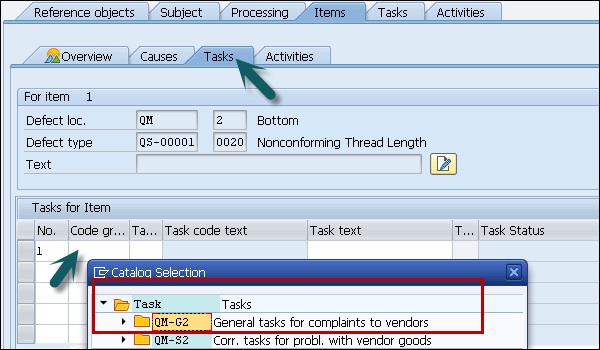
Step 7 − Go to the Tasks tab to define the rework, which needs to be done. Select code QM-G2 for the rework. Go to the Activities tab to move to the next screen.

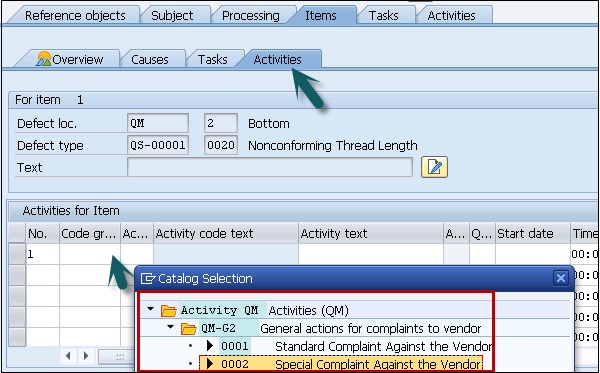
Step 8 − In the Activities tab, you need to mention the activities to be performed when the defect is identified. Enter the group QM- G2 that shows that a special complaint to be filed against the vendor.
Step 9 − To complete the notification process, click the complete button at the top as shown in the screenshot given below.