- SAP PS Tutorial
- SAP PS - Home
- SAP PS - Overview
- Integration with ERP Modules
- Organization Structure Elements
- SAP PS - Currencies
- SAP PS - What is a Project?
- SAP PS - Defining Special Characters
- SAP PS - Status Profile
- SAP PS - Selection Profile
- SAP PS - Project Profile
- SAP PS - Settlement Profile
- SAP PS - Network Profile
- SAP PS - Network Type
- Person Responsible for Work Center
- Maintain Activity Control Key
- SAP PS - Access Control List
- SAP PS - Cost Component
- SAP PS - Execution Service Profile
- SAP PS - Budget Management
- Number Ranges for Budgeting
- SAP PS - Revenues and Earnings
- SAP PS - Dates
- WBS Scheduling Parameters
- SAP PS - Material
- SAP PS - Versions
- SAP PS - Project Information System
- SAP PS - Consultant Responsibilities
- SAP PS - Useful Resources
- SAP PS - Questions & Answers
- SAP PS - Quick Guide
- SAP PS - Useful Resources
- SAP PS - Discussion
SAP PS - Status Profile
A status profile contains the individual user statuses and the business transaction rules defined for those statuses. You can define multiple limit number of user status profiles that can be maintained in SAP system.
To create a status profile in SAP system −
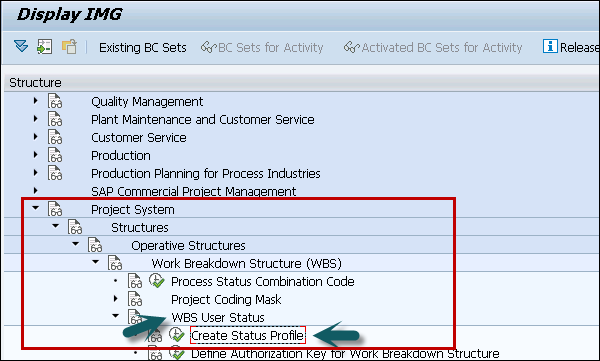
Step 1 − You can use T-code: OK02 or go to SPRO → IMG → Project Systems → Structure → Operative Structure → Work breakdown structure → WBS user status → Create Status profile.
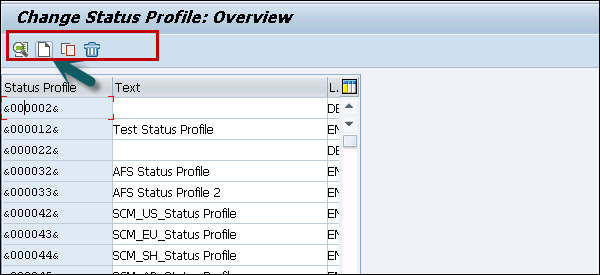
Step 2 − A new screen Change status profile overview will open. You can use other options to copy an existing profile, to delete a profile or to view details.
Step 3 − In the next window, enter status profile Id to identify the profile in SAP system.
Enter the text of profile, Maintenance Language: Enter language key like EN. Press ENTER to continue.

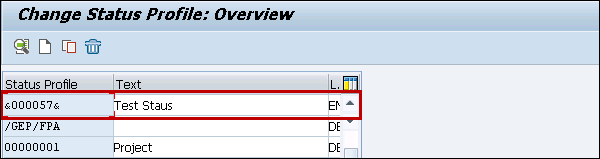
Step 4 − Once you press ENTER, status profile you have created will be shown in the list of status profile. Double-click on status profile.
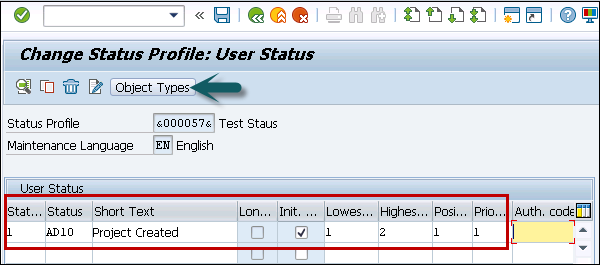
Step 5 − In the next window, enter the following details −
Stat − Status number form lowest to highest
Status − Update unique status id
Short text − description text
Initial Status − To set the status of profile for project
Lowest − Update the lowest status number
Highest − Update highest status number
Position − To determine status to be displayed
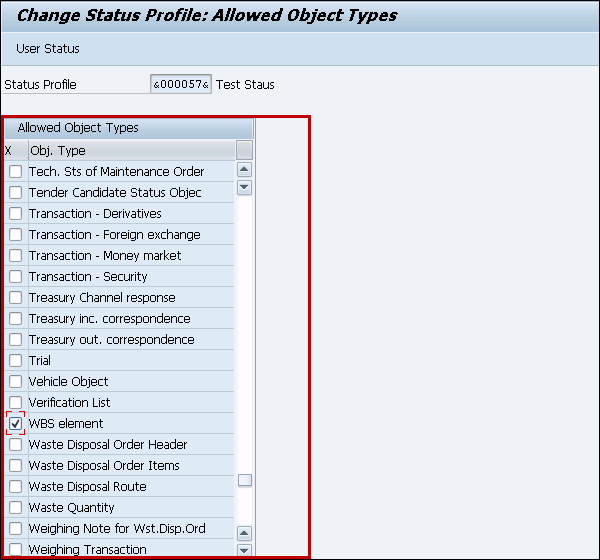
Step 6 − After entering these details, click Object types at the top.
The Allowed Object types screen appears with various options.
Step 7 − Once you enter all the details, click the save button at the top.

