- SAP IDT Tutorial
- SAP IDT – Home
- SAP IDT – Overview & User Interface
- SAP IDT – Resources
- SAP IDT – Creating Universe
- SAP IDT – .unv Universe Introduction
- Dealing With Published Universes
- SAP IDT – Projects
- SAP IDT – Managing Connections
- Managing Resources In Repository
- SAP IDT – Data Foundation Layer
- SAP IDT – Building Data Foundation
- SAP IDT – Qualifiers & Owners
- SAP IDT – Joins In Data Foundation
- SAP IDT – Business Layer
- SAP IDT – Business Layer Properties
- SAP IDT – Folders In Business Layer
- SAP IDT – Business Layer View
- Building Query In Query Panel
- Dependency Among Resources
- SAP IDT – Publishing
- SAP IDT – Security
- Running Query Published Universe
- SAP IDT – Format Editor Overview
- SAP IDT Useful Resources
- SAP IDT - Questions Answers
- SAP IDT - Quick Guide
- SAP IDT - Useful Resources
- SAP IDT - Discussion
SAP IDT - Business Layer View
It is possible to modify the display of Business layer objects by using Business layer views to restrict the number of objects displayed in the Business Layer pane. Use business layer views to group objects that share a business relationship.
Business layer views can be selected in the Query Panel. You can use business layer views to define security to grant or deny the use of business layer objects to certain users or groups.
Creating Business Layer View
To create or edit Business Layer view, open Business Layer editor by clicking on Business layer in the local project.
Click Manage Business Layer view option in the Business layer view pane.

When the ‘Edit Business Layer’ view dialog box opens, to add a new view, click on “New” button. Edit the view name in the Name textbox.
In the Objects in view box, select or clear the checkboxes next to objects in the business layer to include or exclude them from the view.
To work with only the objects already included in the view, select Show selected objects only as shown in the following screenshot.
Enter or edit a description for the view in the Description textbox.
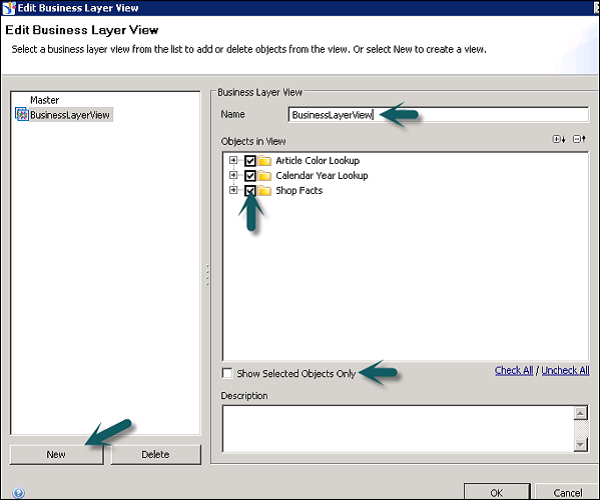
Click OK to save the changes.
Note − You can’t change Master view.
Parameters
You can create a parameter in Business Layer or Data Foundation that requires a user input or predefined input value.
A Parameter can have the following input types −
- User input as a response to prompt.
- A predefined fixed value.
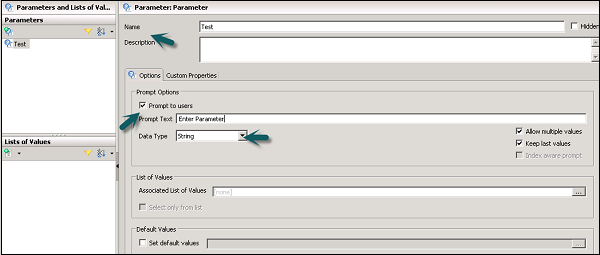
Prompt to users |
If selected, the user is prompted to enter a value at run time. If cleared, a pre-defined value is entered at runtime for the parameter. |
prompt Text |
The text for the prompt question or directive if Prompt to users is selected. |
Set Values |
Available when the prompt to users option is unselected. Lets you enter one or more values to be used for the parameter at the run time. |
Data Types |
The data type required for the answer to the prompt. |
Allow multiple values |
If selected, lets the user take multiple values from the list of values. |
Keep last values |
If selected, the last value chosen by the user is kept when the prompt is re-run. |
Index aware prompt |
If selected, the key column is included in the prompt to restrict the values in a list. The key column is not visible to the user. |
Associated list of values |
A list of values to provide values for the prompt. |
Select only from list |
If selected, the user is forced to select a member in the list. |
Select default value |
Lets you select values to be used as default |
Inserting and Editing Parameters
When you define a parameter in Data Foundation, they are directly inherited to business Layer on top of Data foundation. These parameters can’t be edited in Business Layer and you have to edit them in Data Foundation.
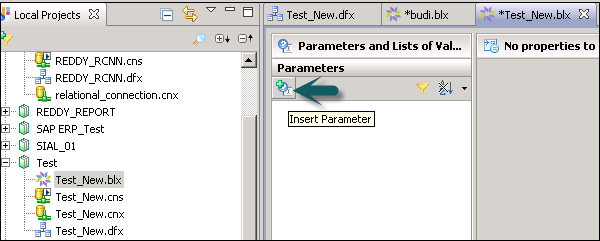
To insert a parameter, click on parameters and LOVs tab in the browsing pane → Click on Insert Parameter icon.
Parameters properties are shown in the right pane. You can use various properties as defined in the previous topic.
To edit an existing parameter, select the parameter from the list and edit it.
LOVs and Properties
Using LOVs, you can select the value of a prompt from the list of values associated with an object. It allows a data set to be restricted to the selected values.
You can use LOVs for an object in Data Foundation or Business Layer. Different types of LOVs can be used.
LOVs based on Business Layer Objects − In this case, LOV is based on other query or on a hierarchy that includes
Static LOVs − It includes List of specified values manually or imported from file.
LOVs based on SQL − It is value return by specific SQL expression.
Inserting and Editing LOVs
To insert or edit an existing LOV, go to Parameters and LOVs tab in the editor. Click on Insert + sign in the LOV pane −

The properties of LOVs appear in the right pane. To edit an existing LOV, click List of Value in the list.
The Properties tab in LOVs properties lets you edit the column properties on LOVs. You can edit the following properties by clicking the property column in the table of properties −
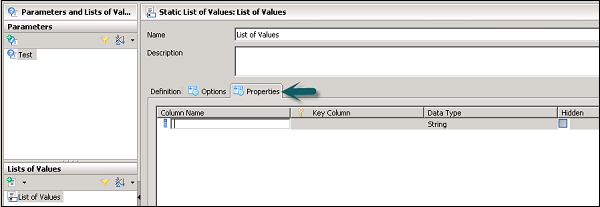
Column Name − You can edit the name of the column.
Key Column − You can select a column to be index aware key.
Data Type − You can select the data type for the column.
Hidden − If you select this option, the column will not be displayed.
Queries in Business Layer
A Query panel is used to create queries and query objects are associated with the Business Layer. These are normally used in IDT to validate the Business layer.
Inserting and Editing a Query
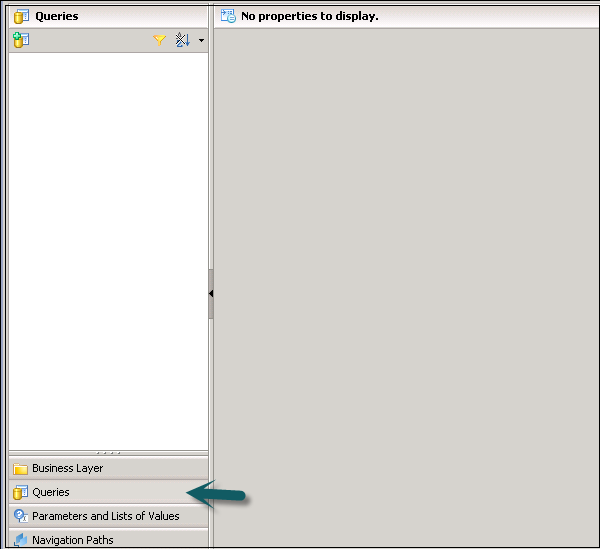
To insert a new query or edit an existing query, click the Query pane in the Business Layer pane.
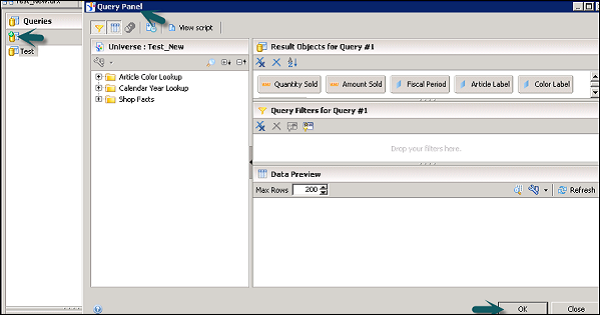
Click Insert Query to add a new query. This will open the Query panel. You can create a new query or edit an existing query and click OK. Select the objects in Query panel → OK.
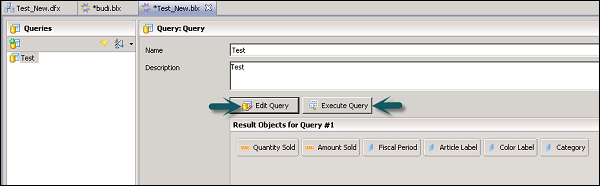
Enter the name and description of Query. You can edit the objects in query by clicking Edit query option. To execute the query → Execute Query.
Aggregate Awareness
Using aggregate awareness, you can use pre-aggregated data in tables in the database. It is used to improve query performance by processing less number of rows.
When you add an aggregate aware object in query, the query generator retrieves the data from the table with the highest aggregation level.
For example − Consider a Sales Fact table where sales is aggregated by per month. If your query asks for sales per month, the query generator will retrieve the data from aggregated table.
Setting Up Aggregate Awareness
To use aggregate awareness, first the aggregated table has to be loaded to database and then add the table to Data Foundation.
Define aggregate aware objects. These are the objects in the business layer for which you want queries to use the aggregate tables when possible, instead of performing aggregation using non-aggregate tables.
In the SQL expression for the object, define the SELECT statement to use the @Aggregate_Aware function −
@Aggregate_Aware(sum(aggr_table_1), …, sum(aggr_table_n))

Select the object in Business Layer → go to SQL Assistant → under Functions → Aggregate Awareness.
