- SAP CRM Tutorial
- SAP CRM – Home
- SAP CRM – Introduction
- SAP CRM – Architecture
- SAP CRM – Capabilities
- SAP CRM – Integration With SAP SD
- SAP CRM – GUI
- SAP CRM – WebClient UI
- SAP CRM – Web UI Configuration
- SAP CRM – Sales
- SAP CRM – Account Planning
- SAP CRM – Activity Management
- SAP CRM – Opportunity Management
- Quotation & Order Mngmt
- SAP CRM – Outline Agreements
- SAP CRM – Taxes
- SAP CRM – Marketing
- SAP CRM – Marketing Planning
- SAP CRM – Marketing Calendar
- SAP CRM – Campaign Management
- SAP CRM – Service
- SAP CRM – Service Request Mngmt
- SAP CRM – Service Contracts
- SAP CRM – Service Order Mngmt
- SAP CRM – Interaction Center
- SAP CRM – IC Profiles & Configuration
- SAP CRM – Product Master
- SAP CRM – Business Transactions
- SAP CRM – Pricing
- SAP CRM – Billing
- SAP CRM – Web Channel
- SAP CRM Useful Resources
- SAP CRM - Questions Answers
- SAP CRM - Quick Guide
- SAP CRM - Useful Resources
- SAP CRM - Discussion
SAP CRM - Web UI Configuration
To perform the enhancements in the SAP CRM WebClient, you can use Web UI configuration and application enhancement tools.. These tools allow you to add new fields, change layout, add tables, etc. to the existing applications.
In any general scenario, companies don’t prefer to use standard applications and some customizations are required. The following tools can be used −
- Web UI Configuration Tool
- Application Enhancement Tool
In a SAP CRM WebClient, there is an option to access Web UI configuration tool as per the authorization. There are predefined roles to which these buttons are available. To make any changes to the WebClient configuration and customization, a user must have sufficient privilege.
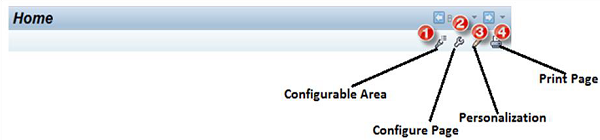
Configurable Area − This option is used to highlight the area on the page which is configurable.
Configure Page − This option allows you to view pop ups that are used to configure a page.
Personalization − Personalization is performed by end users and configuration is done by administrators, project teams. It is used to change the layout of the tool for individual users and not for a group of users. To perform personalization, a personalization dialog is used with which a user can adapt the UI of the application.
Note − Most of the dialogs to perform personalization are created generically and their structure can’t be altered.
You can also create application specific dialogs to change the structure of dialog to some extent but SAP recommends that you should use the same dialog structure as for the standard dialogs.
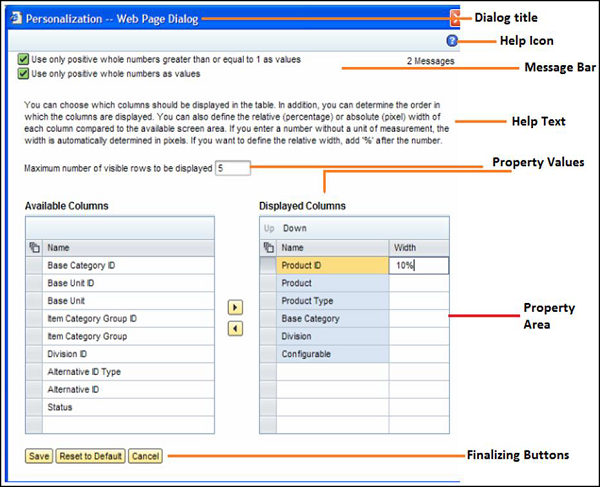
Structure of a Personalized Dialog box
A Personalization dialog box contains the following components −
- Dialog Title
- Message Bar
- Help Icon and Help text
- Property group
- Property Values
- Finalizing Buttons
When a user makes changes to this personalization dialog box, he can use the following finalizing options to execute.
Reset to Default − This option is used to set the property value back to the default value of the application. This function has to be offered for each property in order to avoid data loss on properties for which the user did not want to reset to the default.
If the dialog is not very complex, this button can also be placed in the button row of the finalization buttons.
Save − This option is used to save the changes and to close the dialog box.
Cancel − This option is used to close the current personalization dialog and navigating back to the previous page or closing the dialog box without saving any changes.
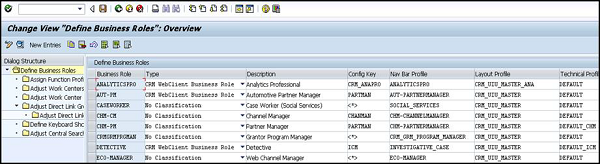
Configuration of the Navigation Bar
When a user logs-in to the WebClient, on the left side they can see the Navigation bar profile.
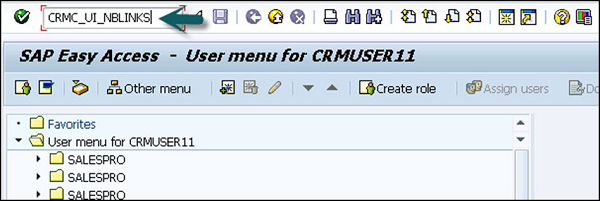
To customize the Navigation bar, use T-Code: CRMC_UI_NBLINKS
Go to SPRO → IMG → Customer Relationship Management → UI Framework → Technical Role Definition → Define Navigation Bar Profile → Execute
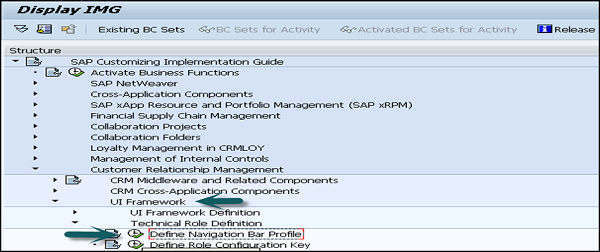
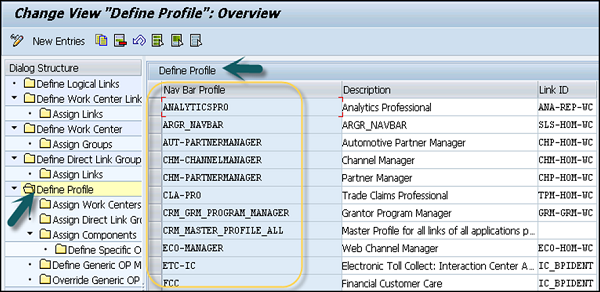
All the options in the right window shows the already created Navigation bar profiles. You can see the description and the Link Id for each profile.

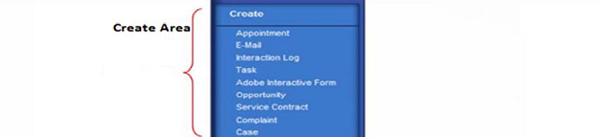
Go to Define Logical links option first in the menu. This shows the already defined logical links.

This is how they look in the WebClient −
To customize the Navigation bar profile, go to Define Navigation bar profile as mentioned in one of the above images.
In the next window, change the Navigation bar profile name and press enter. Then in the next window, copy all the entries and click the Save option at the top. The next step will be to assign this navigation bar profile to a Business role.
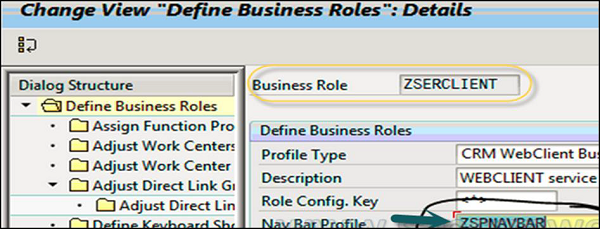
To save the profile, go to transaction CRMC_UI_Profile.