- SAP CCA Tutorial
- SAP CCA - Home
- SAP CCA - Overview
- SAP CCA - Activity Types
- SAP CCA - Master Data
- SAP CCA - Cost Center Groups
- SAP CCA - Creating a Cost Center
- SAP CCA - Cost Center Posting
- SAP CCA - Linking Order Reason
- SAP CCA - Internal Order
- SAP CCA - Settlement of IO
- SAP CCA - Profit Center
- SAP CCA - Postings to Profit Center
- Profit Center Standard Hierarchy
- Assignment of Cost to Profit Centers
- Assigning Materials to Profit Center
- SAP CCA - Compare CO, PC, IO
- SAP CCA - Planning
- SAP CCA - Period-End Closing
- SAP CCA - Accrual Calculation
- SAP CCA - Schedule Manager
- SAP CCA - Variance Calculation
- SAP CCA - Year-End Closing
- SAP CCA - Product Costing
- SAP CCA - Profitability Analysis
- SAP CCA - Information System
- SAP CCA - Standard Reports
- SAP CCA - Important Tables
- SAP CCA - Job Responsibilities
- SAP CCA - Useful Resources
- SAP CCA - Questions Answers
- SAP CCA - Quick Guide
- SAP CCA - Useful Resources
- SAP CCA - Discussion
SAP CCA - Cost Center Groups
You can divide cost center in cost center groups. In system, it should have at least one group that contains all cost centers and represents the entire business organization. This cost center group is described as the standard hierarchy. You can assign more cost center groups to the standard hierarchy.
Note − In standard hierarchy, you can only assign each cost center to one group.
Create Cost Center Group
To create a cost center group −
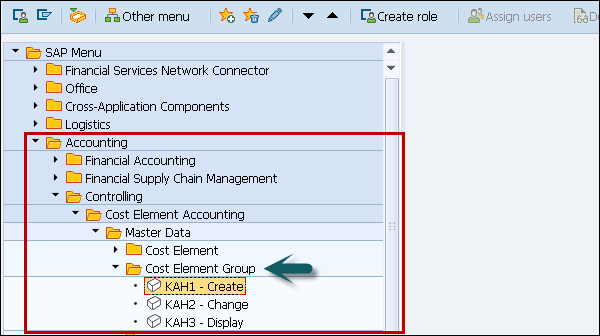
Step 1 − Navigate to Accounting → Controlling → Cost Center Accounting → Master Data → Cost Element Groups → Create/Change/Display
While creating a new group, it is possible to use an existing group as a template. The template group can belong to the same Controlling Area or COA.
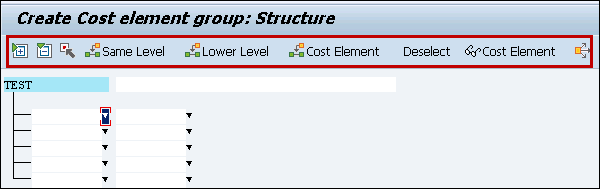
Enter the name of new group. The highest node contains the group names entered. The existing structure is appended to the highest node. This means that every change to the original automatically affects the copy.
You can create your groups successively in the group structure display.
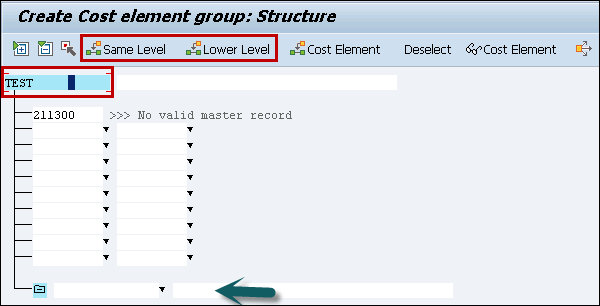
Step 2 − Choose the node that you want to extend the group, and select from Insert at same level or Insert at lower level.
You can create your groups successively in the group structure display.
Step 3 − Choose the node from which you want to extend the group. Click insert at same level or Insert at lower level.
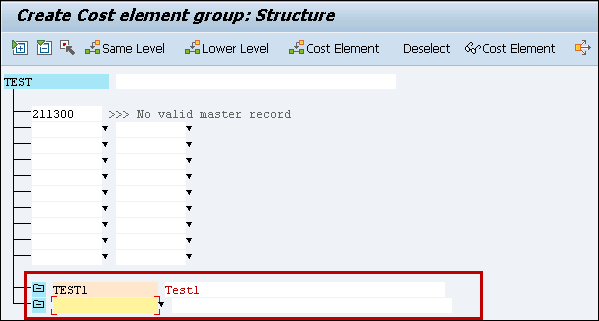
Step 4 − Enter the name and description for the new subgroup.
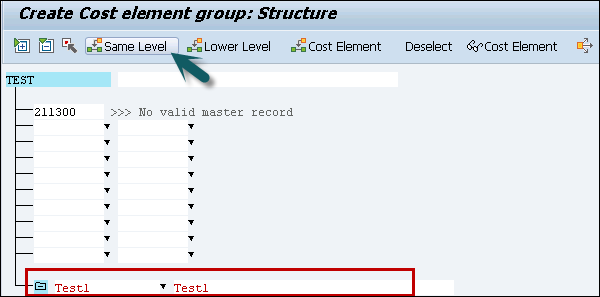
When you select the sub group and click same level, a new subgroup is created as shown below −
This is how you can define cost elements groups and hierarchy in system.
Step 5 − To save the hierarchy, click the save button at the top.
