- OrientDB Tutorial
- OrientDB - Home
- OrientDB - Overview
- OrientDB - Installation
- OrientDB - Basic Concepts
- OrientDB - Data Types
- OrientDB - Console Modes
- OrientDB Database Commands
- OrientDB - Create Database
- OrientDB - Alter Database
- OrientDB - Backup Database
- OrientDB - Restore Database
- OrientDB - Connect Database
- OrientDB - Disconnect Database
- OrientDB - Info Database
- OrientDB - List Database
- OrientDB - Freeze Database
- OrientDB - Release Database
- OrientDB - Config Database
- OrientDB - Export Database
- OrientDB - Import Database
- OrientDB - Commit Database
- OrientDB - Rollback Database
- OrientDB - Optimize Database
- OrientDB - Drop Database
- OrientDB Record Commands
- OrientDB - Insert Record
- OrientDB - Display Records
- OrientDB - Load Record
- OrientDB - Reload Record
- OrientDB - Export Record
- OrientDB - Update Record
- OrientDB - Truncate Record
- OrientDB - Delete Record
- OrientDB Class Commands
- OrientDB - Create Class
- OrientDB - Alter Class
- OrientDB - Truncate Class
- OrientDB - Drop Class
- OrientDB Cluster Commands
- OrientDB - Create Cluster
- OrientDB - Alter Cluster
- OrientDB - Truncate Cluster
- OrientDB - Drop Cluster
- OrientDB Property Commands
- OrientDB - Create Property
- OrientDB - Alter Property
- OrientDB - Drop Property
- OrientDB Vertex Commands
- OrientDB - Create Vertex
- OrientDB - Move Vertex
- OrientDB - Delete Vertex
- OrientDB Edge Commands
- OrientDB - Create Edge
- OrientDB - Update Edge
- OrientDB - Delete Edge
- OrientDB Advanced Concepts
- OrientDB - Functions
- OrientDB - Sequences
- OrientDB - Indexes
- OrientDB - Transactions
- OrientDB - Hooks
- OrientDB - Caching
- OrientDB - Logging
- OrientDB - Performance Tuning
- OrientDB - Upgrading
- OrientDB - Security
- OrientDB - Studio
- OrientDB Interfaces
- OrientDB - Java Interface
- OrientDB - Python Interface
- OrientDB Useful Resources
- OrientDB - Quick Guide
- OrientDB - Useful Resources
- OrientDB - Discussion
OrientDB - Studio
OrientDB provides a web UI to carry out database operations through GUI. This chapter explains the different options available in OrientDB.
Studio Homepage
Studio is a web interface for the administration of OrientDB that comes in bundle with the OrientDB distribution.
First, you need to start the OrientDB server using the following command.
$ server.sh
If you run OrientDB in your machine, the web interface can be accessed via the URL −
http://localhost:2480
If the command is executed successfully, following will be the output on screen.
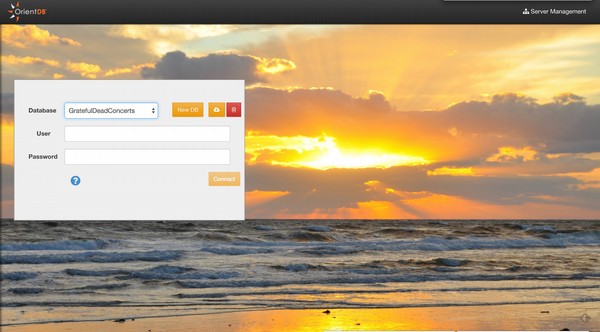
Connect to an Existing Database
To login, select a database from the databases list and use any database user. By default (username/password) reader/reader can read records from the database, writer/writer can read, create, update and delete records, while admin/admin has all rights.
Drop an Existing Database
Select a database from the databases list and click the trash icon. Studio will open a confirmation popup where you have to insert the Server User and Server Password.
Then click the "Drop database" button. You can find the server credentials in the $ORIENTDB_HOME/config/orientdb-server-config.xml file.
<users>
   <user name = "root" password = "pwd" resources = "*" />
</users>
Create a New Database
To create a new database, click the "New DB" button from the homepage.
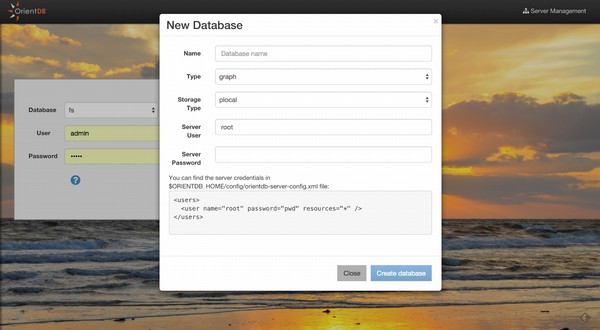
Following information is needed to create a new database −
- Database name
- Database type (Document/Graph)
- Storage type (plocal/memory)
- Server user
- Server password
You can find the server credentials in the $ORIENTDB_HOME/config/orientdbserver-config.xml file.
<users>
   <user name = "root" password = "pwd" resources = "*" />
</users>
Once created, Studio will automatically login to the new database.
Execute a Query
Studio supports auto recognition of the language you're using between those supported: SQL and Gremlin. While writing, use the auto-complete feature by pressing Ctrl + Space.
The following shortcuts are available in the query editor −
Ctrl + Return − To execute the query or just click the Run button.
Ctrl/Cmd + Z − To undo changes.
Ctrl/Cmd + Shift + Z − To redo changes.
Ctrl/Cmd + F − To search in the editor.
Ctrl/Cmd + / − To toggle a comment.
The following screenshot shows how to execute a query.
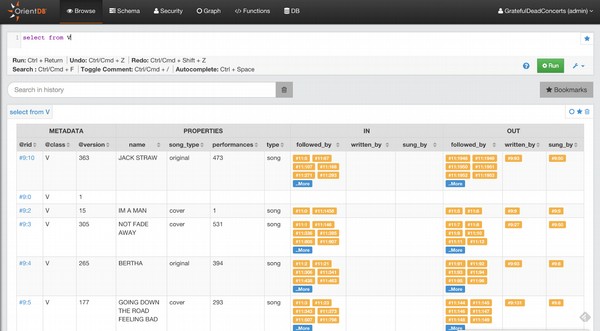
By clicking any @rid value in the result-set, you will go into document edit mode if the record is a Document, otherwise you will go into vertex edit.
You can bookmark your queries by clicking the star icon in the results-set or in the editor. To browse bookmarked queries, click the Bookmarks button. Studio will open the bookmarks list on the left, where you can edit/delete or rerun queries.
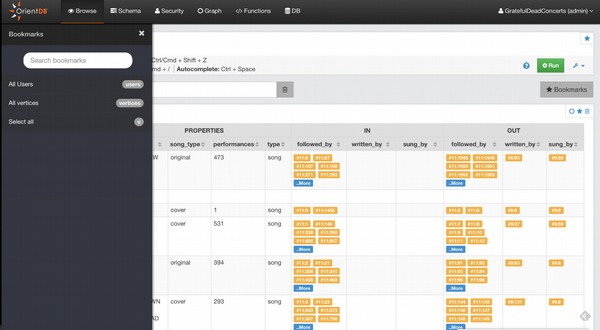
Studio saves the executed queries in the Local Storage of the browser. In the query settings, you can configure how many queries studio will keep in history. You can also search a previously executed query, delete all the queries from the history, or delete a single query.
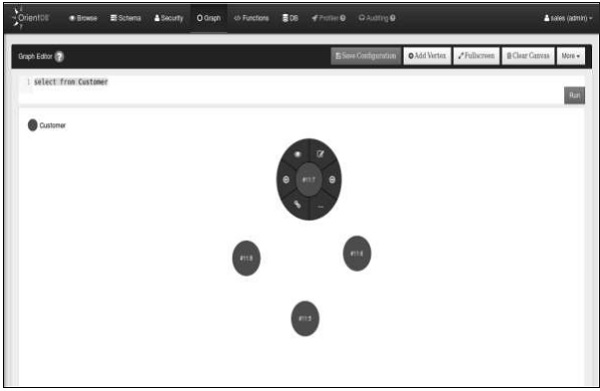
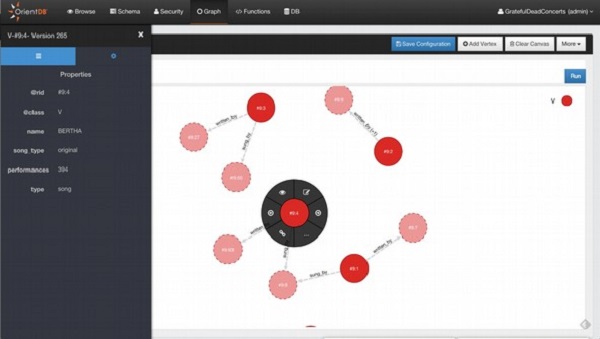
Edit Vertex
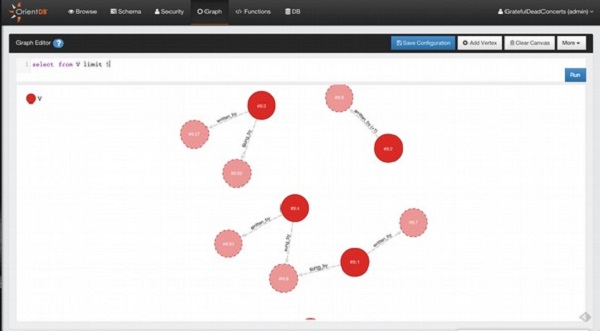
To edit the vertex of the graph, go to the Graph section. Then run the following query.
Select From Customer
On successfully running the query, following be the output screenshot. Select the particular vertex in the graph canvas to edit.
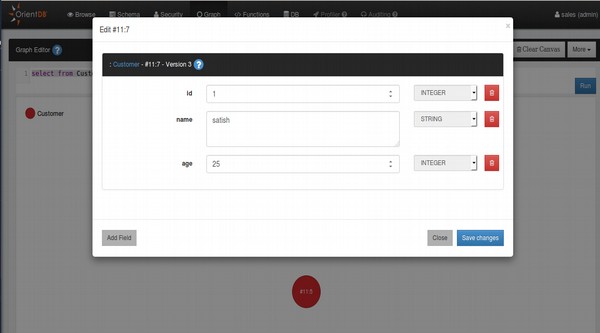
Select the edit symbol on the particular vertex. You will get the following screen which contains the options to edit the vertex.
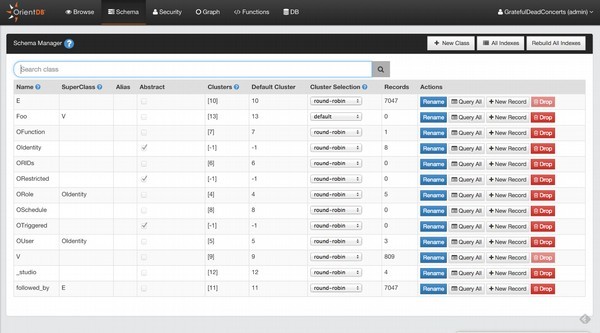
Schema Manager
OrientDB can work in schema-less mode, schema mode or a mix of both. Here we'll discuss the schema mode. Click on the Schema section on the top of web UI. You will get the following screenshot.
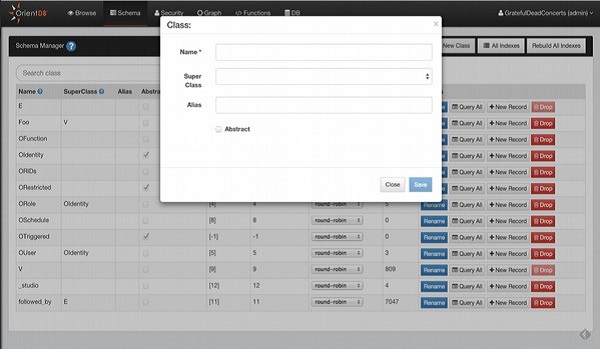
Create a New Class
To create a new Class, just click the New Class button. Following screenshot will appear. You will have to provide the following information as shown in the screenshot to create the new class.
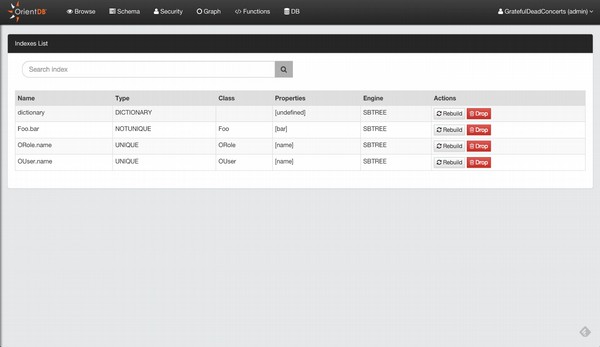
View All Indexes
When you want to have an overview of all indexes created in your database, just click he all indexes button in the Schema UI. This will provide a quick access to some information about indexes (name, type, properties, etc.) and you can drop or rebuild them from here.
Edit Class
Click on any class on the schema section, you will get the following screenshot.
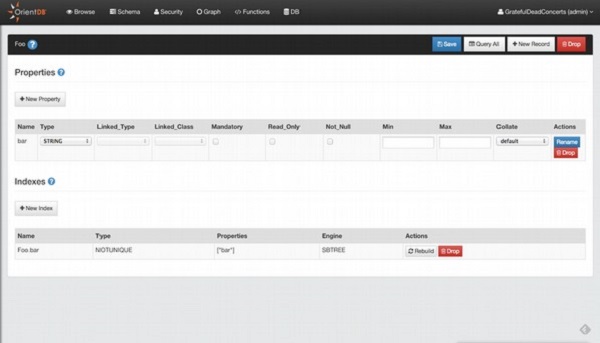
While editing a class, you can add a property or add a new index.
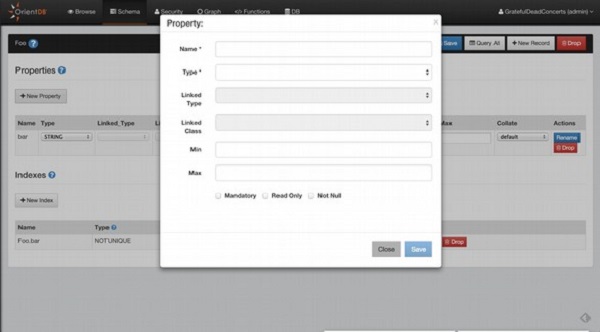
Add a Property
Click the New Property button to add property. You will get the following screenshot.
You have to provide the following details as shown in the screenshot to add property.
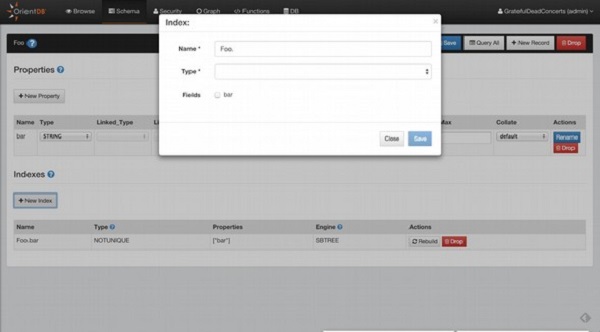
Add an Index
Click the New Index button. You will get the following screenshot. You have to provide the following details as shown in the screenshot to add an index.
Graph Editor
Click the graph section. Not only can you visualize your data in a graph style but you can also interact with the graph and modify it.
To populate the graph area, type a query in the query editor or use the functionality Send To Graph from the Browse UI.
Add Vertices
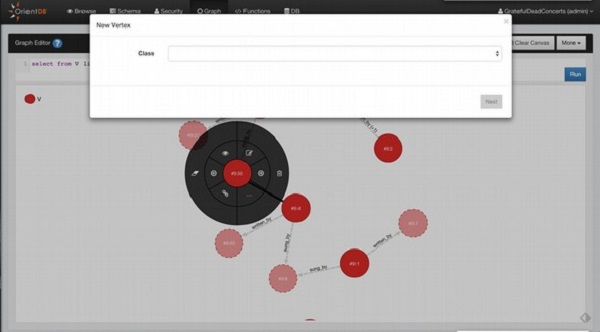
To add a new Vertex in your Graph Database and in the Graph Canvas area, you have to press the button Add Vertex. This operation is done in two steps.
In the first step, you have to choose the class for the new Vertex and then click Next.
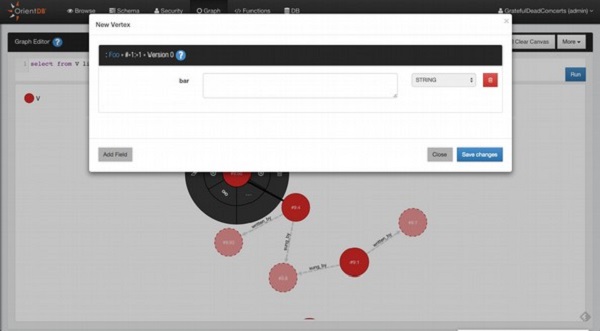
In the second step, you have to insert the field values of the new vertex. You can also add custom fields as OrientDB supports schema-less mode. To make the new vertex persistent, click ‘Save changes’ and the vertex will be saved into the database and added to the canvas area.
Delete Vertices
Open the circular menu by clicking on the Vertex that you want to delete. Open the submenu by hovering the mouse to the menu entry more (...) and then click the trash icon.
Remove Vertices from Canvas
Open the circular menu, open the sub-menu by hovering the mouse to the menu entry more (...) and then click the eraser icon.
Inspect Vertices
If you want to take a quick look to the Vertex property, click to the eye icon.
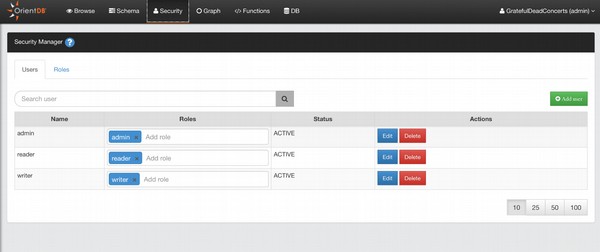
Security
Studio 2.0 includes the new Security Management, where you can manage Users and Roles in a graphical way.
Users
You can perform the following actions to manage the database users −
- Search Users
- Add Users
- Delete Users
- Edit User: roles can be edited in-line, for name, status and password click the Edit button
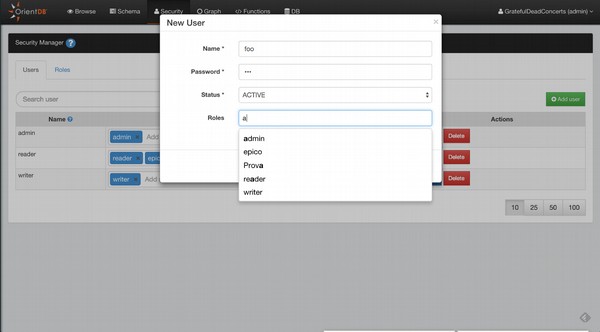
Add Users
To add a new User, click the Add User button, complete the information for the new user (name, password, status, roles) and then save to add the new user to the database.
Roles
You can perform the following actions to manage the database roles −
- Search Role
- Add Role
- Delete Role
- Edit Role
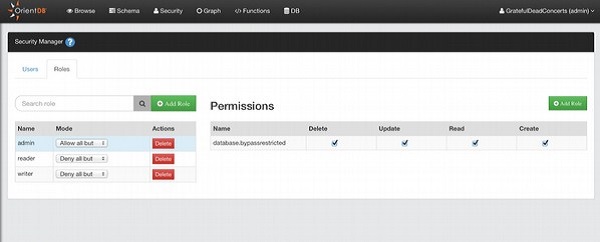
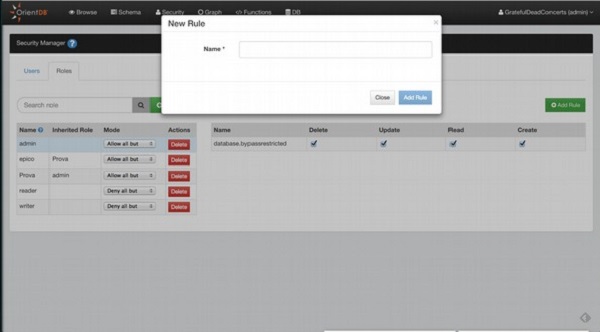
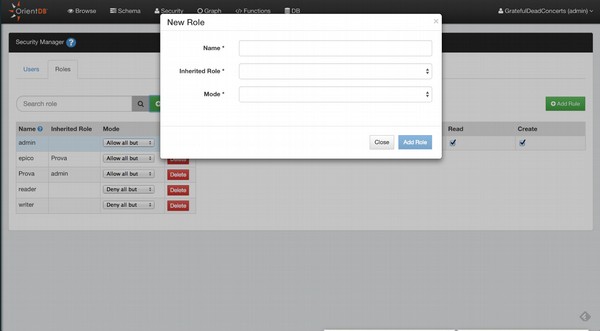
Add Role
To add a new User, click the Add Role button, complete the information for the new role (name, parent role, mode) and then save to add the new role to the database.
Add Rule to a Role
To add a new security rule for the selected role, click the Add Rule button. This will ask you the string of the resource that you want to secure. Then you can configure the CRUD permissions on the newly created resource.