- OpenCV Tutorial
- OpenCV - Home
- OpenCV - Overview
- OpenCV - Environment
- OpenCV - Storing Images
- OpenCV - Reading Images
- OpenCV - Writing an Image
- OpenCV - GUI
- Types of Images
- OpenCV - The IMREAD_XXX Flag
- Reading an Image as Grayscale
- OpenCV - Reading Image as BGR
- Image Conversion
- Colored Images to GrayScale
- OpenCV - Colored Image to Binary
- OpenCV - Grayscale to Binary
- Drawing Functions
- OpenCV - Drawing a Circle
- OpenCV - Drawing a Line
- OpenCV - Drawing a Rectangle
- OpenCV - Drawing an Ellipse
- OpenCV - Drawing Polylines
- OpenCV - Drawing Convex Polylines
- OpenCV - Drawing Arrowed Lines
- OpenCV - Adding Text
- Filtering
- OpenCV - Bilateral Filter
- OpenCV - Box Filter
- OpenCV - SQRBox Filter
- OpenCV - Filter2D
- OpenCV - Dilation
- OpenCV - Erosion
- OpenCV - Morphological Operations
- OpenCV - Image Pyramids
- Sobel Derivatives
- OpenCV - Sobel Operator
- OpenCV - Scharr Operator
- Transformation Operations
- OpenCV - Laplacian Transformation
- OpenCV - Distance Transformation
- Camera and Face Detection
- OpenCV - Using Camera
- OpenCV - Face Detection in a Picture
- Face Detection using Camera
- Geometric Transformations
- OpenCV - Affine Translation
- OpenCV - Rotation
- OpenCV - Scaling
- OpenCV - Color Maps
- Miscellaneous Chapters
- OpenCV - Canny Edge Detection
- OpenCV - Hough Line Transform
- OpenCV - Histogram Equalization
- OpenCV Useful Resources
- OpenCV - Quick Guide
- OpenCV - Useful Resources
- OpenCV - Discussion
OpenCV - Environment
In this chapter, you will learn how to install OpenCV and set up its environment in your system.
Installing OpenCV
First of all, you need to download OpenCV onto your system. Follow the steps given below.
Step 1 − Open the homepage of OpenCV by clicking the following link: http://opencv.org/ On clicking, you will see its homepage as shown below.
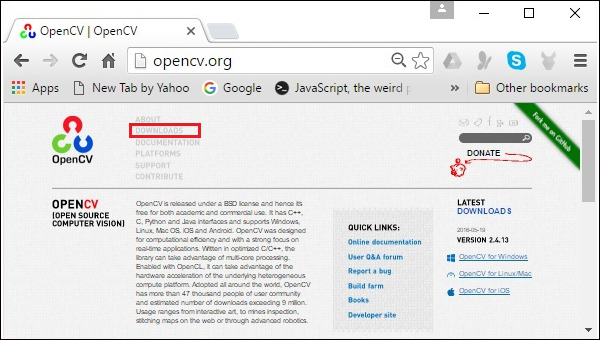
Step 2 − Now, click the Downloads link highlighted in the above screenshot. On clicking, you will be directed to the downloads page of OpenCV.
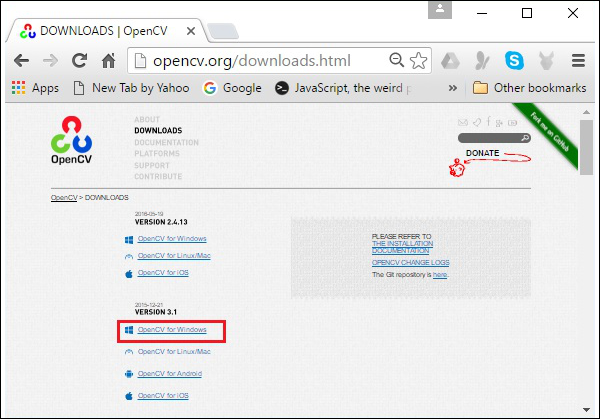
Step 3 − On clicking the highlighted link in the above screenshot, a file named opencv-3.1.0.exe will be downloaded. Extract this file to generate a folder opencv in your system, as shown in the following screenshot.
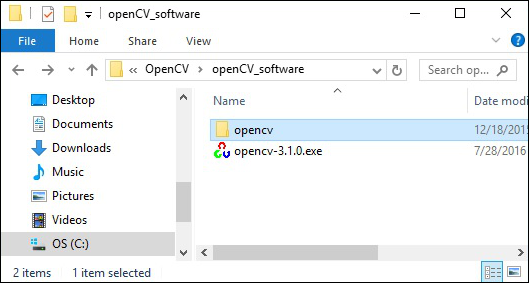
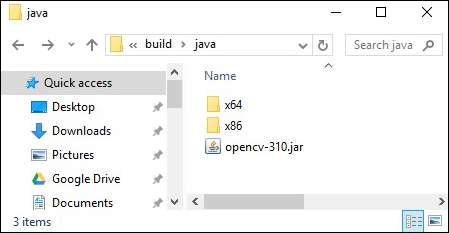
Step 4 − Open the folder OpenCV → build → java. Here you will find the jar file of OpenCV named opencv-310.jar. Save this file in a separate folder for further use.
Eclipse Installation
After downloading the required JAR files, you have to embed these JAR files to your Eclipse environment. You can do this by setting the Build Path to these JAR files and by using pom.xml.
Setting Build Path
Following are the steps to set up OpenCV in Eclipse −
Step 1 − Ensure that you have installed Eclipse in your system. If not, download and install Eclipse in your system.
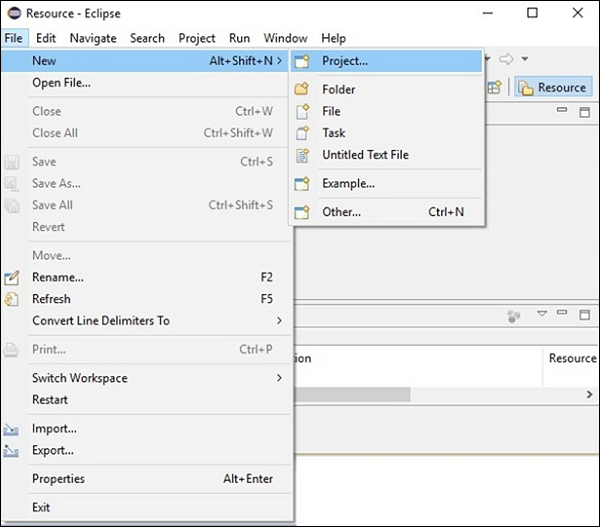
Step 2 − Open Eclipse, click on File, New, and Open a new project as shown in the following screenshot.
Step 3 − On selecting the project, you will get the New Project wizard. In this wizard, select Java project and proceed by clicking the Next button, as shown in the following screenshot.

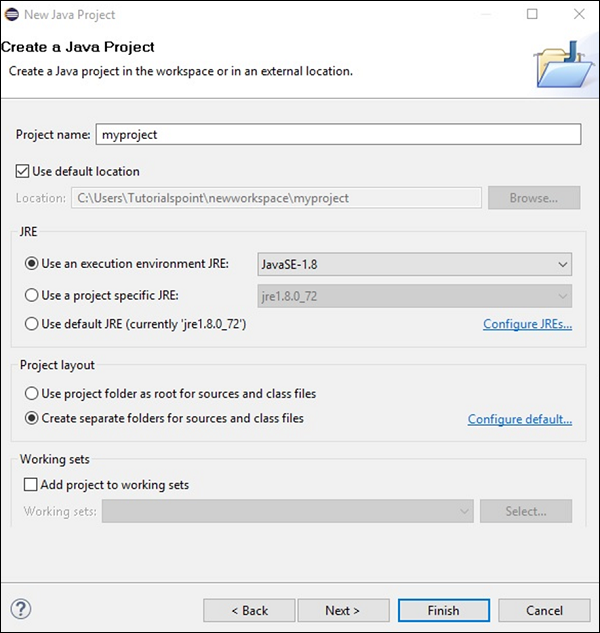
Step 4 − On proceeding forward, you will be directed to the New Java Project wizard. Create a new project and click Next, as shown in the following screenshot.
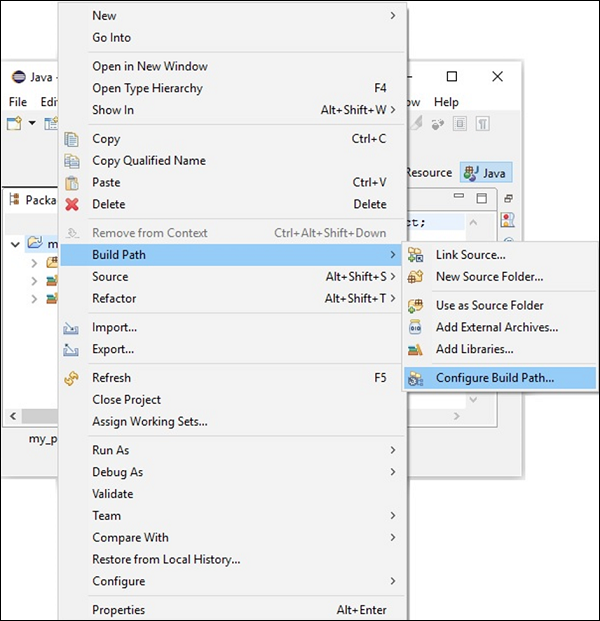
Step 5 − After creating a new project, right-click on it. Select Build Path and click Configure Build Path… as shown in the following screenshot.
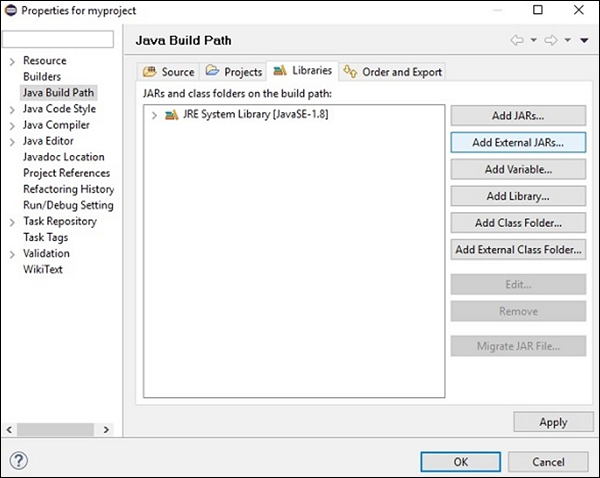
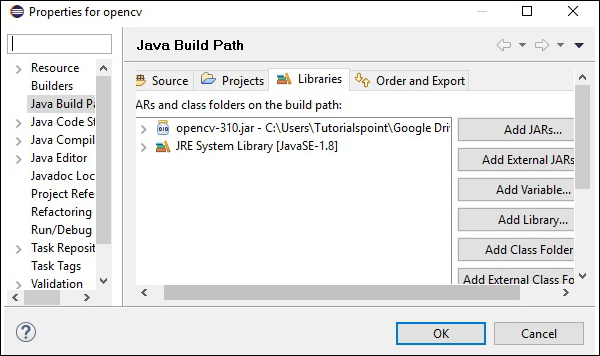
Step 6 − On clicking the Build Path option, you will be directed to the Java Build Path wizard. Click the Add External JARs button, as shown in the following screenshot.
Step 7 − Select the path where you have saved the file opencv-310.jar.
Step 8 − On clicking the Open button in the above screenshot, those files will be added to your library.
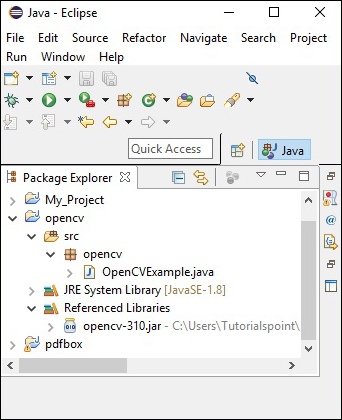
Step 9 − On clicking OK, you will successfully add the required JAR files to the current project and you can verify these added libraries by expanding the Referenced Libraries.
Setting the Path for Native Libraries
In addition to the JAR files, you need to set path for the native libraries (DLL files) of OpenCV.
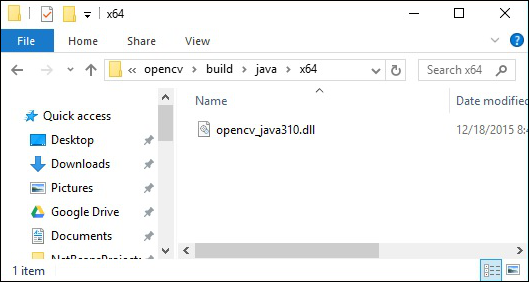
Location of DLL files − Open the installation folder of OpenCV and go to the sub-folder build → java. Here you will find the two folders x64 (64 bit) and x86 (32 bit) which contain the dll files of OpenCV.

Open the respective folder suitable for your operating system, then you can see the dll file, as shown in the following screenshot.
Now, set the path for this file too by following the steps given below −
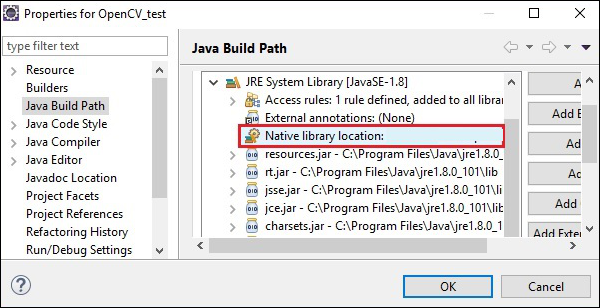
Step 1 − Once again, open the JavaBuildPath window. Here you can observe the added JAR file and the JRE System Library.
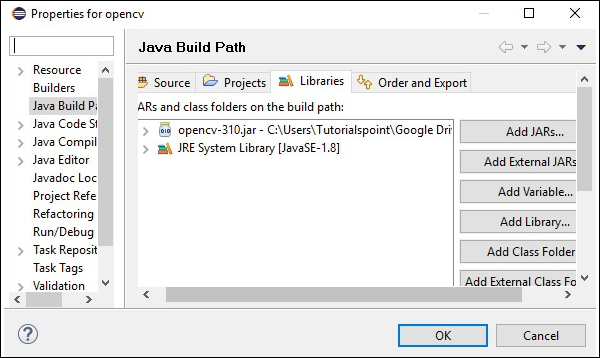
Step 2 − On expanding it, you will get the system libraries and Native library location, as highlighted in the following screenshot.
Step 3 − Double-click on the Native library location. Here, you can see the Native Library Folder Configuration window as shown below.
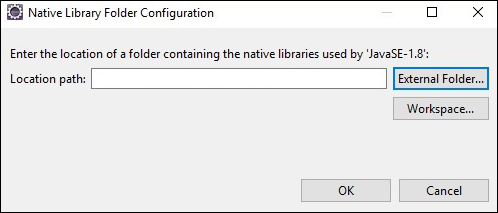
Here, click the button External Folder… and select the location of the dll file in your system.