- Next.js Tutorial
- Next.js - Home
- Next.js - Overview
- Next.js - Environment Setup
- Next.js Features
- Next.js - Pages
- Next.js - Static File Serving
- Next.js - Meta Data
- Next.js - CSS Support
- Next.js - Global CSS Support
- Next.js - Pre-Rendering
- Next.js Routing
- Next.js - Routing
- Next.js - Dynanic API Routes
- Next.js - Imperitive Routing
- Next.js - Shallow Routing
- Next.js API Routes
- Next.js - API Routes
- Next.js - API MiddleWares
- Next.js - Response Helpers
- Next.js Miscellaneous
- Next.js - Typescript
- Next.js - Environment Variables
- Next.js - Deployment
- Next.js - CLI
- Next.js Useful Resources
- Next.js - Quick Guide
- Next.js - Useful Resources
- Next.js - Discussion
Next.js - Quick Guide
Next.js - Overview
The Next.js is React Based framework with server side rendering capability. It is very fast and SEO friendly.
Using Next.js, you can create robust react based application quite easily and test them. Following are the key features of Next.js.
Hot Code Reload − Next.js server detects modified files and reloads them automatically.
Automatic Routing − No need to configure any url for routing. files are to be placed in pages folder. All urls will be mapped to file system. Customization can be done.
Component specific styles − styled-jsx provides support for global as well as component specific styles.
Server side rendering − react components are prerendered on server hence loads faster on client.
Node Ecosystem − Next.js being react based gels well with Node ecosystem.
Automatic code split − Next.js renders pages with libraries they need. Next.js instead of creating a single large javascript file, creates multiples resources. When a page is loaded, only required javascript page is loaded with it.
Prefetch − Next.js provides Link component which is used to link multiple components supports a prefetch property to prefetch page resources in background.
Dynamic Components − Next.js allows to import JavaScript modules and React Components dynamically.
Export Static Site − Next.js allows to export full static site from your web application.
Built-in Typescript Support − Next.js is written in Typescripts and provides excellent Typescript support.
Next.js - Environment Setup
As Next.js is a react based framework, we are using Node environment. Now make sure you have Node.js and npm installed on your system. You can use the following command to install Next.js −
npm install next react react-dom
You can observe the following output once Next.js is successfully installed −
+ react@16.13.1
+ react-dom@16.13.1
+ next@9.4.4
added 831 packages from 323 contributors and audited 834 packages in 172.989s
Now, let's create a node package.json −
npm init
Select default values while creating a package.json −
This utility will walk you through creating a package.json file.
It only covers the most common items, and tries to guess sensible defaults.

See `npm help json` for definitive documentation on these fields
and exactly what they do.

Use `npm install <pkg>` afterwards to install a package and
save it as a dependency in the package.json file.

Press ^C at any time to quit.
package name: (nextjs)
version: (1.0.0)
description:
entry point: (index.js)
test command:
git repository:
keywords:
author:
license: (ISC)
About to write to \Node\nextjs\package.json:
{
   "name": "nextjs",
   "version": "1.0.0",
   "description": "",
   "main": "index.js",
   "dependencies": {
      "next": "^9.4.4",
      "react": "^16.13.1",
      "react-dom": "^16.13.1"
   },
   "devDependencies": {},
   "scripts": {
      "test": "echo \"Error: no test specified\" && exit 1"
   },
   "author": "",
   "license": "ISC"
}
Is this OK? (yes)
Now update the scripts section of package.json to include Next.js commands.
{
   "name": "nextjs",
   "version": "1.0.0",
   "description": "",
   "main": "index.js",
   "dependencies": {
      "next": "^9.4.4",
      "react": "^16.13.1",
      "react-dom": "^16.13.1"
   },
   "devDependencies": {},
   "scripts": {
      "test": "echo \"Error: no test specified\" && exit 1",
      "dev": "next",
      "build": "next build",
      "start": "next start"
   },
   "author": "",
   "license": "ISC"
}
Create pages directory.
Create a pages folder within nextjs folder and create an index.js file with following contents.
function HomePage() {
   return <div>Welcome to Next.js!</div>
}

export default HomePage
Start Next.js Server
Run the following command to start the server −.
npm run dev
> nextjs@1.0.0 dev \Node\nextjs
> next

ready - started server on http://localhost:3000
event - compiled successfully
event - build page: /
wait  - compiling...
event - compiled successfully
event - build page: /next/dist/pages/_error
wait  - compiling...
event - compiled successfully
Verify Output
Open localhost:3000 in a browser and you will see the following output.
Next.js - Pages
In Next.js, we can create pages and navigate between them using file system routing feature. We'll use Link component to have a client side navigation between pages.
In Next.js, a page is a React Component and are exported from pages directory. Each page is associated with a route based on its file name. For example
pages/index.js is linked with '/' route.
pages/posts/first.js is linked with '/posts/first' route and so on.
Let's update the nextjs project created in Environment Setup chapter.
Create post directory and first.js within it with following contents.
export default function FirstPost() {
   return <h1>My First Post</h1>
}
Add Link Support to go back to Home page. Update first.js as follows −
import Link from 'next/link'

export default function FirstPost() {
   return (
      <>
         <h1>My First Post</h1>
         <h2>
            <Link href="/">
               <a>Home</a>
            </Link>
         </h2>
      </>
   )
}
Add Link Support to home page to navigate to first page. Update index.js as follows −
import Link from 'next/link'

function HomePage() {
   return (
      <>
         <div>Welcome to Next.js!</div>
         <Link href="/posts/first"><a>First Post</a></Link>
      </>
   )
}

export default HomePage
Start Next.js Server
Run the following command to start the server −.
npm run dev
> nextjs@1.0.0 dev \Node\nextjs
> next

ready - started server on http://localhost:3000
event - compiled successfully
event - build page: /
wait  - compiling...
event - compiled successfully
event - build page: /next/dist/pages/_error
wait  - compiling...
event - compiled successfully
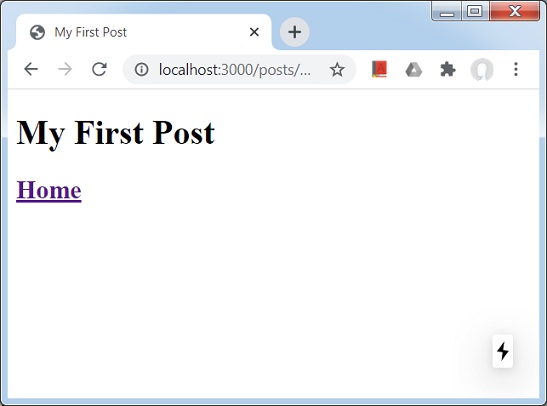
Verify Output
Open localhost:3000 in a browser and you will see the following output.
Click on First Link and you will see the following output.
Next.js - Static File Serving
In Next.js, we can serve static pages like images very easily by putting them in public, a top level directory. We can refer these files in similar fashion like pages in pages directory.
In Next.js, a page is a React Component and are exported from pages directory. Each page is associated with a route based on its file name.
Let's update the nextjs project used in Pages chapter.
Create public directory and place any images within it. We've taken logo.png, TutorialsPoint Logo image.
Update first.js as follows −
import Link from 'next/link'

export default function FirstPost() {
   return (
      <>
         <h1>My First Post</h1>
         <h2>
            <Link href="/">
               <a>Home</a>
            </Link>
         </h2>
         <br/">
         <img src="/logo.png" alt="TutorialsPoint Logo" />
      </>
   )
}
Here we've added a reference to logo.png in index.js file.
Start Next.js Server
Run the following command to start the server −.
npm run dev
> nextjs@1.0.0 dev \Node\nextjs
> next

ready - started server on http://localhost:3000
event - compiled successfully
event - build page: /
wait  - compiling...
event - compiled successfully
event - build page: /next/dist/pages/_error
wait  - compiling...
event - compiled successfully
Verify Output
Open localhost:3000 in a browser and you will see the following output.
public directory is also useful in case of SEO purpose. It can be used for robot.txt, Google Site verification or any other static assets in the web application.
Next.js - Meta Data
In Next.js, we can serve modify the head section of each react pages very easily with the help of <Head> react component which is inbuilt.
Let's update the nextjs project used in Pages chapter.
Update index.js as follows −
import Link from 'next/link'
import Head from 'next/head'

function HomePage() {
   return (
      <>
         <Head>
            <title>Welcome to Next.js!</title>
         </Head>
         <div>Welcome to Next.js!</div>
         <Link href="/posts/first"><a>First Post</a></Link>
         <br/>
         <img src="/logo.png" alt="TutorialsPoint Logo" />
      </>
   )
}

export default HomePage
Update first.js as follows −
import Link from 'next/link'
import Head from 'next/head'

export default function FirstPost() {
   return (
      <>
      <Head>
         <title>My First Post</title>
      </Head>
      <h1>My First Post</h1>
      <h2>
         <Link href="/">
            <a>Home</a>
         </Link>
      </h2>
      </>
   )
}
Here we've added a reference to logo.png in index.js file.
Start Next.js Server
Run the following command to start the server −.
npm run dev
> nextjs@1.0.0 dev \Node\nextjs
> next

ready - started server on http://localhost:3000
event - compiled successfully
event - build page: /
wait  - compiling...
event - compiled successfully
event - build page: /next/dist/pages/_error
wait  - compiling...
event - compiled successfully
Verify Output
Open localhost:3000 in a browser and you will see the following output.
Click on First Page link and verify the title changed in First Post page as well.
Next.js - CSS Support
In Next.js, we can use inbuild css-in-js library named styled-jsx. It allows to write css within a react component and these styles will be scoped to component.
In this example, we'll create a Container object which will be used to style other components by containing them.
Let's update the nextjs project used in Meta Data chapter.
First create a Components directory at root level and add a file container.module.css as follows −
.container {
   max-width: 36rem;
   padding: 0 1rem;
   margin: 3rem auto 6rem;
   border: 1px solid red;
}
Create container.js file in Components directory
import styles from './container.module.css'

function Container({ children }) {
   return <div className={styles.container}>{children}</div>
}

export default Container
Now use Container component in first.js.
import Link from 'next/link'
import Head from 'next/head'
import Container from '../../components/container'

export default function FirstPost() {
   return (
      <>
         <Container>
            <Head>
               <title>My First Post</title>
            </Head>
            <h1>My First Post</h1>
            <h2>
            <Link href="/">
               <a>Home</a>
            </Link>
            </h2>
         </Container>
      </>
   )
}
Start Next.js Server
Run the following command to start the server −.
npm run dev
> nextjs@1.0.0 dev \Node\nextjs
> next

ready - started server on http://localhost:3000
event - compiled successfully
event - build page: /
wait  - compiling...
event - compiled successfully
event - build page: /next/dist/pages/_error
wait  - compiling...
event - compiled successfully
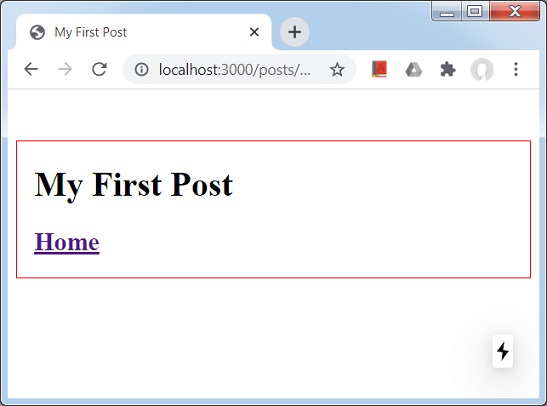
Verify Output
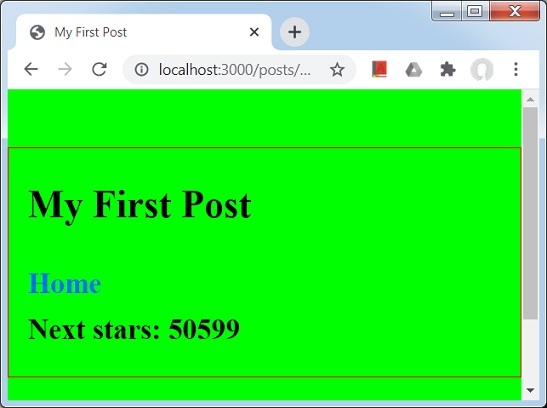
Open localhost:3000 in a browser and go to first post, you will see the following output.
Next.js - Global CSS Support
In Next.js, Let's create global styles which will be applied on all pages.
In this example, we'll create a styles.css which will be used on all components using _app.js component.
Let's update the nextjs project used in CSS Support chapter.
First create a styles directory at root level and add a file styles.css as follows −
html,
body {
   padding: 0;
   margin: 0;
   line-height: 1.6;
   font-size: 18px;
   background-color: lime;
}

* {
   box-sizing: border-box;
}

a {
   color: #0070f3;
   text-decoration: none;
}

a:hover {
   text-decoration: underline;
}

img {
   max-width: 100%;
   display: block;
}
Create _app.js file in pages directory
import '../styles/styles.css'

export default function App({ Component, pageProps }) {
   return <Component {...pageProps} />
}
Start Next.js Server
Run the following command to start the server −.
npm run dev
> nextjs@1.0.0 dev \Node\nextjs
> next

ready - started server on http://localhost:3000
event - compiled successfully
event - build page: /
wait  - compiling...
event - compiled successfully
event - build page: /next/dist/pages/_error
wait  - compiling...
event - compiled successfully
Verify Output
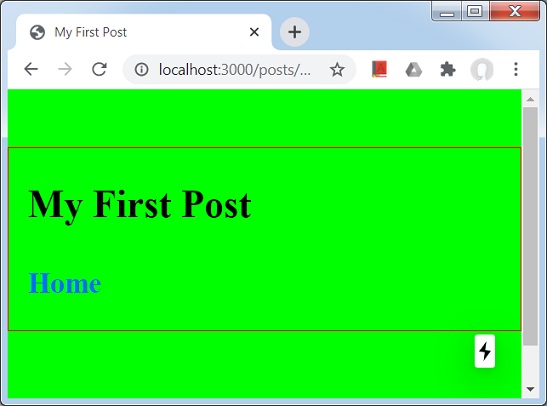
Open localhost:3000 in a browser and you will see the following output.
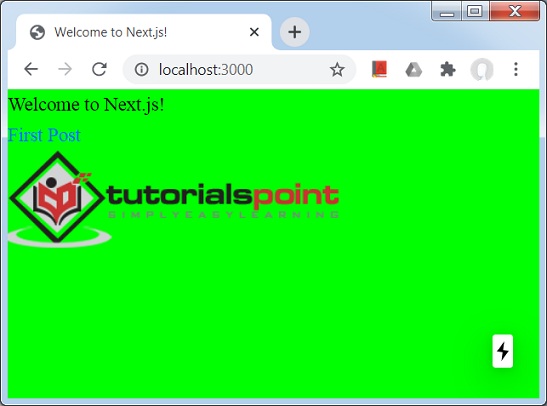
Click on First post link.
Next.js - Pre-Rendering
In Next.js, we know it generates HTML for a page called pre-rendering. Next.JS supports two types of pre-rendering.
Static Generation − This method generates the HTML page at build time. This pre-rendered HTML is sent on each request. This method is useful for marketing websites, blogs, e-commerce products listing wesites, helps, documentation websites.
Server Side Generation − This method generates the HTML page on each request. This method is suitable when an html page contents can vary with each request.
Per Page Pre-rendering
Next.JS allows to set pre-rendering method for each page where most of pages follow static generation and other pages will use server side rendering.
Static Generation Without Data
Static generation can be done without data in which case, HTML pages will be ready without need to prefetch the data and then start rendering. Data can be fetched later or on request. This technique helps in showing user an User Interface without any data in case data takes time to come.
Static Generation With Data
Static generation can be done with data in which case, HTML pages will not be ready until data is fetched, as HTML may be dependent on data. Each component has a special method getStaticProps which can be used to fetch data and pass data as props of the page so that page can render accordings to passed props.
getStaticProps() function runs at build time in production and runs for every request in dev mode.
Let's create an example to demonstrate the same.
In this example, we'll create a update index.js and first.js page to make a server hit to get data.
Let's update the nextjs project used in Global CSS Support chapter.
Update index.js file in pages directory to use getServerSideProps() method. This method will be called per request.
import Link from 'next/link'
import Head from 'next/head'

function HomePage(props) {
   return (
      <>
         <Head>
            <title>Welcome to Next.js!</title>
         </Head>
         <div>Welcome to Next.js!</div>
         <Link href="/posts/first"><a>First Post</a></Link>
         <br/>
         <div>Next stars: {props.stars}</div>
         <img src="/logo.png" alt="TutorialsPoint Logo" />
      </>
   )
}

export async function getServerSideProps(context) {
   const res = await fetch('https://api.github.com/repos/vercel/next.js')
   const json = await res.json()
   return {
      props: { stars: json.stargazers_count }
   }
}

export default HomePage
Update first.js file in pages directory to use getStaticProps() method. This method will be called once.
import Link from 'next/link'
import Head from 'next/head'
import Container from '../../components/container'

export default function FirstPost(props) {
   return (
      <>
         <Container>
            <Head>
               <title>My First Post</title>
            </Head>
            <h1>My First Post</h1>
            <h2>
               <Link href="/">
                  <a>Home</a>
               </Link>
               <div>Next stars: {props.stars}</div>
            </h2>
         </Container>
      </>
   )
}

export async function getStaticProps() {
   const res = await fetch('https://api.github.com/repos/vercel/next.js')
   const json = await res.json()
   return {
      props: { stars: json.stargazers_count }
   }
}
Start Next.js Server
Run the following command to start the server −.
npm run dev
> nextjs@1.0.0 dev \Node\nextjs
> next

ready - started server on http://localhost:3000
event - compiled successfully
event - build page: /
wait  - compiling...
event - compiled successfully
event - build page: /next/dist/pages/_error
wait  - compiling...
event - compiled successfully
Verify Output
Open localhost:3000 in a browser and you will see the following output.
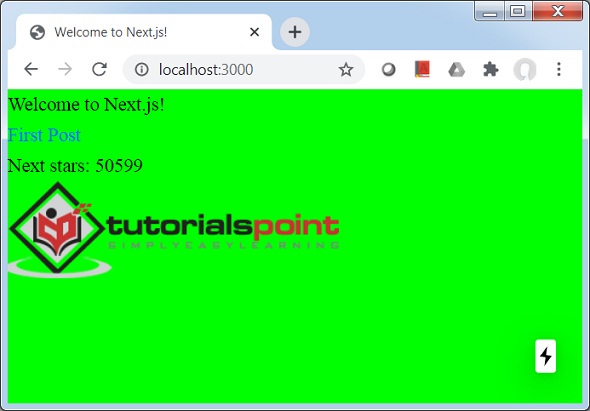
Click on First post link.
Next.js - Routing
Next.js uses file system based router. Whenever we add any page to pages directory, it is automatically available via url. Following are the rules of this router.
Index Routes − An index.js file present in a folder maps to root of directory. For example −
pages/index.js maps to '/'.
pages/posts/index.js maps to '/posts'.
Nested Routes − Any nested folder structure in pages directory because router url automatically. For example −
pages/settings/dashboard/about.js maps to '/settings/dashboard/about'.
pages/posts/first.js maps to '/posts/first'.
Dynamic Routes − We can use named parameter as well to match url. Use brackets for the same. For example −
pages/posts/[id].js maps to '/posts/:id' where we can use URL like '/posts/1'.
pages/[user]/settings.js maps to '/posts/:user/settings' where we can use URL like '/abc/settings'.
pages/posts/[...all].js maps to '/posts/*' where we can use any URL like '/posts/2020/jun/'.
Page Linking
Next.JS allows to link pages on client side using Link react component. It has following properties −
href − name of the page in pages directory. For example /posts/first which refers to first.js present in pages/posts directory.
Let's create an example to demonstrate the same.
In this example, we'll update index.js and first.js page to make a server hit to get data.
Let's update the nextjs project used in Global CSS Support chapter.
Update index.js file in pages directory as following.
import Link from 'next/link'
import Head from 'next/head'
function HomePage(props) {
return (
<>
<Head>
<title>Welcome to Next.js!</title>
</Head>
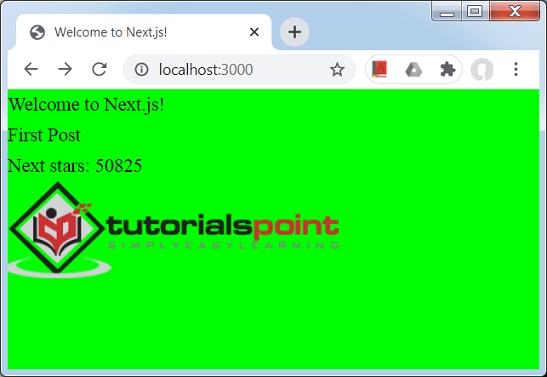
<div>Welcome to Next.js!</div>
<Link href="/posts/first">> <a>First Post</a></Link>
<br/>
<div>Next stars: {props.stars}</div>
<img src="/logo.png" alt="TutorialsPoint Logo" />
</>
)
}
export async function getServerSideProps(context) {
const res = await fetch('https://api.github.com/repos/vercel/next.js')
const json = await res.json()
return {
props: { stars: json.stargazers_count }
}
}
export default HomePage
Start Next.js Server
Run the following command to start the server −.
npm run dev
> nextjs@1.0.0 dev \Node\nextjs
> next

ready - started server on http://localhost:3000
event - compiled successfully
event - build page: /
wait  - compiling...
event - compiled successfully
event - build page: /next/dist/pages/_error
wait  - compiling...
event - compiled successfully
Verify Output
Open localhost:3000 in a browser and you will see the following output.
Click on First post link.
Next.js - Dynamic Routing
In Next.js, we can create routes dynamically. In this example, we'll create pages on the fly and their routing.
Step 1. Define [id].js file − [id].js represents the dynamic page where id will be relative path. Define this file in pages/post directory.
Step 2. Define lib/posts.js − posts.js represents the ids and contents. lib directory is to be created in root directory.
[id].js
Update [id].js file with getStaticPaths() method which sets the paths and getStaticProps() method to get the contents based on id.
import Link from 'next/link'
import Head from 'next/head'
import Container from '../../components/container'
import { getAllPostIds, getPostData } from '../../lib/posts'
export default function Post({ postData }) {
return (
<Container>
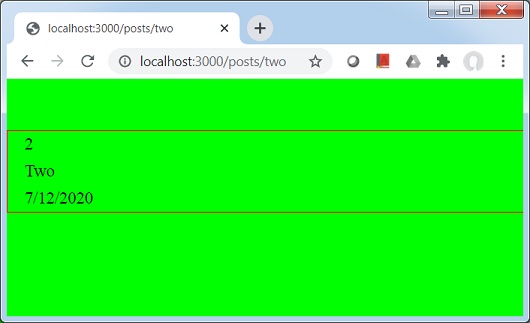
{postData.id}
<br />
{postData.title}
<br />
{postData.date}
</Container>
)
}
export async function getStaticPaths() {
const paths = getAllPostIds()
return {
paths,
fallback: false
}
}
export async function getStaticProps({ params }) {
const postData = getPostData(params.id)
return {
props: {
postData
}
}
}
posts.js
posts.js contains getAllPostIds() to get the ids and getPostData() to get corresponding contents.
export function getPostData(id) {
   const postOne = {
      title: 'One',
      id: 1,
      date: '7/12/2020'
   }

   const postTwo = {
      title: 'Two',
      id: 2,
      date: '7/12/2020'
   }
   if(id == 'one'){
      return postOne;
   }else if(id == 'two'){
      return postTwo;
   }
}

export function getAllPostIds() {
   return [{
      params: {
         id: 'one'
      }
   },
   {
      params: {
         id: 'two'
      }
   }
];
}
Start Next.js Server
Run the following command to start the server −.
npm run dev
> nextjs@1.0.0 dev \Node\nextjs
> next

ready - started server on http://localhost:3000
event - compiled successfully
event - build page: /
wait  - compiling...
event - compiled successfully
event - build page: /next/dist/pages/_error
wait  - compiling...
event - compiled successfully
Verify Output
Open localhost:3000/posts/one in a browser and you will see the following output.

Open localhost:3000/posts/two in a browser and you will see the following output.
Next.js - Imperative Routing
In Next.js, so far we are using Link react component to navigate from one page to other. There is a programmatic way as well to achive the same using Router component. Generally Router component is used with html tags.
Update index.js file in pages directory as following.
import Router from 'next/router'
import Head from 'next/head'

function HomePage(props) {
   return (
      <>
         <Head>
            <title>Welcome to Next.js!</title>
         </Head>
         <div>Welcome to Next.js!</div>
         <span onClick={() => Router.push('/posts/one')}>First Post</span>
         <br/>
         <div>Next stars: {props.stars}</div>
         <img src="/logo.png" alt="TutorialsPoint Logo" />
      </>
   )
}

export async function getServerSideProps(context) {
   const res = await fetch('https://api.github.com/repos/vercel/next.js')
   const json = await res.json()
   return {
      props: { stars: json.stargazers_count }
   }
}

export default HomePage
Start Next.js Server
Run the following command to start the server −.
npm run dev
> nextjs@1.0.0 dev \Node\nextjs
> next

ready - started server on http://localhost:3000
event - compiled successfully
event - build page: /
wait  - compiling...
event - compiled successfully
event - build page: /next/dist/pages/_error
wait  - compiling...
event - compiled successfully
Verify Output
Open localhost:3000 in a browser and you will see the following output.
Click on First post which is not a link but is clickable.
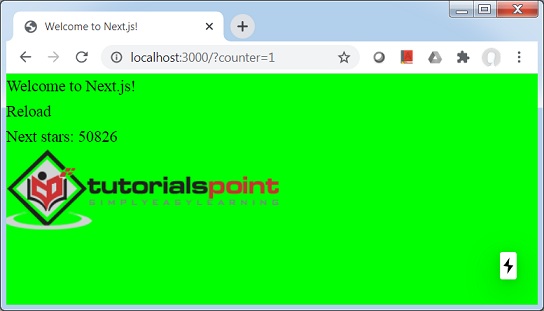
Next.js - Shallow Routing
In Next.js, shallow routing refers to navigating to same page but no calls to getServerSideProps, getStaticProps, and getInitialProps methods.
To do shallow routing, we use Router with shallow flag as true. See the below example.
Update index.js file in pages directory as following.
import Router from 'next/router'
import Head from 'next/head'

function HomePage(props) {
   return (
      <>
         <Head>
            <title>Welcome to Next.js!</title>
         </Head>
         <div>Welcome to Next.js!</div>
         <span onClick={() => Router.push('/?counter=1', undefined, { shallow: true })}>Reload</span>
         <br/>
         <div>Next stars: {props.stars}</div>
         <img src="/logo.png" alt="TutorialsPoint Logo" />
      </>
   )
}

export async function getServerSideProps(context) {
   const res = await fetch('https://api.github.com/repos/vercel/next.js')
   const json = await res.json()
   return {
      props: { stars: json.stargazers_count }
   }
}

export default HomePage
Start Next.js Server
Run the following command to start the server −.
npm run dev
> nextjs@1.0.0 dev \Node\nextjs
> next

ready - started server on http://localhost:3000
event - compiled successfully
event - build page: /
wait  - compiling...
event - compiled successfully
event - build page: /next/dist/pages/_error
wait  - compiling...
event - compiled successfully
Verify Output
Open localhost:3000 in a browser and then click on Reload link and you will see the following output.
Next.js - Api Routes
API Routes is a way to create rest API using Next.js. Next.js maps any file present in /pages/api folder and will be treated as API end point. An example of API function −
export default (req, res) => {
   ...
}
Following are some important points to consider.
req − req is an instance of http.IncomingMessage and is used to get data from request.
res − res is an instance of http.ServerResponse and is used to send data as response.
Let's create an example to demonstrate the same.
In this example, we are going to create an user.js in pages/api directory.
Let's update the nextjs project used in Global CSS Support chapter.
Create user.js file in pages/api directory as following.
export default (req, res) => {
   res.statusCode = 200
   res.setHeader('Content-Type', 'application/json')
   res.end(JSON.stringify({ name: 'Robert' }))
}
Start Next.js Server
Run the following command to start the server −.
npm run dev

> nextjs@1.0.0 dev D:\Node\nextjs
> next

ready - started server on http://localhost:3000
info  - Loaded env from D:\Node\nextjs\.env.local
event - compiled successfully
event - build page: /api/user
wait  - compiling...
event - compiled successfully
event - build page: /next/dist/pages/_error
wait  - compiling...
event - compiled successfully
Verify Output
Open localhost:3000/api/user in a browser and you will see the following output.
{"name":"Robert"}
Next.js - API MiddleWares
API Routes in Next.JS have built-in middlewares which helps in parsing the incoming request.
Following are the middlewares
req.cookies − cookies object contains the cookies sent by the request. Default value is {}.
req.query − query object contains the query string. Default value is {}.
req.body − query object contains the request body parsed using 'content-type'. Default value is null.
Let's create an example to demonstrate the same.
In this example, we are going to update an user.js in pages/api directory.
Let's update the nextjs project used in API Routes chapter.
Create user.js file in pages/api directory as following.
export default (req, res) => {
   res.statusCode = 200
   res.setHeader('Content-Type', 'application/json')
   res.end(JSON.stringify({ query: req.query }))
}
Start Next.js Server
Run the following command to start the server −.
npm run dev

> nextjs@1.0.0 dev D:\Node\nextjs
> next

ready - started server on http://localhost:3000
info  - Loaded env from D:\Node\nextjs\.env.local
event - compiled successfully
event - build page: /api/user
wait  - compiling...
event - compiled successfully
event - build page: /next/dist/pages/_error
wait  - compiling...
event - compiled successfully
Verify Output
Open http://localhost:3000/api/user?counter=1 in a browser and you will see the following output.
{"query":{"counter":"1"}}
Next.js - Response Helpers
res object have express.js like helper methods to ease development to create services.
Following are the response helper methods
res.status(code) − This methods set the status of response. Code passed must be a valid HTTP status.
req.json(json) − This method returns a JSON response. json passed must be a valid JSON object.
req.send(body) − This methods sends an HTTP response. Response can be string, object or Buffer.
Let's create an example to demonstrate the same.
In this example, we are going to update an user.js in pages/api directory.
Let's update the nextjs project used in API Routes chapter.
Create user.js file in pages/api directory as following.
export default (req, res) => {
   res.status(200).json({ name: 'Robert' });
}
Start Next.js Server
Run the following command to start the server −.
npm run dev

> nextjs@1.0.0 dev D:\Node\nextjs
> next

ready - started server on http://localhost:3000
info  - Loaded env from D:\Node\nextjs\.env.local
event - compiled successfully
event - build page: /api/user
wait  - compiling...
event - compiled successfully
event - build page: /next/dist/pages/_error
wait  - compiling...
event - compiled successfully
Verify Output
Open http://localhost:3000/api/user in a browser and you will see the following output.
{ name: 'Robert' }
Next.js - TypeScript Support
Next.js, has execellent support for typescript. Following are few steps to enabling typescript in project.
Create tsconfig.json
Create tsconfig.json in root directory. We're keeping it empty initially. Now start the server.
Next.JS will detect tsconfig.json and show follwing message on console.
npm run dev

> nextjs@1.0.0 dev D:\Node\nextjs
> next

ready - started server on http://localhost:3000
It looks like you're trying to use TypeScript but do not have the required package(s) installed.

Please install typescript, @types/react, and @types/node by running:

        npm install --save-dev typescript @types/react @types/node

If you are not trying to use TypeScript, please remove the tsconfig.json file from your package root (and any TypeScript files).
...
Install typescript
Run the npm install command to install typescript and related libraries.
npm install --save-dev typescript @types/react @types/node
...

+ @types/node@14.0.23
+ @types/react@16.9.43
+ typescript@3.9.6
added 5 packages from 72 contributors and audited 839 packages in 27.538s
...
Start Next.js Server
Run the following command to start the server −.
npm run dev

> nextjs@1.0.0 dev D:\Node\nextjs
> next

ready - started server on http://localhost:3000
We detected TypeScript in your project and created a tsconfig.json file for you.


Your tsconfig.json has been populated with default values.

event - compiled successfully
wait  - compiling...
event - compiled successfully
Open tsconfig.json
NextJS server has modified the tsconfig.json.
{
   "compilerOptions": {
      "target": "es5",
      "lib": [
         "dom",
         "dom.iterable",
         "esnext"
      ],
      "allowJs": true,
      "skipLibCheck": true,
      "strict": false,
      "forceConsistentCasingInFileNames": true,
      "noEmit": true,
      "esModuleInterop": true,
      "module": "esnext",
      "moduleResolution": "node",
      "resolveJsonModule": true,
      "isolatedModules": true,
      "jsx": "preserve"
   },
   "exclude": [
      "node_modules"
   ],
   "include": [
      "next-env.d.ts",
      "**/*.ts",
      "**/*.tsx"
   ]
}
Create hello.ts
Create hello.ts in pages/api directory which will acts as a rest service for us.
import { NextApiRequest, NextApiResponse } from 'next'

export default (_: NextApiRequest, res: NextApiResponse) => {
   res.status(200).json({ text: 'Welcome to TutorialsPoint' })
}
Start Next.js Server
Run the following command to start the server −.
npm run dev
> nextjs@1.0.0 dev \Node\nextjs
> next

ready - started server on http://localhost:3000
event - compiled successfully
event - build page: /
wait  - compiling...
event - compiled successfully
event - build page: /next/dist/pages/_error
wait  - compiling...
event - compiled successfully
Verify Output
Open localhost:3000/api/hello in a browser and you will see the following output.
{"text":"Welcome to TutorialsPoint"}
Next.js - Environment Variables
Next.js, has support for publishing environment variables in node which we can use in connecting to server, database etc. For this, we need to create .env.local file in root directory. We can also create .env.production.
Create .env.local
Create .env.local in root directory with the following contents.
DB_HOST=localhost
DB_USER=tutorialspoint
DB_PASS=nextjs
Create env.js
Create a page named env.js with following contents in pages/posts directory where we'll use the environment variables using process.env.
import Head from 'next/head'
import Container from '../../components/container'
export default function FirstPost(props) {
return (
<>
<Container>
<Head>
<title>Environment Variables</title>
</Head>
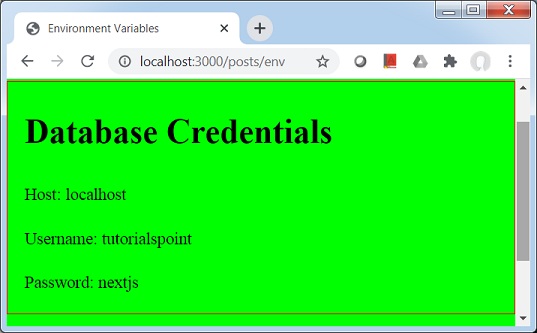
<h1>Database Credentials</h1>
<p>Host: {props.host}</p>
<p>Username: {props.username}</p>
<p>Password: {props.password}</p>
</Container>
</>
)
}
export async function getStaticProps() {
// Connect to Database using DB properties
return {
props: {
host: process.env.DB_HOST,
username: process.env.DB_USER,
password: process.env.DB_PASS
}
}
}
Now start the server.
Next.JS will detect .env.local and show follwing message on console.
npm run dev

> nextjs@1.0.0 dev D:\Node\nextjs
> next

ready - started server on http://localhost:3000
info  - Loaded env from D:\Node\nextjs\.env.local
event - compiled successfully
wait  - compiling...
event - compiled successfully
event - build page: /posts/env
wait  - compiling...
event - compiled successfully
Verify Output
Open localhost:3000/posts/env in a browser and you will see the following output.
Next.js - Deployment
So far we've developed and run sample NEXT.JS application in dev mode, now we'll do the production ready deployment locally using following steps.
npm run build − Build the production ready, highly optimized build.
npm run start − Start the server.
The production ready build lacks source maps and hot code reloading as compared to dev mode as those features are primarily used in debugging.
Prepare Build
Run the following command to prepare production ready build −.
npm run build

> nextjs@1.0.0 build \Node\nextjs
> next build

info  - Loaded env from \Node\nextjs\.env.local
Creating an optimized production build

Compiled successfully.

Automatically optimizing pages

Page                                                           Size     First Load JS
+ ? /                                                          2.25 kB        60.3 kB
+   /_app                                                      288 B          58.1 kB
+        /404                                                       3.25 kB   61.3 kB
+ ? /api/user
+ ? /posts/[id]                                                312 B          61.6 kB
+   + /posts/one
+   + /posts/two
+ ? /posts/env                                                 2.71 kB        60.8 kB
+ ? /posts/first                                               374 B          61.7 kB
+ First Load JS shared by all                                  58.1 kB
  + static/pages/_app.js                                       288 B
  + chunks/3458401054237127135bcd3ee8eb2a19d67af299.a1a019.js  10.5 kB
  + chunks/framework.c6faae.js                                 40 kB
  + runtime/main.60464f.js                                     6.54 kB
  + runtime/webpack.c21266.js                                  746 B
  + css/9706b5b8ed8e82c0fba0.css                               175 B

?  (Server)  server-side renders at runtime (uses getInitialProps or getServerSideProps)
          (Static)  automatically rendered as static HTML (uses no initial props)
?  (SSG)     automatically generated as static HTML + JSON (uses getStaticProps)
Start the server
Run the following command to start production server −.
npm run start

> nextjs@1.0.0 start \Node\nextjs
> next start

info  - Loaded env from \Node\nextjs\.env.local
ready - started server on http://localhost:3000
Verify Output
Open localhost:3000/api/user in a browser and you will see the following output.
{"name":"Robert"}
Next.js - CLI
NEXT.JS provides a CLI to start, build and export application. It can be invoked using npx which comes npm 5.2 onwards.
CLI Help
To get list of CLI commands and help on them, type the following command.
npx next -h
   Usage
      $ next <command>

   Available commands
      build, start, export, dev, telemetry

   Options
      --version, -v   Version number
      --help, -h      Displays this message

   For more information run a command with the --help flag
      $ next build --help
Build Production Ready Build
Type the following command.
npx next build
info  - Loaded env from D:\Node\nextjs\.env.local
Creating an optimized production build

Compiled successfully.

Automatically optimizing pages

Page                                                           Size     First Load JS
+ ? /                                                          2.25 kB        60.3 kB
+   /_app                                                      288 B          58.1 kB
+        /404                                                       3.25 kB   61.3 kB
+ ? /api/user
+ ? /posts/[id]                                                312 B          61.6 kB
+   + /posts/one
+   + /posts/two
+ ? /posts/env                                                 2.71 kB        60.8 kB
+ ? /posts/first                                               374 B          61.7 kB
+ First Load JS shared by all                                  58.1 kB
  + static/pages/_app.js                                       288 B
  + chunks/ab55cb957ceed242a750c37a082143fb9d2f0cdf.a1a019.js  10.5 kB
  + chunks/framework.c6faae.js                                 40 kB
  + runtime/main.60464f.js                                     6.54 kB
  + runtime/webpack.c21266.js                                  746 B
  + css/9706b5b8ed8e82c0fba0.css                               175 B

?  (Server)  server-side renders at runtime (uses getInitialProps or getServerSideProps)
          (Static)  automatically rendered as static HTML (uses no initial props)
?  (SSG)     automatically generated as static HTML + JSON (uses getStaticProps)
Build and Start Development Server
Type the following command.
npx next dev

ready - started server on http://localhost:3000
info  - Loaded env from D:\Node\nextjs\.env.local
event - compiled successfully
Start the production Server
Type the following command.
npx next start

info  - Loaded env from \Node\nextjs\.env.local
ready - started server on http://localhost:3000