- MVVM Tutorial
- MVVM - Home
- MVVM – Introduction
- MVVM - Advantages
- MVVM - Responsibilities
- MVVM - First Application
- MVVM - Hooking Up Views
- MVVM - Hooking Up ViewModel
- MVVM - WPF Data Bindings
- MVVM - WPF Data Templates
- MVVM - ViewModel Communication
- MVVM - Hierarchies & Navigation
- MVVM - Validations
- MVVM - Dependency Injection
- MVVM - Events
- MVVM - Unit Testing
- MVVM - Frameworks
- MVVM - Interview Questions
- MVVM Useful Resources
- MVVM - Quick Guide
- MVVM - Useful Resources
- MVVM - Discussion
MVVM - Quick Guide
MVVM – Introduction
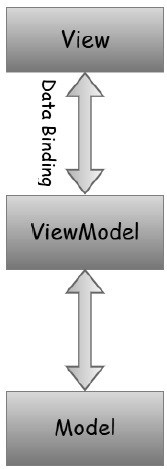
The well-ordered and perhaps the most reusable way to organize your code is to use the 'MVVM' pattern. The Model, View, ViewModel (MVVM pattern) is all about guiding you in how to organize and structure your code to write maintainable, testable and extensible applications.
Model − It simply holds the data and has nothing to do with any of the business logic.
ViewModel − It acts as the link/connection between the Model and View and makes stuff look pretty.
View − It simply holds the formatted data and essentially delegates everything to the Model.
Separated Presentation
To avoid the problems caused by putting application logic in code-behind or XAML, it's best to use a technique known as separated presentation. We're trying to avoid this, where we will have XAML and code-behind with the minimum required for working with user interface objects directly. User interface classes also contain code for complex interaction behaviors, application logic, and everything else as shown in the following figure on the left side.
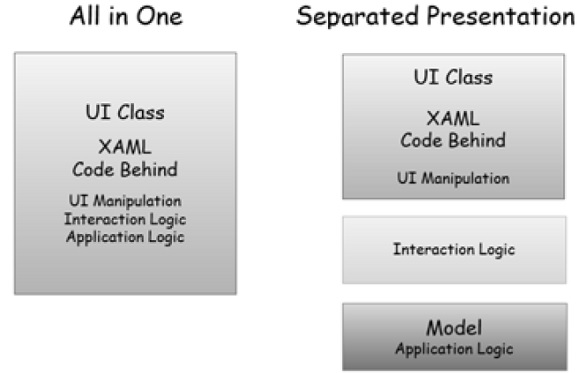
With separated presentation, the user interface class is much simpler. It has the XAML of course, but the code behind does as little as is practical.
The application logic belongs in a separate class, which is often referred to as the model.
However, this is not the whole story. If you stop here, you're likely to repeat a very common mistake that will lead you down the path of data binding insanity.
A lot of developers attempt to use data binding to connect elements in the XAML directly to properties in the model.
Now sometimes this can be okay, but often it's not. The problem is the model is entirely concerned with matters of what the application does, and not with how the user interacts with the application.
The way in which you present data is often somewhat different from how it's structured internally.
Moreover, most user interfaces have some state that does not belong in the application model.
For example, if your user interface uses a drag and drop, something needs to keep track of things like where the item being dragged is right now, how its appearance should change as it moves over possible drop targets, and how those drop targets might also change as the item is dragged over them.
This sort of state can get surprisingly complex, and needs to be thoroughly tested.
In practice, you normally want some other class sitting between the user interface and the model. This has two important roles.
First, it adapts your application model for a particular user interface view.
Second, it's where any nontrivial interaction logic lives, and by that, I mean code required to get your user interface to behave in the way you want.
MVVM – Advantages
MVVM pattern is ultimately the modern structure of the MVC pattern, so the main goal is still the same to provide a clear separation between domain logic and presentation layer. Here are some of the advantages and disadvantages of MVVM pattern.
The key benefit is allowing true separation between the View and Model beyond achieving separation and the efficiency that you gain from having that. What that means in real terms is that when your model needs to change, it can be changed easily without the view needing to and vice-versa.
There are three important key things that flow out of applying MVVM which are as follows.
Maintainability
A clean separation of different kinds of code should make it easier to go into one or several of those more granular and focused parts and make changes without worrying.
That means you can remain agile and keep moving out to new releases quickly.
Testability
With MVVM each piece of code is more granular and if it is implemented right your external and internal dependences are in separate pieces of code from the parts with the core logic that you would like to test.
That makes it a lot easier to write unit tests against a core logic.
Make sure it works right when written and keeps working even when things change in maintenance.
Extensibility
It sometimes overlaps with maintainability, because of the clean separation boundaries and more granular pieces of code.
You have a better chance of making any of those parts more reusable.
It has also the ability to replace or add new pieces of code that do similar things into the right places in the architecture.
The obvious purpose of MVVM pattern is abstraction of the View which reduces the amount of business logic in code-behind. However, following are some other solid advantages −
- The ViewModel is easier to unit test than code-behind or event-driven code.
- You can test it without awkward UI automation and interaction.
- The presentation layer and the logic is loosely coupled.
Disadvantages
- Some people think that for simple UIs, MVVM can be overkill.
- Similarly in bigger cases, it can be hard to design the ViewModel.
- Debugging would be bit difficult when we have complex data bindings.
MVVM – Responsibilities
MVVM pattern consists of three parts − Model, View, and ViewModel. Most of the developers at the start are little confused as to what a Model, View and ViewModel should or shouldn't contain and what are the responsibilities of each part.
In this chapter we will learn the responsibilities of each part of the MVVM pattern so that you can clearly understand what kind of code goes where. MVVM is really a layered architecture for the client side as shown in the following figure.
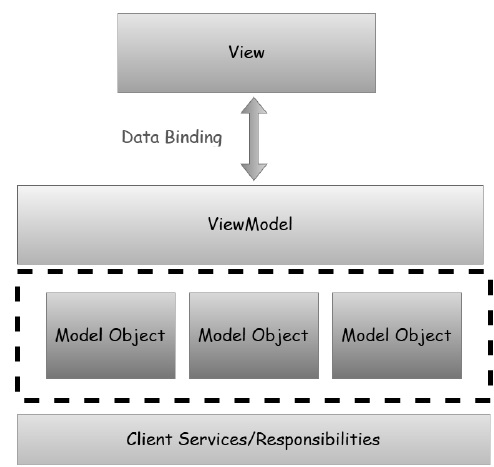
The presentation layer is composed of the views.
The logical layer are the view models.
The presentation layer is the combination of the model objects.
The client services that produce and persist them either directed access in a two-tier application or via service calls in and then to your application.
The client services are not officially part of the MVVM pattern but it is often used with MVVM to achieve further separations and avoid duplicate code.
Model Responsibilities
In general, model is the simplest one to understand. It is the client side data model that supports the views in the application.
It is composed of objects with properties and some variables to contain data in memory.
Some of those properties may reference other model objects and create the object graph which as a whole is the model objects.
Model objects should raise property change notifications which in WPF means data binding.
The last responsibility is validation which is optional, but you can embed the validation information on the model objects by using the WPF data binding validation features via interfaces like INotifyDataErrorInfo/IDataErrorInfo
View Responsibilities
The main purpose and responsibilities of views is to define the structure of what the user sees on the screen. The structure can contain static and dynamic parts.
Static parts are the XAML hierarchy that defines the controls and layout of controls that a view is composed of.
Dynamic part is like animations or state changes that are defined as part of the View.
The primary goal of MVVM is that there should be no code behind in the view.
It’s impossible that there is no code behind in view. In view you at least need the constructor and a call to initialize component.
The idea is that the event handling, action and data manipulation logic code shouldn’t be in the code behind in View.
There are also other kinds of code that have to go in the code behind any code that's required to have a reference to UI element is inherently view code.
ViewModel Responsibilities
ViewModel is the main point of MVVM application. The primary responsibility of the ViewModel is to provide data to the view, so that view can put that data on the screen.
It also allows the user to interact with data and change the data.
The other key responsibility of a ViewModel is to encapsulate the interaction logic for a view, but it does not mean that all of the logic of the application should go into ViewModel.
It should be able to handle the appropriate sequencing of calls to make the right thing happen based on user or any changes on the view.
ViewModel should also manage any navigation logic like deciding when it is time to navigate to a different view.
MVVM – First Application
In this chapter, we will learn how to use MVVM patterns for simple input screen and the WPF application that you may already be used to.
Let’s have a look at a simple example in which we will be using MVVM approach.
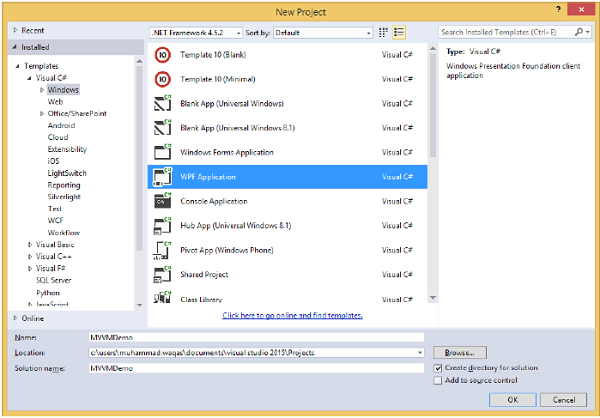
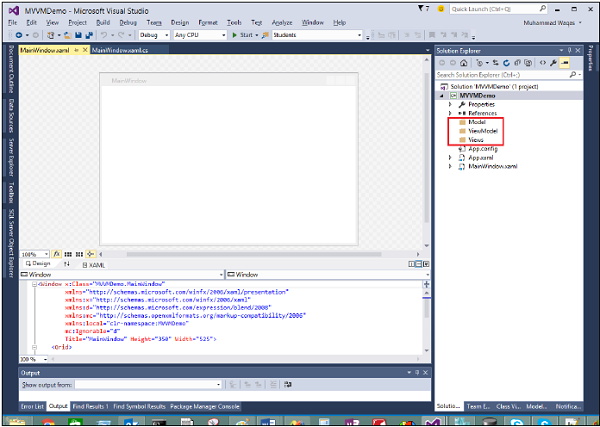
Step 1 − Create a new WPF Application project MVVMDemo.
Step 2 − Add the three folders (Model, ViewModel, and Views) into your project.
Step 3 − Add a StudentModel class in the Model folder and paste the below code in that class
using System.ComponentModel;

namespace MVVMDemo.Model {

   public class StudentModel {}

   public class Student : INotifyPropertyChanged {
      private string firstName;
      private string lastName;

      public string FirstName {
         get {
            return firstName;
         }

         set {
            if (firstName != value) {
               firstName = value;
               RaisePropertyChanged("FirstName");
               RaisePropertyChanged("FullName");
            }
         }
      }

      public string LastName {
         get {return lastName; }

         set {
            if (lastName != value) {
               lastName = value;
               RaisePropertyChanged("LastName");
               RaisePropertyChanged("FullName");
            }
         }
      }

      public string FullName {
         get {
            return firstName + " " + lastName;
         }
      }

      public event PropertyChangedEventHandler PropertyChanged;

      private void RaisePropertyChanged(string property) {
         if (PropertyChanged != null) {
            PropertyChanged(this, new PropertyChangedEventArgs(property));
         }
      }
   }
}
Step 4 − Add another StudentViewModel class into ViewModel folder and paste the following code.
using MVVMDemo.Model;
using System.Collections.ObjectModel;

namespace MVVMDemo.ViewModel {

   public class StudentViewModel {

      public ObservableCollection<Student> Students {
         get;
         set;
      }

      public void LoadStudents() {
         ObservableCollection<Student> students = new ObservableCollection<Student>();

         students.Add(new Student { FirstName = "Mark", LastName = "Allain" });
         students.Add(new Student { FirstName = "Allen", LastName = "Brown" });
         students.Add(new Student { FirstName = "Linda", LastName = "Hamerski" });

         Students = students;
      }
   }
}
Step 5 − Add a new User Control (WPF) by right click Views folder and Select Add > New Item…
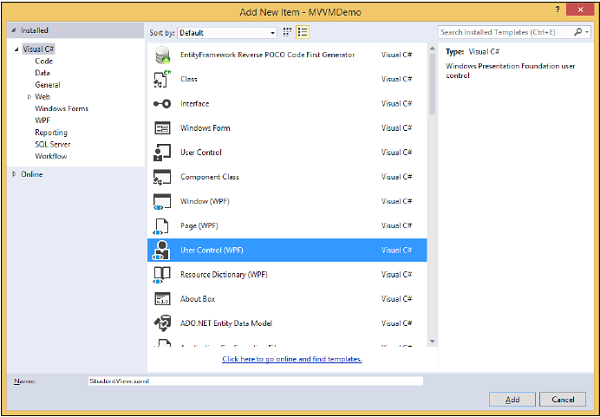
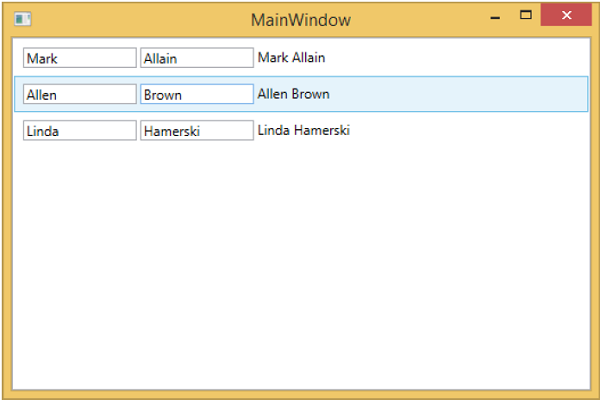
Step 6 − Click Add button. Now you will see the XAML file. Add the following code into StudentView.xaml file which contains different UI elements.
<UserControl x:Class = "MVVMDemo.Views.StudentView"
   xmlns = "http://schemas.microsoft.com/winfx/2006/xaml/presentation"
   xmlns:x = "http://schemas.microsoft.com/winfx/2006/xaml"
   xmlns:mc = "http://schemas.openxmlformats.org/markup-compatibility/2006"
   xmlns:d = "http://schemas.microsoft.com/expression/blend/2008"
   xmlns:local = "clr-namespace:MVVMDemo.Views"
   mc:Ignorable = "d"
   d:DesignHeight = "300" d:DesignWidth = "300">

   <Grid>
      <StackPanel HorizontalAlignment = "Left">

         <ItemsControl ItemsSource = "{Binding Path = Students}">

            <ItemsControl.ItemTemplate>
               <DataTemplate>
                  <StackPanel Orientation = "Horizontal">
                     <TextBox Text = "{Binding Path = FirstName, Mode = TwoWay}"
                        Width = "100" Margin = "3 5 3 5"/>

                     <TextBox Text = "{Binding Path = LastName, Mode = TwoWay}"
                        Width = "100" Margin = "0 5 3 5"/>

                     <TextBlock Text = "{Binding Path = FullName, Mode = OneWay}"
                        Margin = "0 5 3 5"/>

                  </StackPanel>
               </DataTemplate>
            </ItemsControl.ItemTemplate>

         </ItemsControl>

      </StackPanel>
   </Grid>

</UserControl>
Step 7 − Now add the StudentView into your MainPage.xaml file using the following code.
<Window x:Class = "MVVMDemo.MainWindow"
   xmlns = "http://schemas.microsoft.com/winfx/2006/xaml/presentation"
   xmlns:x = "http://schemas.microsoft.com/winfx/2006/xaml"
   xmlns:d = "http://schemas.microsoft.com/expression/blend/2008"
   xmlns:mc = "http://schemas.openxmlformats.org/markup-compatibility/2006"
   xmlns:local = "clr-namespace:MVVMDemo"
   xmlns:views = "clr-namespace:MVVMDemo.Views"
   mc:Ignorable = "d"
   Title = "MainWindow" Height = "350" Width = "525">

   <Grid>
      <views:StudentView x:Name = "StudentViewControl" Loaded = "StudentViewControl_Loaded"/>
   </Grid>

</Window>
Step 8 − Here is the implementation for Loaded event in the MainPage.xaml.cs file, which will update the View from the ViewModel.
using System.Windows;

namespace MVVMDemo {

   /// <summary>
      /// Interaction logic for MainWindow.xaml
   /// </summary>

   public partial class MainWindow : Window {

      public MainWindow() {
         InitializeComponent();
      }

      private void StudentViewControl_Loaded(object sender, RoutedEventArgs e) {
         MVVMDemo.ViewModel.StudentViewModel studentViewModelObject =
            new MVVMDemo.ViewModel.StudentViewModel();
         studentViewModelObject.LoadStudents();

         StudentViewControl.DataContext = studentViewModelObject;
      }
   }
}
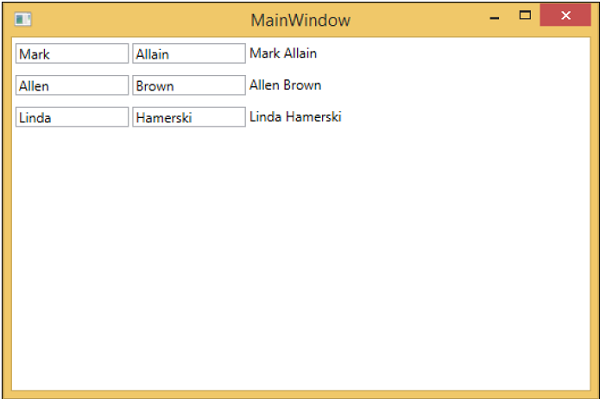
Step 9 − When the above code is compiled and executed, you will receive the following output on your main window.
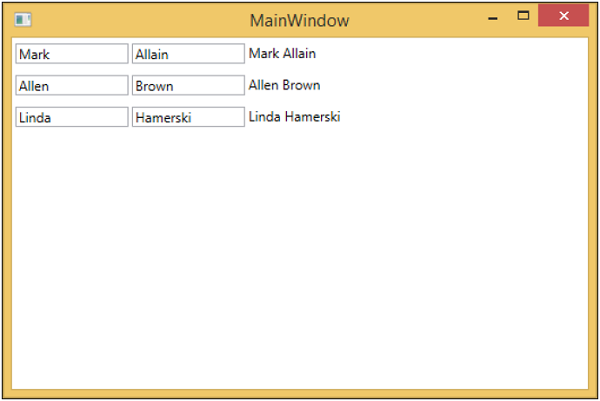
We recommend you to execute the above example in a step-by-step manner for better understanding.
MVVM – Hooking Up Views
In this chapter, we will cover different ways in which you can get your views hooked up to ViewModel. First, let's have a look at View first construction where we can declare it in XAML. As we have seen the example in the last chapter where we have hooked up a view from the main window. Now we will see other ways to hook up views.
We will be using the same example in this chapter as well. Following is the same Model class implementation.
using System.ComponentModel;

namespace MVVMDemo.Model {

   public class StudentModel {}

   public class Student : INotifyPropertyChanged {
      private string firstName;
      private string lastName;

      public string FirstName {
         get { return firstName; }

         set {
            if (firstName != value) {
               firstName = value;
               RaisePropertyChanged("FirstName");
               RaisePropertyChanged("FullName");
            }
         }
      }

      public string LastName {
         get { return lastName; }

         set {
            if (lastName != value) {
               lastName = value;
               RaisePropertyChanged("LastName");
               RaisePropertyChanged("FullName");
            }
         }
      }

      public string FullName {
         get {
            return firstName + " " + lastName;
         }
      }

      public event PropertyChangedEventHandler PropertyChanged;

      private void RaisePropertyChanged(string property) {
         if (PropertyChanged != null) {
            PropertyChanged(this, new PropertyChangedEventArgs(property));
         }
      }
   }
}
Here is the ViewModel class implementation. This time LoadStudents method is called in the default constructor.
using MVVMDemo.Model;
using System.Collections.ObjectModel;

namespace MVVMDemo.ViewModel{

   public class StudentViewModel {

      public StudentViewModel() {
         LoadStudents();
      }

      public ObservableCollection<Student> Students {
         get;
         set;
      }

      public void LoadStudents() {
         ObservableCollection<Student> students = new ObservableCollection<Student>();

         students.Add(new Student { FirstName = "Mark", LastName = "Allain" });
         students.Add(new Student { FirstName = "Allen", LastName = "Brown" });
         students.Add(new Student { FirstName = "Linda", LastName = "Hamerski" });

         Students = students;
      }
   }
}
Whether the view is a Window, User Control or Page, parser generally works top to bottom and left to right. It calls the default constructor for each element as it encounters it. There are two ways to construct a view. You can use any on them.
- View First Construction in XAML
- View First Construction in Code-behind
View First Construction in XAML
One way is to simply add your ViewModel as a nested element in the setter for the DataContext property as shown in the following code.
<UserControl.DataContext>
   <viewModel:StudentViewModel/>
</UserControl.DataContext>
Here is the complete View XAML file.
<UserControl x:Class="MVVMDemo.Views.StudentView"
   xmlns = "http://schemas.microsoft.com/winfx/2006/xaml/presentation"
   xmlns:x = "http://schemas.microsoft.com/winfx/2006/xaml"
   xmlns:mc = "http://schemas.openxmlformats.org/markup-compatibility/2006"
   xmlns:d = "http://schemas.microsoft.com/expression/blend/2008"
   xmlns:local = "clr-namespace:MVVMDemo.Views"
   xmlns:viewModel = "clr-namespace:MVVMDemo.ViewModel"
   mc:Ignorable = "d"
   d:DesignHeight = "300" d:DesignWidth = "300">

   <UserControl.DataContext>
      <viewModel:StudentViewModel/>
   </UserControl.DataContext>

   <Grid>
      <StackPanel HorizontalAlignment = "Left">
         <ItemsControl ItemsSource = "{Binding Path = Students}">

            <ItemsControl.ItemTemplate>
               <DataTemplate>

                  <StackPanel Orientation = "Horizontal">
                     <TextBox Text = "{Binding Path = FirstName, Mode = TwoWay}"
                        Width = "100" Margin = "3 5 3 5"/>

                      <TextBox Text = "{Binding Path = LastName, Mode = TwoWay}"
                        Width = "100" Margin = "0 5 3 5"/>

                     <TextBlock Text = "{Binding Path = FullName, Mode = OneWay}"
                        Margin = "0 5 3 5"/>

                  </StackPanel>

               </DataTemplate>
            </ItemsControl.ItemTemplate>

         </ItemsControl>
      </StackPanel>
   </Grid>

</UserControl>
View First Construction in Code-behind
Another way is that you can get View first construction is by simply constructing the view model yourself in the code behind of your View by setting the DataContext property there with the instance.
Typically, the DataContext property is set in the constructor method of view, but you could also defer the construction until the Load event of the view fires.
using System.Windows.Controls;

namespace MVVMDemo.Views {

   /// <summary>
      /// Interaction logic for StudentView.xaml
   /// </summary>

   public partial class StudentView : UserControl {
      public StudentView() {
         InitializeComponent();
         this.DataContext = new MVVMDemo.ViewModel.StudentViewModel();
      }
   }
}
One reason for constructing the view model in Code-behind instead of XAML is that the View model constructor takes parameters, but XAML parsing can only construct elements if defined in default constructor.
Now in this case the XAML file of View will look like as shown in the following code.
<UserControl x:Class = "MVVMDemo.Views.StudentView"
   xmlns = "http://schemas.microsoft.com/winfx/2006/xaml/presentation"
   xmlns:x = "http://schemas.microsoft.com/winfx/2006/xaml"
   xmlns:mc = "http://schemas.openxmlformats.org/markup-compatibility/2006"
   xmlns:d = "http://schemas.microsoft.com/expression/blend/2008"
   xmlns:local = "clr-namespace:MVVMDemo.Views"
   mc:Ignorable = "d"
   d:DesignHeight = "300"
   d:DesignWidth = "300">

   <Grid>
      <StackPanel HorizontalAlignment = "Left">
         <ItemsControl ItemsSource = "{Binding Path = Students}">

            <ItemsControl.ItemTemplate>
               <DataTemplate>

                  <StackPanel Orientation = "Horizontal"<
                     <TextBox Text = "{Binding Path = FirstName, Mode = TwoWay}"
                        Width = "100" Margin = "3 5 3 5"/>

                     <TextBox Text = "{Binding Path = LastName, Mode = TwoWay}"
                        Width = "100" Margin = "0 5 3 5"/>

                     <TextBlock Text = "{Binding Path = FullName, Mode = OneWay}"
                        Margin = "0 5 3 5"/>

                  </StackPanel>

               </DataTemplate>
            </ItemsControl.ItemTemplate>

         </ItemsControl>
      </StackPanel>
   </Grid>

</UserControl>
You can declare this View in the MainWindow as shown in the MainWindow.XAML file.
<Window x:Class = "MVVMDemo.MainWindow"
   xmlns = "http://schemas.microsoft.com/winfx/2006/xaml/presentation"
   xmlns:x = "http://schemas.microsoft.com/winfx/2006/xaml"
   xmlns:d = "http://schemas.microsoft.com/expression/blend/2008"
   xmlns:mc = "http://schemas.openxmlformats.org/markup-compatibility/2006"
   xmlns:local = "clr-namespace:MVVMDemo"
   xmlns:views = "clr-namespace:MVVMDemo.Views"
   mc:Ignorable = "d"
   Title = "MainWindow" Height = "350" Width = "525">

   <Grid>
      <views:StudentView x:Name = "StudentViewControl"/>
   </Grid>

</Window>
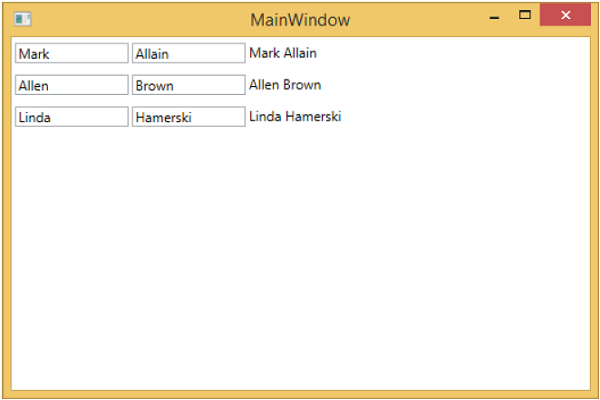
When the above code is compiled and executed, you will see the following output on your main window.

We recommend you to execute the above example in a step-by-step manner for better understanding.
MVVM – Hooking Up ViewModel
In this chapter, we will cover how to hook up ViewModel. It is a continuation of the last chapter in which we discussed the View first construction. Now, the next form of the first construction is a meta-pattern which is known as ViewModelLocator. It is a pseudo pattern and is layered on top of the MVVM pattern.
In MVVM each View needs to be hooked up to its ViewModel.
The ViewModelLocator is a simple approach to centralize the code and decoupling the view more.
It means that it does not have to explicitly know about ViewModel type and how to construct it.
There are a number of different approaches to use ViewModelLocator, but here we use the most similar to the one that's part of the PRISM framework.
ViewModelLocator provides a standard, consistent, declarative and loosely coupled way to do view first construction which automates the process of getting ViewModel hooked up to the View. The following figure represents the high level process of ViewModelLocator.
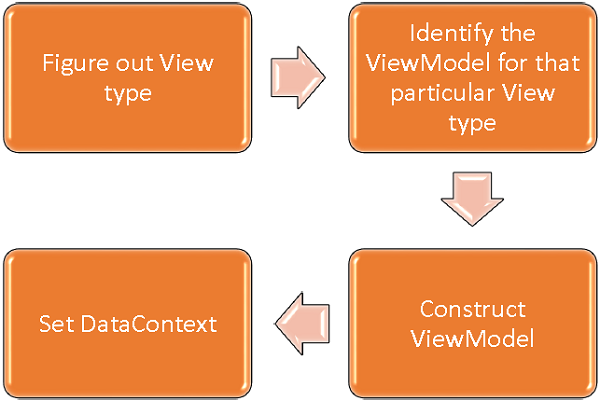
Step 1 − Figure out which View type is being constructed.
Step 2 − Identify the ViewModel for that particular View type.
Step 3 − Construct that ViewModel.
Step 4 − Set the Views DataContext to the ViewModel.
To understand the basic concept, let's have a look at the simple example of ViewModelLocator by continuing the same example from the last chapter. If you look at the StudentView.xaml file, you will see that we have statically hooked up the ViewModel.
Now as shown in the following program, comment these XAML code also remove the code from Code-behind.
<UserControl x:Class = "MVVMDemo.Views.StudentView"
   xmlns = "http://schemas.microsoft.com/winfx/2006/xaml/presentation"
   xmlns:x = "http://schemas.microsoft.com/winfx/2006/xaml"
   xmlns:mc = "http://schemas.openxmlformats.org/markup-compatibility/2006"
   xmlns:d = "http://schemas.microsoft.com/expression/blend/2008"
   xmlns:local = "clr-namespace:MVVMDemo.Views"
   xmlns:viewModel = "clr-namespace:MVVMDemo.ViewModel"
   mc:Ignorable = "d" d:DesignHeight = "300" d:DesignWidth = "300">

   <!--<UserControl.DataContext>
      <viewModel:StudentViewModel/>
   </UserControl.DataContext>-->

   <Grid>
      <StackPanel HorizontalAlignment = "Left">
         <ItemsControl ItemsSource = "{Binding Path = Students}">
            <ItemsControl.ItemTemplate>
               <DataTemplate>

                  <StackPanel Orientation = "Horizontal">
                     <TextBox Text = "{Binding Path = FirstName, Mode = TwoWay}"
                        Width = "100" Margin = "3 5 3 5"/>

                     <TextBox Text = "{Binding Path = LastName, Mode = TwoWay}"
                        Width = "100" Margin = "0 5 3 5"/>

                     <TextBlock Text = "{Binding Path = FullName, Mode = OneWay}"
                        Margin = "0 5 3 5"/>

                  </StackPanel>

               </DataTemplate>
            </ItemsControl.ItemTemplate>
         </ItemsControl>
      </StackPanel>
   </Grid>

</UserControl>
Now let’s create a new folder VML and add a new public class ViewModelLocator which will contain a single attached property (dependency property) AutoHookedUpViewModel as shown in the following code.
public static bool GetAutoHookedUpViewModel(DependencyObject obj) {
   return (bool)obj.GetValue(AutoHookedUpViewModelProperty);
}

public static void SetAutoHookedUpViewModel(DependencyObject obj, bool value) {
   obj.SetValue(AutoHookedUpViewModelProperty, value);
}

// Using a DependencyProperty as the backing store for AutoHookedUpViewModel.
//This enables animation, styling, binding, etc...

public static readonly DependencyProperty AutoHookedUpViewModelProperty =
   DependencyProperty.RegisterAttached("AutoHookedUpViewModel",
   typeof(bool), typeof(ViewModelLocator), new PropertyMetadata(false,
   AutoHookedUpViewModelChanged));
And now you can see a basic attach property definition. To add behavior to the property, we need to add a changed event handler for this property which contains the automatic process of hooking up the ViewModel for View. The code to do this is as follows −
private static void AutoHookedUpViewModelChanged(DependencyObject d,
   DependencyPropertyChangedEventArgs e) {
   if (DesignerProperties.GetIsInDesignMode(d)) return;
   var viewType = d.GetType();
   string str = viewType.FullName;
   str = str.Replace(".Views.", ".ViewModel.");

   var viewTypeName = str;
   var viewModelTypeName = viewTypeName + "Model";
   var viewModelType = Type.GetType(viewModelTypeName);
   var viewModel = Activator.CreateInstance(viewModelType);
   ((FrameworkElement)d).DataContext = viewModel;
}
Following is the complete implementation of ViewModelLocator class.
using System;
using System.ComponentModel;
using System.Windows;

namespace MVVMDemo.VML {

   public static class ViewModelLocator {

      public static bool GetAutoHookedUpViewModel(DependencyObject obj) {
         return (bool)obj.GetValue(AutoHookedUpViewModelProperty);
      }

      public static void SetAutoHookedUpViewModel(DependencyObject obj, bool value) {
         obj.SetValue(AutoHookedUpViewModelProperty, value);
      }

      // Using a DependencyProperty as the backing store for AutoHookedUpViewModel.

      //This enables animation, styling, binding, etc...
      public static readonly DependencyProperty AutoHookedUpViewModelProperty =
         DependencyProperty.RegisterAttached("AutoHookedUpViewModel",
         typeof(bool), typeof(ViewModelLocator), new
         PropertyMetadata(false, AutoHookedUpViewModelChanged));

      private static void AutoHookedUpViewModelChanged(DependencyObject d,
         DependencyPropertyChangedEventArgs e) {
         if (DesignerProperties.GetIsInDesignMode(d)) return;
         var viewType = d.GetType();

         string str = viewType.FullName;
         str = str.Replace(".Views.", ".ViewModel.");

         var viewTypeName = str;
         var viewModelTypeName = viewTypeName + "Model";
         var viewModelType = Type.GetType(viewModelTypeName);
         var viewModel = Activator.CreateInstance(viewModelType);

        ((FrameworkElement)d).DataContext = viewModel;
      }
   }
}
First thing to do is to add a namespace so that we can get to that ViewModelLocator type in the root of our project. Then on route element which is a view type, add AutoHookedUpViewModel property and set it to true.
xmlns:vml = "clr-namespace:MVVMDemo.VML"
vml:ViewModelLocator.AutoHookedUpViewModel = "True"
Here is the complete implementation of StudentView.xaml file.
<UserControl x:Class = "MVVMDemo.Views.StudentView"
   xmlns = "http://schemas.microsoft.com/winfx/2006/xaml/presentation"
   xmlns:x = "http://schemas.microsoft.com/winfx/2006/xaml"
   xmlns:mc = "http://schemas.openxmlformats.org/markup-compatibility/2006"
   xmlns:d = "http://schemas.microsoft.com/expression/blend/2008"
   xmlns:local = "clr-namespace:MVVMDemo.Views"
   xmlns:viewModel = "clr-namespace:MVVMDemo.ViewModel"
   xmlns:vml = "clr-namespace:MVVMDemo.VML"
   vml:ViewModelLocator.AutoHookedUpViewModel = "True"
   mc:Ignorable = "d" d:DesignHeight = "300" d:DesignWidth = "300">

   <!--<UserControl.DataContext>
      <viewModel:StudentViewModel/>
   </UserControl.DataContext>-->

   <Grid>
      <StackPanel HorizontalAlignment = "Left">
         <ItemsControl ItemsSource = "{Binding Path = Students}">
            <ItemsControl.ItemTemplate>
               <DataTemplate>

                  <StackPanel Orientation = "Horizontal">
                     <TextBox Text = "{Binding Path = FirstName, Mode = TwoWay}"
                        Width = "100" Margin = "3 5 3 5"/>

                     <TextBox Text = "{Binding Path = LastName, Mode = TwoWay}"
                        Width = "100" Margin = "0 5 3 5"/>

                     <TextBlock Text = "{Binding Path = FullName, Mode = OneWay}"
                        Margin = "0 5 3 5"/>

                  </StackPanel>

               </DataTemplate>
            </ItemsControl.ItemTemplate>
         </ItemsControl>
      </StackPanel>
   </Grid>

</UserControl>
When the above code is compiled and executed, you will see that ViewModelLocator is hooking up the ViewModel for that particular View.
A key thing to notice about this is the view is no longer coupled in a way to what the type of its ViewModel is or how it gets constructed. That’s all been moved out to the central location inside the ViewModelLocator.
MVVM – WPF Data Bindings
In this chapter, we will be learn how data binding supports the MVVM pattern. Data binding is the key feature that differentiates MVVM from other UI separation patterns like MVC and MVP.
For data binding you need to have a view or set of UI elements constructed, and then you need some other object that the bindings are going to point to.
The UI elements in a view are bound to the properties which are exposed by the ViewModel.
The order that the View and ViewModel are constructed on depends on the situation, as we have covered the View first.
A View and ViewModel get constructed and the DataContext of the View gets set to the ViewModel.
Bindings can either be OneWay or TwoWay data bindings to flow data back and forth between the View and ViewModel.
Let's take a look at data bindings in the same example. Below is the XAML code of StudentView.
<UserControl x:Class = "MVVMDemo.Views.StudentView"
   xmlns = "http://schemas.microsoft.com/winfx/2006/xaml/presentation"
   xmlns:x = "http://schemas.microsoft.com/winfx/2006/xaml"
   xmlns:mc = "http://schemas.openxmlformats.org/markup-compatibility/2006"
   xmlns:d = "http://schemas.microsoft.com/expression/blend/2008"
   xmlns:local = "clr-namespace:MVVMDemo.Views"
   xmlns:viewModel = "clr-namespace:MVVMDemo.ViewModel"
   xmlns:vml = "clr-namespace:MVVMDemo.VML"
   vml:ViewModelLocator.AutoHookedUpViewModel = "True"
   mc:Ignorable = "d" d:DesignHeight = "300" d:DesignWidth = "300">

   <!--<UserControl.DataContext>
      <viewModel:StudentViewModel/>
   </UserControl.DataContext>-->

   <Grid>
      <StackPanel HorizontalAlignment = "Left">
         <ItemsControl ItemsSource = "{Binding Path = Students}">
            <ItemsControl.ItemTemplate>
               <DataTemplate>

                  <StackPanel Orientation = "Horizontal">
                     <TextBox Text = "{Binding Path = FirstName, Mode = TwoWay}"
                        Width = "100" Margin = "3 5 3 5"/>

                     <TextBox Text = "{Binding Path = LastName, Mode = TwoWay}"
                        Width = "100" Margin = "0 5 3 5"/>

                     <TextBlock Text = "{Binding Path = FullName, Mode = OneWay}"
                        Margin = "0 5 3 5"/>

                  </StackPanel>

               </DataTemplate>
            </ItemsControl.ItemTemplate>
         </ItemsControl>
      </StackPanel>
   </Grid>

</UserControl>
If you look at the above XAML code you will see that ItemsControl is bound to the Students collection exposed by ViewModel.
You can also see that the property of Student model has their own individual bindings as well, and these are bound to the Textboxes and TextBlock.
The ItemSource of ItemsControl is able to bind to the Students property, because the overall DataContext for the View is set to ViewModel.
The individual bindings of properties here are also DataContext bindings, but they're not binding against the ViewModel itself, because of the way an ItemSource works.
When an item source binds to its collection it renders out a container for each item at rendering, and it sets the DataContext of that container to the item. So the overall DataContext for each textbox and textblock within a row is going to be an individual Student in the collection. And you can also see that these bindings for TextBoxes are TwoWay data binding and for TextBlock it is OneWay data binding as you can’t edit TextBlock.
When you run this application again, you will see the following output.
Let us now change the text in the second textbox of first row from Allain to Upston and press tab to lose focus. You will see that the TextBlock text is also updated.
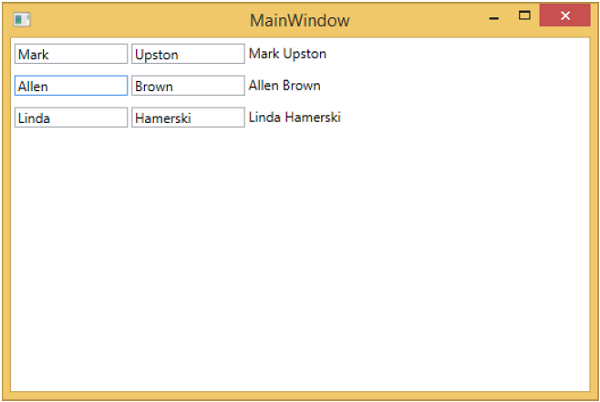
This is because the bindings of the TextBoxes are set to TwoWay and it updates the Model as well, and from the model again the TextBlock is updated.
MVVM – WPF Data Templates
A template describes the overall look and visual appearance of the control. For each control there is a default template associated with it which gives the appearance to that control. In WPF application, you can easily create your own templates when you want to customize the visual behavior and visual appearance of a control. Connectivity between the logic and template can be achieved by data binding.
In MVVM, there is another primary form which is known as ViewModel first construction.
ViewModel first construction approach leverages the capabilities of implicit data templates in WPF.
Implicit data templates can automatically select an appropriate template from the current resource dictionary for an element that uses data binding. They do this based on the type of data object which is rendered by data binding. First, you need to have some element that is binding to a data object.
Let’s take a look at our simple example again in which you will understand how you can do view model first leveraging data templates, specifically implicit data templates. Here is the implementation of our StudentViewModel class.
using MVVMDemo.Model;
using System.Collections.ObjectModel;

namespace MVVMDemo.ViewModel {

   public class StudentViewModel {

      public StudentViewModel() {
         LoadStudents();
      }

      public ObservableCollection<Student> Students {
         get;
         set;
      }

      public void LoadStudents() {
         ObservableCollection<Student> students = new ObservableCollection<Student>();

         students.Add(new Student { FirstName = "Mark", LastName = "Allain" });
         students.Add(new Student { FirstName = "Allen", LastName = "Brown" });
         students.Add(new Student { FirstName = "Linda", LastName = "Hamerski" });

         Students = students;
      }
   }
}
You can see that the above ViewModel is unchanged. We will continue with same example from the previous chapter. This ViewModel class just exposes the Students collection property and populates it on construction. Let's go to the StudentView.xaml file, remove the existing implementation and define a data template in Resources section.
<UserControl.Resources>
   <DataTemplate x:Key = "studentsTemplate">

      <StackPanel Orientation = "Horizontal">
         <TextBox Text = "{Binding Path = FirstName, Mode = TwoWay}"
            Width = "100" Margin = "3 5 3 5"/>

         <TextBox Text = "{Binding Path = LastName, Mode = TwoWay}"
            Width = "100" Margin = "0 5 3 5"/>

         <TextBlock Text = "{Binding Path = FullName, Mode = OneWay}"
            Margin = "0 5 3 5"/>
      </StackPanel>

   </DataTemplate>
</UserControl.Resources>
Now add a list box and data bind that list box to Students property as shown in the following code.
<ListBox ItemsSource = "{Binding Students}" ItemTemplate = "{StaticResource studentsTemplate}"/>
In the Resource section, the DataTemplate has a key of studentsTemplate and then to actually use that template, we need to use the ItemTemplate property of a ListBox. So now you can see that we instruct the listbox to go use that specific template for rendering out those Students. Following is the complete implementation of StudentView.xaml file.
<UserControl x:Class = "MVVMDemo.Views.StudentView"
   xmlns = "http://schemas.microsoft.com/winfx/2006/xaml/presentation"
   xmlns:x = "http://schemas.microsoft.com/winfx/2006/xaml"
   xmlns:mc = "http://schemas.openxmlformats.org/markup-compatibility/2006"
   xmlns:d = "http://schemas.microsoft.com/expression/blend/2008"
   xmlns:local = "clr-namespace:MVVMDemo.Views"
   xmlns:viewModel = "clr-namespace:MVVMDemo.ViewModel"
   xmlns:vml = "clr-namespace:MVVMDemo.VML"
   vml:ViewModelLocator.AutoHookedUpViewModel = "True"
   mc:Ignorable = "d" d:DesignHeight = "300" d:DesignWidth = "300">

   <UserControl.Resources>
      <DataTemplate x:Key = "studentsTemplate">

         <StackPanel Orientation = "Horizontal">
            <TextBox Text = "{Binding Path = FirstName, Mode = TwoWay}"
               Width = "100" Margin = "3 5 3 5"/>

            <TextBox Text = "{Binding Path = LastName, Mode = TwoWay}"
               Width = "100" Margin = "0 5 3 5"/>

            <TextBlock Text = "{Binding Path = FullName, Mode = OneWay}"
               Margin = "0 5 3 5"/>

         </StackPanel>

      </DataTemplate>
   </UserControl.Resources>

   <Grid>
      <ListBox
         ItemsSource = "{Binding Students}"
         ItemTemplate = "{StaticResource studentsTemplate}"/>
   </Grid>

</UserControl>
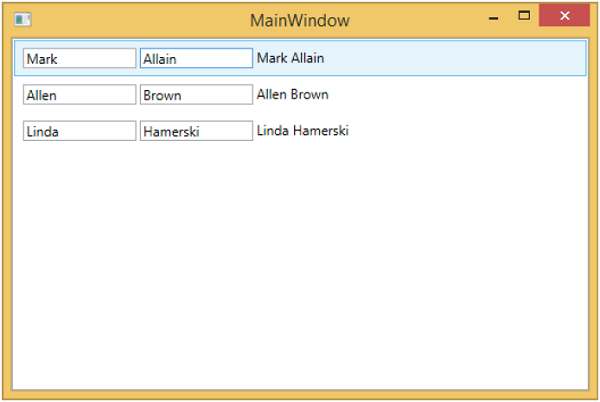
When the above code is compiled and executed, you will see the following window, which contains one ListBox. Each ListBoxItem contains the Student class object data which are displayed on TextBlock and Text boxes.
To make this an implicit template, we need to remove the ItemTemplate property from a list box and add a DataType property in our template definition as shown in the following code.
<UserControl.Resources>
   <DataTemplate DataType = "{x:Type data:Student}">

      <StackPanel Orientation = "Horizontal">
         <TextBox Text = "{Binding Path = FirstName, Mode = TwoWay}"
            Width = "100" Margin = "3 5 3 5"/>

         <TextBox Text = "{Binding Path = LastName, Mode = TwoWay}"
            Width = "100" Margin = "0 5 3 5"/>

         <TextBlock Text = "{Binding Path = FullName, Mode = OneWay}"
            Margin = "0 5 3 5"/>

      </StackPanel>

   </DataTemplate>
</UserControl.Resources>

<Grid>
   <ListBox ItemsSource = "{Binding Students}"/>
</Grid>
In DataTemplate, the x:Type markup extension is very important which is like a type of operator in XAML. So, basically we need to point to the Student data type which is in MVVMDemo.Model namespace. Following is the updated complete XAML file.
<UserControl x:Class="MVVMDemo.Views.StudentView"
   xmlns = "http://schemas.microsoft.com/winfx/2006/xaml/presentation"
   xmlns:x = "http://schemas.microsoft.com/winfx/2006/xaml"
   xmlns:mc = "http://schemas.openxmlformats.org/markup-compatibility/2006"
   xmlns:d = "http://schemas.microsoft.com/expression/blend/2008"
   xmlns:local = "clr-namespace:MVVMDemo.Views"
   xmlns:viewModel = "clr-namespace:MVVMDemo.ViewModel"
   xmlns:data = "clr-namespace:MVVMDemo.Model"
   xmlns:vml = "clr-namespace:MVVMDemo.VML"
   vml:ViewModelLocator.AutoHookedUpViewModel = "True"
   mc:Ignorable = "d" d:DesignHeight = "300" d:DesignWidth = "300">

   <UserControl.Resources>
      <DataTemplate DataType = "{x:Type data:Student}">

         <StackPanel Orientation = "Horizontal">
            <TextBox Text = "{Binding Path = FirstName, Mode = TwoWay}"
               Width = "100" Margin = "3 5 3 5"/>

            <TextBox Text = "{Binding Path = LastName, Mode = TwoWay}"
               Width = "100" Margin = "0 5 3 5"/>

            <TextBlock Text = "{Binding Path = FullName, Mode = OneWay}"
               Margin = "0 5 3 5"/>

         </StackPanel>

      </DataTemplate>
   </UserControl.Resources>

   <Grid>
      <ListBox ItemsSource = "{Binding Students}"/>
   </Grid>

</UserControl>
When you run this application again, you will still get the same rendering of the Students with data template because it's automatically mapping the type of the object being rendered by locating the appropriate DataTemplate.
We recommend you to execute the above example in a step-by-step method for better understanding.
MVVM – View / ViewModel Communication
In this chapter, we will learn how to add interactivity to MVVM applications and how to cleanly call logic. You will also see that all of this is done by maintaining the loose coupling and good structuring which is the heart of the MVVM pattern. To understand all this, first let us learn about commands.
View / ViewModel Communication via Commands
The command pattern has been well documented and frequently uses design pattern for a couple of decades. In this pattern there are two main actors, the invoker and the receiver.
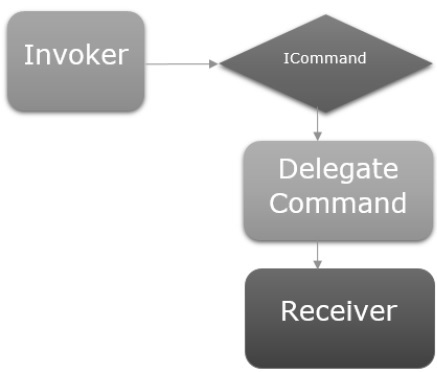
Invoker
The invoker is a piece of code which can execute some imperative logic.
Typically, it is a UI element that the user interacts with, in the context of a UI framework.
It could just be another chunk of logic code somewhere else in the application.
Receiver
The receiver is the logic that is intended for execution when the invoker fires.
In the context of MVVM, the receiver is typically a method in your ViewModel that needs to be called.
In between these two, you have an obstruction layer, which implies the invoker and receiver do not have to explicitly know about each other. This is typically represented as an interface abstraction exposed to the invoker and a concrete implementation of that interface is capable of calling the receiver.
Let’s have a look into a simple example in which you will learn the commands and how to use them to communicate Between View and ViewModel. In this chapter, we will continue with the same example from the last chapter.
In StudentView.xaml file, we have a ListBox which hooks up the student data from a ViewModel. Now let’s add a button for deleting a student from the ListBox.
The important thing is that working with commands on button is very easy because they have a command property to hook up to an ICommand.
So, we can expose a property on our ViewModel that has an ICommand and binds to it from the button’s command property as shown in the following code.
<Button Content = "Delete"
   Command = "{Binding DeleteCommand}"
   HorizontalAlignment = "Left"
   VerticalAlignment = "Top"
   Width = "75" />
Let’s add a new class in your project, which will implement the ICommand interface. Following is the implementation of ICommand interface.
using System;
using System.Windows.Input;

namespace MVVMDemo {

   public class MyICommand : ICommand {
      Action _TargetExecuteMethod;
      Func<bool> _TargetCanExecuteMethod;

      public MyICommand(Action executeMethod) {
         _TargetExecuteMethod = executeMethod;
      }

      public MyICommand(Action executeMethod, Func<bool> canExecuteMethod){
         _TargetExecuteMethod = executeMethod;
         _TargetCanExecuteMethod = canExecuteMethod;
      }

      public void RaiseCanExecuteChanged() {
         CanExecuteChanged(this, EventArgs.Empty);
      }

      bool ICommand.CanExecute(object parameter) {

         if (_TargetCanExecuteMethod != null) {
            return _TargetCanExecuteMethod();
         }

         if (_TargetExecuteMethod != null) {
            return true;
         }

         return false;
      }

      // Beware - should use weak references if command instance lifetime
         is longer than lifetime of UI objects that get hooked up to command

      // Prism commands solve this in their implementation
      public event EventHandler CanExecuteChanged = delegate { };

      void ICommand.Execute(object parameter) {
         if (_TargetExecuteMethod != null) {
            _TargetExecuteMethod();
         }
      }
   }
}
As you can see, this is a simple delegating implementation of ICommand where we have two delegates one for the executeMethod and one for the canExecuteMethod which can be passed in on construction.
In the above implementation, there are two overloaded constructors, one for only executeMethod and one for both executeMethod and I can canExecuteMethod.
Let’s add a property of MyICommand type in StudentView Model class. Now we need to construct an instance in the StudentViewModel. We will use the overloaded constructor of MyICommand that takes two parameters.
public MyICommand DeleteCommand { get; set;}

public StudentViewModel() {
   LoadStudents();
   DeleteCommand = new MyICommand(OnDelete, CanDelete);
}
Now add the implementation of OnDelete and CanDelete methods.
private void OnDelete() {
   Students.Remove(SelectedStudent);
}

private bool CanDelete() {
   return SelectedStudent != null;
}
We also need to add a new SelectedStudent so that the user can delete the Selected Item from ListBox.
private Student _selectedStudent;

public Student SelectedStudent {
   get {
      return _selectedStudent;
   }

   set {
      _selectedStudent = value;
      DeleteCommand.RaiseCanExecuteChanged();
   }
}
Following is the complete implementation of ViewModel class.
using MVVMDemo.Model;

using System.Collections.ObjectModel;
using System.Windows.Input;
using System;

namespace MVVMDemo.ViewModel {

   public class StudentViewModel {

      public MyICommand DeleteCommand { get; set;}

      public StudentViewModel() {
         LoadStudents();
         DeleteCommand = new MyICommand(OnDelete, CanDelete);
      }

      public ObservableCollection<Student> Students {
         get;
         set;
      }

      public void LoadStudents() {
         ObservableCollection<Student> students = new ObservableCollection<Student>();

         students.Add(new Student { FirstName = "Mark", LastName = "Allain" });
         students.Add(new Student { FirstName = "Allen", LastName = "Brown" });
         students.Add(new Student { FirstName = "Linda", LastName = "Hamerski" });

         Students = students;
      }

      private Student _selectedStudent;

      public Student SelectedStudent {
         get {
            return _selectedStudent;
         }

         set {
            _selectedStudent = value;
            DeleteCommand.RaiseCanExecuteChanged();
         }
      }

      private void OnDelete() {
         Students.Remove(SelectedStudent);
      }

      private bool CanDelete() {
         return SelectedStudent != null;
      }
   }
}
In StudentView.xaml, we need to add SelectedItem property in a ListBox which will bind to the SelectStudent property.
<ListBox ItemsSource = "{Binding Students}" SelectedItem = "{Binding SelectedStudent}"/>
Following is the complete xaml file.
<UserControl x:Class = "MVVMDemo.Views.StudentView"
   xmlns = "http://schemas.microsoft.com/winfx/2006/xaml/presentation"
   xmlns:x = "http://schemas.microsoft.com/winfx/2006/xaml"
   xmlns:mc = "http://schemas.openxmlformats.org/markup-compatibility/2006"
   xmlns:d = "http://schemas.microsoft.com/expression/blend/2008"
   xmlns:local = "clr-namespace:MVVMDemo.Views"
   xmlns:viewModel = "clr-namespace:MVVMDemo.ViewModel"
   xmlns:data = "clr-namespace:MVVMDemo.Model"
   xmlns:vml = "clr-namespace:MVVMDemo.VML"
   vml:ViewModelLocator.AutoHookedUpViewModel = "True"
   mc:Ignorable = "d"
   d:DesignHeight = "300" d:DesignWidth = "300">

   <UserControl.Resources>
      <DataTemplate DataType = "{x:Type data:Student}">

         <StackPanel Orientation = "Horizontal">

            <TextBox Text = "{Binding Path = FirstName, Mode = TwoWay}"
               Width = "100" Margin = "3 5 3 5"/>

            <TextBox Text = "{Binding Path = LastName, Mode = TwoWay}"
               Width = "100" Margin = "0 5 3 5"/>

            <TextBlock Text = "{Binding Path = FullName, Mode = OneWay}"
               Margin = "0 5 3 5"/>

         </StackPanel>

      </DataTemplate>
   </UserControl.Resources>

   <Grid>
      <StackPanel Orientation = "Horizontal">
         <ListBox ItemsSource = "{Binding Students}"
            SelectedItem = "{Binding SelectedStudent}"/>

         <Button Content = "Delete"
            Command = "{Binding DeleteCommand}"
            HorizontalAlignment = "Left"
            VerticalAlignment = "Top"
            Width = "75" />
      </StackPanel>
   </Grid>

</UserControl>
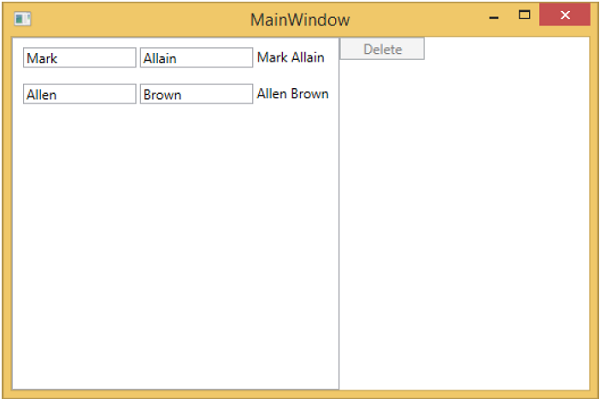
When the above code is compiled and executed, you will see the following window.
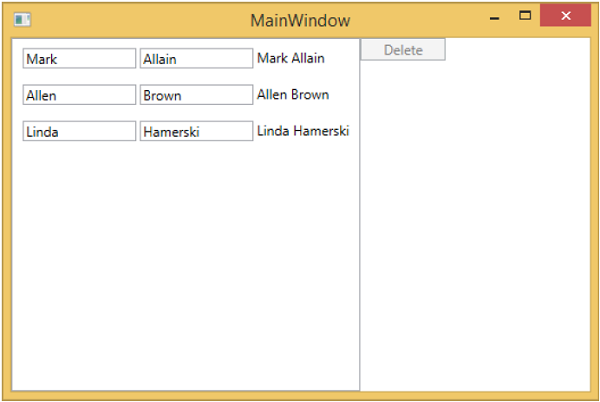
You can see that delete button is disabled. It will be enabled when you select any item.
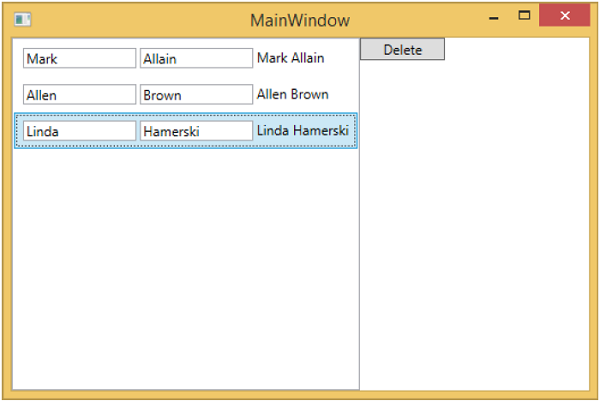
When you select any item and press delete. You will see that the selected item list is deleted and the delete button again becomes disabled.
We recommend you to execute the above example in a step-by-step manner for better understanding.
MVVM – Hierarchies & Navigation
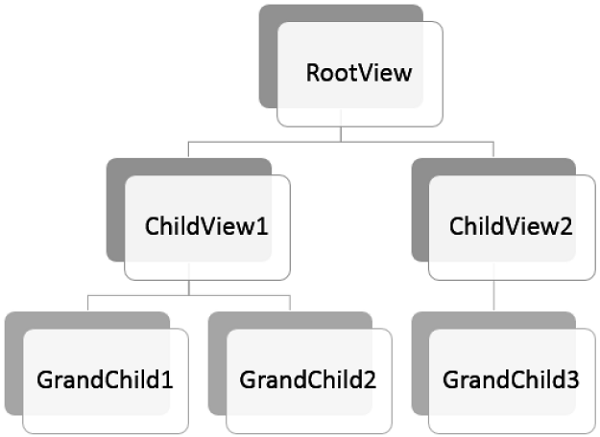
When building MVVM applications, you typically decompose complex screens of information into a set of parent and child views, where the child views are contained within the parent views in panels or container controls, and forms a hierarchy of use themselves.
After decomposing the complex Views it doesn’t mean that each and every piece of child content that you separate into its own XAML file necessarily needs to be an MVVM view.
The chunk of content just provides the structure to render something to the screen and does not support any input or manipulation by the user for that content.
It may not need a separate ViewModel, but it could just be a chunk XAML that renders based on properties exposed by the parents ViewModel.
Finally, if you have a hierarchy of Views and ViewModels, the parent ViewModel can become a hub for communications so that each child ViewModel can remain decoupled from the other child ViewModels and from their parent as much as possible.
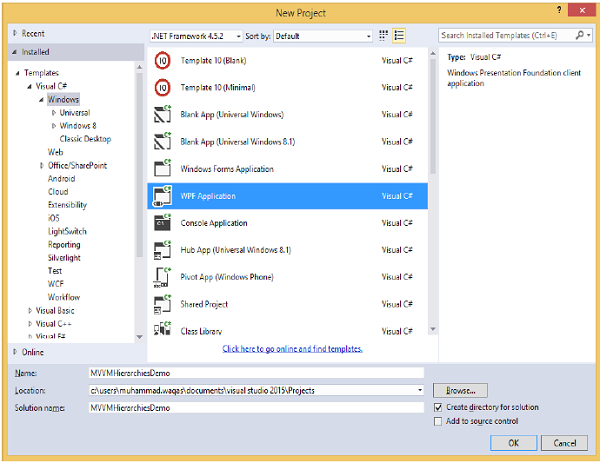
Let’s take a look at an example in which we will define a simple hierarchy between different views. Create a new WPF Application project MVVMHierarchiesDemo
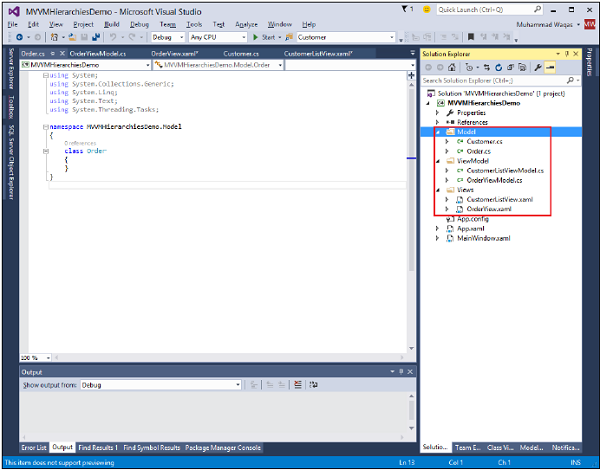
Step 1 − Add the three folders (Model, ViewModel, and Views) into your project.

Step 2 − Add Customer and Order classes in Model folder, CustomerListView and OrderView in Views folder, and CustomerListViewModel and OrderViewModel in ViewModel folder as shown in the following image.
Step 3 − Add textblocks in both CustomerListView and OrderView. Here is CustomerListView.xaml file.
<UserControl x:Class="MVVMHierarchiesDemo.Views.CustomerListView"
   xmlns = "http://schemas.microsoft.com/winfx/2006/xaml/presentation"
   xmlns:x = "http://schemas.microsoft.com/winfx/2006/xaml"
   xmlns:mc = "http://schemas.openxmlformats.org/markup-compatibility/2006"
   xmlns:d = "http://schemas.microsoft.com/expression/blend/2008"
   xmlns:local = "clr-namespace:MVVMHierarchiesDemo.Views"
   mc:Ignorable = "d"
   d:DesignHeight = "300" d:DesignWidth = "300">

   <Grid>
      <TextBlock Text = "Customer List View"/>
   </Grid>

</UserControl>
Following is the OrderView.xaml file.
<UserControl x:Class = "MVVMHierarchiesDemo.Views.OrderView"
   xmlns = "http://schemas.microsoft.com/winfx/2006/xaml/presentation"
   xmlns:x ="http://schemas.microsoft.com/winfx/2006/xaml"
   xmlns:mc ="http://schemas.openxmlformats.org/markup-compatibility/2006"
   xmlns:d ="http://schemas.microsoft.com/expression/blend/2008"
   xmlns:local = "clr-namespace:MVVMHierarchiesDemo.Views" mc:Ignorable = "d"
   d:DesignHeight = "300" d:DesignWidth = "300">

   <Grid>
      <TextBlock Text = "Order View"/>
   </Grid>

</UserControl>
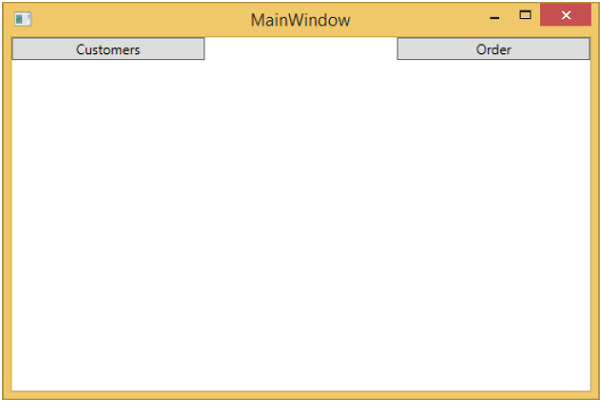
Now we need something to host these views, and a good place for that in our MainWindow because it is a simple application. We need a container control that we can place our views and switch them in a navigation fashion. For this purpose, we need to add ContentControl in our MainWindow.xaml file and we will be using its content property and bind that to a ViewModel reference.
Now define the data templates for each view in a resource dictionary. Following is the MainWindow.xaml file. Note how each data template maps a data type (the ViewModel type) to a corresponding View.
<Window x:Class = "MVVMHierarchiesDemo.MainWindow"
   xmlns = "http://schemas.microsoft.com/winfx/2006/xaml/presentation"
   xmlns:x = "http://schemas.microsoft.com/winfx/2006/xaml"
   xmlns:d = "http://schemas.microsoft.com/expression/blend/2008"
   xmlns:mc = "http://schemas.openxmlformats.org/markup-compatibility/2006"
   xmlns:local = "clr-namespace:MVVMHierarchiesDemo"
   xmlns:views = "clr-namespace:MVVMHierarchiesDemo.Views"
   xmlns:viewModels = "clr-namespace:MVVMHierarchiesDemo.ViewModel"
   mc:Ignorable = "d"
   Title = "MainWindow" Height = "350" Width = "525">

   <Window.DataContext>
      <local:MainWindowViewModel/>
   </Window.DataContext>

   <Window.Resources>
      <DataTemplate DataType = "{x:Type viewModels:CustomerListViewModel}">
         <views:CustomerListView/>
      </DataTemplate>

      <DataTemplate DataType = "{x:Type viewModels:OrderViewModel}">
         <views:OrderView/>
      </DataTemplate>
   </Window.Resources>

   <Grid>
      <ContentControl Content = "{Binding CurrentView}"/>
   </Grid>

</Window>
Anytime the current view model is set to an instance of a CustomerListViewModel, it will render out a CustomerListView with the ViewModel is hooked up. It’s an order ViewModel, it'll render out OrderView and so on.
We now need a ViewModel that has a CurrentViewModel property and some logic and commanding to be able to switch the current reference of ViewModel inside the property.
Let's create a ViewModel for this MainWindow called MainWindowViewModel. We can just create an instance of our ViewModel from XAML and use that to set the DataContext property of the window. For this, we need to create a base class to encapsulate the implementation of INotifyPropertyChanged for our ViewModels.
The main idea behind this class is to encapsulate the INotifyPropertyChanged implementation and provide helper methods to the derived class so that they can easily trigger the appropriate notifications. Following is the implementation of BindableBase class.
using System;
using System.Collections.Generic;
using System.ComponentModel;
using System.Linq;
using System.Runtime.CompilerServices;
using System.Text;
using System.Threading.Tasks;

namespace MVVMHierarchiesDemo {

   class BindableBase : INotifyPropertyChanged {

      protected virtual void SetProperty<T>(ref T member, T val,
         [CallerMemberName] string propertyName = null) {
            if (object.Equals(member, val)) return;

            member = val;
            PropertyChanged(this, new PropertyChangedEventArgs(propertyName));
      }

      protected virtual void OnPropertyChanged(string propertyName) {
         PropertyChanged(this, new PropertyChangedEventArgs(propertyName));
      }

      public event PropertyChangedEventHandler PropertyChanged = delegate { };
   }
}
Now it's time to actually start doing some view switching using our CurrentViewModel property. We just need some way to drive the setting of this property. And we're going to make it so that the end user can command going to the customer list or to the order view. First add a new class in your project which will implement the ICommand interface. Following is the implementation of ICommand interface.
using System;
using System.Windows.Input;

namespace MVVMHierarchiesDemo {

   public class MyICommand<T> : ICommand {

      Action<T> _TargetExecuteMethod;
      Func<T, bool> _TargetCanExecuteMethod;

      public MyICommand(Action<T> executeMethod) {
         _TargetExecuteMethod = executeMethod;
      }

      public MyICommand(Action<T> executeMethod, Func<T, bool> canExecuteMethod) {
         _TargetExecuteMethod = executeMethod;
         _TargetCanExecuteMethod = canExecuteMethod;
      }

      public void RaiseCanExecuteChanged() {
         CanExecuteChanged(this, EventArgs.Empty);
      }

      #region ICommand Members

      bool ICommand.CanExecute(object parameter) {

         if (_TargetCanExecuteMethod != null) {
            T tparm = (T)parameter;
            return _TargetCanExecuteMethod(tparm);
         }

         if (_TargetExecuteMethod != null) {
            return true;
         }

         return false;
      }

      // Beware - should use weak references if command instance lifetime is
         longer than lifetime of UI objects that get hooked up to command

      // Prism commands solve this in their implementation

      public event EventHandler CanExecuteChanged = delegate { };

      void ICommand.Execute(object parameter) {
         if (_TargetExecuteMethod != null) {
            _TargetExecuteMethod((T)parameter);
         }
      }

      #endregion
   }
}
We now need to set up some top level navigation to these to ViewModels and logic for that switching should belong inside MainWindowViewModel. For this we're going to use a method called on navigate that takes a string destination and returns the CurrentViewModel property.
private void OnNav(string destination) {

   switch (destination) {
      case "orders":
         CurrentViewModel = orderViewModelModel;
      break;
      case "customers":
      default:
         CurrentViewModel = custListViewModel;
      break;
   }
}
For navigation of these different Views, we need to add two buttons in our MainWindow.xaml file. Following is the complete XAML file implementation.
<Window x:Class = "MVVMHierarchiesDemo.MainWindow"
   xmlns = "http://schemas.microsoft.com/winfx/2006/xaml/presentation"
   xmlns:x = "http://schemas.microsoft.com/winfx/2006/xaml"
   xmlns:d = "http://schemas.microsoft.com/expression/blend/2008"
   xmlns:mc = "http://schemas.openxmlformats.org/markup-compatibility/2006"
   xmlns:local = "clr-namespace:MVVMHierarchiesDemo"
   xmlns:views = "clr-namespace:MVVMHierarchiesDemo.Views"
   xmlns:viewModels = "clr-namespace:MVVMHierarchiesDemo.ViewModel"
   mc:Ignorable = "d"
   Title = "MainWindow" Height = "350" Width = "525">

   <Window.DataContext>
      <local:MainWindowViewModel/>
   </Window.DataContext>

   <Window.Resources>
      <DataTemplate DataType = "{x:Type viewModels:CustomerListViewModel}">
         <views:CustomerListView/>
      </DataTemplate>

      <DataTemplate DataType = "{x:Type viewModels:OrderViewModel}">
         <views:OrderView/>
      </DataTemplate>
   </Window.Resources>

   <Grid>
      <Grid.RowDefinitions>
         <RowDefinition Height = "Auto" />
         <RowDefinition Height = "*" />
      </Grid.RowDefinitions>

      <Grid x:Name = "NavBar">
         <Grid.ColumnDefinitions>
            <ColumnDefinition Width = "*" />
            <ColumnDefinition Width = "*" />
            <ColumnDefinition Width = "*" />
         </Grid.ColumnDefinitions>

         <Button Content = "Customers"
            Command = "{Binding NavCommand}"
            CommandParameter = "customers"
            Grid.Column = "0" />

         <Button Content = "Order"
            Command = "{Binding NavCommand}"
            CommandParameter = "orders"
            Grid.Column = "2" />
      </Grid>

      <Grid x:Name = "MainContent" Grid.Row = "1">
         <ContentControl Content = "{Binding CurrentViewModel}" />
      </Grid>

   </Grid>

</Window>
Following is the complete MainWindowViewModel implementation.
using MVVMHierarchiesDemo.ViewModel;
using MVVMHierarchiesDemo.Views;

using System;
using System.Collections.Generic;
using System.Linq;
using System.Text;
using System.Threading.Tasks;

namespace MVVMHierarchiesDemo {

   class MainWindowViewModel : BindableBase {

      public MainWindowViewModel() {
         NavCommand = new MyICommand<string>(OnNav);
      }

      private CustomerListViewModel custListViewModel = new CustomerListViewModel();

      private OrderViewModel orderViewModelModel = new OrderViewModel();

      private BindableBase _CurrentViewModel;

      public BindableBase CurrentViewModel {
         get {return _CurrentViewModel;}
         set {SetProperty(ref _CurrentViewModel, value);}
      }

      public MyICommand<string> NavCommand { get; private set; }

      private void OnNav(string destination) {

         switch (destination) {
            case "orders":
               CurrentViewModel = orderViewModelModel;
               break;
            case "customers":
            default:
               CurrentViewModel = custListViewModel;
               break;
         }
      }
   }
}
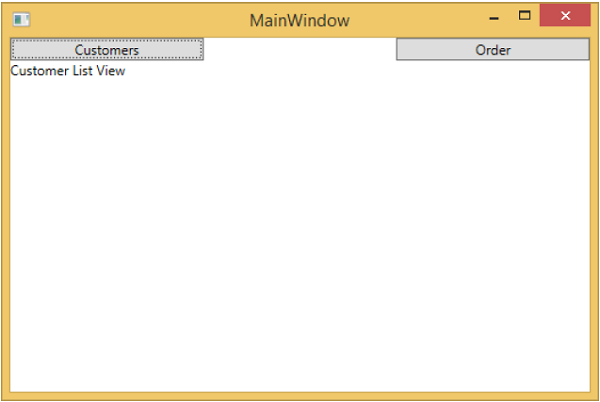
Derive all of your ViewModels from BindableBase class. When the above code is compiled and executed, you will see the following output.
As you can see, we have added only two buttons and a CurrentViewModel on our MainWindow. If you click any button then it will navigate to that particular View. Let’s click on Customers button and you will see that the CustomerListView is displayed.
We recommend you to execute the above example in a step-by-step manner for better understanding.
MVVM – Validations
In this chapter, we will learn about validations. We will also look at a clean way to do validation with what WPF bindings already support but tying it into MVVM components.
Validation in MVVM
When your application starts accepting data input from end users you need to consider validating that input.
Make sure it conforms to your overall requirements.
WPF has some great builds and features in the binding system for validating input and you can still leverage all those features when doing MVVM.
Keep in mind that the logic that supports your validation and defines what rules exist for what properties should be part of the Model or the ViewModel, not the View itself.
You can still use all the ways of expressing validation that are supported by WPF data binding including −
- Throwing exceptions on a property is set.
- Implementing the IDataErrorInfo interface.
- Implementing INotifyDataErrorInfo.
- Use WPF validation rules.
In general, INotifyDataErrorInfo is recommended and was introduced to WPF .net 4.5 and it supports querying the object for errors associated with properties and it also fixes a couple of deficiencies with all the other options. Specifically, it allows asynchronous validation. It allows properties to have more than one error associated with them.
Adding Validation
Let’s take a look at an example in which we will add validation support to our input view, and in large application you will probably need this a number of places in your application. Sometimes on Views, sometimes on ViewModels and sometimes on these helper objects there are wrappers around model objects.
It’s a good practice for putting the validation support in a common base class that you can then inherit from different scenarios.
The base class will support INotifyDataErrorInfo so that that validation gets triggered when properties change.
Create add a new class called ValidatableBindableBase. Since we already have a base class for a property change handling, let’s derive the base class from it and also implement the INotifyDataErrorInfo interface.
Following is the implementation of ValidatableBindableBase class.
using System;
using System.Collections.Generic;
using System.ComponentModel;

//using System.ComponentModel.DataAnnotations;
using System.Linq;
using System.Runtime.CompilerServices;
using System.Text;
using System.Threading.Tasks;
using System.Windows.Controls;

namespace MVVMHierarchiesDemo {

   public class ValidatableBindableBase : BindableBase, INotifyDataErrorInfo {
      private Dictionary<string, List<string>> _errors = new Dictionary<string, List<string>>();

      public event EventHandler<DataErrorsChangedEventArgs>
         ErrorsChanged = delegate { };

      public System.Collections.IEnumerable GetErrors(string propertyName) {

         if (_errors.ContainsKey(propertyName))
            return _errors[propertyName];
         else
            return null;
      }

      public bool HasErrors {
         get { return _errors.Count > 0; }
      }

      protected override void SetProperty<T>(ref T member, T val,
         [CallerMemberName] string propertyName = null) {

         base.SetProperty<T>(ref member, val, propertyName);
         ValidateProperty(propertyName, val);
      }

      private void ValidateProperty<T>(string propertyName, T value) {
         var results = new List<ValidationResult>();

         //ValidationContext context = new ValidationContext(this);
         //context.MemberName = propertyName;
         //Validator.TryValidateProperty(value, context, results);

         if (results.Any()) {
            //_errors[propertyName] = results.Select(c => c.ErrorMessage).ToList();
         } else {
            _errors.Remove(propertyName);
         }

         ErrorsChanged(this, new DataErrorsChangedEventArgs(propertyName));
      }
   }
}
Now add AddEditCustomerView and AddEditCustomerViewModel in respective folders. Following is the code of AddEditCustomerView.xaml.
<UserControl x:Class = "MVVMHierarchiesDemo.Views.AddEditCustomerView"
   xmlns = "http://schemas.microsoft.com/winfx/2006/xaml/presentation"
   xmlns:x = "http://schemas.microsoft.com/winfx/2006/xaml"
   xmlns:mc = "http://schemas.openxmlformats.org/markup-compatibility/2006"
   xmlns:d = "http://schemas.microsoft.com/expression/blend/2008"
   xmlns:local = "clr-namespace:MVVMHierarchiesDemo.Views"
   mc:Ignorable = "d"
   d:DesignHeight = "300" d:DesignWidth = "300">

   <Grid>
      <Grid.RowDefinitions>
         <RowDefinition Height = "Auto" />
         <RowDefinition Height = "Auto" />
      </Grid.RowDefinitions>

      <Grid x:Name = "grid1"
         HorizontalAlignment = "Left"
         DataContext = "{Binding Customer}"
         Margin = "10,10,0,0"
         VerticalAlignment = "Top">

         <Grid.ColumnDefinitions>
            <ColumnDefinition Width = "Auto" />
            <ColumnDefinition Width = "Auto" />
         </Grid.ColumnDefinitions>

         <Grid.RowDefinitions>
            <RowDefinition Height = "Auto" />
            <RowDefinition Height = "Auto" />
            <RowDefinition Height = "Auto" />
            <RowDefinition Height = "Auto" />
         </Grid.RowDefinitions>

         <Label Content = "First Name:"
            Grid.Column = "0"
            HorizontalAlignment = "Left"
            Margin = "3"
            Grid.Row = "0"
            VerticalAlignment = "Center" />

         <TextBox x:Name = "firstNameTextBox"
            Grid.Column = "1"
            HorizontalAlignment = "Left"
            Height = "23"
            Margin = "3"
            Grid.Row = "0"
            Text = "{Binding FirstName, ValidatesOnNotifyDataErrors = True}"
            VerticalAlignment = "Center"
            Width = "120" />

         <Label Content = "Last Name:"
            Grid.Column = "0"
            HorizontalAlignment = "Left"
            Margin = "3"
            Grid.Row = "1"
            VerticalAlignment = "Center" />

         <TextBox x:Name = "lastNameTextBox"
            Grid.Column = "1"
            HorizontalAlignment = "Left"
            Height = "23"
            Margin = "3"
            Grid.Row = "1"
            Text = "{Binding LastName, ValidatesOnNotifyDataErrors = True}"
            VerticalAlignment = "Center"
            Width = "120" />

         <Label Content = "Email:"
            Grid.Column = "0"
            HorizontalAlignment = "Left"
            Margin = "3"
            Grid.Row = "2"
            VerticalAlignment = "Center" />

         <TextBox x:Name = "emailTextBox"
            Grid.Column = "1"
            HorizontalAlignment = "Left"
            Height = "23"
            Margin = "3"
            Grid.Row = "2"
            Text = "{Binding Email, ValidatesOnNotifyDataErrors = True}"
            VerticalAlignment = "Center"
            Width = "120" />

         <Label Content = "Phone:"
            Grid.Column = "0"
            HorizontalAlignment = "Left"
            Margin = "3"
            Grid.Row = "3"
            VerticalAlignment = "Center" />

         <TextBox x:Name = "phoneTextBox"
            Grid.Column = "1"
            HorizontalAlignment = "Left"
            Height = "23"
            Margin = "3"
            Grid.Row = "3"
            Text = "{Binding Phone, ValidatesOnNotifyDataErrors = True}"
            VerticalAlignment = "Center"
            Width = "120" />

      </Grid>

      <Grid Grid.Row = "1">
         <Button Content = "Save"
            Command = "{Binding SaveCommand}"
            HorizontalAlignment = "Left"
            Margin = "25,5,0,0"
            VerticalAlignment = "Top"
            Width = "75" />

         <Button Content = "Add"
            Command = "{Binding SaveCommand}"
            HorizontalAlignment = "Left"
            Margin = "25,5,0,0"
            VerticalAlignment = "Top"
            Width = "75" />

         <Button Content = "Cancel"
            Command = "{Binding CancelCommand}"
            HorizontalAlignment = "Left"
            Margin = "150,5,0,0"
            VerticalAlignment = "Top"
            Width = "75" />
      </Grid>

   </Grid>

</UserControl>
Following is the AddEditCustomerViewModel implementation.
using MVVMHierarchiesDemo.Model;

using System;
using System.Collections.Generic;
using System.Linq;
using System.Text;
using System.Threading.Tasks;

namespace MVVMHierarchiesDemo.ViewModel {

   class AddEditCustomerViewModel : BindableBase {

      public AddEditCustomerViewModel() {
         CancelCommand = new MyIcommand(OnCancel);
         SaveCommand = new MyIcommand(OnSave, CanSave);
      }

      private bool _EditMode;

      public bool EditMode {
         get { return _EditMode; }
         set { SetProperty(ref _EditMode, value);}
      }

      private SimpleEditableCustomer _Customer;

      public SimpleEditableCustomer Customer {
         get { return _Customer; }
         set { SetProperty(ref _Customer, value);}
      }

      private Customer _editingCustomer = null;

      public void SetCustomer(Customer cust) {
         _editingCustomer = cust;

         if (Customer != null) Customer.ErrorsChanged -= RaiseCanExecuteChanged;
         Customer = new SimpleEditableCustomer();
         Customer.ErrorsChanged += RaiseCanExecuteChanged;
         CopyCustomer(cust, Customer);
      }

      private void RaiseCanExecuteChanged(object sender, EventArgs e) {
         SaveCommand.RaiseCanExecuteChanged();
      }

      public MyIcommand CancelCommand { get; private set; }
      public MyIcommand SaveCommand { get; private set; }

      public event Action Done = delegate { };

      private void OnCancel() {
         Done();
      }

      private async void OnSave() {
         Done();
      }

      private bool CanSave() {
         return !Customer.HasErrors;
      }
   }
}
Following is the implementation of SimpleEditableCustomer class.
using System;
using System.Collections.Generic;
using System.Linq;
using System.Text;
using System.Threading.Tasks;

namespace MVVMHierarchiesDemo.Model {

   public class SimpleEditableCustomer : ValidatableBindableBase {
      private Guid _id;

      public Guid Id {
         get { return _id; }
         set { SetProperty(ref _id, value); }
      }

      private string _firstName;
      [Required]

      public string FirstName {
         get { return _firstName; }
         set { SetProperty(ref _firstName, value); }
      }

      private string _lastName;
      [Required]

      public string LastName {
         get { return _lastName; }
         set { SetProperty(ref _lastName, value); }
      }

      private string _email;
      [EmailAddress]

      public string Email {
         get { return _email; }
         set { SetProperty(ref _email, value); }
      }

      private string _phone;
      [Phone]

      public string Phone {
         get { return _phone; }
         set { SetProperty(ref _phone, value); }
      }
   }
}
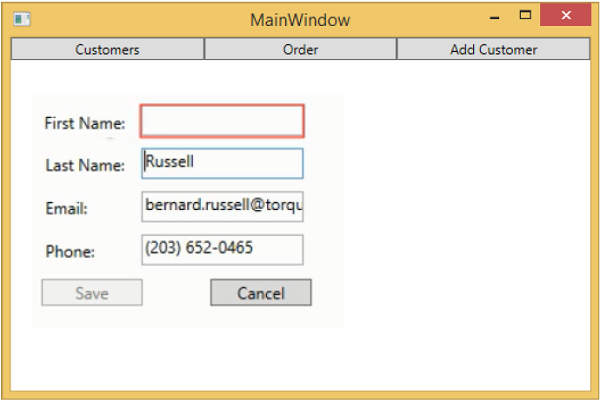
When the above code is compiled and executed, you will see the following window.
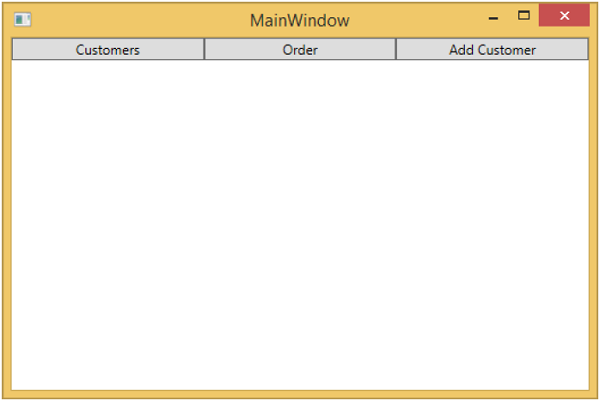
When you press the Add Customer button you will see the following view. When the user leaves any field empty, then it will become highlighted and the save button will become disabled.
MVVM – Dependency Injection
In this chapter, we will briefly discuss about dependency injection. We have already covered data binding decouples Views and ViewModels from each other that allows them to communicate without knowing explicitly what is going on at the other end of the communication.
Now we need something similar to decouple our ViewModel from the client services.
In early days of object-oriented programming, developers have faced the issue of creating and retrieving instances of classes in applications. Various solutions have been proposed for this problem.
For the past few years, dependency injection and inversion of control (IoC) have gained popularity among developers and have taken precedence over some older solutions such as the Singleton pattern.
Dependency Injection / IoC Containers
IoC and dependency injection are two design patterns that are closely related and the container is basically a chunk of infrastructure code that does both of those patterns for you.
IoC pattern is about delegating responsibility for construction and the dependency injection pattern is about providing dependencies to an object that's already been constructed.
They can both be treated as a two-phase approach to constructing. When you use a container, the container takes several responsibilities which are as follows −
- It constructs an object when asked.
- The container will determine what that object depends on.
- Constructing those dependencies.
- Injecting them into the object being constructed.
- Recursively doing process.
Let's have a look at how we can use dependency injection to break decoupling between ViewModels and the client services. We will wire up the save handling AddEditCustomerViewModel form by using dependency injection related to that.
First we need to create a new interface in our project in Services folder. If you don’t have a services folder in your project then create it first and add the following interface in the Services folder.
using MVVMHierarchiesDemo.Model;

using System;
using System.Collections.Generic;
using System.Linq;
using System.Text;
using System.Threading.Tasks;

namespace MVVMHierarchiesDemo.Services {

   public interface ICustomersRepository {
      Task<List<Customer>> GetCustomersAsync();
      Task<Customer> GetCustomerAsync(Guid id);
      Task<Customer> AddCustomerAsync(Customer customer);
      Task<Customer> UpdateCustomerAsync(Customer customer);
      Task DeleteCustomerAsync(Guid customerId);
   }
}
Following is the implementation of ICustomersRepository.
using MVVMHierarchiesDemo.Model;

using System;
using System.Collections.Generic;
using System.Linq; using System.Text;
using System.Threading.Tasks;

namespace MVVMHierarchiesDemo.Services {

   public class CustomersRepository : ICustomersRepository {
      ZzaDbContext _context = new ZzaDbContext();

      public Task<List<Customer>> GetCustomersAsync() {
         return _context.Customers.ToListAsync();
      }

      public Task<Customer> GetCustomerAsync(Guid id) {
         return _context.Customers.FirstOrDefaultAsync(c => c.Id == id);
      }

      public async Task<Customer> AddCustomerAsync(Customer customer){
         _context.Customers.Add(customer);
         await _context.SaveChangesAsync();
         return customer;
      }

      public async Task<Customer> UpdateCustomerAsync(Customer customer) {

         if (!_context.Customers.Local.Any(c => c.Id == customer.Id)) {
            _context.Customers.Attach(customer);
         }

         _context.Entry(customer).State = EntityState.Modified;
         await _context.SaveChangesAsync();
         return customer;

      }

      public async Task DeleteCustomerAsync(Guid customerId) {
         var customer = _context.Customers.FirstOrDefault(c => c.Id == customerId);

         if (customer != null) {
            _context.Customers.Remove(customer);
         }

         await _context.SaveChangesAsync();
      }
   }
}
The simple way to do Save handling is to add a new instance of ICustomersRepository in AddEditCustomerViewModel and overload the AddEditCustomerViewModel and CustomerListViewModel constructor.
private ICustomersRepository _repo;

public AddEditCustomerViewModel(ICustomersRepository repo) {
   _repo = repo;
   CancelCommand = new MyIcommand(OnCancel);
   SaveCommand = new MyIcommand(OnSave, CanSave);
}
Update the OnSave method as shown in the following code.
private async void OnSave() {
   UpdateCustomer(Customer, _editingCustomer);

   if (EditMode)
      await _repo.UpdateCustomerAsync(_editingCustomer);
   else
      await _repo.AddCustomerAsync(_editingCustomer);
   Done();
}

private void UpdateCustomer(SimpleEditableCustomer source, Customer target) {
   target.FirstName = source.FirstName;
   target.LastName = source.LastName;
   target.Phone = source.Phone;
   target.Email = source.Email;
}
Following is the complete AddEditCustomerViewModel.
using MVVMHierarchiesDemo.Model;
using MVVMHierarchiesDemo.Services;

using System;
using System.Collections.Generic;
using System.Linq;
using System.Text;
using System.Threading.Tasks;

namespace MVVMHierarchiesDemo.ViewModel {

   class AddEditCustomerViewModel : BindableBase {
      private ICustomersRepository _repo;

      public AddEditCustomerViewModel(ICustomersRepository repo) {
         _repo = repo;
         CancelCommand = new MyIcommand(OnCancel);
         SaveCommand = new MyIcommand(OnSave, CanSave);
      }

      private bool _EditMode;

      public bool EditMode {
         get { return _EditMode; }
         set { SetProperty(ref _EditMode, value); }
      }

      private SimpleEditableCustomer _Customer;

      public SimpleEditableCustomer Customer {
         get { return _Customer; }
         set { SetProperty(ref _Customer, value); }
      }

      private Customer _editingCustomer = null;

      public void SetCustomer(Customer cust) {
         _editingCustomer = cust;

         if (Customer != null) Customer.ErrorsChanged -= RaiseCanExecuteChanged;
         Customer = new SimpleEditableCustomer();
         Customer.ErrorsChanged += RaiseCanExecuteChanged;
         CopyCustomer(cust, Customer);
      }

      private void RaiseCanExecuteChanged(object sender, EventArgs e) {
         SaveCommand.RaiseCanExecuteChanged();
      }

      public MyIcommand CancelCommand { get; private set; }
      public MyIcommand SaveCommand { get; private set; }

      public event Action Done = delegate { };

      private void OnCancel() {
         Done();
      }

      private async void OnSave() {
         UpdateCustomer(Customer, _editingCustomer);

         if (EditMode)
            await _repo.UpdateCustomerAsync(_editingCustomer);
         else
            await _repo.AddCustomerAsync(_editingCustomer);
         Done();
      }

      private void UpdateCustomer(SimpleEditableCustomer source, Customer target) {
         target.FirstName = source.FirstName;
         target.LastName = source.LastName;
         target.Phone = source.Phone;
         target.Email = source.Email;
      }

      private bool CanSave() {
         return !Customer.HasErrors;
      }

      private void CopyCustomer(Customer source, SimpleEditableCustomer target) {
         target.Id = source.Id;

         if (EditMode) {
            target.FirstName = source.FirstName;
            target.LastName = source.LastName;
            target.Phone = source.Phone;
            target.Email = source.Email;
         }
      }
   }
}
When the above code is compiled and executed, you will see the same output but now ViewModels are more loosely decoupled.
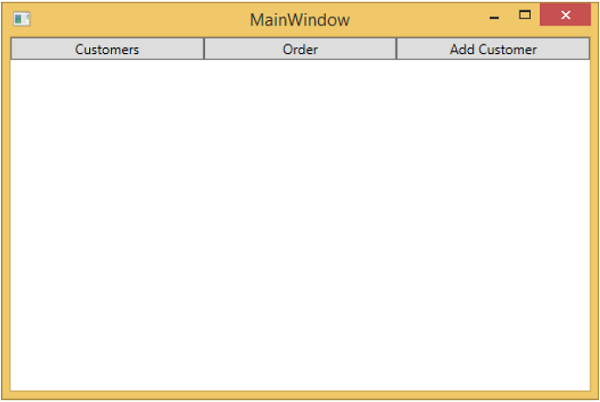
When you press the Add Customer button, you will see the following view. When the user leaves any field empty, then it will become highlighted and the save button will become disabled.
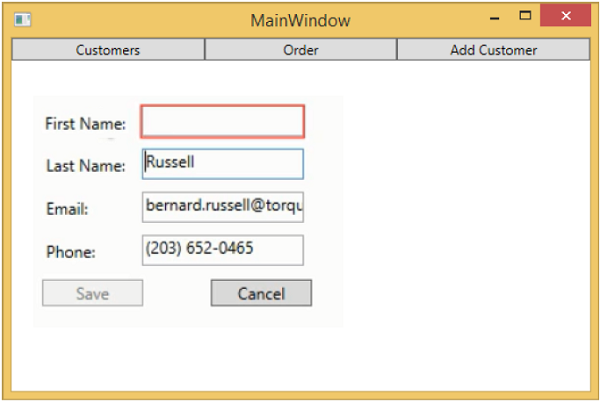
MVVM – Events
An event is a programming construct that reacts to a change in state, notifying any endpoints that have registered for notification. Primarily, events are used to inform a user input via the mouse and keyboard, but their usefulness is not limited to that. Whenever a state change is detected, perhaps when an object has been loaded or initialized, an event can be fired to alert any interested third parties.
In a WPF application that uses the MVVM (Model-View-ViewModel) design pattern, the view model is the component that is responsible for handling the application's presentation logic and state.
The view's code-behind file should contain no code to handle events that are raised from any User Interface (UI) element such as a Button or a ComboBox nor should it contain any domain specific logic.
Ideally, the code-behind of a View contains only a constructor that calls the InitializeComponent method and perhaps some additional code to control or interact with the view layer that is difficult or inefficient to express in XAML, e.g. complex animations.
Let’s take a look at a simple example of button click events in our application. Following is the XAML code of MainWindow.xaml file in which you will see two buttons.
<Window x:Class = "MVVMHierarchiesDemo.MainWindow"
   xmlns = "http://schemas.microsoft.com/winfx/2006/xaml/presentation"
   xmlns:x = "http://schemas.microsoft.com/winfx/2006/xaml"
   xmlns:d = "http://schemas.microsoft.com/expression/blend/2008"
   xmlns:mc = "http://schemas.openxmlformats.org/markup-compatibility/2006"
   xmlns:local = "clr-namespace:MVVMHierarchiesDemo"
   xmlns:views = "clr-namespace:MVVMHierarchiesDemo.Views"
   xmlns:viewModels = "clr-namespace:MVVMHierarchiesDemo.ViewModel"
   mc:Ignorable = "d"
   Title = "MainWindow" Height = "350" Width = "525">

   <Window.DataContext>
      <local:MainWindowViewModel/>
   </Window.DataContext>

   <Window.Resources>
      <DataTemplate DataType = "{x:Type viewModels:CustomerListViewModel}">
         <views:CustomerListView/>
      </DataTemplate>

      <DataTemplate DataType = "{x:Type viewModels:OrderViewModel}">
         <views:OrderView/>
      </DataTemplate>
   </Window.Resources>

   <Grid>
      <Grid.RowDefinitions>
         <RowDefinition Height = "Auto" />
         <RowDefinition Height = "*" />
      </Grid.RowDefinitions>

      <Grid x:Name = "NavBar">
         <Grid.ColumnDefinitions>
            <ColumnDefinition Width = "*" />
            <ColumnDefinition Width = "*" />
            <ColumnDefinition Width = "*" />
         </Grid.ColumnDefinitions>

         <Button Content = "Customers"
            Command = "{Binding NavCommand}"
            CommandParameter = "customers"
            Grid.Column = "0" />

         <Button Content = "Order"
            Command = "{Binding NavCommand}"
            CommandParameter = "orders"
            Grid.Column = "2" />
      </Grid>

      <Grid x:Name = "MainContent" Grid.Row = "1">
         <ContentControl Content = "{Binding CurrentViewModel}" />
      </Grid>

   </Grid>

</Window>
You can see that the button Click property is not used in the above XAML file but Command and CommandParameter properties are used to load different Views when the button is pressed. Now you need to define the commands implementation in MainWindowViewModel.cs file but not in View file. Following is the complete MainWindowViewModel implementation.
using MVVMHierarchiesDemo.ViewModel;
using MVVMHierarchiesDemo.Views;

using System;
using System.Collections.Generic;
using System.Linq;
using System.Text;
using System.Threading.Tasks;

namespace MVVMHierarchiesDemo {

   class MainWindowViewModel : BindableBase {

      public MainWindowViewModel() {
         NavCommand = new MyICommand<string>(OnNav);
      }

      private CustomerListViewModel custListViewModel = new CustomerListViewModel();
      private OrderViewModel orderViewModelModel = new OrderViewModel();

      private BindableBase _CurrentViewModel;

      public BindableBase CurrentViewModel {
         get { return _CurrentViewModel; }
         set { SetProperty(ref _CurrentViewModel, value); }
      }

      public MyICommand<string> NavCommand { get; private set; }

      private void OnNav(string destination) {

         switch (destination) {
            case "orders":
               CurrentViewModel = orderViewModelModel;
               break;
            case "customers":
               default:
               CurrentViewModel = custListViewModel;
               break;
         }
      }
   }
}
Derive all of your ViewModels from BindableBase class. When the above code is compiled and executed, you will see the following output.
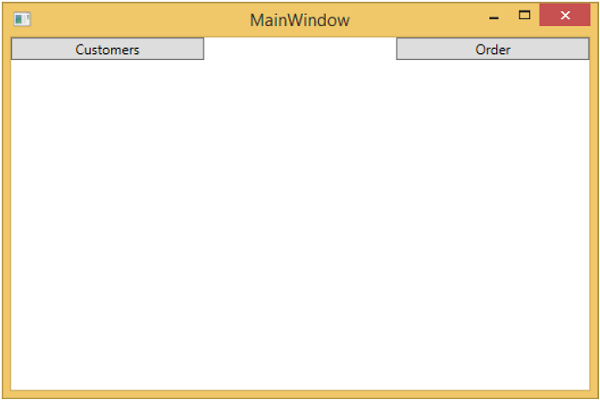
As you can see, we have added only two buttons and a CurrentViewModel on our MainWindow. Now if you click the any button then it will navigate to that particular View. Let’s click on Customers button and you will see that the CustomerListView is displayed.

We recommend you to execute the above example in a step-by-step method for better understanding.
MVVM – Unit Testing
The idea behind unit testing is to take discrete chunks of code (units) and write test methods that use the code in an expected way, and then test to see if they get the expected results.
Being code themselves, unit tests are compiled just like the rest of the project.
They are also executed by the test-running software, which can speed through each test, effectively giving the thumbs up or thumbs down to indicate whether the test has passed or failed, respectively.
Let’s take a look at an example created earlier. Following is the implementation of Student Model.
using System.ComponentModel;

namespace MVVMDemo.Model {

   public class StudentModel {}

   public class Student : INotifyPropertyChanged {
      private string firstName;
      private string lastName;

      public string FirstName {
         get { return firstName; }

         set {
            if (firstName != value) {
               firstName = value;
               RaisePropertyChanged("FirstName");
               RaisePropertyChanged("FullName");
            }
         }
      }

      public string LastName {
         get { return lastName; }

         set {
            if (lastName != value) {
               lastName = value;
               RaisePropertyChanged("LastName");
               RaisePropertyChanged("FullName");
            }
         }
      }

      public string FullName {
         get {
            return firstName + " " + lastName;
         }
      }

      public event PropertyChangedEventHandler PropertyChanged;

      private void RaisePropertyChanged(string property) {
         if (PropertyChanged != null) {
            PropertyChanged(this, new PropertyChangedEventArgs(property));
         }
      }
   }
}
Following is the implementation of StudentView.
<UserControl x:Class="MVVMDemo.Views.StudentView"
   xmlns = "http://schemas.microsoft.com/winfx/2006/xaml/presentation"
   xmlns:x = "http://schemas.microsoft.com/winfx/2006/xaml"
   xmlns:mc = "http://schemas.openxmlformats.org/markup-compatibility/2006"
   xmlns:d = "http://schemas.microsoft.com/expression/blend/2008"
   xmlns:local = "clr-namespace:MVVMDemo.Views"
   xmlns:viewModel = "clr-namespace:MVVMDemo.ViewModel"
   xmlns:data = "clr-namespace:MVVMDemo.Model"
   xmlns:vml = "clr-namespace:MVVMDemo.VML"
   vml:ViewModelLocator.AutoHookedUpViewModel = "True"
   mc:Ignorable = "d"
   d:DesignHeight = "300" d:DesignWidth = "300">

   <UserControl.Resources>
      <DataTemplate DataType = "{x:Type data:Student}">

         <StackPanel Orientation = "Horizontal">
            <TextBox Text = "{Binding Path = FirstName, Mode = TwoWay}"
               Width = "100" Margin = "3 5 3 5"/>

            <TextBox Text = "{Binding Path = LastName, Mode = TwoWay}"
               Width = "100" Margin = "0 5 3 5"/>

            <TextBlock Text = "{Binding Path = FullName, Mode = OneWay}"
               Margin = "0 5 3 5"/>
         </StackPanel>

      </DataTemplate>
   </UserControl.Resources>

   <Grid>
      <StackPanel Orientation = "Horizontal">
         <ListBox ItemsSource = "{Binding Students}"
            SelectedItem = "{Binding SelectedStudent}"/>

         <Button Content = "Delete"
            Command = "{Binding DeleteCommand}"
            HorizontalAlignment = "Left"
            VerticalAlignment = "Top"
            Width = "75" />
      </StackPanel>
   </Grid>

</UserControl>
Following is the StudentViewModel implementation.
using MVVMDemo.Model;

using System.Collections.ObjectModel;
using System.Windows.Input;
using System;

namespace MVVMDemo.ViewModel {

   public class StudentViewModel {

      public MyICommand DeleteCommand { get; set;}

      public StudentViewModel() {
         LoadStudents();
         DeleteCommand = new MyICommand(OnDelete, CanDelete);
      }

      public ObservableCollection<Student> Students {
         get;
         set;
      }

      public void LoadStudents() {
         ObservableCollection<Student> students = new ObservableCollection<Student>();

         students.Add(new Student { FirstName = "Mark", LastName = "Allain" });
         students.Add(new Student { FirstName = "Allen", LastName = "Brown" });
         students.Add(new Student { FirstName = "Linda", LastName = "Hamerski" });

         Students = students;
      }

      private Student _selectedStudent;

      public Student SelectedStudent {
         get {
            return _selectedStudent;
         }

         set {
            _selectedStudent = value;
            DeleteCommand.RaiseCanExecuteChanged();
         }
      }

      private void OnDelete() {
         Students.Remove(SelectedStudent);
      }

      private bool CanDelete() {
         return SelectedStudent != null;
      }

      public int GetStudentCount() {
         return Students.Count;
      }
   }
}
Following is the MainWindow.xaml file.
<Window x:Class = "MVVMDemo.MainWindow"
   xmlns = "http://schemas.microsoft.com/winfx/2006/xaml/presentation"
   xmlns:x = "http://schemas.microsoft.com/winfx/2006/xaml"
   xmlns:d = "http://schemas.microsoft.com/expression/blend/2008"
   xmlns:mc = "http://schemas.openxmlformats.org/markup-compatibility/2006"
   xmlns:local = "clr-namespace:MVVMDemo"
   xmlns:views = "clr-namespace:MVVMDemo.Views"
   mc:Ignorable = "d"
   Title = "MainWindow" Height = "350" Width = "525">

   <Grid>
      <views:StudentView x:Name = "StudentViewControl"/>
   </Grid>

</Window>
Following is the MyICommand implementation, which implements the ICommand interface.
using System;
using System.Windows.Input;

namespace MVVMDemo {

   public class MyICommand : ICommand {
      Action _TargetExecuteMethod;
      Func<bool> _TargetCanExecuteMethod;

      public MyICommand(Action executeMethod) {
         _TargetExecuteMethod = executeMethod;
      }

      public MyICommand(Action executeMethod, Func<bool> canExecuteMethod) {
         _TargetExecuteMethod = executeMethod;
         _TargetCanExecuteMethod = canExecuteMethod;
      }

      public void RaiseCanExecuteChanged() {
         CanExecuteChanged(this, EventArgs.Empty);
      }

      bool ICommand.CanExecute(object parameter) {

         if (_TargetCanExecuteMethod != null) {
            return _TargetCanExecuteMethod();
         }

         if (_TargetExecuteMethod != null) {
            return true;
         }

         return false;
      }

      // Beware - should use weak references if command instance lifetime
         is longer than lifetime of UI objects that get hooked up to command

      // Prism commands solve this in their implementation

      public event EventHandler CanExecuteChanged = delegate { };

      void ICommand.Execute(object parameter) {
         if (_TargetExecuteMethod != null) {
            _TargetExecuteMethod();
         }
      }
   }
}
When the above code is compiled and executed, you will see the following output on your main window.

To write a unit test for the above example, let’s add a new Test Project to the Solution.
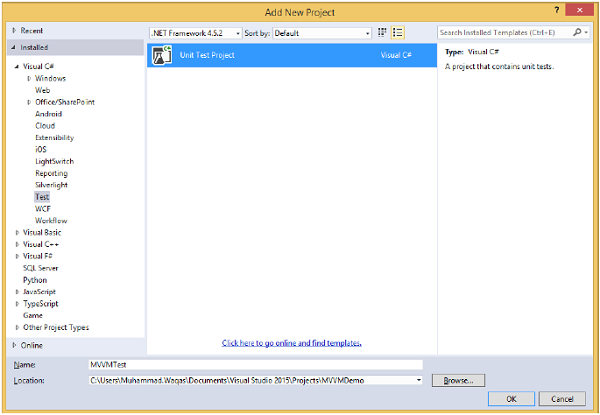
Add reference to the project by a right-click on References.
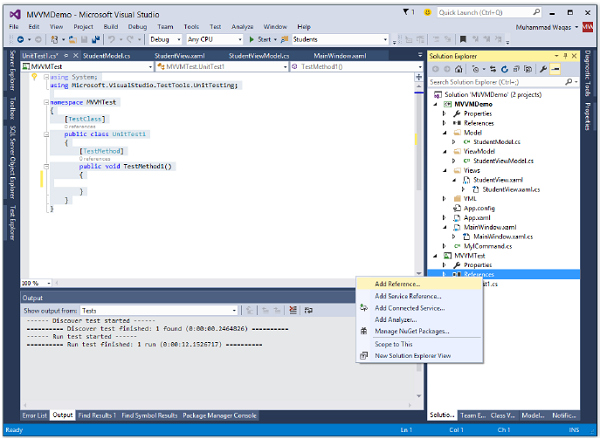
Select the existing project and click Ok.
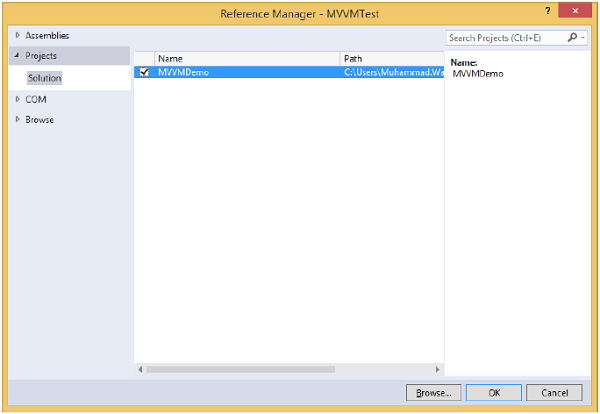
Let us now add a simple Test which will check the Student Count as shown in the following code.
using System;

using Microsoft.VisualStudio.TestTools.UnitTesting;
using MVVMDemo.ViewModel;

namespace MVVMTest {
   [TestClass]

   public class UnitTest1 {
      [TestMethod]

      public void TestMethod1() {
         StudentViewModel sViewModel = new StudentViewModel();
         int count = sViewModel.GetStudentCount();
         Assert.IsTrue(count == 3);
      }
   }
}
To execute this test, select Test → Run → All Tests menu option.
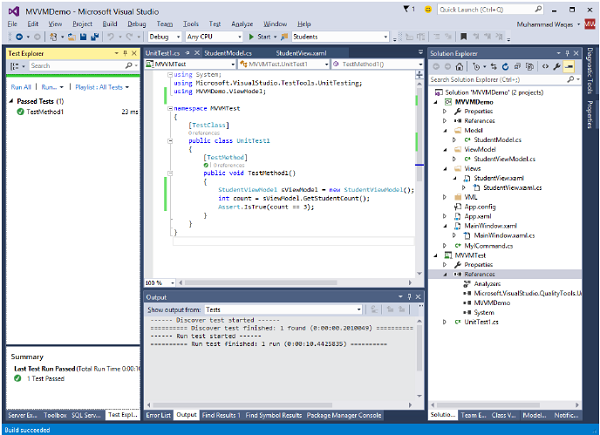
You can see in the Test Explorer that the Test is Passed, because in the StudentViewModel, three students are added. Change the count condition from 3 to 4 as shown in the following code.
using System;

using Microsoft.VisualStudio.TestTools.UnitTesting;
using MVVMDemo.ViewModel;

namespace MVVMTest {
   [TestClass]

   public class UnitTest1 {
      [TestMethod] public void TestMethod1() {
         StudentViewModel sViewModel = new StudentViewModel();
         int count = sViewModel.GetStudentCount();
         Assert.IsTrue(count == 4);
      }
   }
}
When the test plan is executed again, you will see that that the test failed because student count is not equal to 4.

We recommend you to execute the above example in a step-by-step method for better understanding.
MVVM – Frameworks
In this chapter, we will discuss MVVM toolkits or frameworks that are available. You can also use these frameworks so that you don't have to write a bunch of repetitive code to implement the MVVM pattern yourself. Here are some of the most popular frameworks −
- Prism
- MVVM Light
- Caliburn Micro

Prism
Prism provides guidance in the form of samples and documentation that help you easily design and build rich, flexible, and easily maintained Windows Presentation Foundation (WPF) desktop applications. Rich Internet Applications (RIAs) built with the Microsoft Silverlight browser plug-in and Windows applications.
Prism uses design patterns that embody important architectural design principles, such as separation of concerns and loose coupling.
Prism helps you design and build applications using loosely coupled components that can evolve independently but which can be easily and seamlessly integrated into the overall application.
These types of applications are known as composite applications.
Prism has a number of features out-of-the-box. Following are some of the important features of Prism.
MVVM Pattern
Prism has support for the MVVM pattern. It has a Bindablebase class similar to the one which is implemented in the earlier chapters.
It has a flexible ViewModelLocator that has conventions to it but allows you to override those conventions and declaratively hook up your Views and ViewModels in a loosely coupled way.
Modularity
It is the ability to break up your code into totally loosely coupled class libraries in parts and bring them together at runtime into a cohesive whole for the end user, while the code remains fully decoupled.
UI Composition/Regions
It is the ability to plug views into containers without the View that's doing the plugging, needing to have an explicit reference to the UI container itself.
Navigation
Prism has navigation features that layer on top of regions, like forward and backward navigation and the navigation stack that allows your view models to participate in the navigation process directly.
Commands
Prism has commands so they have a delegate command that's very similar to the MyICommand we have used in earlier chapters except it's got some extra robustness to protect you from memory leaks.
Pub/Sub Events
Prism also has support for Pub/Sub events. These are loosely coupled events where the publisher and subscriber can have different lifetimes and do not have to have explicit references to each other to communicate through events.
MVVM Light
MVVM Light is produced by Laurent Bugnion and helps you separate your View from your Model, which creates applications that are cleaner and easier to maintain and extend.
It also creates testable applications and allows you to have a much thinner user interface layer (which is more difficult to test automatically).
This toolkit places special emphasis on to open and edit the user interface into Blend, including the creation of design-time data to enable the Blend users to "see something" when they work with data controls.
Caliburn Micro
This is another small open-source framework that helps you implement the MVVM pattern and also supports a number of things out-of-the-box.
Caliburn Micro is a small, yet powerful framework, designed for building applications across all XAML platforms.
With strong support for MVVM and other proven UI patterns, Caliburn Micro will enable you to build your solution quickly, without the need to sacrifice code quality or testability.