- Matplotlib Tutorial
- Matplotlib - Home
- Matplotlib - Introduction
- Matplotlib - Environment Setup
- Matplotlib - Anaconda distribution
- Matplotlib - Jupyter Notebook
- Matplotlib - Pyplot API
- Matplotlib - Simple Plot
- Matplotlib - PyLab module
- Object-oriented Interface
- Matplotlib - Figure Class
- Matplotlib - Axes Class
- Matplotlib - Multiplots
- Matplotlib - Subplots() Function
- Matplotlib - Subplot2grid() Function
- Matplotlib - Grids
- Matplotlib - Formatting Axes
- Matplotlib - Setting Limits
- Setting Ticks and Tick Labels
- Matplotlib - Twin Axes
- Matplotlib - Bar Plot
- Matplotlib - Histogram
- Matplotlib - Pie Chart
- Matplotlib - Scatter Plot
- Matplotlib - Contour Plot
- Matplotlib - Quiver Plot
- Matplotlib - Box Plot
- Matplotlib - Violin Plot
- Three-dimensional Plotting
- Matplotlib - 3D Contour Plot
- Matplotlib - 3D Wireframe plot
- Matplotlib - 3D Surface plot
- Matplotlib - Working With Text
- Mathematical Expressions
- Matplotlib - Working with Images
- Matplotlib - Transforms
- Matplotlib Useful Resources
- Matplotlib - Quick Guide
- Matplotlib - Useful Resources
- Matplotlib - Discussion
Matplotlib - Figure Class
In Matplotlib, a Figure is a top-level container that holds all the elements of a plot or visualization. It is an overall window or canvas that contains various components like axes, labels, titles, legends, colorbars, and other elements.
See the below image for reference −
In the above image, the green region represents the figure and the white region is the axes area.
Figure Class in Matplotlb
The Figure() class in Matplotlib is a top-level artist that acts as the primary container for all plot elements. It holds everything together, including subplots, axes, titles, legends, and other artistic elements.
This class is available in the matplotlib.figure module with several customization options, in addition to the Figure() class, the module also contains classes related to creating and managing figures.
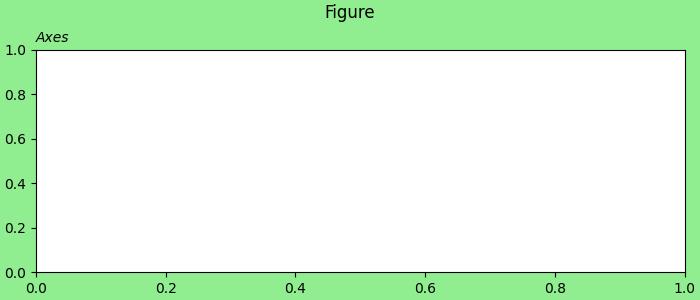
Creating a Figure
A Figure instance is typically created using pyplot methods such as figure, subplots, and subplot_mosaic. These methods return both a Figure instance and a set of Axes, providing a convenient way to create and work with visualizations.
Example
Here is an example that uses the pyplot.figure() method to create a figure.
import matplotlib.pyplot as plt
import numpy as np

# Creating the Figure instance
fig = plt.figure(figsize=[7, 3], facecolor='lightgreen', layout='constrained')

# Adding a title to the Figure
fig.suptitle('Figure')

# Adding a subplot (Axes) to the Figure
ax = fig.add_subplot()

# Setting a title for the subplot
ax.set_title('Axes', loc='left', fontstyle='oblique', fontsize='medium')

# Showing the plot
plt.show()
Output
On executing the above code we will get the following output −
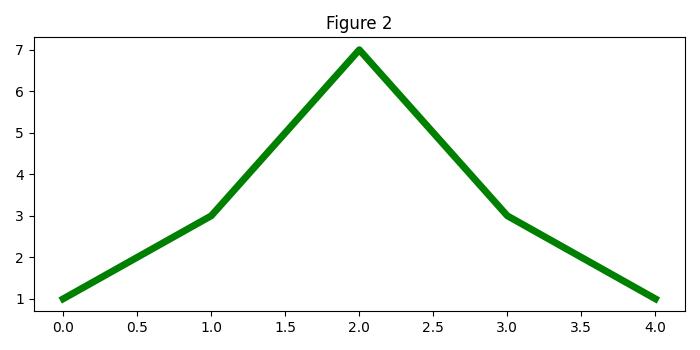
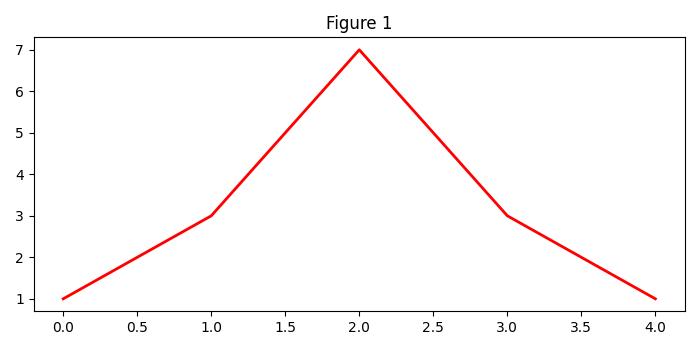
Example
This example demonstrates how to create multiple figures separately within a single script in Matplotlib.
from matplotlib import pyplot as plt

plt.rcParams["figure.figsize"] = [7, 3.50]
plt.rcParams["figure.autolayout"] = True

# Create Figure 1
fig1 = plt.figure("Figure 1")
plt.plot([1, 3, 7, 3, 1], c="red", lw=2)
plt.title("Figure 1")

# Create Figure 2
fig2 = plt.figure("Figure 2")
plt.plot([1, 3, 7, 3, 1], c="green", lw=5)
plt.title("Figure 2")

# Display both figures
plt.show()
Output
On executing the above code you will get the following output −
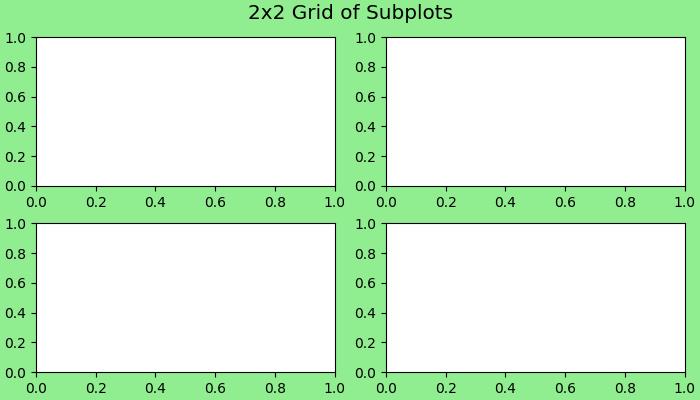
Creating a Figure with Grids of Subplots
When creating figures, various options can be customized, including subplots, size, resolution, colors, and layout. The Figure class attributes such as figsize, dpi, facecolor, edgecolor, linewidth, and layout play crucial roles in shaping the appearance of your visualizations.
Example
Here is an example that uses the pyplot.subplots() method to create a 2x2 grid of subplots with multiple various customization options.
import matplotlib.pyplot as plt
import numpy as np

# Create a 2x2 grid of subplots with various customization options
fig, axs = plt.subplots(2, 2, figsize=(7, 4), facecolor='lightgreen',
   layout='constrained')

# Super title for the entire figure
fig.suptitle('2x2 Grid of Subplots', fontsize='x-large')

# Display the Figure
plt.show()
Output
On executing the above code we will get the following output −
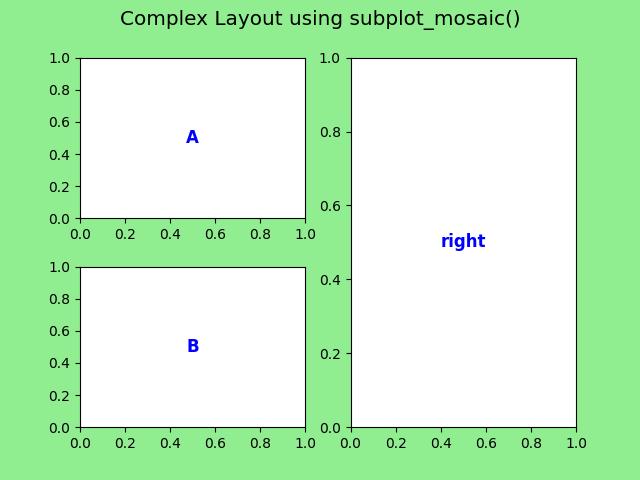
Example
Here is another example that creates a more complex layout using the plt.subplot_mosaic() method.
import matplotlib.pyplot as plt

# Create a more complex layout using plt.subplot_mosaic()
fig, axs = plt.subplot_mosaic([['A', 'right'], ['B', 'right']],
   facecolor='lightgreen',
   layout='constrained')

# Add text to each subplot
for ax_name, ax in axs.items():
   ax.text(0.5, 0.5, ax_name, ha='center', va='center',
   fontsize='large', fontweight='bold', color='blue')

# Super title for the entire figure
fig.suptitle('Complex Layout using subplot_mosaic()', fontsize='x-large')

# Display the Figure
plt.show()
Output
On executing the above code we will get the following output −
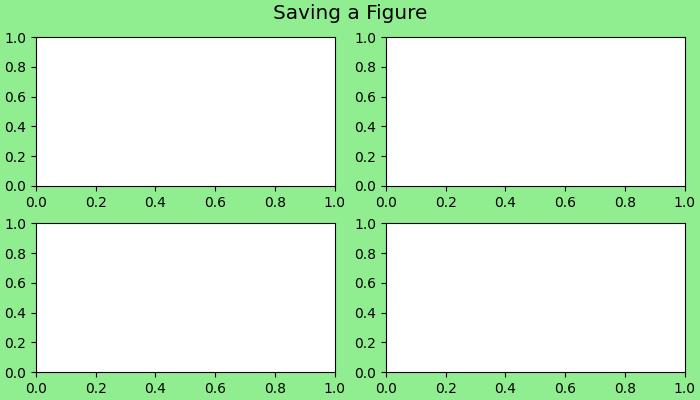
Saving a Figure
After completing a visualization, saving Figures to disk is simple using the savefig() method. This method allows you to specify the file format (e.g., PNG, PDF) and customize options such as resolution and bounding box.
Example
Let’s see a simple example to save the Figure object.
import matplotlib.pyplot as plt

# Create a 2x2 grid of subplots with various customization options
fig, axs = plt.subplots(2, 2, figsize=(7, 4), facecolor='lightgreen',
   layout='constrained')

# Super title for the entire figure
fig.suptitle('2x2 Grid of Subplots', fontsize='x-large')

# Super title for the entire figure
fig.suptitle('Saving a Figure', fontsize='x-large')

# Display the Figure
plt.show()

# Save the Figure object to a file
fig.savefig('Saved Figure.png', dpi=300)
Output
On executing the above program, the following figure will be saved in your working direcory −