- Koa.js Tutorial
- Koa.js - Home
- Koa.js - Overview
- Koa.js - Environment
- Koa.js - Hello World
- Koa.js - Generators
- Koa.js - Routing
- Koa.js - URL Building
- Koa.js - HTTP Methods
- Koa.js - Request Object
- Koa.js - Response Object
- Koa.js - Redirects
- Koa.js - Error Handling
- Koa.js - Cascading
- Koa.js - Templating
- Koa.js - Form Data
- Koa.js - File Uploading
- Koa.js - Static Files
- Koa.js - Cookies
- Koa.js - Sessions
- Koa.js - Authentication
- Koa.js - Compression
- Koa.js - Caching
- Koa.js - Database
- Koa.js - RESTful APIs
- Koa.js - Logging
- Koa.js - Scaffolding
- Koa.js - Resources
- Koa.js Useful Resources
- Koa.js - Quick Guide
- Koa.js - Useful Resources
- Koa.js - Discussion
Koa.js - Quick Guide
Koa.js - Overview
A web application framework provides you with a simple API to build websites, web apps, and backends. You need not worry about low level protocols, processes, etc.
What is Koa?
Koa provides a minimal interface to build applications. It is a very small framework (600 LoC) which provides the required tools to build apps and is quite flexible. There are numerous modules available on npm for Koa, which can be directly plugged into it. Koa can be thought of as the core of express.js without all the bells and whistles.
Why Koa?
Koa has a small footprint (600 LoC) and is a very thin layer of abstraction over the node to create server side apps. It is completely pluggable and has a huge community. This also allows us to easily extend Koa and use it according to our needs. It is built using the bleeding edge technology (ES6) which gives it an edge over older frameworks such as express.
Pug
Pug (earlier known as Jade) is a terse language for writing HTML templates.
- Produces HTML
- Supports dynamic code
- Supports reusability (DRY)
It is one of the most popular templating language used with Koa.
MongoDB and Mongoose
MongoDB is an open-source, document database designed for ease of development and scaling. We'll use this database to store data.
Mongoose is a client API for node.js which makes it easy to access our database from our Koa application.
Koa.js - Environment
To get started with developing using the Koa framework, you need to have Node and npm (node package manager) installed. If you don’t already have these, head over to Node setup to install node on your local system. Confirm that node and npm are installed by running the following commands in your terminal.
$ node --version
$ npm --version
You should receive an output similar to −
v5.0.0
3.5.2
Please ensure your node version is above 6.5.0. Now that we have Node and npm set up, let us understand what npm is and how to use it.
Node Package Manager (npm)
npm is the package manager for node. The npm Registry is a public collection of packages of open-source code for Node.js, front-end web apps, mobile apps, robots, routers, and countless other needs of the JavaScript community. npm allows us to access all these packages and install them locally. You can browse through the list of packages available on npm at npmJS.
How to Use npm?
There are two ways to install a package using npm − globally and locally.
Globally − This method is generally used to install development tools and CLI based packages. To install a package globally, use the following command.
$ npm install -g <package-name>
Locally − This method is generally used to install frameworks and libraries. A locally installed package can be used only within the directory it is installed. To install a package locally, use the same command as above without the −g flag.
$ npm install <package-name>
Whenever we create a project using npm, we need to provide a package.json file, which has all the details about our project. npm makes it easy for us to set up this file. Let us set up our development project.
Step 1 − Fire up your terminal/cmd, create a new folder named hello-world and cd into it −

Step 2 − Now to create the package.json file using npm, use the following.
npm init
It’ll ask you for the following information −
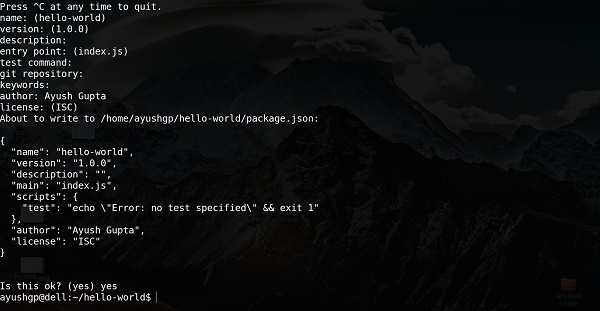
Just keep pressing enter, and enter your name in the “author name” field.
Step 3 − Now we have our package.json file set up, we’ll install Koa. To install Koa and add it in our package.json file, use the following command.
$ npm install --save koa
To confirm Koa installed correctly, run the following command.
$ ls node_modules #(dir node_modules for windows)
Tip − The --save flag can be replaced by -S flag. This flag ensures that Koa is added as a dependency to our package.json file. This has an advantage, the next time we need to install all the dependencies of our project, we just need to run the command npm install and it’ll find the dependencies in this file and install them for us.
This is all we need to start development using the Koa framework. To make our development process a lot easier, we will install a tool from npm, nodemon. What this tool does is, it restarts our server as soon as we make a change in any of our files, otherwise we need to restart the server manually after each file modification. To install nodemon, use the following command.
$ npm install -g nodemon
Now we are all ready to dive into Koa!
Koa.js - Hello World
Once we have set up the development, it is time to start developing our first app using Koa. Create a new file called app.js and type the following in it.
var koa = require('koa');
var app = new koa();

app.use(function* (){
   this.body = 'Hello world!';
});

app.listen(3000, function(){
   console.log('Server running on https://localhost:3000')
});
Save the file, go to your terminal and type.
$ nodemon app.js
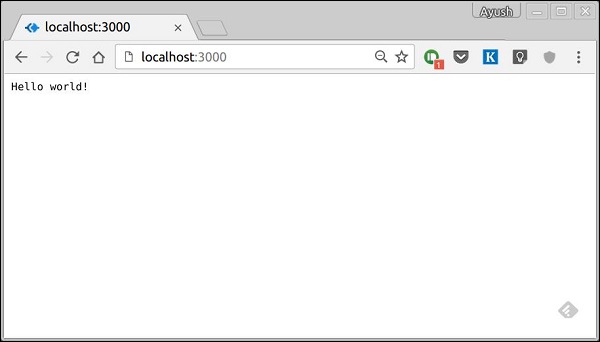
This will start the server. To test this app, open your browser and go to https://localhost:3000 and you should receive the following message.
How This App Works?
The first line imports Koa in our file. We have access to its API through the variable Koa. We use it to create an application and assign it to var app.
app.use(function) − This function is a middleware, which gets called whenever our server gets a request. We'll learn more about middleware in the subsequent chapters. The callback function is a generator, which we'll see in the next chapter. The context of this generator is called context in Koa. This context is used to access and modify the request and response objects. We are setting the body of this response to be Hello world!.
app.listen(port, function) − This function binds and listens for connections on the specified port. Port is the only required parameter here. The callback function is executed, if the app runs successfully.
Koa.js - Generators
One of the most exciting new features of JavaScript ES6 is a new breed of function, called a generator. Before generators, the whole script was used to usually execute in a top to bottom order, without an easy way to stop code execution and resuming with the same stack later. Generators are functions which can be exited and later re-entered. Their context (variable bindings) will be saved across re-entrances.
Generators allow us to stop code execution in between. Hence, let’s take a look at a simple generator.
var generator_func = function* (){
   yield 1;
   yield 2;
};

var itr = generator_func();
console.log(itr.next());
console.log(itr.next());
console.log(itr.next());
When running the above code, following will be the result.
{ value: 1, done: false }
{ value: 2, done: false }
{ value: undefined, done: true }
Let’s look inside the above code. We first create a generator called generator_func(). We created an instance of this weird looking function and assigned it to itr. Then we started calling next() on this itr variable.
Calling next() starts the generator and it runs until it hits a yield. Then it returns the object with value and done, where the value has the expression value. This expression can be anything. At this point, it pauses execution. Again when we call this function(next), the generator resumes execution from the last yield point with the function state being the same at the time of pause, till the next yield point. This is done till there are no more yield points in the code.
Generators in Koa
So why are we discussing generators in this tutorial. As you might remember from the hello world program, we used a function* () notation to pass a callback to app.use(). Koa is an object, which contains an array of middleware generator functions, all of which are composed and executed in a stack-like manner upon each request. Koa also implements downstreaming followed by upstreaming of control flow.
Take a look at the following example to understand this in a better way.
var koa = require('koa');
var app = koa();

app.use(function* (next) {
   //do something before yielding to next generator function

   //in line which will be 1st event in downstream
   console.log("1");
   yield next;

   //do something when the execution returns upstream,
   //this will be last event in upstream
   console.log("2");
});
app.use(function* (next) {
   // This shall be 2nd event downstream
   console.log("3");
   yield next;

   // This would be 2nd event upstream
   console.log("4");
});
app.use(function* () {
   // Here it would be last function downstream
   console.log("5");

   // Set response body
   this.body = "Hello Generators";

   // First event of upstream (from the last to first)
   console.log("6");
});

app.listen(3000);
When running the above code and navigating to https://localhost:3000/ we get the following output on our console.
1
3
5
6
4
2
This is essentially how Koa uses generators. It allows us to create compact middleware using this property and write code for both upstream and downstream functionalities, thus saving us from callbacks.
Koa.js - Routing
Web frameworks provide resources such as HTML pages, scripts, images, etc. at different routes. Koa does not support routes in the core module. We need to use the Koa-router module to easily create routes in Koa. Install this module using the following command.
npm install --save koa-router
Now that we have Koa-router installed, let’s look at a simple GET route example.
var koa = require('koa');
var router = require('koa-router');
var app = koa();

var _ = router();              //Instantiate the router
_.get('/hello', getMessage);   // Define routes

function *getMessage() {
   this.body = "Hello world!";
};

app.use(_.routes());           //Use the routes defined using the router
app.listen(3000);
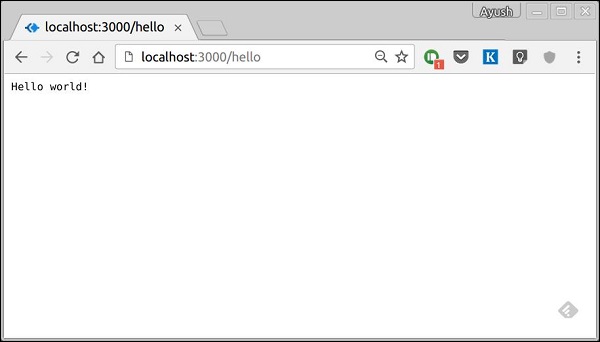
If we run our application and go to localhost:3000/hello, the server receives a get request at route "/hello". Our Koa app executes the callback function attached to this route and sends "Hello World!" as the response.
We can also have multiple different methods at the same route. For example,
var koa = require('koa');
var router = require('koa-router');
var app = koa();

var _ = router(); //Instantiate the router

_.get('/hello', getMessage);
_.post('/hello', postMessage);

function *getMessage() {
	this.body = "Hello world!";
};
function *postMessage() {
   this.body = "You just called the post method at '/hello'!\n";
};
app.use(_.routes()); //Use the routes defined using the router
app.listen(3000);
To test this request, open your terminal and use cURL to execute the following request
curl -X POST "https://localhost:3000/hello"

A special method, all, is provided by express to handle all types of http methods at a particular route using the same function. To use this method, try the following −
_.all('/test', allMessage);

function *allMessage(){
   this.body = "All HTTP calls regardless of the verb will get this response";
};
Koa.js - URL Building
We can now define routes; they are either static or fixed. To use dynamic routes, we need to provide different types of routes. Using dynamic routes allow us to pass parameters and process based on them. Following is an example of a dynamic route.
var koa = require('koa');
var router = require('koa-router');
var app = koa();

var _ = router();

_.get('/:id', sendID);

function *sendID() {
   this.body = 'The id you specified is ' + this.params.id;
}

app.use(_.routes());
app.listen(3000);
To test this go to https://localhost:3000/123. You will get the following response.

You can replace '123' in the URL with anything else and it'll be reflected in the response. Following is a complex example of the above.
var koa = require('koa');
var router = require('koa-router');
var app = koa();
var _ = router();
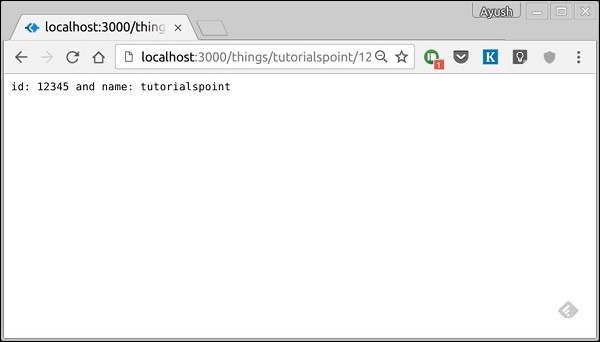
_.get('/things/:name/:id', sendIdAndName);
function *sendIdAndName(){
this.body = 'id: ' + this.params.id + ' and name: ' + this.params.name;
};
app.use(_.routes());
app.listen(3000);
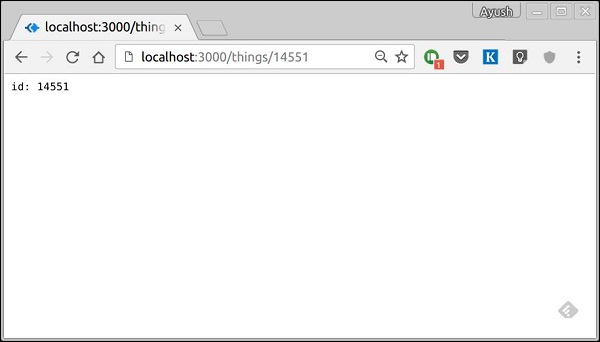
To test this go to https://localhost:3000/things/tutorialspoint/12345.
You can use the this.params object to access all the parameters you pass in the URL. Note that the above two have different paths. They will never overlap. Also if you want to execute the code when you get '/things', then you need to define it separately.
Pattern Matched Routes
You can also use regex to restrict URL parameter matching. Let's say you need the id to be five digits long number. You can use the following route definition.
var koa = require('koa');
var router = require('koa-router');
var app = koa();

var _ = router();

_.get('/things/:id([0-9]{5})', sendID);

function *sendID(){
   this.body = 'id: ' + this.params.id;
}

app.use(_.routes());
app.listen(3000);
Note that this will only match the requests that have a 5-digit long id. You can use more complex regexes to match/validate your routes. If none of your routes match the request, you'll get a Not found message as response.
For example, if we define the same routes as above, on requesting with a valid URL, we get −
Koa.js - HTTP Methods
The HTTP method is supplied in the request and specifies the operation that the client has requested. The following table summarizes the commonly used HTTP methods.
| Sr.No. | Method & Description |
|---|---|
| 1 | GET The GET method requests a representation of the specified resource. Requests using GET should only retrieve data and should have no other effect. |
| 2 | POST The POST method requests that the server accept the data enclosed in the request as a new object/entity of the resource identified by the URI. |
| 3 |
PUT The PUT method requests that the server accept the data enclosed in the request as a modification to the existing object identified by the URI. If it does not exist, then PUT method should create one. |
| 4 |
DELETE The DELETE method requests that the server delete the specified resource. |
These are the most common HTTP methods. To learn more about them, head over to https://www.tutorialspoint.com/http/http_methods.htm.
Koa.js - Request Object
A Koa Request object is an abstraction on top of node's vanilla request object, providing additional functionality that is useful for everyday HTTP server development. The Koa request object is embedded in the context object, this. Let’s log out the request object whenever we get a request.
var koa = require('koa');
var router = require('koa-router');
var app = koa();

var _ = router();

_.get('/hello', getMessage);

function *getMessage(){
   console.log(this.request);
   this.body = 'Your request has been logged.';
}
app.use(_.routes());
app.listen(3000);
When you run this code and navigate to https://localhost:3000/hello, then you will receive the following response.

On your console, you'll get the request object logged out.
{
   method: 'GET',
   url: '/hello/',
   header:
   {
      host: 'localhost:3000',
      connection: 'keep-alive',
      'upgrade-insecure-requests': '1',
      'user-agent': 'Mozilla/5.0 (X11; Linux x86_64)
         AppleWebKit/537.36 (KHTML, like Gecko) Chrome/52.0.2743.116 Safari/537.36',
      accept: 'text/html,application/xhtml+xml,
         application/xml;q = 0.9,image/webp,*/*;q = 0.8',
      dnt: '1',
      'accept-encoding': 'gzip, deflate, sdch',
      'accept-language': 'en-US,en;q = 0.8'
   }
}
We have access to many useful properties of the request using this object. Let us look at some examples.
request.header
Provides all the request headers.
request.method
Provides the request method(GET, POST, etc.)
request.href
Provides the full request URL.
request.path
Provides the path of the request. Without query string and base url.
request.query
Gives the parsed query string. For example, if we log this on a request such as https://localhost:3000/hello/?name=Ayush&age=20&country=India, then we'll get the following object.
{
   name: 'Ayush',
   age: '20',
   country: 'India'
}
request.accepts(type)
This function returns true or false based on whether the requested resources accept the given request type.
You can read more about the request object in the docs at Request.
Koa.js - Response Object
A Koa Response object is an abstraction on top of node's vanilla response object, providing additional functionality that is useful for everyday HTTP server development. The Koa response object is embedded in the context object, this. Let’s log out the response object whenever we get a request.
var koa = require('koa');
var router = require('koa-router');
var app = koa();

var _ = router();

_.get('/hello', getMessage);

function *getMessage(){
   this.body = 'Your request has been logged.';
   console.log(this.response);
}

app.use(_.routes());
app.listen(3000);
When you run this code and navigate to https://localhost:3000/hello then you'll receive the following response.
On your console, you'll get the request object logged out.
{
   status: 200,
   message: 'OK',
   header:
   {
      'content-type': 'text/plain; charset=utf-8',
      'content-length': '12'
   },
   body: 'Your request has been logged.'
}
The status and message are automatically set by Koa but can be modified by us. If we don’t set the response body, the status code is set to 404. Once we set the response body, the status is set to 200 by default. We can explicitly override this behavior.
We have access to many useful properties of the response using this object. Let us look at some examples −
response.header
Provides all the response headers.
response.status
Provides the response status (200, 404, 500, etc). This property is also used to set the response status.
response.message
Provides the response message. This property is also used to set custom messages with responses. It is associated with response.status.
response.body
Get or set the response body. Usually, we access it using the context object. This is just another way to access it. The body could be of the type: String, Buffer, Stream, Object or Null.
response.type
Get or set the content type of the current response.
response.get(field)
This function is used to get the values of headers with case insensitive value field.
response.set(field, value)
This function is used to set a header on the response using field and value pair.
response.remove(field)
This function is used to unset a header on the response using a field name.
You can read more about the response object in the docs at Response.
Koa.js - Redirects
Redirection is very important when creating websites. If a malformed URL is requested or there are some errors on your server, you should redirect them to the respective error pages. Redirects can also be used to keep people out of restricted areas of your website.
Let us create an error page and redirect to that page whenever someone requests a malformed URL.
var koa = require('koa');
var router = require('koa-router');
var app = koa();
var _ = router();

_.get('/not_found', printErrorMessage);
_.get('/hello', printHelloMessage);

app.use(_.routes());
app.use(handle404Errors);

function *printErrorMessage() {
   this.status = 404;
   this.body = "Sorry we do not have this resource.";
}
function *printHelloMessage() {
   this.status = 200;
   this.body = "Hey there!";
}
function *handle404Errors(next) {
   if (404 != this.status) return;
   this.redirect('/not_found');
}
app.listen(3000);
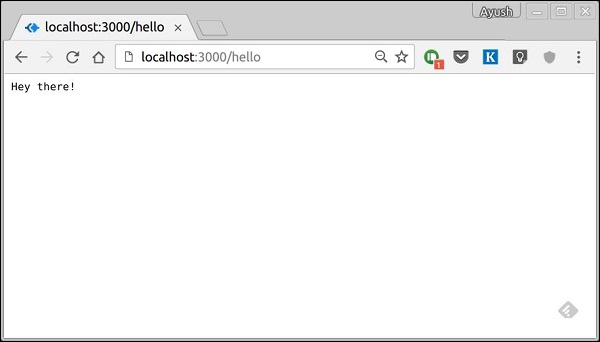
When we run this code and navigate to any route other than /hello, we'll be redirected to /not_found. We have placed the middleware at the end (app.use function call to this middleware). This ensures we reach the middleware at last and send the corresponding response. Following are the results we see when we run the above code.
When we navigate to https://localhost:3000/hello, we get −
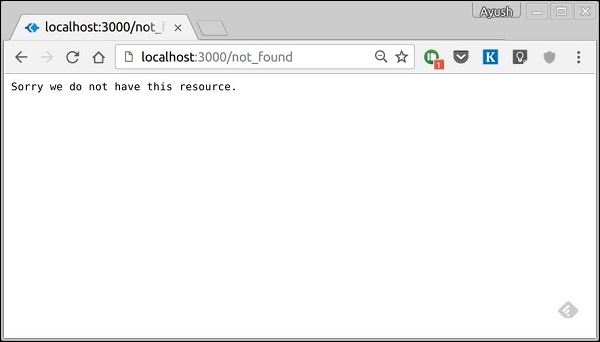
If we navigate to any other route, we get −
Koa.js - Error Handling
Error handling plays an important part in building web applications. Koa uses middleware for this purpose as well.
In Koa, you add a middleware that does try { yield next } as one of the first middleware. If we encounter any error downstream, we return to the associated catch clause and handle the error here. For example −
var koa = require('koa');
var app = koa();

//Error handling middleware
app.use(function *(next) {
   try {
      yield next;
   } catch (err) {
      this.status = err.status || 500;
      this.body = err.message;
      this.app.emit('error', err, this);
   }
});

//Create an error in the next middleware
//Set the error message and status code and throw it using context object

app.use(function *(next) {
   //This will set status and message
   this.throw('Error Message', 500);
});

app.listen(3000);
We have deliberately created an error in the above code and are handling the error in our first middleware's catch block. This is then emitted to our console as well as sent as the response to our client. Following is the error message we get when we trigger this error.
InternalServerError: Error Message
   at Object.module.exports.throw
      (/home/ayushgp/learning/koa.js/node_modules/koa/lib/context.js:91:23)
   at Object.<anonymous> (/home/ayushgp/learning/koa.js/error.js:18:13)
   at next (native)
   at onFulfilled (/home/ayushgp/learning/koa.js/node_modules/co/index.js:65:19)
   at /home/ayushgp/learning/koa.js/node_modules/co/index.js:54:5
   at Object.co (/home/ayushgp/learning/koa.js/node_modules/co/index.js:50:10)
   at Object.toPromise (/home/ayushgp/learning/koa.js/node_modules/co/index.js:118:63)
   at next (/home/ayushgp/learning/koa.js/node_modules/co/index.js:99:29)
   at onFulfilled (/home/ayushgp/learning/koa.js/node_modules/co/index.js:69:7)
   at /home/ayushgp/learning/koa.js/node_modules/co/index.js:54:5
Right now any request sent to the server will result in this error.
Koa.js - Cascading
Middleware functions are functions that have access to the context object and the next middleware function in the application’s request-response cycle. These functions are used to modify the request and response objects for tasks such as parsing request bodies, adding response headers, etc. Koa goes a step further by yielding 'downstream', then flowing the control back 'upstream'. This effect is called cascading.
Following is a simple example of a middleware function in action.
var koa = require('koa');
var app = koa();
var _ = router();

//Simple request time logger
app.use(function* (next) {
   console.log("A new request received at " + Date.now());

   //This function call is very important. It tells that more processing is
   //required for the current request and is in the next middleware function/route handler.
   yield next;
});

app.listen(3000);
The above middleware is called for every request on the server. Thus after every request, we will get the following message in the console.
A new request received at 1467267512545
To restrict it to a specific route (and all its subroutes), we just need to create the routes like we did for routing. Actually its these middleware only that handle our request.
For example,
var koa = require('koa');
var router = require('koa-router');
var app = koa();

var _ = router();

//Simple request time logger
_.get('/request/*', function* (next) {
   console.log("A new request received at " + Date.now());
   yield next;
});

app.use(_.routes());
app.listen(3000);
Now whenever you request any subroute of '/request', only then it'll log the time.
Order of Middleware Calls
One of the most important things about middleware in Koa is that the order in which they are written/included in your file, are the order in which they are executed downstream. As soon as we hit a yield statement in a middleware, it switches to the next middleware in line, till we reach the last. Then again we start moving back up and resuming functions from yield statements.
For example, in the following code snippet, the first function executes first till yield, then the second middleware till yield, then the third. As we have no more middleware here, we start moving back up, executing in a reverse order, i.e., third, second, first. This example summarizes how to use middleware the Koa way.
var koa = require('koa');
var app = koa();

//Order of middlewares
app.use(first);
app.use(second);
app.use(third);

function *first(next) {
   console.log("I'll be logged first. ");

   //Now we yield to the next middleware
   yield next;

   //We'll come back here at the end after all other middlewares have ended
   console.log("I'll be logged last. ");
};

function *second(next) {
   console.log("I'll be logged second. ");
   yield next;
   console.log("I'll be logged fifth. ");
};

function *third(next) {
   console.log("I'll be logged third. ");
   yield next;
   console.log("I'll be logged fourth. ");
};

app.listen(3000);
When we visit '/' after running this code, on our console we will get −
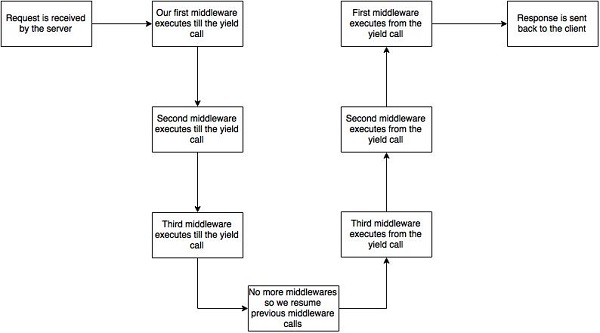
I'll be logged first.
I'll be logged second.
I'll be logged third.
I'll be logged fourth.
I'll be logged fifth.
I'll be logged last.
The following diagram summarizes what is actually happening in the above example.
Now that we know how to create our own middleware, let us discuss some of the most commonly used community created middleware.
Third Party Middleware
A list of third party middleware for express is available here. Following are some of the most commonly used middleware −
- koa-bodyparser
- koa-router
- koa-static
- koa-compress
We'll discuss multiple middleware in the subsequent chapters.
Koa.js - Templating
Pug is a templating engine. Templating engines are used to remove the cluttering of our server code with HTML, concatenating strings wildly to existing HTML templates. Pug is a very powerful templating engine, which has a variety of features such as filters, includes, inheritance, interpolation, etc. There is a lot of ground to cover on this.
To use Pug with Koa, we need to install it using the following command.
$ npm install --save pug koa-pug
Once pug is installed, set it as the templating engine for your app. Add the following code to your app.js file.
var koa = require('koa');
var router = require('koa-router');
var app = koa();

var Pug = require('koa-pug');
var pug = new Pug({
   viewPath: './views',
   basedir: './views',
   app: app //Equivalent to app.use(pug)
});

var _ = router(); //Instantiate the router

app.use(_.routes()); //Use the routes defined using the router
app.listen(3000);
Now, create a new directory called views. Inside the directory, create a file named first_view.pug, and enter the following data in it.
doctype html
html
head
title = "Hello Pug"
body
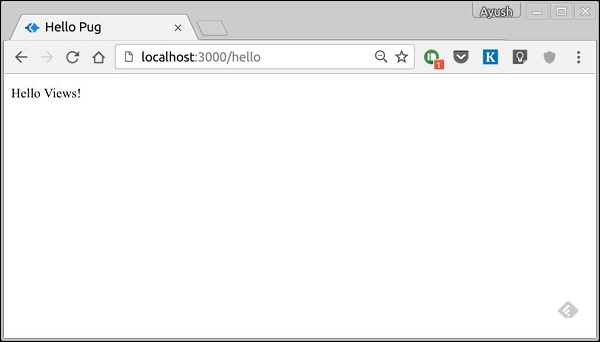
p.greetings#people Hello Views!
To run this page, add the following route to your app.
_.get('/hello', getMessage); // Define routes

function *getMessage(){
   this.render('first_view');
};
You'll receive the output as −
What Pug does is, it converts this very simple looking markup to html. We don’t need to keep track of closing our tags, no need to use class and id keywords, rather use '.' and '#' to define them. The above code first gets converted to
<!DOCTYPE html>
<html>
   <head>
      <title>Hello Pug</title>
   </head>

   <body>
      <p class = "greetings" id = "people">Hello Views!</p>
   </body>
</html>
Pug is capable of doing much more than simplifying HTML markup. Let’s explore some of these features of Pug.
Simple Tags
Tags are nested according to their indentation. Like in the above example, <title> was indented within the <head> tag, so it was inside it. However, the <body> tag was on the same indentation, thus it was a sibling of <head> tag.
We don’t need to close tags. As soon as Pug encounters the next tag on the same or the outer indentation level, it closes the tag for us.
There are three methods to put text inside of a tag −
- Space seperated −
h1 Welcome to Pug
- Piped text −
div
   | To insert multiline text,
   | You can use the pipe operator.
- Block of text −
div.
   But that gets tedious if you have a lot of text.
   You can use "." at the end of tag to denote block of text.
   To put tags inside this block, simply enter tag in a new line and
   indent it accordingly.
Comments
Pug uses the same syntax as JavaScript(//) for creating comments. These comments are converted to html comments(<!--comment-->). For example,
//This is a Pug comment
This comment gets converted to −
<!--This is a Pug comment-->
Attributes
To define attributes, we use a comma separated list of attributes, in parenthesis. Class and ID attributes have special representations. The following line of code covers defining attributes, classes, and id for a given html tag.
div.container.column.main#division(width = "100",height = "100")
This line of code, gets converted to −
<div class = "container column main" id = "division" width = "100" height = "100"></div>
Passing Values to Templates
When we render a Pug template, we can actually pass it a value from our route handler, which we can then use in our template. Create a new route handler with the following code.
var koa = require('koa');
var router = require('koa-router');
var app = koa();

var Pug = require('koa-pug');
var pug = new Pug({
   viewPath: './views',
   basedir: './views',
   app: app // equals to pug.use(app) and app.use(pug.middleware)
});

var _ = router(); //Instantiate the router

_.get('//dynamic_view', dynamicMessage); // Define routes

function *dynamicMessage(){
   this.render('dynamic', {
      name: "TutorialsPoint",
      url:"https://www.tutorialspoint.com"
   });
};

app.use(_.routes()); //Use the routes defined using the router
app.listen(3000);
Then, create a new view file in the views directory, named dynamic.pug, using the following code.
html
head
title = name
body
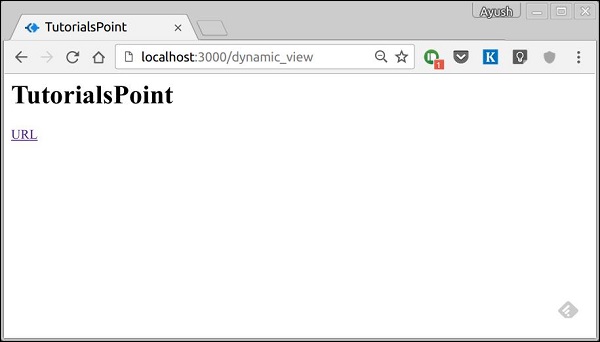
h1 = name
a(href = url) URL
Open localhost:3000/dynamic in your browser and following should be the output. −
We can also use these passed variables within the text. To insert passed variables in between text of a tag, we use #{variableName} syntax. For example, in the above example, if we want to insert Greetings from TutorialsPoint, then we have to use the following code.
html
   head
      title = name
   body
      h1 Greetings from #{name}
      a(href = url) URL
This method of using values is called interpolation.
Conditionals
We can use conditional statements and looping constructs as well. Consider this practical example, if a user is logged in we would want to display "Hi, User" and if not, then we would want to show him a "Login/Sign Up" link. To achieve this, we can define a simple template such as −
html
   head
      title Simple template
   body
      if(user)
         h1 Hi, #{user.name}
      else
         a(href = "/sign_up") Sign Up
When we render this using our routes, and if we pass an object like −
this.render('/dynamic',{user:
   {name: "Ayush", age: "20"}
});
It'll give a message displaying Hi, Ayush. However, if we don’t pass any object or pass one with no user key, then we will get a Sign up link.
Include and Components
Pug provides a very intuitive way to create components for a web page. For example, if you see a news website, the header with logo and categories is always fixed. Instead of copying that to every view, we can use an include. Following example shows how we can use an include −
Create three views with the following code −
header.pug
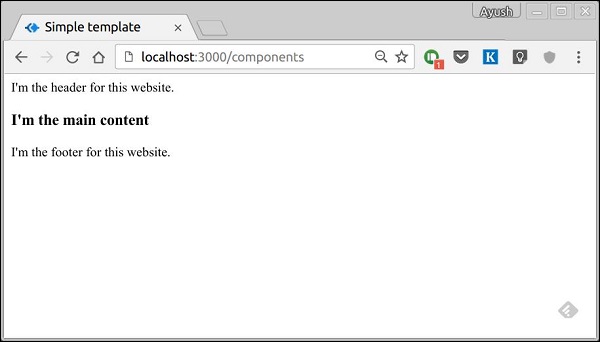
div.header.
   I'm the header for this website.
content.pug
html
   head
      title Simple template
   body
      include ./header.pug
      h3 I'm the main content
      include ./footer.pug
footer.pug
div.footer.
   I'm the footer for this website.
Create a route for this as follows.
var koa = require('koa');
var router = require('koa-router');
var app = koa();

var Pug = require('koa-pug');
var pug = new Pug({
   viewPath: './views',
   basedir: './views',
   app: app //Equivalent to app.use(pug)
});

var _ = router(); //Instantiate the router

_.get('/components', getComponents);

function *getComponents(){
   this.render('content.pug');
}

app.use(_.routes()); //Use the routes defined using the router
app.listen(3000);
Go to localhost:3000/components, you should get the following output.
include can also be used to include plaintext, CSS and JavaScript.
There are many other features of Pug. However, those are out of the scope for this tutorial. You can further explore Pug at Pug.
Koa.js - Form Data
Forms are an integral part of the web. Almost every website we visit offers us forms that submit or fetch some information for us. To get started with forms, we will first install the koa-body. To install this, go to your terminal and use −
$ npm install --save koa-body
Replace your app.js file contents with the following code.
var koa = require('koa');
var router = require('koa-router');
var bodyParser = require('koa-body');
var app = koa();

//Set up Pug
var Pug = require('koa-pug');
var pug = new Pug({
   viewPath: './views',
   basedir: './views',
   app: app //Equivalent to app.use(pug)
});

//Set up body parsing middleware
app.use(bodyParser({
   formidable:{uploadDir: './uploads'},
   multipart: true,
   urlencoded: true
}));

_.get('/', renderForm);
_.post('/', handleForm);

function * renderForm(){
   this.render('form');
}
function *handleForm(){
   console.log(this.request.body);
   console.log(this.req.body);
   this.body = this.request.body; //This is where the parsed request is stored
}

app.use(_.routes());
app.listen(3000);
The new things we are doing here are importing the body parser and multer. We are using the body parser for parsing json and x-www-form-urlencoded header requests, while we use multer for parsing multipart/form-data.
Let us create a html form to test this out! Create a new view named form.pug with the following code.
html
   head
      title Form Tester
   body
      form(action = "/", method = "POST")
         div
            label(for = "say") Say:
            input(name = "say" value = "Hi")
         br
         div
            label(for = "to") To:
            input(name = "to" value = "Koa form")
         br
         button(type = "submit") Send my greetings
Run your server using −
nodemon index.js
Now go to localhost:3000/ and fill the form as you like, and submit it. You'll receive the response as −
Take a look at your console, it'll show you the body of your request as a JavaScript object. For example −

The this.request.body object contains your parsed request body. To use fields from that object, just use them as normal JS objects.
This is just one way to send a request. There are many other ways, but those are irrelevant to cover here, because our Koa app will handle all those requests in the same way. To read more about different ways to make a request, have a look at this page.
Koa.js - File Uploading
Web applications need to provide the functionality to allow file uploads. Let us see how we can receive files from the clients and store them on our server.
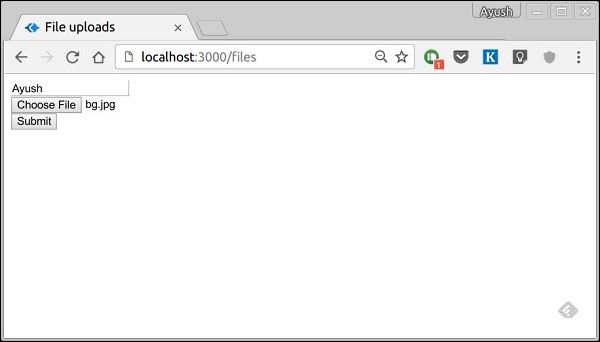
We have already used the koa-body middleware for parsing requests. This middleware is also used for handling file uploads. Let us create a form that allows us to upload files and then save these files using Koa. First create a template named file_upload.pug with the following contents.
html
   head
      title File uploads
   body
      form(action = "/upload" method = "POST" enctype = "multipart/form-data")
         div
            input(type = "text" name = "name" placeholder = "Name")

         div
            input(type = "file" name = "image")

         div
            input(type = "submit")
Note that you need to give the same encoding type as above in your form. Now let us handle this data on our server.
var koa = require('koa');
var router = require('koa-router');
var bodyParser = require('koa-body');
var app = koa();
//Set up Pug
var Pug = require('koa-pug');
var pug = new Pug({
viewPath: './views',
basedir: './views',
app: app
});
//Set up body parsing middleware
app.use(bodyParser({
formidable:{uploadDir: './uploads'}, //This is where the files would come
multipart: true,
urlencoded: true
}));
var _ = router(); //Instantiate the router
_.get('/files', renderForm);
_.post('/upload', handleForm);
function * renderForm(){
this.render('file_upload');
}
function *handleForm(){
console.log("Files: ", this.request.body.files);
console.log("Fields: ", this.request.body.fields);
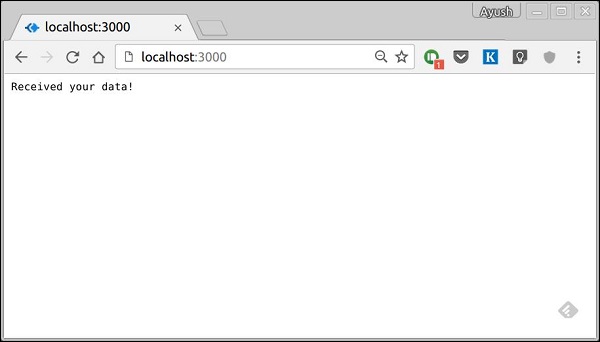
this.body = "Received your data!"; //This is where the parsed request is stored
}
app.use(_.routes());
app.listen(3000);
When you run this, you get the following form.
When you submit this, your console will produce the following output.

The files that were uploaded are stored in the path in the above output. You can access the files in the request using this.request.body.files and the fields in that request by this.request.body.fields.
Koa.js - Static Files
Static files are files that clients download as they are from the server. Create a new directory, public. Express, by default doesn't allow you to serve static files.
We need a middleware to serve this purpose. Go ahead and install koa-serve −
$ npm install --save koa-static
Now we need to use this middleware. Before that create a directory called public. We will store all our static files here. This allows us to keep our server code secure as nothing above this public folder would be accessible to the clients. After you've created a public directory, create a file named hello.txt in it with any content you like. Now add the following to your app.js.
var serve = require('koa-static');
var koa = require('koa');
var app = koa();

app.use(serve('./public'));

app.listen(3000);
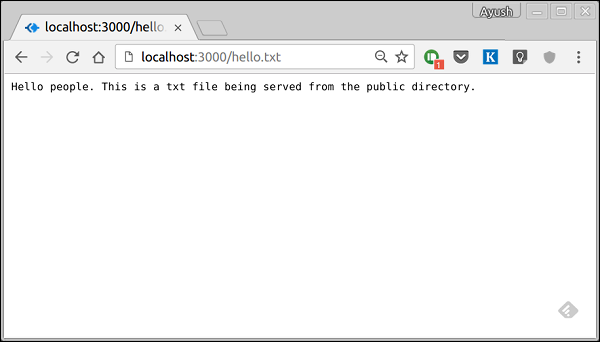
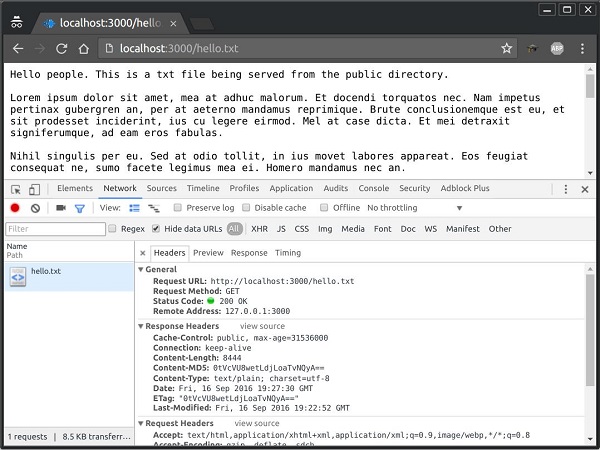
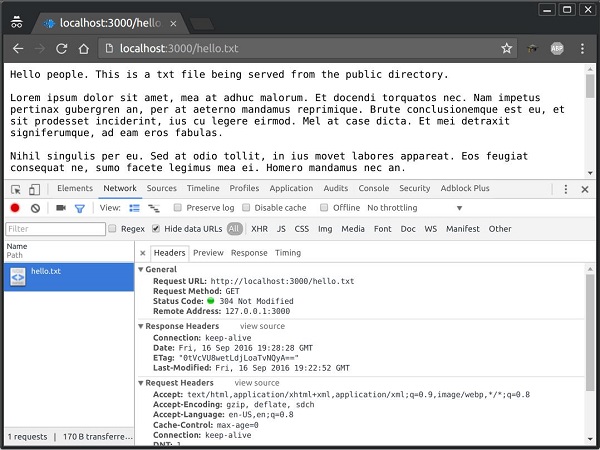
Note − Koa looks up the files relative to the static directory, so the name of the static directory is not part of the URL. The root route is now set to your public dir, so all static files you load will be considering public as the root. To test that this is working fine, run your app and visit https://localhost:3000/hello.txt
You should get the following output. Note that this is not a HTML document or Pug view, rather it is a simple txt file.
Multiple Static Dirs
We can also set multiple static assets directories using −
var serve = require('koa-static');
var koa = require('koa');
var app = koa();

app.use(serve('./public'));
app.use(serve('./images'));

app.listen(3000);
Now when we request a file, Koa will search these directories and send us the matching file.
Koa.js - Cookies
Cookies are simple, small files/data that are sent to client with a server request and stored on the client side. Every time the user loads the website back, this cookie is sent with the request. This helps keep track of the users actions. There are numerous uses of HTTP Cookies.
- Session management
- Personalization(Recommendation systems)
- User tracking
To use cookies with Koa, we have the functions: ctx.cookies.set() and ctx.cookies.get(). To set a new cookie, let’s define a new route in our Koa app.
var koa = require('koa');
var router = require('koa-router');
var app = koa();

_.get('/', setACookie);

function *setACookie() {
   this.cookies.set('foo', 'bar', {httpOnly: false});
}

var _ = router();

app.use(_.routes());
app.listen(3000);
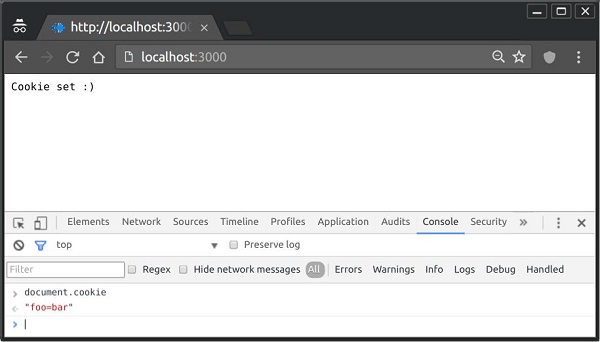
To check if the cookie is set or not, just go to your browser, fire up the console, and enter −
console.log(document.cookie);
This will produce the following output (you may have more cookies set maybe due to extensions in your browser).
"foo = bar"
Here is an example of the above.
The browser also sends back cookies every time it queries the server. To view a cookie on your server, on the server console in a route, add the following code to that route.
console.log('Cookies: foo = ', this.cookies.get('foo'));
Next time you send a request to this route, you'll get the following output.
Cookies: foo = bar
Adding Cookies with Expiration Time
You can add cookies that expire. To add a cookie that expires, just pass an object with the property 'expires' set to the time when you want it to expire. For example,
var koa = require('koa');
var router = require('koa-router');
var app = koa();

_.get('/', setACookie);

function *setACookie(){
   //Expires after 360000 ms from the time it is set.
	this.cookies.set('name', 'value', {
      httpOnly: false, expires: 360000 + Date.now() });
}

var _ = router();

app.use(_.routes());
app.listen(3000);
Deleting Existing Cookies
To unset a cookie, simply set the cookie to an empty string. For example, if you need to clear a cookie named foo, use the following code.
var koa = require('koa');
var router = require('koa-router');
var app = koa();

_.get('/', setACookie);

function *setACookie(){
   //Expires after 360000 ms from the time it is set.
   this.cookies.set('name', '');
}

var _ = router();

app.use(_.routes());
app.listen(3000);
This will unset the said cookie. Note that you should leave the HttpOnly option to be true when not using the cookie in the client side code.
Koa.js - Sessions
HTTP is stateless, hence in order to associate a request to any other request, you need a way to store user data between HTTP requests. Cookies and URL parameters are both suitable ways to transport data between the client and the server. However, they are both readable on the client side. Sessions solve exactly this problem. You assign the client an ID and it makes all further requests using that ID. Information associated with the client is stored on the server linked to this ID.
We'll need the koa-session, thus install it using −
npm install --save koa-session
We will put the koa-session middleware in place. In this example, we'll use the RAM to store sessions. Never use this in production environments. The session middleware handles everything, i.e. creating the session, setting the session cookie, and creating the session object in context object.
Whenever we make a request from the same client again, we will have their session information stored with us (given that server was not restarted). We can add more properties to this session object. In the following example, we will create a view counter for a client.
var session = require('koa-session');
var koa = require('koa');
var app = koa();
app.keys = ['Shh, its a secret!'];
app.use(session(app)); // Include the session middleware
app.use(function *(){
var n = this.session.views || 0;
this.session.views = ++n;
if(n === 1)
this.body = 'Welcome here for the first time!';
else
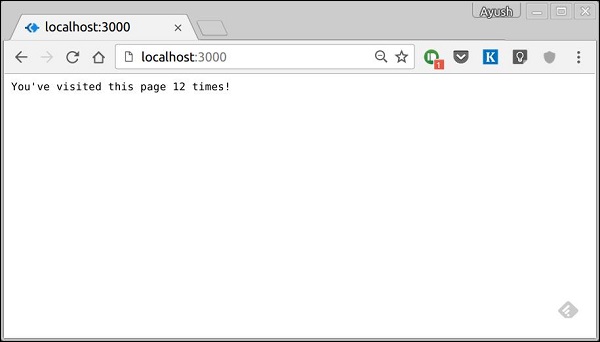
this.body = "You've visited this page " + n + " times!";
})
app.listen(3000);
What the above code does is, when a user visits the site, it creates a new session for the user and assigns a cookie. Next time the user visits, the cookie is checked and the page_view session variable is updated accordingly.
Now if you run the app and go to localhost:3000, you'll get the following response.
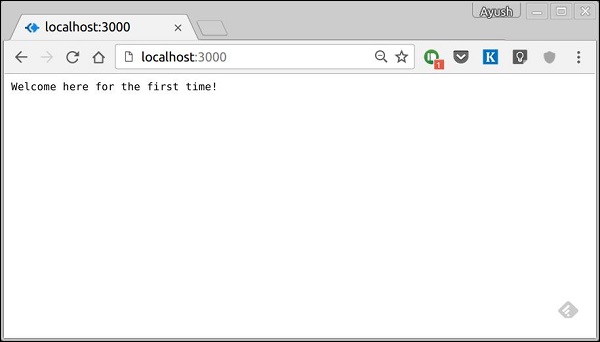
If you revisit the page, the page counter will increase. In this case, the page was refreshed 12 times.
Koa.js - Authentication
Authentication is a process in which the credentials provided are compared to those on file in the database of authorized users' information on a local operating system or within an authentication server. If the credentials match, the process is completed and the user is granted authorization for access.
We'll be creating a very basic authentication system that'll use Basic HTTP Authentication. This is the simplest possible way to enforce access control as it doesn't require cookies, sessions, or anything else. To use this, the client has to send the Authorization header along with every request it makes. The username and password are not encrypted, but are concatenated in a single string like the following.
username:password
This string is encoded with Base64, and the word Basic is put before this value. For example, if your username is Ayush and password India, then the string "Ayush:India" would be sent as encoded in the authorization header.
Authorization: Basic QXl1c2g6SW5kaWE=
To implement this in your koa app, you'll need the koa-basic-auth middleware. Install it using −
$ npm install --save koa-basic-auth
Now open your app.js file and enter the following code in it.
//This is what the authentication would be checked against
var credentials = { name: 'Ayush', pass: 'India' }

var koa = require('koa');
var auth = require('koa-basic-auth');
var _ = require('koa-router')();

var app = koa();

//Error handling middleware
app.use(function *(next){
   try {
      yield next;
   } catch (err) {
      if (401 == err.status) {
         this.status = 401;
         this.set('WWW-Authenticate', 'Basic');
         this.body = 'You have no access here';
      } else {
         throw err;
      }
   }
});

// Set up authentication here as first middleware.
// This returns an error if user is not authenticated.
_.get('/protected', auth(credentials), function *(){
   this.body = 'You have access to the protected area.';
   yield next;
});

// No authentication middleware present here.
_.get('/unprotected', function*(next){
   this.body = "Anyone can access this area";
   yield next;
});

app.use(_.routes());
app.listen(3000);
We have created an error handling middleware to handle all authentication related errors. Then, we have created 2 routes −
/protected − This route can only be accessed if the user sends the correct authentication header. For all others, it'll give an error.
/unprotected − This route can be accessed by anyone, with or without the authentication.
Now if you send a request to /protected without an authentication header or with the wrong credentials, you'll receive an error. For example,
$ curl https://localhost:3000/protected
You'll receive the response as −
HTTP/1.1 401 Unauthorized
WWW-Authenticate: Basic
Content-Type: text/plain; charset=utf-8
Content-Length: 28
Date: Sat, 17 Sep 2016 19:05:56 GMT
Connection: keep-alive

Please authenticate yourself
However, with the right credentials, you'll get the expected response. For example,
$ curl -H "Authorization: basic QXl1c2g6SW5kaWE=" https://localhost:3000/protected -i
You'll get the response as −
HTTP/1.1 200 OK
Content-Type: text/plain; charset=utf-8
Content-Length: 38
Date: Sat, 17 Sep 2016 19:07:33 GMT
Connection: keep-alive

You have access to the protected area.
The /unprotected route is still accessible to everyone.
Koa.js - Compression
Compression is a simple, effective way to save bandwidth and speed up your site. It is only compatible with modern browsers and should be used with caution if your users use legacy browsers as well.
When sending responses from the server, if compression is used, it can greatly improve the load time. We'll be using a middleware called koa-compress to take care of the compression of files as well as setting appropriate headers.
Go ahead and install the middleware using −
$ npm install --save koa-compress
Now in your app.js file, add the following code −
var koa = require('koa');
var router = require('koa-router');
var app = koa();

var Pug = require('koa-pug');
var pug = new Pug({
   viewPath: './views',
   basedir: './views',
   app: app //Equivalent to app.use(pug)
});

app.use(compress({
   filter: function (content_type) {
      return /text/i.test(content_type)
   },
   threshold: 2048,
   flush: require('zlib').Z_SYNC_FLUSH
}));

var _ = router(); //Instantiate the router

_.get('/', getRoot);

function *getRoot(next){
   this.render('index');
}

app.use(_.routes()); //Use the routes defined using the router
app.listen(3000);
This puts our compression middleware in place. The filter option is a function that checks the response content type to decide whether to compress. The threshold option is the minimum response size in bytes to compress. This ensures we don’t compress every little response.
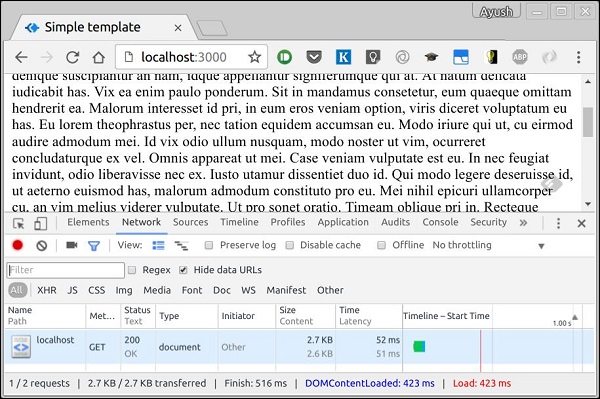
Following is a response without compression.
Following is the similar response with compression.
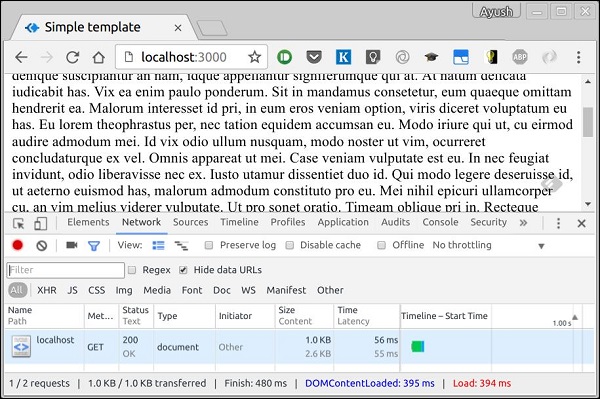
If you look at the size tab at the bottom, you can very well see the difference between the two. There is more than 150% improvement, when we compress the files.
Koa.js - Caching
Caching is the term for storing reusable responses in order to make subsequent requests faster. Every browser ships with an implementation of a HTTP cache. All we have to do is ensure that each server response provides correct HTTP header directives to instruct the browser on when and for how long the response can be cached by the browser.
Following are some benefits of including caching in your web apps −
Your network costs decrease. If your content is cached, you'll need to send less of it for every subsequent request.
Speed and performance of your website increases.
Your content can be made available even if your client is offline.
We'll be using the koa-static-cache middleware to implement caching in our app. Install these middleware using −
$ npm install --save koa-static-cache
Go to your app.js file and add the following code to it.
var koa = require('koa');
var app = koa();

var path = require('path');
var staticCache = require('koa-static-cache');

app.use(staticCache(path.join(__dirname, 'public'), {
   maxAge: 365 * 24 * 60 * 60  //Add these files to caches for a year
}))

app.listen(3000);
The koa-static-cache middleware is used to cache server responses on the client side. The cache-control header is set according to the options we provide while initializing the cache object. We have set the expiration time of this cached response to 1 year. Following are the comparisons of request we have sent before and after the file was cached.
Before this file was cached, the returned status code was 200, which is OK. The response headers had multiple information regarding the content to be cached and had also given an ETag for the content.
The next time the request was sent, it was sent along with the ETtag. Since our content hadn't changed on the server, its corresponding ETag also remained the same and the client was told that the copy it has locally is up-to-date with what the server would provide and should use the local one instead of requesting again.
Note − For invalidating any cached file, you just need to change its file name and update its reference. This will ensure that you have a new file to send to the client and the client can’t load it back from the cache.
Koa.js - Database
We are receiving the requests, but are not storing them anywhere. We need a Database to store the data. We'll use a famous NoSQL database called MongoDB. To install and read about Mongo, head over to this link.
In order to use Mongo with Koa, we need a client API for the node. There are multiple options for us, however for this tutorial we'll stick to mongoose. Mongoose is used for document modeling in Node for MongoDB. Document modeling means that, we will create a Model (much like a class in document-oriented programming), and then we will produce documents using this Model (like we create documents of a class in OOP). All our processing will be done on these "documents", then finally, we will write these documents in our database.
Setting Up Mongoose
Now that we have Mongo installed, let us install mongoose, the same way we have been installing our other node packages.
$ npm install --save mongoose
Before we start using mongoose, we have to create a database using the Mongo shell. To create a new database, open your terminal and enter "mongo". A Mongo shell will start, enter the following.
use my_db
A new database will be created for you. Whenever you open the Mongo shell, it'll default to "test" db and you'll have to change to your database using the same command as above.
To use mongoose, we will require it in our app.js file and then connect to the mongod service running on mongodb://localhost
var koa = require('koa');
var _ = require('koa-router')();
var app = koa();

var mongoose = require('mongoose');
mongoose.connect('mongodb://localhost/my_db');

app.use(_.routes());
app.listen(3000);
Now our app is connected to our database, let’s create a new Model. This model will act as a collection in our database. To create a new Model, use the following code, before defining any routes.
var koa = require('koa');
var _ = require('koa-router')();
var app = koa();

var mongoose = require('mongoose');
mongoose.connect('mongodb://localhost/my_db');

var personSchema = mongoose.Schema({
   name: String,
   age: Number,
   nationality: String
});

var Person = mongoose.model("Person", personSchema);

app.use(_.routes());
app.listen(3000);
The above code defines the schema for a person and is used to create a mongoose Model Person.
Saving Documents
Now we will create a new html form, which will get the details of a person and save it to our database. To create the form, create a new view file called person.pug in the views directory with the following content.
html
   head
      title Person
   body
      form(action = "/person", method = "POST")
         div
            label(for = "name") Name:
            input(name = "name")
         br
         div
            label(for = "age") Age:
            input(name = "age")
         br
         div
            label(for = "nationality") Nationality:
            input(name = "nationality")
         br
         button(type = "submit") Create new person
Also add a new get route in index.js to render this document.
var koa = require('koa');
var _ = require('koa-router')();
var app = koa();

var mongoose = require('mongoose');
mongoose.connect('mongodb://localhost/my_db');

var personSchema = mongoose.Schema({
   name: String,
   age: Number,
   nationality: String
});

var Person = mongoose.model("Person", personSchema);

_.get('/person', getPerson);

function *getPerson(next){
   this.render('person');
   yield next;
}

app.use(_.routes());
app.listen(3000);
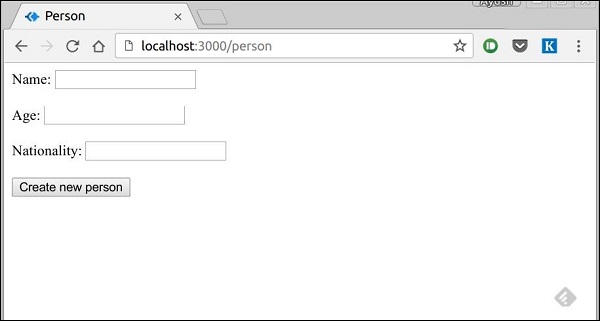
Go to localhost:3000/person to check if our form is displaying right. Note that this is just the UI, it’s not working yet. This is how our form looks.
We'll now define a post route handler at '/person' which will handle this request.
var koa = require('koa');
var _ = require('koa-router')();
var app = koa();

var mongoose = require('mongoose');
mongoose.connect('mongodb://localhost/my_db');

var personSchema = mongoose.Schema({
   name: String,
   age: Number,
   nationality: String
});

var Person = mongoose.model("Person", personSchema);

_.post('/person', createPerson);

function *createPerson(next){
   var self = this;
   var personInfo = self.request.body; //Get the parsed information

   if(!personInfo.name || !personInfo.age || !personInfo.nationality){
      self.render(
         'show_message', {message: "Sorry, you provided wrong info", type: "error"});
   } else {
      var newPerson = new Person({
         name: personInfo.name,
         age: personInfo.age,
         nationality: personInfo.nationality
      });
      yield newPerson.save(function(err, res) {
         if(err)
            self.render('show_message',
               {message: "Database error", type: "error"});
         else
            self.render('show_message',
               {message: "New person added", type: "success", person: personInfo});
      });
   }
}

app.use(_.routes());
app.listen(3000);
In the above code, if we receive any empty field or do not receive any field, we will send an error response. However, if we receive a well-formed document, then we create a newPerson document from the Person model and save it to our DB using newPerson.save() function. This is defined in mongoose and accepts a callback as argument. This callback has two arguments, error and response. This will render show_message view, so we need to create that as well.
To show the response from this route, we will also need to create a show_message view. Create a new view with the following code.
html
   head
      title Person
   body
      if(type = "error")
         h3(style = "color:red") #{message}
      else
         h3 New person, name:
            #{person.name}, age:
            #{person.age} and nationality:
            #{person.nationality} added!
Following is the response we receive on successfully submitting the form (show_message.pug).
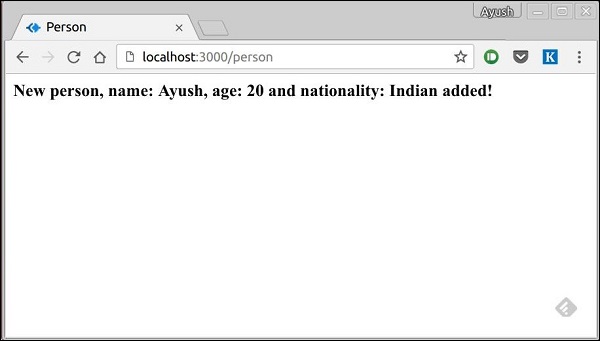
We now have an interface to create persons!
Retrieving Documents
Mongoose provides a lot of functions for retrieving documents, we will focus on three of those. All these functions also take a callback as the last parameter, and just like the save function, their arguments are error and response.
The three functions are −
Model.find(conditions, callback)
This function finds all the documents matching the fields in conditions object. Same operators used in Mongo also work in mongoose. For example, this will fetch all the documents from the persons’ collection.
Person.find(function(err, response){
   console.log(response);
});
This will fetch all documents where the field name is "Ayush" and age is 20.
Person.find({name: "Ayush", age: 20},
   function(err, response){
      console.log(response);
   });
We can also provide the projection we need, i.e., the fields we need. For example, if we want only the names of the people whose nationality is "Indian", we use −
Person.find({nationality: "Indian"},
   "name", function(err, response) {
      console.log(response);
   });
Model.findOne(conditions, callback)
This functions always fetches a single, most relevant document. It has the same exact arguments as Model.find().
Model.findById(id, callback)
This function takes in the _id (defined by mongo) as the first argument, an optional projection string and a callback to handle the response. For example,
Person.findById("507f1f77bcf86cd799439011",
   function(err, response){
      console.log(response);
   });
Let's create a route to view all people records.
var koa = require('koa');
var _ = require('koa-router')();
var app = koa();

var mongoose = require('mongoose');
mongoose.connect('mongodb://localhost/my_db');

var personSchema = mongoose.Schema({
   name: String,
   age: Number,
   nationality: String
});

var Person = mongoose.model("Person", personSchema);

_.get('/people', getPeople);
function *getPeople(next){
   var self = this;

   yield Person.find(function(err, response){
      self.body = response;
   });
}
app.use(_.routes());
app.listen(3000);
Updating Documents
Mongoose provides three functions to update documents.
Model.update(condition, updates, callback)
This function takes a condition and an updates the object as input and applies the changes to all the documents matching the conditions in the collection. For example, the following code will update all Person documents to have a nationality "American".
Person.update({age: 25},
   {nationality: "American"},
   function(err, response){
      console.log(response);
   });
Model.findOneAndUpdate(condition, updates, callback)
It does exactly what is says. Finds one document based on the query and updates that according to the second argument. It also takes a callback as the last argument. For example,
Person.findOneAndUpdate({name: "Ayush"},
   {age: 40},
   function(err, response){
      console.log(response);
   });
Model.findByIdAndUpdate(id, updates, callback)
This function updates a single document identified by its id. For example,
Person.findByIdAndUpdate("507f1f77bcf86cd799439011",
   {name: "James"},
   function(err, response){
      console.log(response);
   });
Let’s create a route to update people. This will be a PUT route with the id as a parameter and details in the payload.
var koa = require('koa');
var _ = require('koa-router')();
var app = koa();
var mongoose = require('mongoose');

mongoose.connect('mongodb://localhost/my_db');

var personSchema = mongoose.Schema({
   name: String,
   age: Number,
   nationality: String
});

var Person = mongoose.model("Person", personSchema);

_.put('/people/:id', updatePerson);

function *updatePerson() {
   var self = this;
   yield Person.findByIdAndUpdate(self.params.id,
      {$set: {self.request.body}}, function(err, response){

      if(err) {
         self.body = {
            message: "Error in updating person with id " + self.params.id};
      } else {
         self.body = response;
      }
   });
}

app.use(_.routes());
app.listen(3000);
To test this route, enter the following in your terminal (replace the id with an id from your created people).
curl -X PUT --data "name = James&age = 20&nationality = American" https://localhost:3000/people/507f1f77bcf86cd799439011
This will update the document associated with the id provided in the route with the above details.
Deleting Documents
We have covered Create, Read and Update, now we'll see how mongoose can be used to Delete documents. There are three functions here, exactly like update.
Model.remove(condition, [callback])
This function takes a condition object as input and removes all the documents matching the conditions. For example, if we need to remove all people aged 20,
Person.remove({age:20});
Model.findOneAndRemove(condition, [callback])
This functions removes a single, most relevant document according to conditions object. For example,
Person.findOneAndRemove({name: "Ayush"});
Model.findByIdAndRemove(id, [callback])
This function removes a single document identified by its id. For example,
Person.findByIdAndRemove("507f1f77bcf86cd799439011");
Now let’s create a route to delete people from our database.
var koa = require('koa');
var _ = require('koa-router')();
var app = koa();

var mongoose = require('mongoose');
mongoose.connect('mongodb://localhost/my_db');

var personSchema = mongoose.Schema({
   name: String,
   age: Number,
   nationality: String
});

var Person = mongoose.model("Person", personSchema);

_.delete('/people/:id', deletePerson);
function *deletePerson(next){
   var self = this;
   yield Person.findByIdAndRemove(self.params.id, function(err, response){
      if(err) {
         self.body = {message: "Error in deleting record id " + self.params.id};
      } else {
         self.body = {message: "Person with id " + self.params.id + " removed."};
      }
   });
}

app.use(_.routes());
app.listen(3000);
To test this out, use the following curl command −
curl -X DELETE https://localhost:3000/people/507f1f77bcf86cd799439011
This will remove the person with the given id producing the following message. −
{message: "Person with id 507f1f77bcf86cd799439011 removed."}
This wraps up how we can create simple CRUD applications using MongoDB, mongoose and Koa. To explore mongoose further, read the API docs.
Koa.js - RESTful APIs
To create mobile applications, single page applications, use AJAX calls and provide data to clients, you'll need an API. A popular architectural style of how to structure and name these APIs and the endpoints is called REST(Representational Transfer State). HTTP 1.1 was designed keeping REST principles in mind. REST was introduced by Roy Fielding in 2000 in his paper Fielding Dissertations.
RESTful URIs and methods provide us with almost all information we need to process a request. The following table summarizes how the various verbs should be used and how URIs should be named. We'll be creating a movies API towards the end, so let’s discuss how it'll be structured.
| Method | URI | Details | Function |
|---|---|---|---|
| GET | /movies | Safe, cachable | Gets the list of all movies and their details |
| GET | /movies/1234 | Safe, cachable | Gets the details of Movie id 1234 |
| POST | /movies | N/A | Creates a new movie with details provided. Response contains the URI for this newly created resource. |
| PUT | /movies/1234 | Idempotent | Modifies movie id 1234 (creates one if it doesn't already exist). Response contains the URI for this newly created resource. |
| DELETE | /movies/1234 | Idempotent | Movie id 1234 should be deleted, if it exists. Response should contain the status of request. |
| DELETE or PUT | /movies | Invalid | Should be invalid. DELETE and PUT should specify which resource they are working on. |
Now let’s create this API in Koa. We will be using JSON as our transport data format as it is easy to work with in JavaScript and has loads of other benefits. Replace your index.js file with the following −
INDEX.JS
var koa = require('koa');
var router = require('koa-router');
var bodyParser = require('koa-body');

var app = koa();

//Set up body parsing middleware
app.use(bodyParser({
   formidable:{uploadDir: './uploads'},
   multipart: true,
   urlencoded: true
}));

//Require the Router we defined in movies.js
var movies = require('./movies.js');

//Use the Router on the sub route /movies
app.use(movies.routes());

app.listen(3000);
Now that we have our application set up, let us concentrate on creating the API. First set up the movies.js file. We are not using a database to store the movies but are storing them in memory, so every time the server restarts the movies added by us will vanish. This can easily be mimicked using a database or a file (using node fs module).
Import koa-router, create a Router and export it using module.exports.
var Router = require('koa-router');
var router = Router({
  prefix: '/movies'
});  //Prefixed all routes with /movies

var movies = [
   {id: 101, name: "Fight Club", year: 1999, rating: 8.1},
   {id: 102, name: "Inception", year: 2010, rating: 8.7},
   {id: 103, name: "The Dark Knight", year: 2008, rating: 9},
   {id: 104, name: "12 Angry Men", year: 1957, rating: 8.9}
];

//Routes will go here

module.exports = router;
GET Routes
Define the GET route for getting all the movies.
router.get('/', sendMovies);
function *sendMovies(next){
   this.body = movies;
   yield next;
}
That's it. To test out if this is working fine, run your app, then open your terminal and enter −
curl -i -H "Accept: application/json" -H "Content-Type: application/json" -X GET localhost:3000/movies
You'll get the following response −
[{"id":101,"name":"Fight
Club","year":1999,"rating":8.1},{"id":102,"name":"Inception","year":2010,"rating":8.7},
{"id":103,"name":"The Dark Knight","year":2008,"rating":9},{"id":104,"name":"12 Angry
Men","year":1957,"rating":8.9}]
We have a route to get all the movies. Now let’s create a route to get a specific movie by its id.
router.get('/:id([0-9]{3,})', sendMovieWithId);

function *sendMovieWithId(next){
   var ctx = this;
   var currMovie = movies.filter(function(movie){
      if(movie.id == ctx.params.id){
         return true;
      }
   });
   if(currMovie.length == 1){
      this.body = currMovie[0];
   } else {
      this.response.status = 404;//Set status to 404 as movie was not found
      this.body = {message: "Not Found"};
   }
   yield next;
}
This will get us the movies according to the id that we provide. To test this out, use the following command in your terminal.
curl -i -H "Accept: application/json" -H "Content-Type: application/json" -X GET localhost:3000/movies/101
You'll get the response as −
{"id":101,"name":"Fight Club","year":1999,"rating":8.1}
If you visit an invalid route, it'll produce a cannot GET error, while if you visit a valid route with an id that doesn’t exist, it'll produce a 404 error.
We are done with the GET routes. Now, let’s move on to POST route.
POST Route
Use the following route to handle the POSTed data.
router.post('/', addNewMovie);

function *addNewMovie(next){
   //Check if all fields are provided and are valid:
   if(!this.request.body.name ||
      !this.request.body.year.toString().match(/^[0-9]{4}$/g) ||
      !this.request.body.rating.toString().match(/^[0-9]\.[0-9]$/g)){

      this.response.status = 400;
      this.body = {message: "Bad Request"};
   } else {
      var newId = movies[movies.length-1].id+1;

      movies.push({
         id: newId,
         name: this.request.body.name,
         year: this.request.body.year,
         rating: this.request.body.rating
      });
      this.body = {message: "New movie created.", location: "/movies/" + newId};
   }
   yield next;
}
This will create a new movie and store it in the movies variable. To test this route out, enter the following in your terminal −
curl -X POST --data "name = Toy%20story&year = 1995&rating = 8.5"
https://localhost:3000/movies
You'll get the following response −
{"message":"New movie created.","location":"/movies/105"}
To test if this was added to the movies object, run the get request for /movies/105 again. You'll get the following response −
{"id":105,"name":"Toy story","year":"1995","rating":"8.5"}
Let’s move on to create the PUT and DELETE routes.
PUT Route
The PUT route is almost exactly the same as the POST route. We will be specifying the id for the object that'll be updated/created. Create the route in the following way −
router.put('/:id', updateMovieWithId);

function *updateMovieWithId(next){
   //Check if all fields are provided and are valid:
   if(!this.request.body.name ||
      !this.request.body.year.toString().match(/^[0-9]{4}$/g) ||
      !this.request.body.rating.toString().match(/^[0-9]\.[0-9]$/g) ||
      !this.params.id.toString().match(/^[0-9]{3,}$/g)){

      this.response.status = 400;
      this.body = {message: "Bad Request"};
   } else {
      //Gets us the index of movie with given id.
      var updateIndex = movies.map(function(movie){
         return movie.id;
      }).indexOf(parseInt(this.params.id));

      if(updateIndex === -1){
         //Movie not found, create new movies.push({
            id: this.params.id,
            name: this.request.body.name,
            year: this.request.body.year,
            rating: this.request.body.rating
         });
         this.body = {message: "New movie created.", location: "/movies/" + this.params.id};
      } else {
         //Update existing movie
         movies[updateIndex] = {
            id: this.params.id,
            name: this.request.body.name,
            year: this.request.body.year,
            rating: this.request.body.rating
         };
         this.body = {message: "Movie id " + this.params.id + " updated.", location: "/movies/" + this.params.id};
      }
   }
}
This route will do the function we specified in the table above. It'll update the object with new details if it exists. If it doesn't exist, it'll create a new object. To test out this route, use the following curl command. This will update an existing movie. To create a new Movie, just change the id to a non-existing id.
curl -X PUT --data "name = Toy%20story&year = 1995&rating = 8.5"
https://localhost:3000/movies/101
Response
{"message":"Movie id 101 updated.","location":"/movies/101"}
DELETE Route
Use the following code to create a delete route.
router.delete('/:id', deleteMovieWithId);

function *deleteMovieWithId(next){
   var removeIndex = movies.map(function(movie){
      return movie.id;
   }).indexOf(this.params.id); //Gets us the index of movie with given id.

   if(removeIndex === -1){
      this.body = {message: "Not found"};
   } else {
      movies.splice(removeIndex, 1);
      this.body = {message: "Movie id " + this.params.id + " removed."};
   }
}
Test the route in the same way we did for the others. On successful deletion (for example id 105), you will get −
{message: "Movie id 105 removed."}
Finally, our movies.js file looks like −
var Router = require('koa-router');
var router = Router({
   prefix: '/movies'
});  //Prefixed all routes with /movies
var movies = [
   {id: 101, name: "Fight Club", year: 1999, rating: 8.1},
   {id: 102, name: "Inception", year: 2010, rating: 8.7},
   {id: 103, name: "The Dark Knight", year: 2008, rating: 9},
   {id: 104, name: "12 Angry Men", year: 1957, rating: 8.9}
];

//Routes will go here
router.get('/', sendMovies);
router.get('/:id([0-9]{3,})', sendMovieWithId);
router.post('/', addNewMovie);
router.put('/:id', updateMovieWithId);
router.delete('/:id', deleteMovieWithId);

function *deleteMovieWithId(next){
   var removeIndex = movies.map(function(movie){
      return movie.id;
   }).indexOf(this.params.id); //Gets us the index of movie with given id.

   if(removeIndex === -1){
      this.body = {message: "Not found"};
   } else {
      movies.splice(removeIndex, 1);
      this.body = {message: "Movie id " + this.params.id + " removed."};
   }
}

function *updateMovieWithId(next) {
   //Check if all fields are provided and are valid:
   if(!this.request.body.name ||
      !this.request.body.year.toString().match(/^[0-9]{4}$/g) ||
      !this.request.body.rating.toString().match(/^[0-9]\.[0-9]$/g) ||
      !this.params.id.toString().match(/^[0-9]{3,}$/g)){

      this.response.status = 400;
      this.body = {message: "Bad Request"};
   } else {
      //Gets us the index of movie with given id.
      var updateIndex = movies.map(function(movie){
         return movie.id;
      }).indexOf(parseInt(this.params.id));

      if(updateIndex === -1){
         //Movie not found, create new
         movies.push({
            id: this.params.id,
            name: this.request.body.name,
            year: this.request.body.year,
            rating: this.request.body.rating
         });
         this.body = {message: "New movie created.", location: "/movies/" + this.params.id};
      } else {
         //Update existing movie
            movies[updateIndex] = {
            id: this.params.id,
            name: this.request.body.name,
            year: this.request.body.year,
            rating: this.request.body.rating
         };
         this.body = {message: "Movie id " + this.params.id + " updated.",
            location: "/movies/" + this.params.id};
      }
   }
}

function *addNewMovie(next){
   //Check if all fields are provided and are valid:
   if(!this.request.body.name ||
      !this.request.body.year.toString().match(/^[0-9]{4}$/g) ||
      !this.request.body.rating.toString().match(/^[0-9]\.[0-9]$/g)){

      this.response.status = 400;
      this.body = {message: "Bad Request"};
   } else {
      var newId = movies[movies.length-1].id+1;

      movies.push({
         id: newId,
         name: this.request.body.name,
         year: this.request.body.year,
         rating: this.request.body.rating
      });
      this.body = {message: "New movie created.", location: "/movies/" + newId};
   }
   yield next;
}
function *sendMovies(next){
   this.body = movies;
   yield next;
}
function *sendMovieWithId(next){
   var ctx = this

   var currMovie = movies.filter(function(movie){
      if(movie.id == ctx.params.id){
         return true;
      }
   });
   if(currMovie.length == 1){
      this.body = currMovie[0];
   } else {
      this.response.status = 404;//Set status to 404 as movie was not found
      this.body = {message: "Not Found"};
   }
   yield next;
}
module.exports = router;
This completes our REST API. Now you can create much more complex applications using this simple architectural style and Koa.
Koa.js - Logging
Logging is quite useful when creating web applications as they tell us where exactly things went wrong. We also get the context for the things that went wrong and can come up with possible solutions for the same.
To enable logging in Koa, we need the middleware, koa-logger. Install it using the following command.
$ npm install --save-dev koa-logger
Now in your application, add the following code to enable logging.
var logger = require('koa-logger')
var koa = require('koa')

var app = koa()
app.use(logger())

app.use(function*(){
   this.body = "Hello Logger";
})

app.listen(3000)
Run this server and visit any route on the server. You should see the logs like −
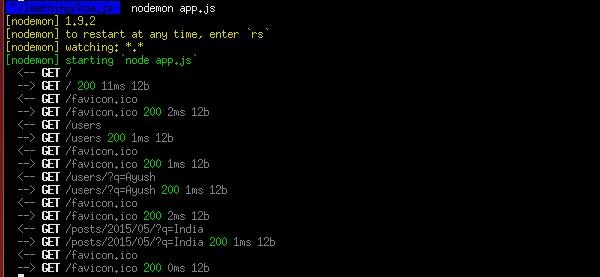
Now if you get an error on a specific route or request, these logs should help you figure out what went wrong in each of them.
Koa.js - Scaffolding
Scaffolding allows us to easily create a skeleton for a web application. We manually created our public directory, added middleware, created separate route files, etc. A scaffolding tool sets up all these things for us so that we can directly get started with building our application.
The scaffolder we'll use is called Yeoman. It is a scaffolding tool built for Node.js but also has generators for several other frameworks (such as flask, rails, django, etc.). To install yeoman, enter the following command in your terminal.
$ npm install -g yeoman
Yeoman uses generators to scaffold out applications. To check out the generators available on npm to use with yeoman, head over here. For the purpose of this tutorial, we'll use the 'generator-koa'. To install this generator, enter the following command in your terminal.
$ npm install -g generator-koa
To use this generator, enter −
yo koa
Then it'll create a directory structure and will create the following files for you. It'll also install the necessary npm modules and bower components for you.
create package.json
create test/routeSpec.js
create views/layout.html
create views/list.html
create public/styles/main.css
create public/scripts/.gitkeep
create controllers/messages.js
create app.js
create .editorconfig
create .jshintrc

I'm all done. Running npm install & bower install for you to install
the required dependencies.
If this fails, try running the command yourself.
This generator creates a very simple structure for us.
.
├── controllers
│   └── messages.js
├── public
|   ├── scripts
|   └── styles
|       └── main.css
├── test
|   └── routeSpec.js
├── views
|   ├── layout.html
|   └── list.html
├── .editorconfig
├── .jshintrc
├── app.js
└── package.json
Explore the many generators available for Koa and choose the one that fits you right. Steps to working with all generators is the same. You'll need to install a generator, run it using yeoman, it'll ask you some questions and then create a skeleton for your application based on your answers.
Koa.js - Resources
Following is a list of resources we have used while developing this tutorial −
Koajs - Examples A list of examples created by the community
A CRUD API using koa.js - A short screencast that goes through creating a CRUD API in Koa.js