- JSF Tutorial
- JSF - Home
- JSF - Overview
- JSF - Environment Setup
- JSF - Architecture
- JSF - Life Cycle
- JSF - First Application
- JSF - Managed Beans
- JSF - Page Navigation
- JSF - Basic Tags
- JSF - Facelet Tags
- JSF - Convertor Tags
- JSF - Validator Tags
- JSF - DataTable
- JSF - Composite Components
- JSF - Ajax
- JSF - Event Handling
- JSF - JDBC Integration
- JSF - Spring Integration
- JSF - Expression Language
- JSF - Internationalization
- JSF Useful Resources
- JSF - Quick Guide
- JSF - Useful Resources
- JSF - Discussion
JSF - Custom Validator
We can create our own Custom validator in JSF.
Defining a custom validator in JSF is a three-step process.
| Step | Description |
|---|---|
| 1 | Create a validator class by implementing javax.faces.validator.Validator interface. |
| 2 | Implement validate() method of the above interface. |
| 3 | Use Annotation @FacesValidator to assign a unique ID to the custom validator. |
Step 1: Create a Validator Class : UrlValidator.java
public class UrlValidator implements Validator {
...
}
Step 2: Implement Validator Interface Methods : UrlValidator.java
public class UrlValidator implements Validator {

   @Override
   public void validate(FacesContext facesContext,
      UIComponent component, String value) throws ValidatorException {
      ...
   }
}
Step 3: Annotate to Register the Validator : UrlValidator.java
@FacesValidator("com.tutorialspoint.test.UrlValidator")
public class UrlValidator implements Validator {
}
Use the validator in JSF page
<h:inputText id="urlInput" value="#{userData.data}" label="URL" >
   <f:validator validatorId="com.tutorialspoint.test.UrlValidator" />
</h:inputText>
Example Application
Let us create a test JSF application to test the above tag.
| Step | Description |
|---|---|
| 1 | Create a project with a name helloworld under a package com.tutorialspoint.test as explained in the JSF - First Application chapter. |
| 2 | Create UrlValidator.java as a converter under package com.tutorialspoint.test as explained below. |
| 3 | Create UserData.java as a managed bean under package com.tutorialspoint.test as explained below. |
| 4 | Modify home.xhtml as explained below. Keep rest of the files unchanged. |
| 5 | Create result.xhtml in the webapps directory as explained below. |
| 6 | Compile and run the application to make sure business logic is working as per the requirements. |
| 7 | Finally, build the application in the form of war file and deploy it in Apache Tomcat Webserver. |
| 8 | Launch your web application using appropriate URL as explained below in the last step. |
UrlValidator.java
package com.tutorialspoint.test;

import java.net.URI;
import java.net.URISyntaxException;

import javax.faces.application.FacesMessage;
import javax.faces.component.UIComponent;
import javax.faces.context.FacesContext;
import javax.faces.validator.FacesValidator;
import javax.faces.validator.Validator;
import javax.faces.validator.ValidatorException;

@FacesValidator("com.tutorialspoint.test.UrlValidator")
public class UrlValidator implements Validator {

   @Override
   public void validate(FacesContext facesContext,
      UIComponent component, Object value)
      throws ValidatorException {
      StringBuilder url = new StringBuilder();
      String urlValue = value.toString();

      if(!urlValue.startsWith("http://", 0)) {
         url.append("http://");
      }
      url.append(urlValue);

      try {
         new URI(url.toString());
      } catch (URISyntaxException e) {
         FacesMessage msg =
            new FacesMessage("URL validation failed","Invalid URL format");
         msg.setSeverity(FacesMessage.SEVERITY_ERROR);
         throw new ValidatorException(msg);
      }
   }
}
UserData.java
package com.tutorialspoint.test;

import java.io.Serializable;

import javax.faces.bean.ManagedBean;
import javax.faces.bean.SessionScoped;

@ManagedBean(name = "userData", eager = true)
@SessionScoped
public class UserData implements Serializable {
   private static final long serialVersionUID = 1L;
   public String data;

   public String getData() {
      return data;
   }

   public void setData(String data) {
      this.data = data;
   }
}
home.xhtml
<?xml version = "1.0" encoding = "UTF-8"?>
<!DOCTYPE html PUBLIC "-//W3C//DTD XHTML 1.0 Transitional//EN"
"http://www.w3.org/TR/xhtml1/DTD/xhtml1-transitional.dtd">

<html xmlns = "http://www.w3.org/1999/xhtml"
   xmlns:h = "http://java.sun.com/jsf/html"
   xmlns:f = "http://java.sun.com/jsf/core">

   <h:head>
      <title>JSF tutorial</title>
   </h:head>

   <h:body>
      <h2>Custom Validator Example</h2>

      <h:form>
         <h:inputText id = "urlInput" value = "#{userData.data}"
            label = "URL" >
            <f:validator validatorId = "com.tutorialspoint.test.UrlValidator" />
         </h:inputText>
         <h:commandButton value = "submit" action = "result"/>
         <h:message for = "urlInput" style = "color:red" />
      </h:form>

   </h:body>
</html>
result.xhtml
<?xml version = "1.0" encoding = "UTF-8"?>
<!DOCTYPE html PUBLIC "-//W3C//DTD XHTML 1.0 Transitional//EN"
"http://www.w3.org/TR/xhtml1/DTD/xhtml1-transitional.dtd">

<html xmlns = "http://www.w3.org/1999/xhtml"
   xmlns:f = "http://java.sun.com/jsf/core"
   xmlns:h = "http://java.sun.com/jsf/html"
   xmlns:ui = "http://java.sun.com/jsf/facelets">

   <h:body>
      <h2>Result</h2>
      <hr />
      #{userData.data}
   </h:body>
</html>
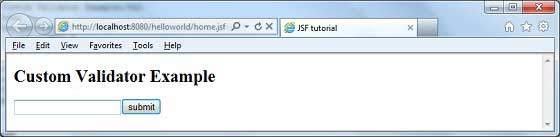
Once you are ready with all the changes done, let us compile and run the application as we did in JSF - First Application chapter. If everything is fine with your application, this will produce the following result.
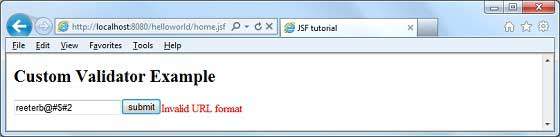
Enter any invalid value and press Submit button. See the following error message.
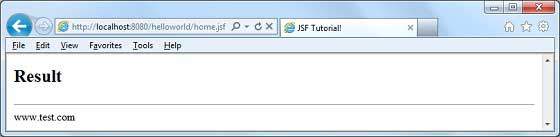
Enter any valid value and press Submit button. Following will be the ouput.
jsf_validation_tags.htm
Advertisements