- jMeter Tutorial
- jMeter - Home
- jMeter - Overview
- jMeter - Environment
- jMeter - Build Test Plan
- jMeter - Test Plan Elements
- jMeter - Web Test Plan
- jMeter - Database Test Plan
- jMeter - FTP Test Plan
- jMeter - Webservice Test Plan
- jMeter - JMS Test Plan
- jMeter - Monitor Test Plan
- jMeter - Listeners
- jMeter - Functions
- jMeter - Regular Expressions
- jMeter - Best Practices
- jMeter Resources
- jMeter - Quick Guide
- jMeter - Useful Resources
- jMeter - Discussion
jMeter - JMS Point To Point Test Plan
Building a JMS Point-to-Point Test Plan
Now let us write a JMeter test plan to test a JMS Point-to-Point messaging solution. The setup of the test is one threadgroup with one thread or user sending 2 messages each through a request queue.
Let us start the JMeter from /home/manisha/apache-jmeter2.9/bin/jmeter.sh..
Add Users
Create a Thread group.
Right-click the Test Plan node.
Select Add → Threads (Users) → Thread Group. Thread Group gets added under the Test Plan node.
Rename this Thread Group as JMSTestPlan-PointtoPoint.
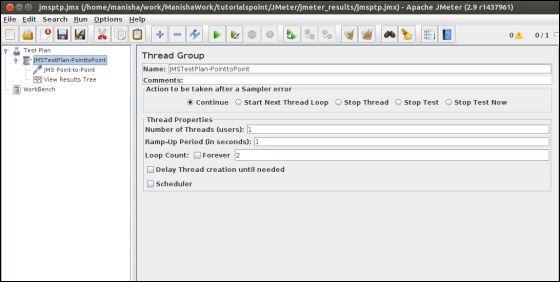
We will change the Loop Count to two. Rest of the default properties of the Thread Group are retained. It means one thread group with one thread or one user sends two messages each through a request queue.
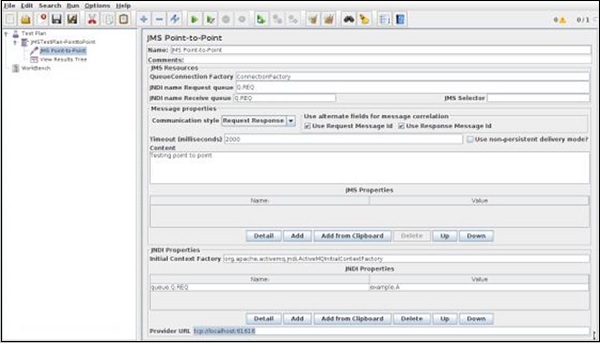
Add JMS Point-to-Point Sampler
Now that we have defined the users, it is time to define the tasks that they will be performing. Start by adding the sampler JMS Point-to-Point to the Point-to-Point element.
Select Add → Sampler → JMS Point-to-Point.
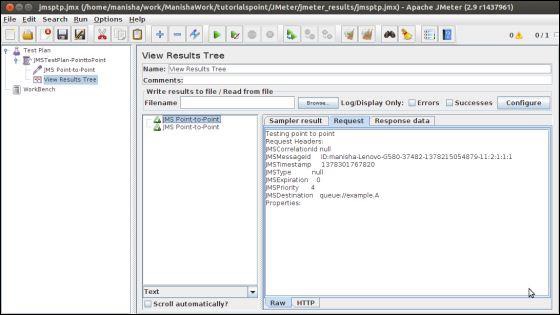
Select the JMS Point-to-Point sampler element in the tree.
The following property changes are made to the JMS Point-to-Point sampler element −
| Property | Value | Description |
|---|---|---|
| QueueuConnectionFactory | ConnectionFactory | This is the default JNDI entry for the connection factory within active MQ. |
| JNDI Name Request Queue | Q.REQ | The JNDI name for JMeter to make the connection between the connection factory and queue. |
| JNDI Name Receive Queue | Q.REQ | The JNDI name for JMeter to make the connection between the connection factory and queue. We are using the same queue for response. |
| Communication Style | Request Response | It means you need at least a service running outside of JMeter, which will respond to the requests. This service must listen to the Request Queue and send messages to the queue referenced by the message .getJMSReplyTo() |
| Use Request message ID | checked | You can leave JMeter to use the message ID Request (deposit) to the correlation between the incoming message and the recovered. |
| Use Response message ID | checked | You can leave JMeter to use the message identifier Response(recovery) for the correlation between the incoming message and recovered. |
| Time(milliseconds) | 2000 | This timeout is used when the message is received by JMeter if nothing is recovered in time (here 2 sec), then the item is marked in error. |
| Content | Testing point to point | This is just the content of the message. |
| InitialContextFactory | org.apache.activemq.jndi ActiveMQInitial ContextFactory |
The standard InitialContextFactory for Active MQ |
| queue.Q.REQ | example.A | Correspondence between the JNDI name of the queue (Q.REQ) and the real name of the queue in ActiveMQ (example.A). |
| Provider URL | tcp://localhost:61616 | The address and port to attack ActiveMQ. |
The following screenshot shows the above configurations −
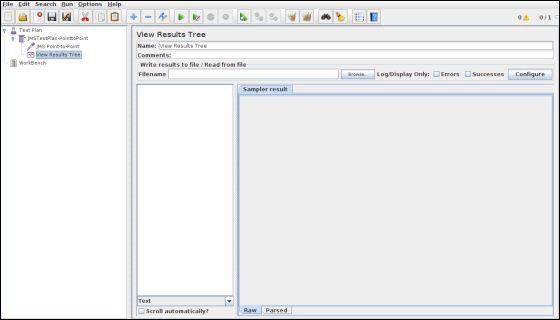
Create Listener
Now add the Listener element. This element is responsible for storing all of the results of your JMS requests in a file and presenting a visual model of the data.
Select the Thread Group element.
Add a View Results Tree listener by selecting Add → Listener → View Results Tree.
Save and Execute Test Plan
Now save the above test plan as jmsptp_test.jmx. Execute this test plan using Run → Start option.
Verify Output
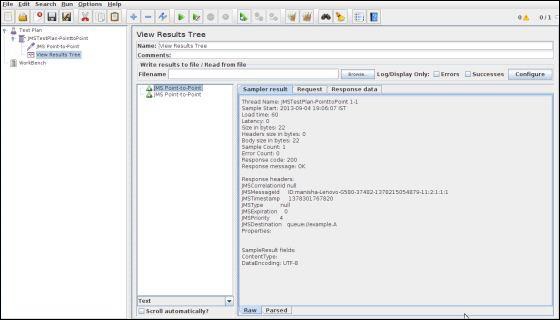
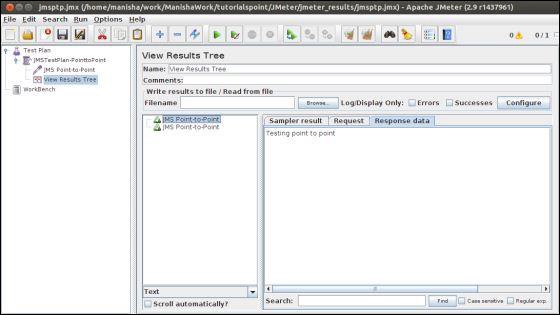
Return to the admin console of ActiveMQ. Here we can see the message status in the queue.
