- iOS Tutorial
- iOS - Home
- iOS - Getting Started
- iOS - Environment Setup
- iOS - Objective-C Basics
- iOS - First iPhone Application
- iOS - Actions and Outlets
- iOS - Delegates
- iOS - UI Elements
- iOS - Accelerometer
- iOS - Universal Applications
- iOS - Camera Management
- iOS - Location Handling
- iOS - SQLite Database
- iOS - Sending Email
- iOS - Audio & Video
- iOS - File Handling
- iOS - Accessing Maps
- iOS - In-App Purchase
- iOS - iAd Integration
- iOS - GameKit
- iOS - Storyboards
- iOS - Auto Layouts
- iOS - Twitter & Facebook
- iOS - Memory Management
- iOS - Application Debugging
- iOS Useful Resources
- iOS - Quick Guide
- iOS - Useful Resources
- iOS - Discussion
iOS - Environment Setup
iOS - Xcode Installation
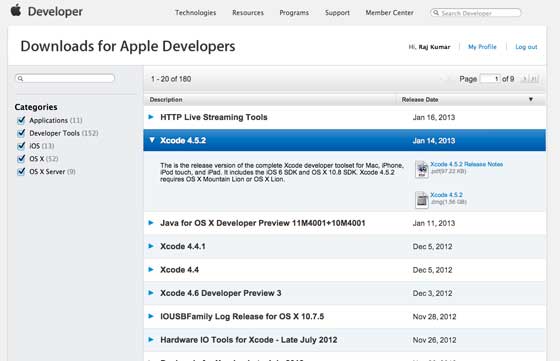
Step 1 − Download the latest version of Xcode from https://developer.apple.com/downloads/
Step 2 − Double click the Xcode dmg file.
Step 3 − You will find a device mounted and opened.
Step 4 − There will be two items in the window that's displayed namely, Xcode application and the Application folder's shortcut.
Step 5 − Drag the Xcode to application and it will be copied to your applications.
Step 6 − Now Xcode will be available as a part of other applications from which you can select and run.
You also have another option of downloading Xcode from the Mac App store and then install following the step-by-step procedure given on the screen.
Interface Builder
Interface builder is the tool that enables easy creation of UI interface. You have a rich set of UI elements that is developed for use. You just have to drag and drop into your UI view. We'll learn about adding UI elements, creating outlets and actions for the UI elements in the upcoming pages.
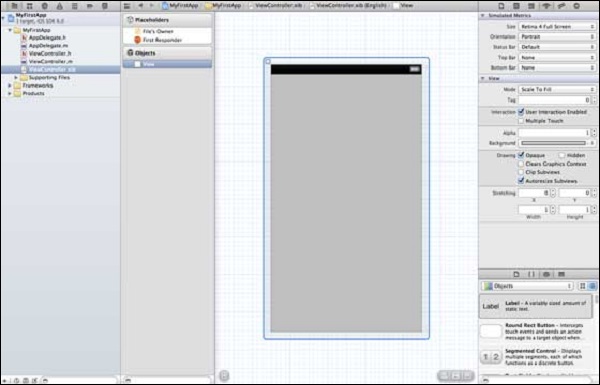
You have objects library at the right bottom that consists the entire necessary UI element. The user interface is often referred as xibs, which is its file extension. Each of the xibs is linked to a corresponding view controller.
iOS Simulator
An iOS simulator actually consists of two types of devices, namely iPhone and iPad with their different versions. iPhone versions include iPhone (normal), iPhone Retina, iPhone 5. iPad has iPad and iPad Retina. A screenshot of an iPhone simulator is displayed below.

You can simulate location in an iOS simulator for playing around with latitude and longitude effects of the app. You can also simulate memory warning and in-call status in the simulator. You can use the simulator for most purposes, however you cannot test device features like accelerometer. So, you might always need an iOS device to test all the scenarios of an application thoroughly.