- H2 Database Tutorial
- H2 Database - Home
- H2 Database - Introduction
- H2 Database - Installation
- H2 Database - Data Manipulation
- H2 Database - Select
- H2 Database - Insert
- H2 Database - Update
- H2 Database - Delete
- H2 Database - Backup
- H2 Database - Call
- H2 Database - Explain
- H2 Database - Merge
- H2 Database - Show
- H2 Database - Data Definition
- H2 Database - Create
- H2 Database - Alter
- H2 Database - Drop
- H2 Database - Truncate
- H2 Database - Commit
- H2 Database - Grant
- H2 Database - Savepoint
- H2 Database - Rollback
- H2 Database - JDBC Connection
- H2 Database Useful Resources
- H2 Database - Quick Guide
- H2 Database - Useful Resources
- H2 Database - Discussion
H2 Database - Installation
H2 is a database written in Java. We can easily embed this database to our application by using JDBC. We can run this on many different platforms or any version of Java Runtime Environment. However, before installing the database, there should be Java installed in the system.
Verify Java Installation
If JDK is installed in the system, try the following command to verify the Java version.
java –version
If JDk is successfully installed in the system, then we will get the following output.
java version "1.8.0_91"
Java(TM) SE Runtime Environment (build 1.8.0_91-b14)
Java HotSpot(TM) 64-Bit Server VM (build 25.91-b14, mixed mode)
If JDK is not installed in the system, then visit the following link to Install JDK.
Install H2 Database
We can run this database on many different platforms. In this chapter, we will learn about H2 Database installation on Windows.
Following are the steps to install H2 Database on Windows operating system.
Step 1: Download H2 Setup File
Download the latest version of H2 Database from the given link. In this link, you will get the latest version of H2 database in two types. One is Windows Installer type (that is .exe file) and second is Platform-Independent zip file for other operating systems.
Click the Windows installer for downloading the Windows supportable H2 database after downloading the .exe file. In this case, we are using H2 Database with the version 1.4.192.
Step 2: Install H2 Database
After downloading we get the H2 Windows installer file (i.e. h2-setup-yyyy-mm-dd.exe) in the Downloads directory. To start the installation process of H2 Database, double click on the installer file.
The following screen is the first step in the installation process. Provide a path where we want to install the H2 database server as shown in the following screenshot.
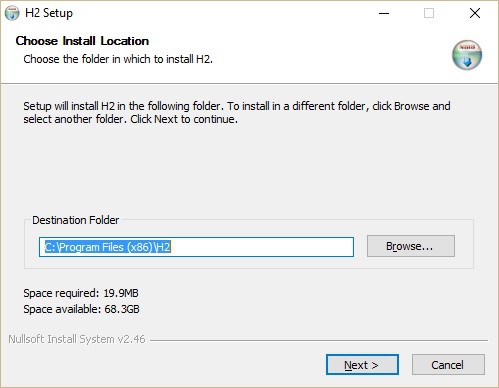
As seen in the above screenshot, by default it will take C:\ProgramFiles (x86)\H2 as the destination folder. Click next to proceed to the next step. The following screen pops up.
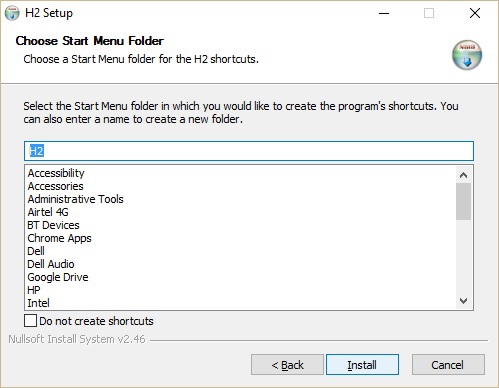
In the above screenshot, click the Install button to start the installation process. After installation, we get the following screenshot.
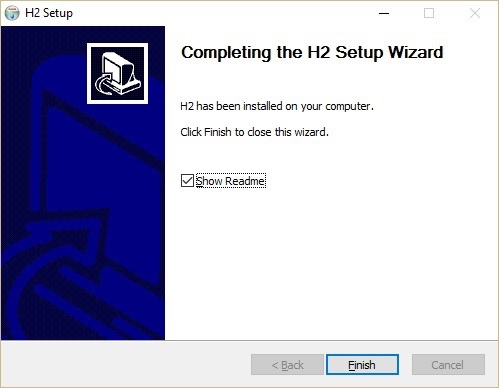
Click Finish to complete the installation process.
Step 3: Verify H2 Database Installation
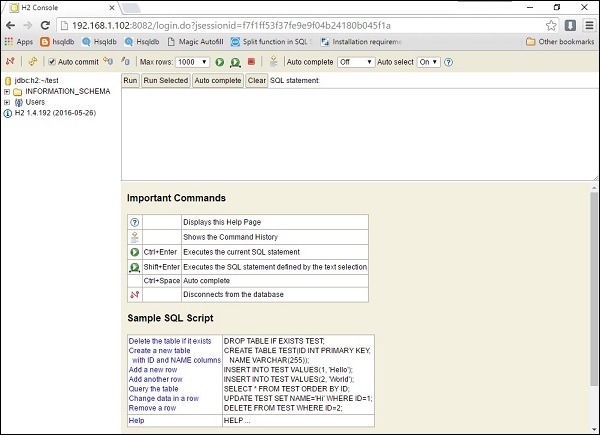
After installation, let us verify the database installation in the system. Click Windows → type H2 Console → Click H2 console icon. Connect to the URL http://localhost:8082. At the time of connecting, the H2 database will ask for database registration as shown in the following screenshot.
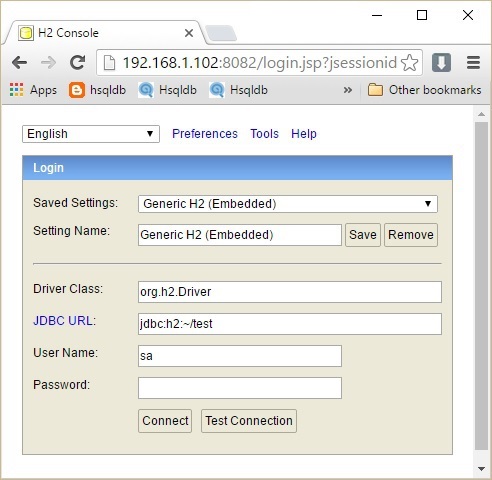
Fill all the details in the above dialog box such as Saved Settings, Settings Name, Driver Class, JDBC URL, User Name, and Password. In the JDBC URL, specify the database is located and the database name. User Name and Password are the fields for user name and password of the database. Click Connect.
The Database welcome page pops up as shown in the following screenshot.