- GWT Tutorial
- GWT - Home
- GWT - Overview
- GWT - Environment Setup
- GWT - Applications
- GWT - Create Application
- GWT - Deploy Application
- GWT - Style with CSS
- GWT - Basic Widgets
- GWT - Form Widgets
- GWT - Complex widgets
- GWT - Layout Panels
- GWT - Event Handling
- GWT - Custom Widgets
- GWT - UIBinder
- GWT - RPC Communication
- GWT - JUnit Integration
- GWT - Debugging Application
- GWT - Internationalization
- GWT - History Class
- GWT - Bookmark Support
- GWT - Logging Framework
- GWT Useful Resources
- GWT - Questions and Answers
- GWT - Quick Guide
- GWT - Useful Resources
- GWT - Discussion
GWT - Button Widget
Introduction
The Button widget represents a standard push button.
Class Declaration
Following is the declaration for com.google.gwt.user.client.ui.Button class −
public class Button
   extends ButtonBase
CSS Style Rules
Following default CSS Style rule will be applied to all the Button widget. You can override it as per your requirements.
.gwt-Button { }
Class Constructors
| Sr.No. | Constructor & Description |
|---|---|
| 1 |
Button() Creates a button with no caption. |
| 2 |
protected Button(Element element) This constructor may be used by subclasses to explicitly use an existing element. |
| 3 |
Button(java.lang.String html) Creates a button with the given HTML caption. |
| 4 |
Button(java.lang.String html, ClickListener listener) Creates a button with the given HTML caption and click listener. |
Class Methods
| Sr.No. | Function name & Description |
|---|---|
| 1 |
click() Programmatic equivalent of the user clicking the button. |
| 2 |
static Button wrap(Element element) Creates a Button widget that wraps an existing <a> element. |
Methods Inherited
This class inherits methods from the following classes −
com.google.gwt.user.client.ui.UIObject
com.google.gwt.user.client.ui.Widget
com.google.gwt.user.client.ui.FocusWidget
com.google.gwt.user.client.ui.ButtonBase
java.lang.Object
Button Widget Example
This example will take you through simple steps to show usage of a Button Widget in GWT. Follow the following steps to update the GWT application we created in GWT - Create Application chapter −
| Step | Description |
|---|---|
| 1 | Create a project with a name HelloWorld under a package com.tutorialspoint as explained in the GWT - Create Application chapter. |
| 2 | Modify HelloWorld.gwt.xml, HelloWorld.css, HelloWorld.html and HelloWorld.java as explained below. Keep rest of the files unchanged. |
| 3 | Compile and run the application to verify the result of the implemented logic. |
Following is the content of the modified module descriptor src/com.tutorialspoint/HelloWorld.gwt.xml.
<?xml version = "1.0" encoding = "UTF-8"?>
<module rename-to = 'helloworld'>
   <!-- Inherit the core Web Toolkit stuff.                        -->
   <inherits name = 'com.google.gwt.user.User'/>

   <!-- Inherit the default GWT style sheet.                       -->
   <inherits name = 'com.google.gwt.user.theme.clean.Clean'/>

   <!-- Specify the app entry point class.                         -->
   <entry-point class = 'com.tutorialspoint.client.HelloWorld'/>

   <!-- Specify the paths for translatable code                    -->
   <source path = 'client'/>
   <source path = 'shared'/>

</module>
Following is the content of the modified Style Sheet file war/HelloWorld.css.
body {
   text-align: center;
   font-family: verdana, sans-serif;
}

h1 {
   font-size: 2em;
   font-weight: bold;
   color: #777777;
   margin: 40px 0px 70px;
   text-align: center;
}

.gwt-Button {
   color:red;
}

.gwt-Green-Button {
   color:green;
}

.gwt-Blue-Button {
   color:blue;
}
Following is the content of the modified HTML host file war/HelloWorld.html.
<html>
   <head>
      <title>Hello World</title>
      <link rel = "stylesheet" href = "HelloWorld.css"/>
      <script language = "javascript" src = "helloworld/helloworld.nocache.js">
      </script>
   </head>

   <body>
      <h1>Button Widget Demonstration</h1>
      <div id = "gwtContainer"></div>
   </body>
</html>
Let us have following content of Java file src/com.tutorialspoint/HelloWorld.java which will demonstrate use of Button widget.
package com.tutorialspoint.client;

import com.google.gwt.core.client.EntryPoint;
import com.google.gwt.event.dom.client.ClickEvent;
import com.google.gwt.event.dom.client.ClickHandler;
import com.google.gwt.user.client.Window;
import com.google.gwt.user.client.ui.Button;
import com.google.gwt.user.client.ui.RootPanel;
import com.google.gwt.user.client.ui.VerticalPanel;

public class HelloWorld implements EntryPoint {
   public void onModuleLoad() {

      //create buttons
      Button redButton = new Button("Red");
      Button greenButton = new Button("Green");
      Button blueButton = new Button("Blue");

      // use UIObject methods to set button properties.
      redButton.setWidth("100px");
      greenButton.setWidth("100px");
      blueButton.setWidth("100px");
      greenButton.addStyleName("gwt-Green-Button");
      blueButton.addStyleName("gwt-Blue-Button");

      //add a clickListener to the button
      redButton.addClickHandler(new ClickHandler() {
         @Override
         public void onClick(ClickEvent event) {
            Window.alert("Red Button clicked!");
         }
      });

      //add a clickListener to the button
      greenButton.addClickHandler(new ClickHandler() {
         @Override
         public void onClick(ClickEvent event) {
            Window.alert("Green Button clicked!");
         }
      });

      //add a clickListener to the button
      blueButton.addClickHandler(new ClickHandler() {
         @Override
         public void onClick(ClickEvent event) {
            Window.alert("Blue Button clicked!");
         }
      });

      // Add button to the root panel.
      VerticalPanel panel = new VerticalPanel();
      panel.setSpacing(10);
      panel.add(redButton);
      panel.add(greenButton);
      panel.add(blueButton);

      RootPanel.get("gwtContainer").add(panel);
   }
}
Once you are ready with all the changes done, let us compile and run the application in development mode as we did in GWT - Create Application chapter. If everything is fine with your application, this will produce following result −
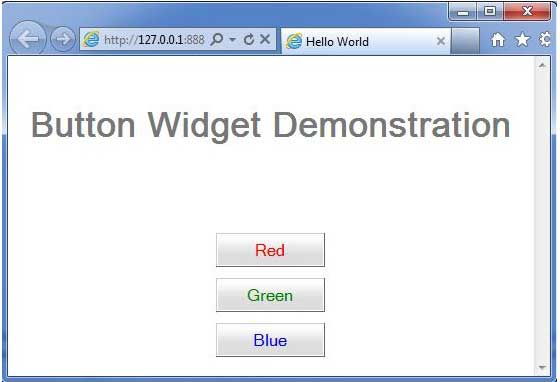
When you click Click Me button, it will show an alert message Hello World!