- Excel Macros Tutorial
- Excel Macros - Home
- Excel Macros - Overview
- Excel Macros - Creation
- Macros in a Single Workbook
- Excel Macros - Security
- Excel Macros - Absolute References
- Excel Macros - Relative References
- Excel Macros - VBA
- Excel Macros - Understanding Codes
- Assigning Macros to Objects
- Excel Macros - Running a Macro
- Creating a Macro Using VBA Editor
- Excel Macros - Editing
- Excel Macros - UserForms
- Excel Macros - Debugging a Code
- Excel Macros - Configuring a Macro
- Excel Macros Useful Resources
- Excel Macros - Quick Guide
- Excel Macros - Useful Resources
- Excel Macros - Discussion
Excel Macros - Assigning Macros to Objects
Suppose you have created a macro that you need to execute several times. For example, the macros that you have created for absolute references and relative references. Then, it would be easy for you if you can run the macro using a mouse click. You can accomplish this by assigning the macro to an object such as a shape or a graphic or a control.
In this chapter, you will learn how to include an object in your workbook and assign a macro to it.
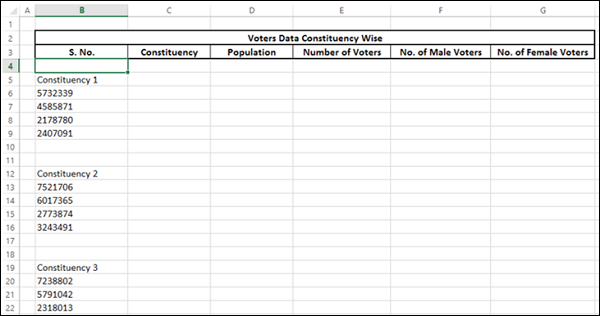
Recall the macro that you created using relative references. The macro arranges the data given in one column into a table to facilitate data analysis.
Assigning a Macro to a Shape
You can insert a shape in your worksheet that is in a meaningful form with self-explanatory text, which when clicked runs the macro assigned to it.
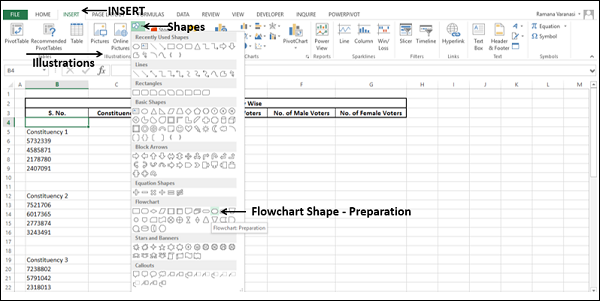
Click the INSERT tab on the Ribbon.
Click Shapes in the Illustrations group.
Select any of the ready-made shapes that appear in the dropdown list. For example, the Flowchart shape – Preparation, as you are in the process of preparing the data.
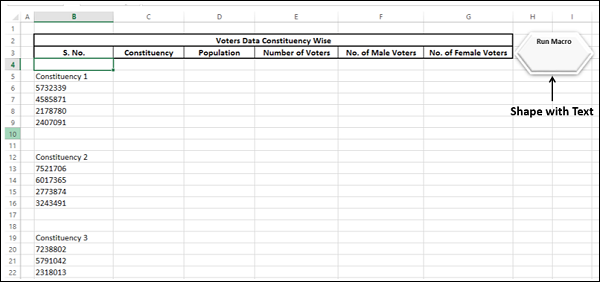
Draw the shape and format it.

Right click on the shape and select Edit Text from the dropdown list.
Type text inside the shape - Run Macro.
Format the text.
- Right click on the shape.
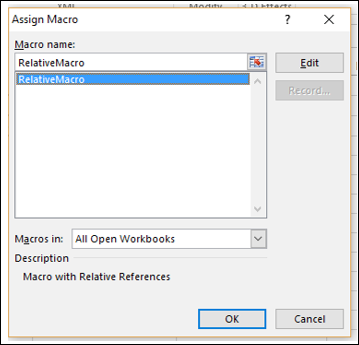
- Select Assign Macro from the dropdown list.
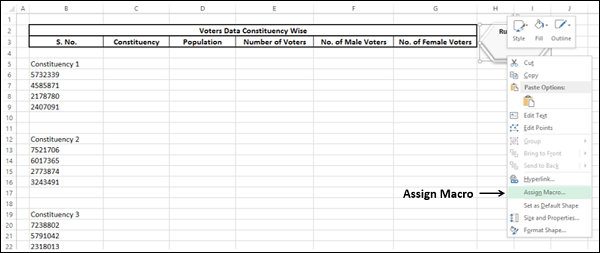
The Assign Macro dialog box appears. Click the macro name i.e. RelativeMacro and click OK.
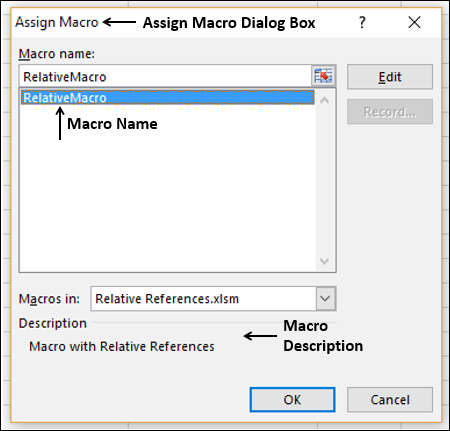
The macro is assigned to the shape.
Click in the cell where you have to run the macro say B4.
Move the cursor (pointer) onto the shape. The cursor (pointer) changes to finger.
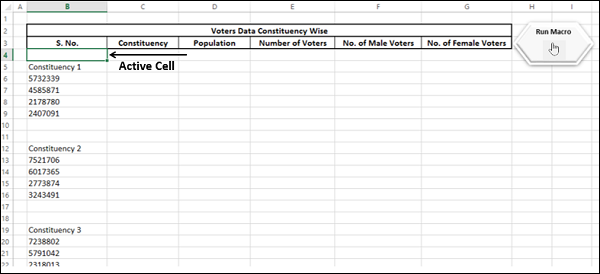
Now click the shape. The macro will run. Just repeat the mouse clicks to run the macro several times and you are done with the task of arranging the data into a table in a matter of a few seconds.
Assigning a Macro to a Graphic
You can insert a graphic in the worksheet and assign a macro to it. The graphic can be chosen to visualize your macro. For example, you can have a graphic of table representing that the macro will arrange the data into a table.
- Click the INSERT tab on the Ribbon.
- Click Pictures in the Illustrations group.
- Select a file that contains your graphic.

The rest of the steps are the same as those of shape given in the previous section.
Assigning a Macro to a Control
Inserting a VBA control and assigning a macro to it makes your work look professional. You can insert VBA controls from the Developer tab on the Ribbon.
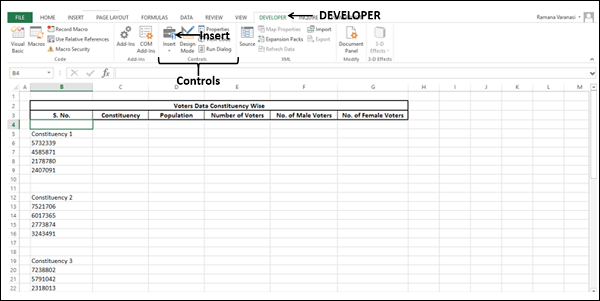
Click the DEVELOPER tab on the Ribbon.
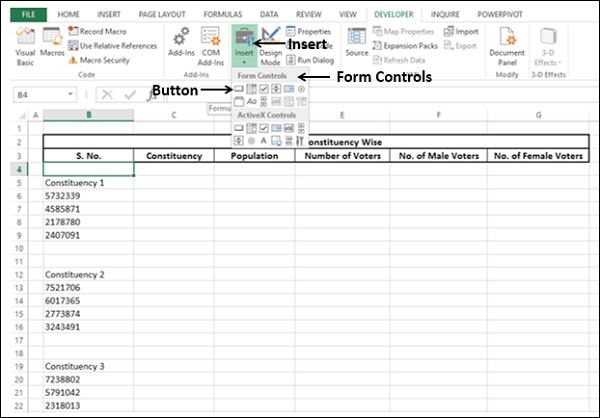
Click Insert in the Controls group.
Select the Button icon under Form Controls from the dropdown list as shown in screenshot given below −
Click the cell on the worksheet where you want to insert the Button control. The Assign Macro dialog box appears.
Click the macro name and click OK.
The control button with the assigned macro will be inserted.
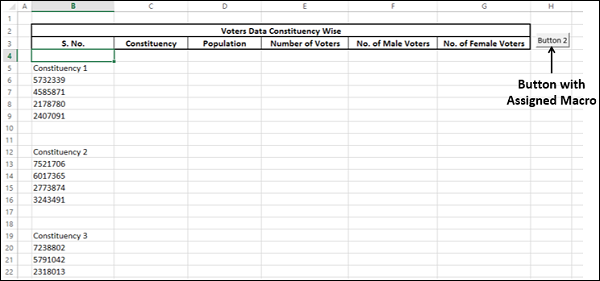
- Right click on the button.
- Click Edit Text.
- Type – Run Macro.
- Format Text and resize Button.
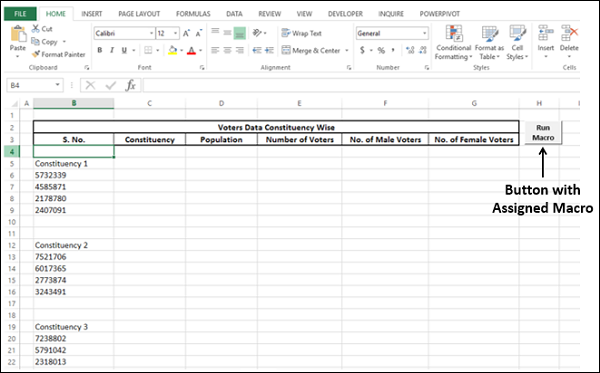
You can run the macro any number of times by just clicking the Button repeatedly.
Using Form Controls is an easy and effective way of interacting with the user. You will learn more about this in the chapter – Interacting with the User.