- Excel Data Analysis Tutorial
- Excel Data Analysis - Home
- Data Analysis - Overview
- Data Analysis - Process
- Excel Data Analysis - Overview
- Working with Range Names
- Tables
- Cleaning Data with Text Functions
- Cleaning Data Contains Date Values
- Working with Time Values
- Conditional Formatting
- Sorting
- Filtering
- Subtotals with Ranges
- Quick Analysis
- Lookup Functions
- PivotTables
- Data Visualization
- Data Validation
- Financial Analysis
- Working with Multiple Sheets
- Formula Auditing
- Inquire
- Advanced Data Analysis
- Advanced Data Analysis - Overview
- Data Consolidation
- What-If Analysis
- What-If Analysis with Data Tables
- What-If Analysis Scenario Manager
- What-If Analysis with Goal Seek
- Optimization with Excel Solver
- Importing Data into Excel
- Data Model
- Exploring Data with PivotTables
- Exploring Data with Powerpivot
- Exploring Data with Power View
- Exploring Data Power View Charts
- Exploring Data Power View Maps
- Exploring Data PowerView Multiples
- Exploring Data Power View Tiles
- Exploring Data with Hierarchies
- Aesthetic Power View Reports
- Key Performance Indicators
- Excel Data Analysis Resources
- Excel Data Analysis - Quick Guide
- Excel Data Analysis - Resources
- Excel Data Analysis - Discussion
Excel Data Analysis - Inquire
You can use Inquire to −
- Compare two workbooks.
- Analyze a workbook for problems or inconsistencies.
- View the links between workbooks.
- View the links between worksheets.
- View the relationships between cells.
- Clean excess cell formatting.
- Manage passwords.
The INQUIRE tab will be on the Ribbon. If you find the INQUIRE tab on the Ribbon, you can skip to the next section.
If you do not find the INQUIRE tab on the Ribbon, make the Inquire Add-in active.
- Click File > Options.
- In Excel Options window, click on Add-Ins.
- In Manage box, click on COM Add-ins.
- Click Go.
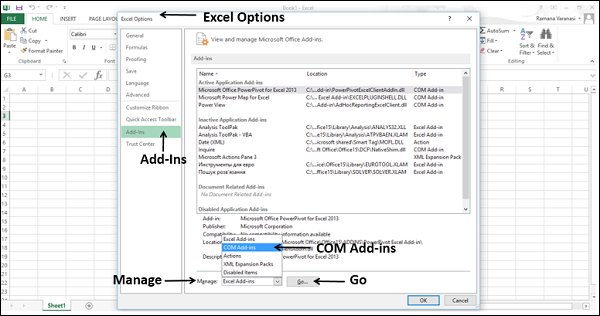
COM Add-Ins dialog box appears.
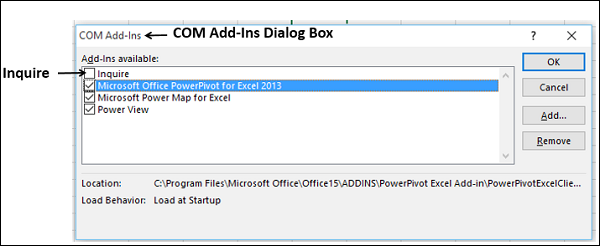
- Check the Inquire box.
- Click OK. Now, Inquire Add-In is active. You will find the INQUIRE tab on the Ribbon.
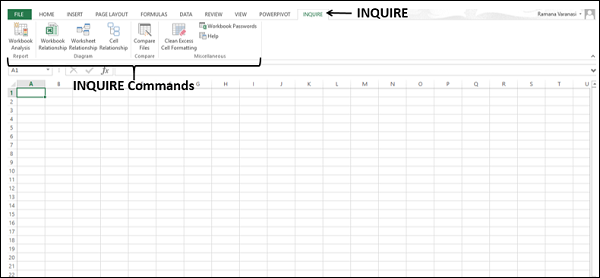
INQUIRE Commands
Let us learn about the INQUIRE commands.
Click the INQUIRE tab. You will find the following commands −
- Workbook Analysis
- Workbook Relationship
- Worksheet Relationship
- Cell Relationship
- Compare Files
- Clean Excess Cell Formatting
- Workbook Passwords
Comparing Two Workbooks
You can compare two workbooks cell by cell and find the differences, if any, in terms of changes in the second workbook as compared to the first.
Follow the below given steps −
- Open two workbooks that you want to compare.
- Click on INQUIRE tab on the Ribbon.
- Click on Compare Files in the Compare group.
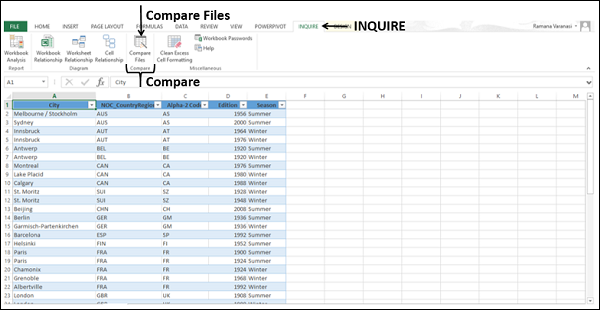
- The Select Files To Compare dialog box appears.
- Check the file names displayed in the boxes next to Compare and To.
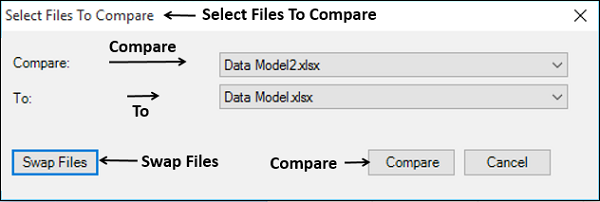
- If any File name that is displayed is not the one you wanted, click the down-arrow next to that File name.
- Only the workbooks that are open will be displayed.
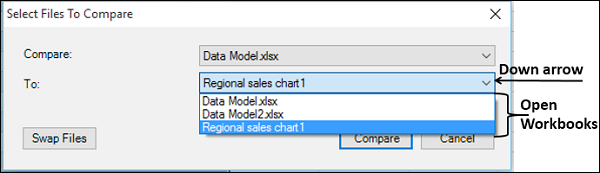
- Select the File.
- Check if the order of Files in Compare and To is OK.
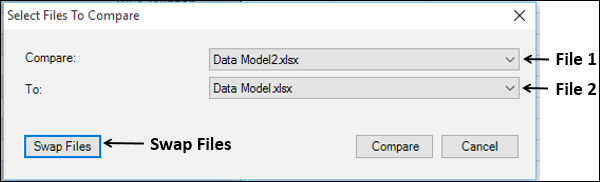
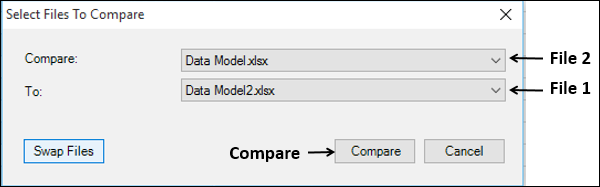
If the order is not OK, click Swap Files. The order of Files in Compare and To gets changed.
Click Compare.
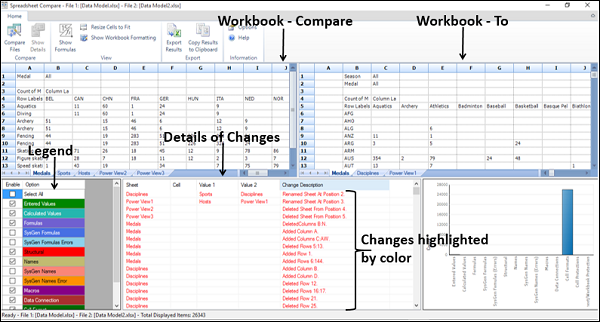
The results of the comparison appear in a two-pane grid −
- The workbook on the left corresponds to the "Compare" file you have chosen.
- The workbook on the right corresponds to the "To" file you have chosen.
Details of changes in workbook-To as compared to Workbook-Compare appear in a pane below these two grids. The changes are highlighted by color, depending on the kind of change. The legend for the highlight colors appears in the lower-left pane.
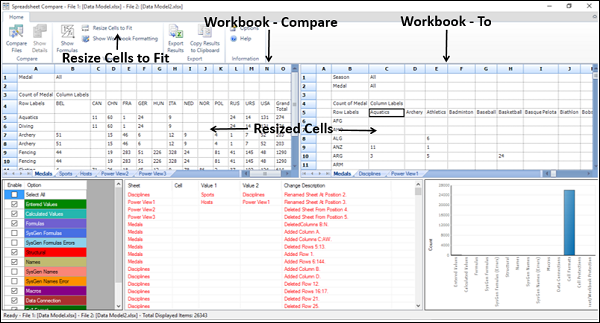
Click Resize Cells to Fit on the Ribbon to view the cell contents in the Compare and To workbooks. The cells in both the workbooks are resized so that the contents are visible.
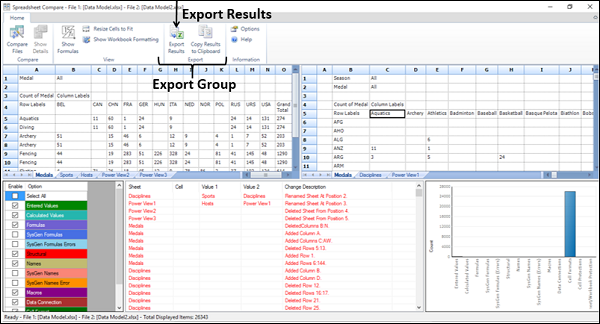
Click the Export Results in the Export group on the Ribbon.
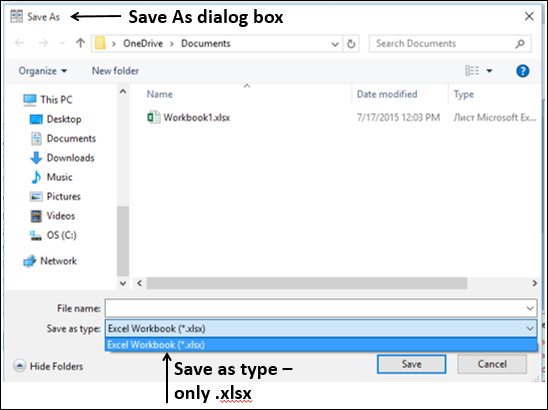
The Save As dialog box appears. You can save the results to an Excel workbook. Note that only .xlsx file type is available.
If you need the results in another application, you can do it by copying it to Clipboard.
Click Copy Results to Clipboard in the Export group on the Ribbon.
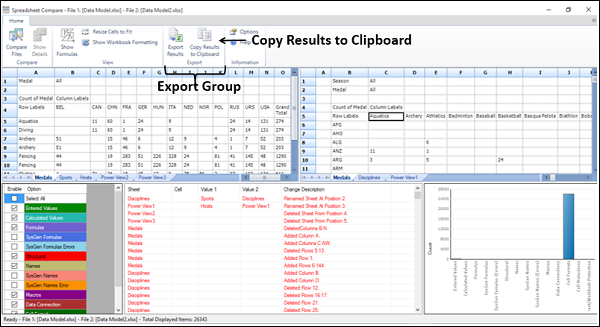
Paste in an application you want.
Creating an Interactive Report
You can use the Workbook Analysis command to create an interactive report that can show detailed information about the workbook and its Structure, Formulas, Cells, Ranges and Warnings.
- Click the Inquire tab on the Ribbon.
- Click Workbook Analysis in the Report group.
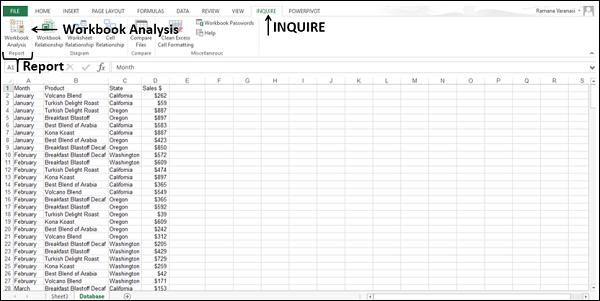
The report will be displayed after the Workbook Analysis is completed.

The Report has the following six categories −
Summary − General information about the structure and content of the workbook.
Workbook (with subcategories) − General workbook statistics.
Formulas (with subcategories) − Specific information about formulae in the workbook.
Cells (with subcategories) − Specific information about cells in the workbook.
Ranges (with subcategories) − Specific information about ranges in the workbook.
Warnings − Several types of warnings about workbook structure and content.
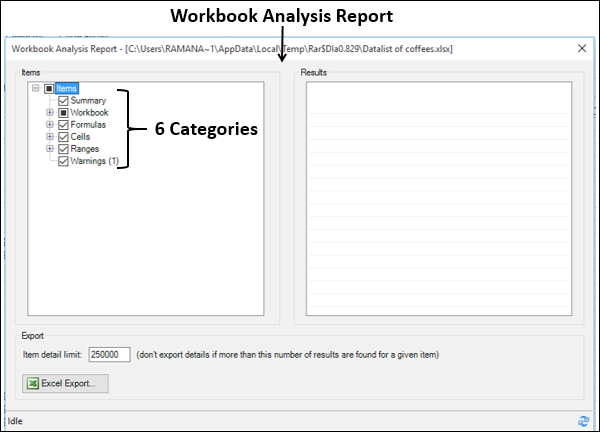
Selecting a category gives you more information about that category.
Check the Formulas option. The sub-categories of formulas will be displayed.
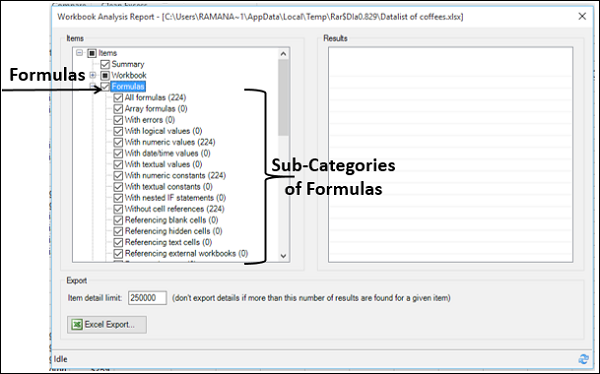
You will observe the following in the workbook that you are analyzing −
- All formulas are 224 in number.
- With numeric values, they are 224 in number.
- Click Sub-Category With numeric values.
In the Results pane, for each of the cells with formula with numeric values, worksheet name, cell address and formula are displayed.
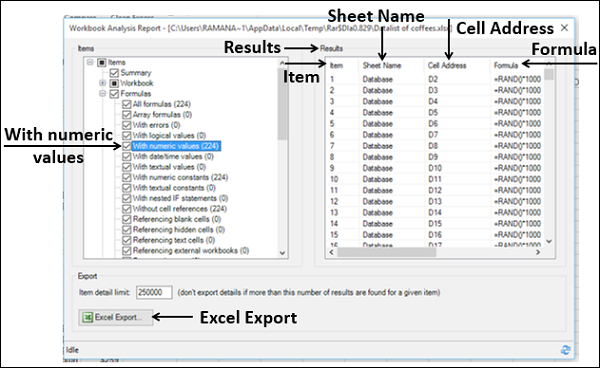
Click the Excel Export button. The Save As dialog box appears.
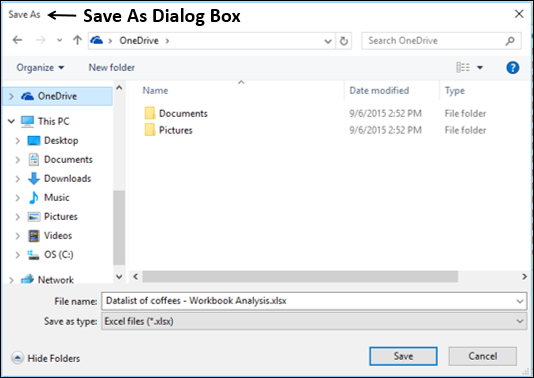
- Save the Report as an Excel file.
- Load Export File button appears next to Excel Export button.
- Click on Load Export File button.
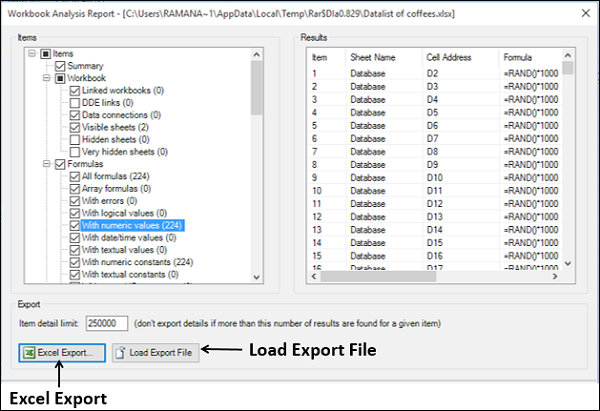
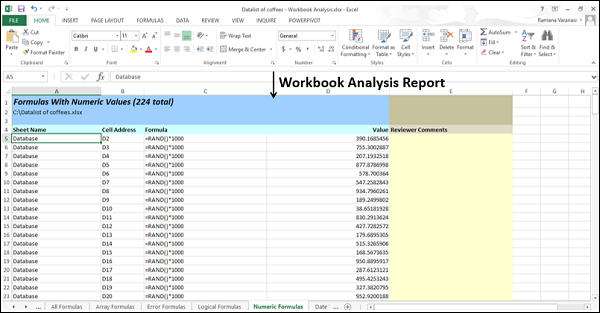
The saved Report Excel workbook opens and you can clearly view the workbook analysis results.
Viewing with Diagrams
You can view workbook relationships, worksheet relationships and cell relationships with interactive diagrams created by links. The links show the dependencies between the nodes in the diagram. You can drag the links or nodes to arrange them and align them to view whatever you are looking for.
Viewing Workbook Relationships
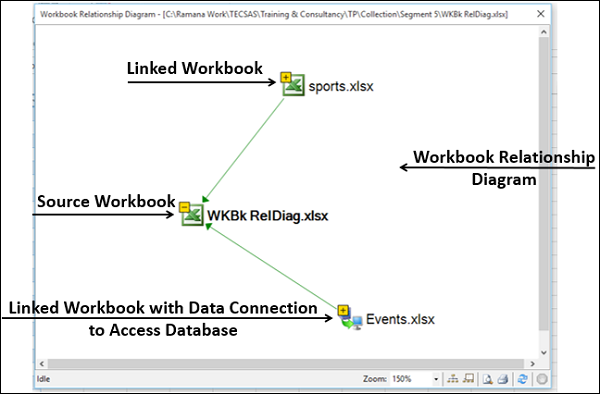
You can have an interactive, graphical map of workbook dependencies created by connections (links) between files using workbook relationship diagram.
The types of links in the diagram can include other workbooks, Access databases, text files, HTML pages, SQL Server databases and other data sources.
- Click the INQUIRE tab on the Ribbon.
- Click Workbook Relationship in the Diagram group.
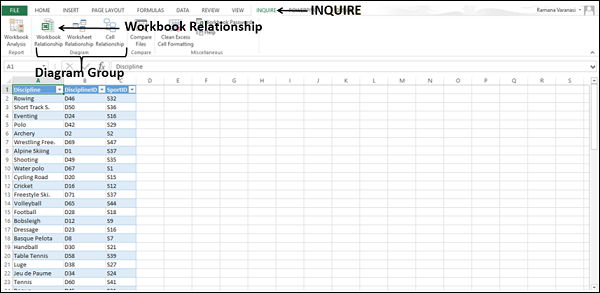
The Workbook Relationship Diagram appears, showing links of the workbook with different Data Sources.
Viewing Worksheet Relationships
You can use Worksheet Relationship Diagram to create an interactive, graphical map of connections (links) between worksheets in the same workbook and /or worksheets in other workbooks.
- Click the INQUIRE tab on the Ribbon.
- Click Worksheet Relationship in the Diagram group.
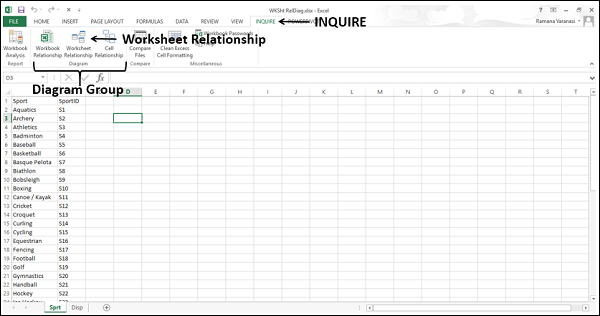
The Worksheet Relationship Diagram appears, showing links between the worksheets in the same workbook, and in other workbooks.
The difference between these two can be identified by the direction of the arrows.
Viewing Cell Relationships
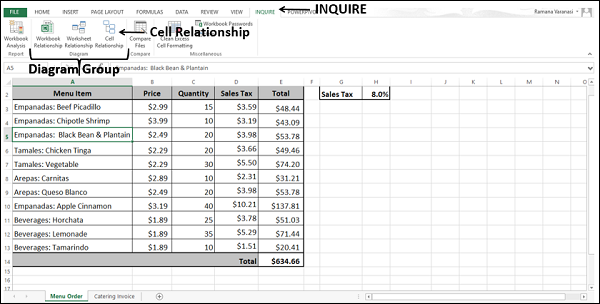
You can use the Cell Relationship Diagram to get a detailed, interactive map of all links from a selected cell to cells in other worksheets or even other workbooks.
- Click the INQUIRE tab on the Ribbon.
- Click Cell Relationship in the Diagram group.
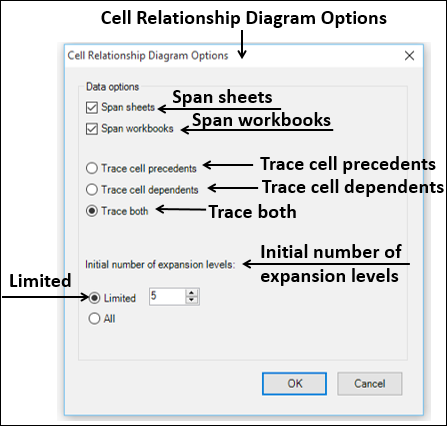
The Cell Relationship Diagram Options dialog box appears.
Check Span sheets and Span workbooks.
Select Trace both under Trace cell precedents and Trace cell dependents.
Under Initial number of expansion levels, select limited and type 5 in the box next to it.
Click OK.
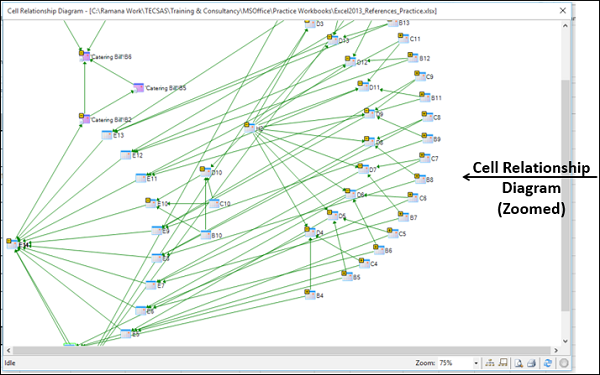
The Cell Relationship Diagram appears, showing links between the selected cell and the cells in the same worksheet, same workbook and in other workbooks, based on the options you have chosen.
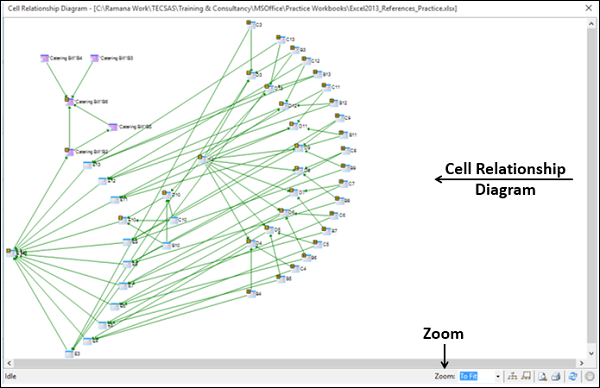
Click Zoom. You can view the nodes clearly.
Cleaning Excess Cell Formatting
When you find that a workbook is getting loaded slowly, or has become huge in size, it might have formatting applied to rows and/or columns that is not needed (for example, conditional formatting an entire column that has less than 15 values).
You can use the Clean Excess Cell Formatting command to remove excess formatting and greatly reduce the file size. This also results in improving Excel's speed.
Before cleaning the excess cell formatting, create a backup copy of your Excel file because there are certain cases where this process may increase your file size, and there is no way to undo the change.
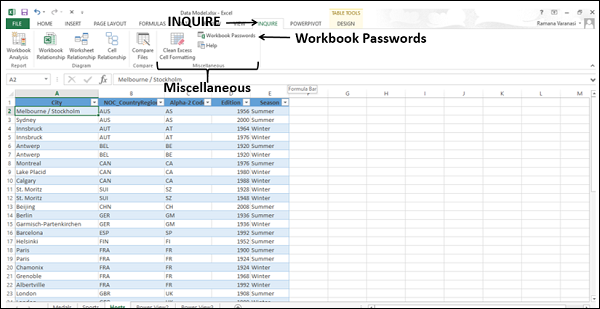
- Click the INQUIRE tab on the Ribbon.
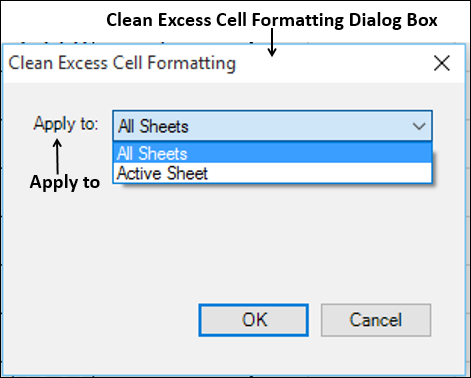
- Click Clean Excess Cell Formatting in the Miscellaneous group.
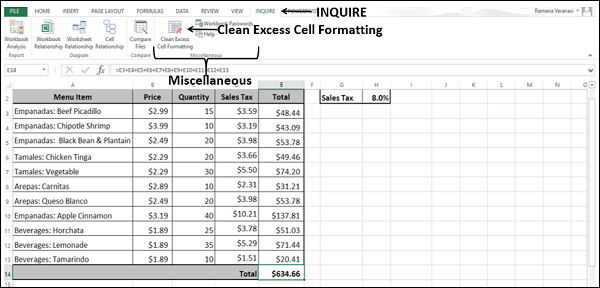
The Clean Excess Cell Formatting dialog box appears. Choose All Sheets in the Apply to box
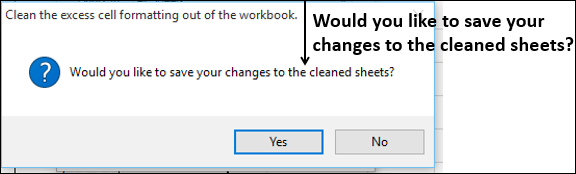
You will get a message about saving changes. Click OK.
Managing Passwords of Files
If you are using Workbook Analysis or Compare Files commands for workbooks that are password protected, you can avoid having to type the password each time those files are opened. This is possible with using Password Manager.
- Click the INQUIRE tab on the Ribbon.
- Click Workbook Passwords in the Miscellaneous group.
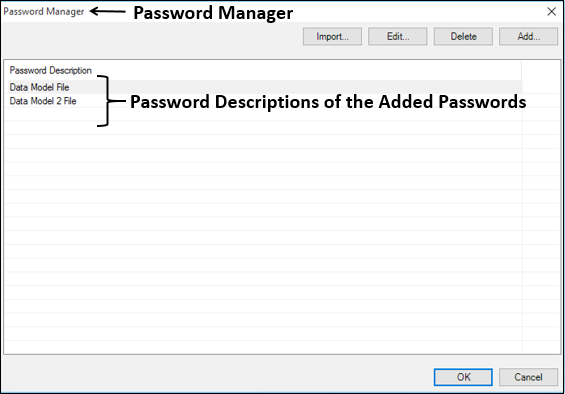
The Password Manager Dialog box appears. Click the Add button to add passwords of your workbooks.
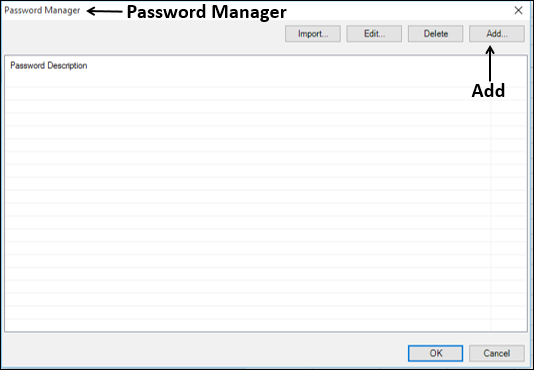
Add password descriptions also, for the passwords you added.
Next time when you need to use any of these files for comparing or analyzing, you do not have to key in the passwords.