- DocumentDB Tutorial
- DocumentDB - Home
- DocumentDB - Introduction
- DocumentDB - Advantages
- DocumentDB - Environment Setup
- DocumentDB - Create Account
- DocumentDB - Connect Account
- DocumentDB - Create Database
- DocumentDB - List Databases
- DocumentDB - Drop Databases
- DocumentDB - Create Collection
- DocumentDB - Delete Collection
- DocumentDB - Insert Document
- DocumentDB - Query Document
- DocumentDB - Update Document
- DocumentDB - Delete Document
- DocumentDB - Data Modeling
- DocumentDB - Data Types
- DocumentDB - Limiting Records
- DocumentDB - Sorting Records
- DocumentDB - Indexing Records
- DocumentDB - Geospatial Data
- DocumentDB - Partitioning
- DocumentDB - Data Migration
- DocumentDB - Access Control
- DocumentDB - Visualize Data
- DocumentDB Useful Resources
- DocumentDB - Quick Guide
- DocumentDB - Useful Resources
- DocumentDB - Discussion
DocumentDB - Quick Guide
DocumentDB - Introduction
In this chapter, we will briefly discuss the major concepts around NoSQL and document databases. We will also have a quick overview of DocumentDB.
NoSQL Document Database
DocumentDB is Microsoft's newest NoSQL document database, so when you say NoSQL document database then, what precisely do we mean by NoSQL, and document database?
SQL means Structured Query Language which is traditional query language of relational databases. SQL is often equated with relational databases.
It's really more helpful to think of a NoSQL database as a non-relational database, so NoSQL really means non-relational.
There are different types of NoSQL databases which include key value stores such as −
- Azure Table Storage.
- Column-based stores like Cassandra.
- Graph databases like NEO4.
- Document databases like MongoDB and Azure DocumentDB.
Azure DocumentDB
Microsoft officially launched Azure DocumentDB on April 8th, 2015, and it certainly can be characterized as a typical NoSQL document database. It's massively scalable, and it works with schema-free JSON documents.
DocumentDB is a true schema-free NoSQL document database service designed for modern mobile and web applications.
It also delivers consistently fast reads and writes, schema flexibility, and the ability to easily scale a database up and down on demand.
It does not assume or require any schema for the JSON documents it indexes.
DocumentDB automatically indexes every property in a document as soon as the document is added to the database.
DocumentDB enables complex ad-hoc queries using a SQL language, and every document is instantly queryable the moment it's created, and you can search on any property anywhere within the document hierarchy.
DocumentDB – Pricing
DocumentDB is billed based on the number of collections contained in a database account. Each account can have one or more databases and each database can have a virtually unlimited number of collections, although there is an initial default quota of 100. This quota can be lifted by contacting Azure support.
A collection is not only a unit of scale, but also a unit of cost, so in DocumentDB you pay per collection, which has a storage capacity of up to 10 GB.
At a minimum, you'll need one S1 collection to store documents in a database that will cost roughly $25 per month, which gets billed against your Azure subscription.
As your database grows in size and exceeds 10 GB, you'll need to purchase another collection to contain the additional data.
Each S1 collection will give you 250 request units per second, and if that's not enough, then you can scale the collection up to an S2 and get a 1000 request units per second for about $50 a month.
You can also turn it all the way up to an S3 and pay around $100 a month.
DocumentDB - Advantages
DocumentDB stands out with some very unique capabilities. Azure DocumentDB offers the following key capabilities and benefits.
Schema Free
In a relational database, every table has a schema that defines the columns and data types that each row in the table must conform to.
In contrast, a document database has no defined schema, and every document can be structured differently.
SQL Syntax
DocumentDB enables complex ad-hoc queries using SQL language, and every document is instantly queryable the moment it's created. You can search on any property anywhere within the document hierarchy.
Tunable Consistency
It provides some granular, well-defined consistency levels, which allows you to make sound trade-offs between consistency, availability, and latency.
You can select from four well-defined consistency levels to achieve optimal trade-off between consistency and performance. For queries and read operations, DocumentDB offers four distinct consistency levels −
- Strong
- Bounded-staleness
- Session
- Eventual
Elastic Scale
Scalability is the name of the game with NoSQL, and DocumentDB delivers. DocumentDB has already been proven its scale.
Major services like Office OneNote and Xbox are already backed by DocumentDB with databases containing tens of terabytes of JSON documents, over a million active users, and operating consistently with 99.95% availability.
You can elastically scale DocumentDB with predictable performance by creating more units as your application grows.
Fully Managed
DocumentDB is available as a fully managed cloud-based platform as a service running on Azure.
There is simply nothing for you to install or manage.
There are no servers, cables, no operating systems or updates to deal with, no replicas to set up.
Microsoft does all that work and keeps the service running.
Within literally minutes, you can get started working with DocumentDB using just a browser and an Azure subscription.
DocumentDB - Environment Setup
Microsoft provides a free version of Visual Studio which also contains SQL Server and it can be downloaded from https://www.visualstudio.com
Installation
Step 1 − Once downloading is completed, run the installer. The following dialog will be displayed.
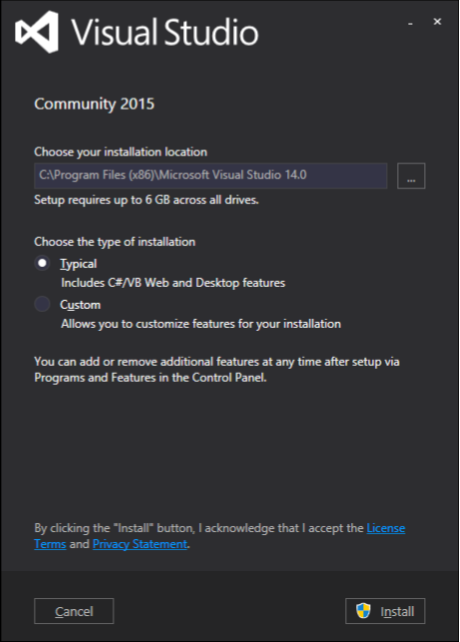
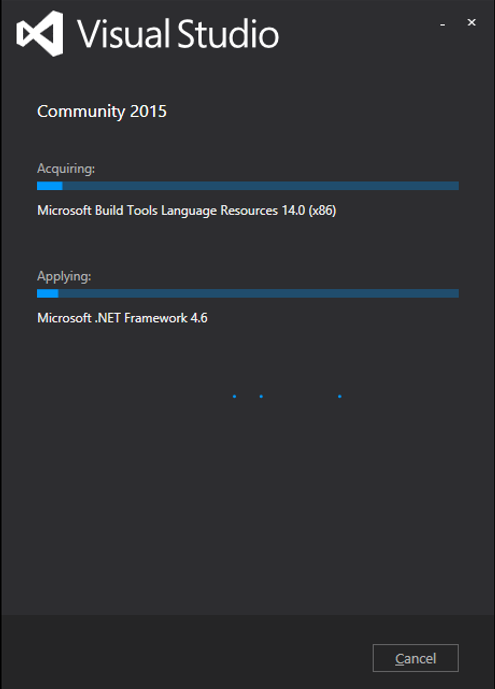
Step 2 − Click on the Install button and it will start the installation process.
Step 3 − Once the installation process is completed successfully, you will see the following dialog.
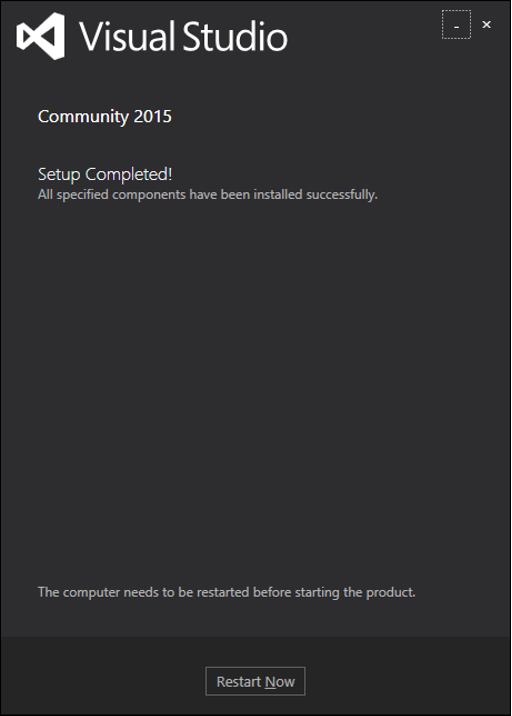
Step 4 − Close this dialog and restart your computer if required.
Step 5 − Now open Visual studio from start Menu which will open the below dialog. It will take some time for the first time only for preparation.
Once all is done, you will see the main window of Visual Studio.
Step 6 − Let’s create a new project from File → New → Project.

Step 7 − Select Console Application, enter DocumentDBDemo in the Name field and click OK button.
Step 8 − In solution Explorer, right-click on your project.
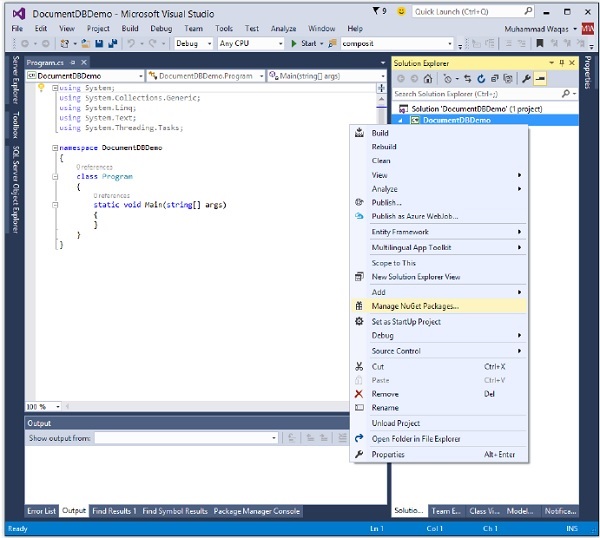
Step 9 − Select Manage NuGet Packages which will open the following window in Visual Studio and in the Search Online input box, search for DocumentDB Client Library.

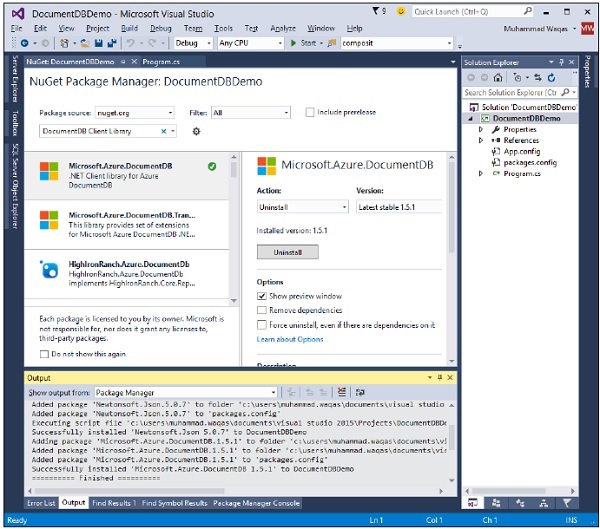
Step 10 − Install the latest version by clicking the install button.
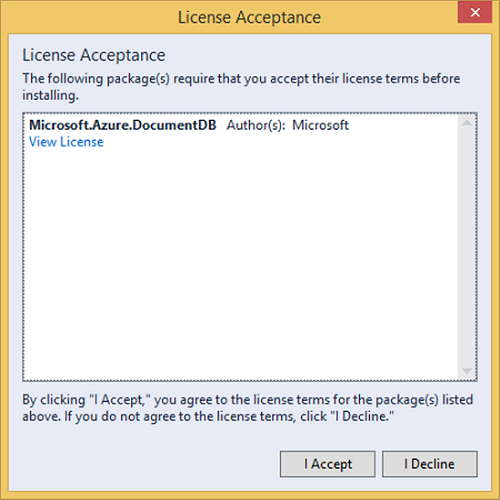
Step 11 − Click “I Accept”. Once installation is done you will see the message in your output window.
You are now ready to start your application.
DocumentDB - Create Account
To use Microsoft Azure DocumentDB, you must create a DocumentDB account. In this chapter, we will create a DocumentDB account using Azure portal.
Step 1 − Log in to the online https://portal.azure.com if you already have an Azure subscription otherwise you need to sign in first.
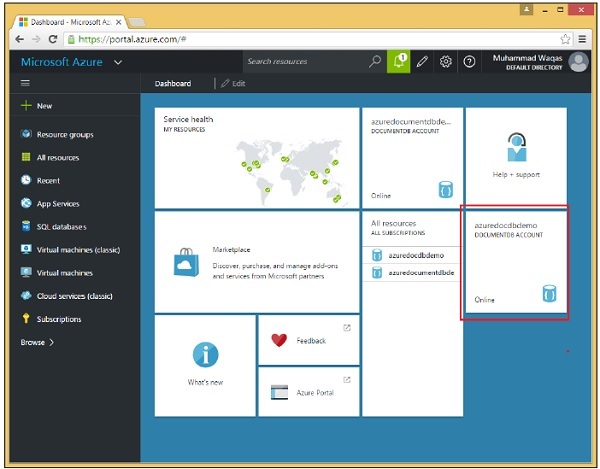
You will see the main Dashboard. It is fully customizable so you can arrange these tiles any way you like, resize them, add and remove tiles for things you frequently use or no longer do.
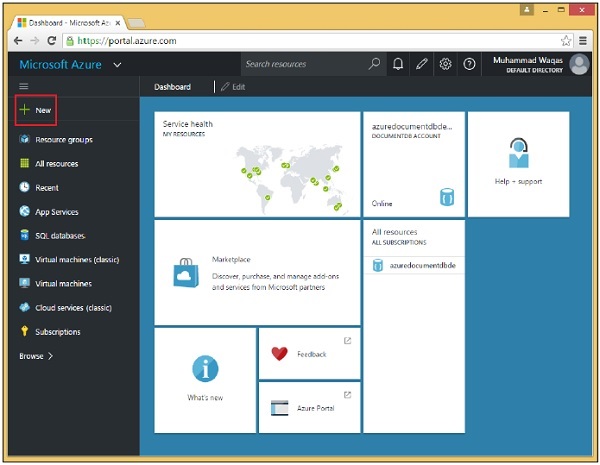
Step 2 − Select the ‘New’ option on the top left side of the page.
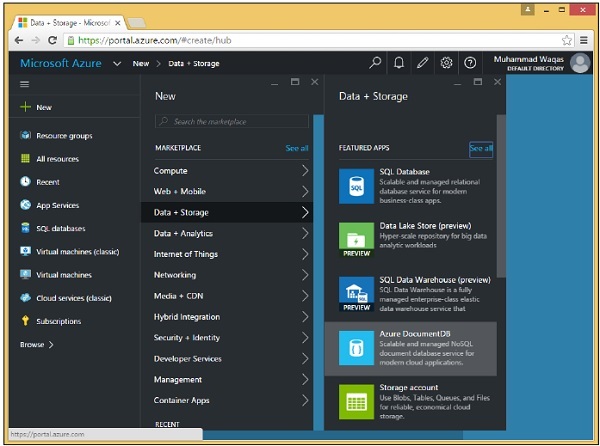
Step 3 − Now select Data + Storage > Azure DocumentDB option and you see the following New DocumentDB account section.
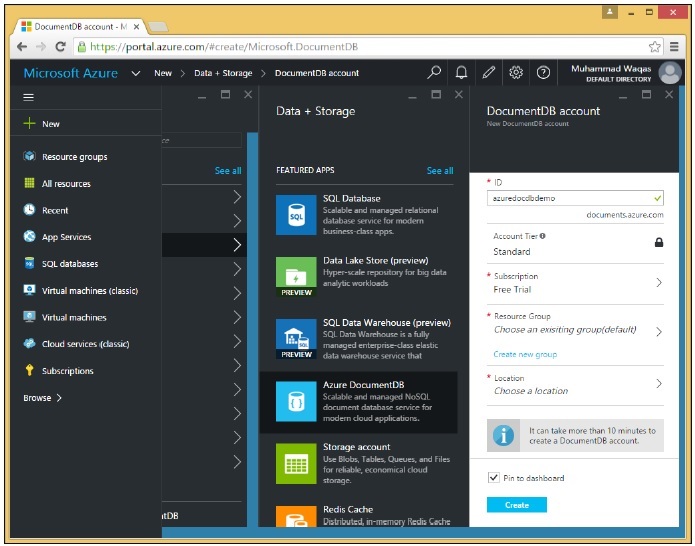
We need to come up with a globally unique name (ID), which combined with .documents.azure.com is the publicly addressable endpoint to our DocumentDB account. All the databases we create beneath that account can be accessed over the internet using this endpoint.
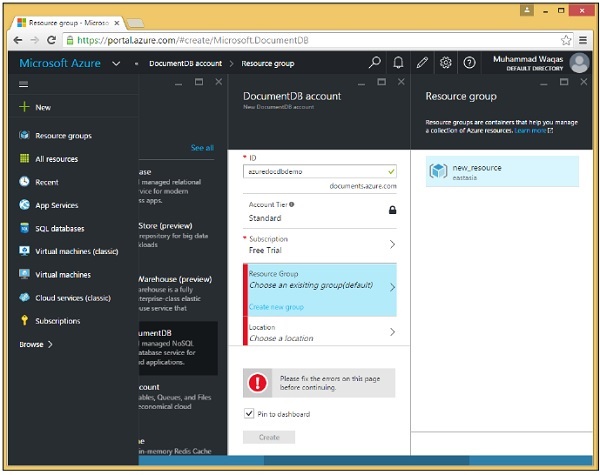
Step 4 − Let’s name it azuredocdbdemo and click on Resource Group → new_resource.
Step 5 − Choose the location i.e., which Microsoft data center you want this account to be hosted. Select the location and choose your region.
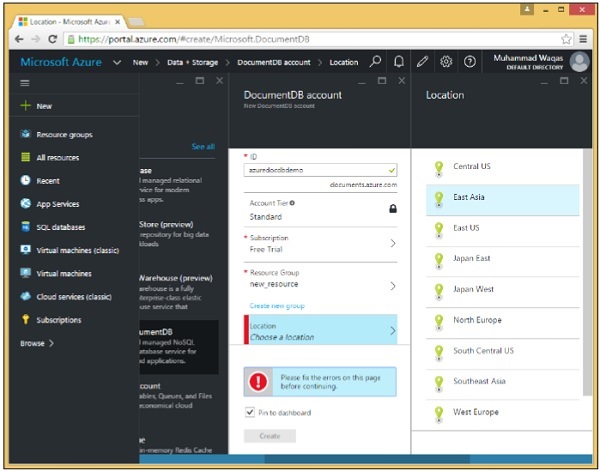
Step 6 − Check Pin to dashboard checkbox and just go ahead and click Create button.
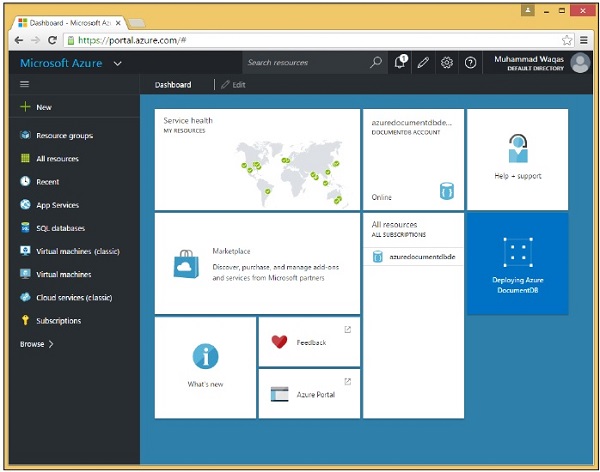
You can see that the tile has already been added to the Dashboard, and it's letting us know that the account is being created. It can actually take a few minutes to set things up for a new account while DocumentDB allocates the endpoint, provisions replicas, and performs other work in the background.
Once it is done, you will see the dashboard.
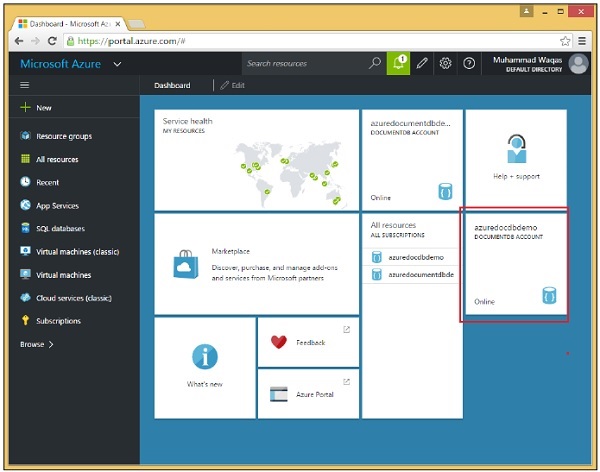
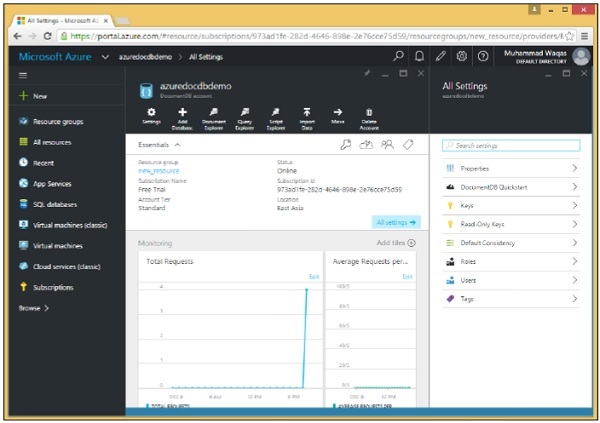
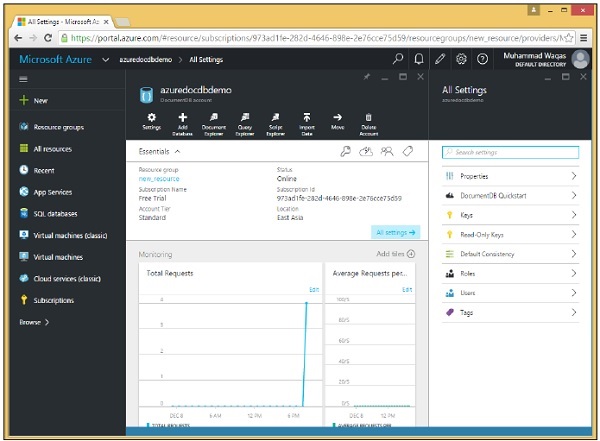
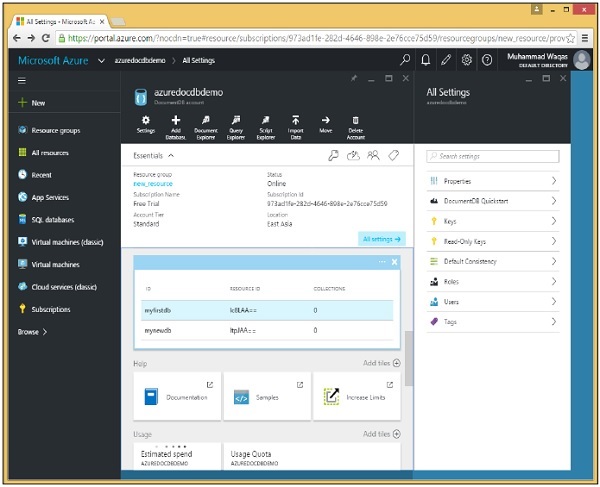
Step 7 − Now click on the created DocumentDB account and you will see a detailed screen as the following image.
DocumentDB - Connect Account
When you start programming against DocumentDB, the very first step is to connect. So to connect to your DocumentDB account you will need two things;
- Endpoint
- Authorization Key
Endpoint
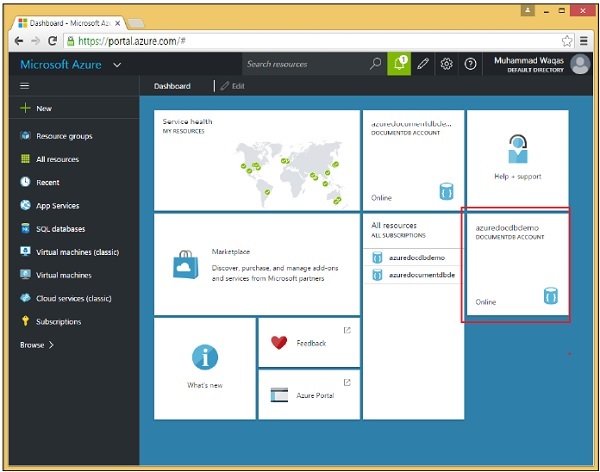
Endpoint is the URL to your DocumentDB account and it is constructed by combining your DocumentDB account name with .documents.azure.com. Let’s go to the Dashboard.
Now, click on the created DocumentDB account. You will see the details as shown in the following image.
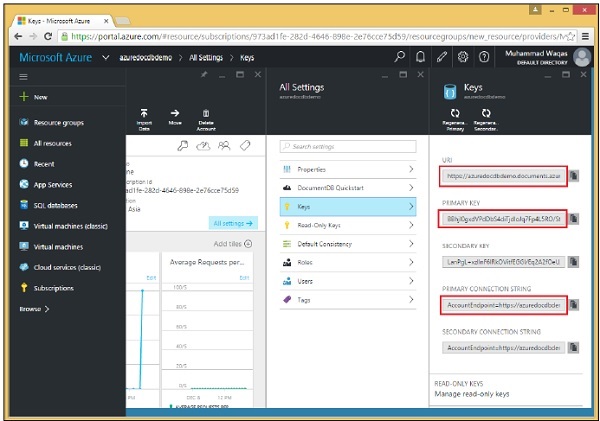
When you select the ‘Keys’ option, it will display additional information as shown in the following image. You will also see the URL to your DocumentDB account, which you can use as your endpoint.
Authorization Key
Authorization key contains your credentials and there are two types of keys. The master key allows full access to all resources within the account, while resource tokens permit restricted access to specific resources.
Master Keys
There's nothing you can't do with a master key. You can blow away your entire database if you want, using the master key.
For this reason, you definitely don't want to be sharing the master key or distributing it to client environments. As an added security measure, it's a good idea to change it frequently.
There are actually two master keys for each database account, the primary and the secondary as highlighted in the above screenshot.
Resource Tokens
You can also use resource tokens instead of a master key.
Connections based on resource tokens can only access the resources specified by the tokens and no other resources.
Resource tokens are based on user permissions, so first you create one or more users, and these are defined at the database level.
You create one or more permissions for each user, based on the resources that you want to allow each user to access.
Each permission generates a resource token that allows either read-only or full access to a given resource and that can be any user resource within the database.
Let’s go to console application created in chapter 3.
Step 1 − Add the following references in the Program.cs file.
using Microsoft.Azure.Documents;
using Microsoft.Azure.Documents.Client;
using Microsoft.Azure.Documents.Linq;
using Newtonsoft.Json;
Step 2 − Now add Endpoint URL and Authorization key. In this example we will be using primary key as Authorization key.
Note that in your case both Endpoint URL and authorization key should be different.
private const string EndpointUrl = "https://azuredocdbdemo.documents.azure.com:443/";
private const string AuthorizationKey =
   "BBhjI0gxdVPdDbS4diTjdloJq7Fp4L5RO/StTt6UtEufDM78qM2CtBZWbyVwFPSJIm8AcfDu2O+AfV T+TYUnBQ==";
Step 3 − Create a new instance of the DocumentClient in asynchronous task called CreateDocumentClient and instantiate new DocumentClient.
Step 4 − Call your asynchronous task from your Main method.
Following is the complete Program.cs file so far.
using System;
using System.Collections.Generic;
using System.Linq;
using System.Text;
using System.Threading.Tasks;

using Microsoft.Azure.Documents;
using Microsoft.Azure.Documents.Client;
using Microsoft.Azure.Documents.Linq;
using Newtonsoft.Json;

namespace DocumentDBDemo {

   class Program {
      private const string EndpointUrl = "https://azuredocdbdemo.documents.azure.com:443/";

      private const string AuthorizationKey = "BBhjI0gxdVPdDbS4diTjdloJq7Fp4L5RO/
         StTt6UtEufDM78qM2CtBZWbyVwFPSJIm8AcfDu2O+AfV T+TYUnBQ==";

      static void Main(string[] args) {
         try {
            CreateDocumentClient().Wait();
         } catch (Exception e) {
            Exception baseException = e.GetBaseException();
            Console.WriteLine("Error: {0}, Message: {1}", e.Message, baseException.Message);
         }

         Console.ReadKey();
      }

      private static async Task CreateDocumentClient() {
         // Create a new instance of the DocumentClient
         var client = new DocumentClient(new Uri(EndpointUrl), AuthorizationKey);
      }

   }
}
In this chapter, we have learnt how to connect to a DocumentDB account and create an instance of the DocumentClient class.
DocumentDB - Create Database
In this chapter, we will learn how to create a database. To use Microsoft Azure DocumentDB, you must have a DocumentDB account, a database, a collection, and documents. We already have a DocumentDB account, now to create database we have two options −
- Microsoft Azure Portal or
- .Net SDK
Create a Database for DocumentDB using the Microsoft Azure Portal
To create a database using portal, following are the steps.
Step 1 − Login to Azure portal and you will see the dashboard.
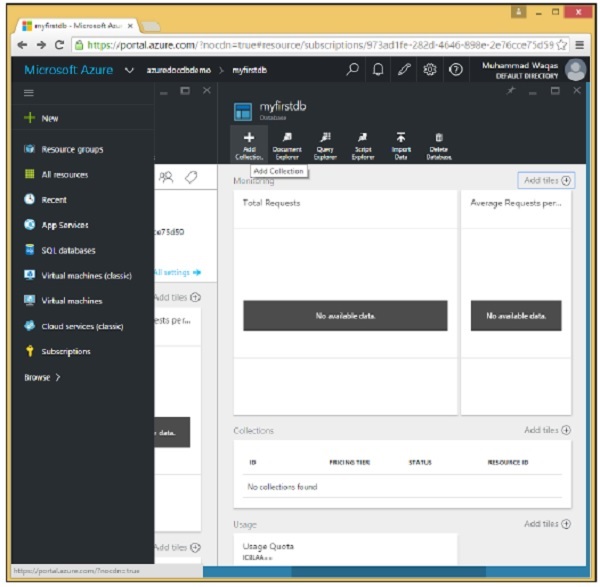
Step 2 − Now click on the created DocumentDB account and you will see the details as shown in the following screenshot.
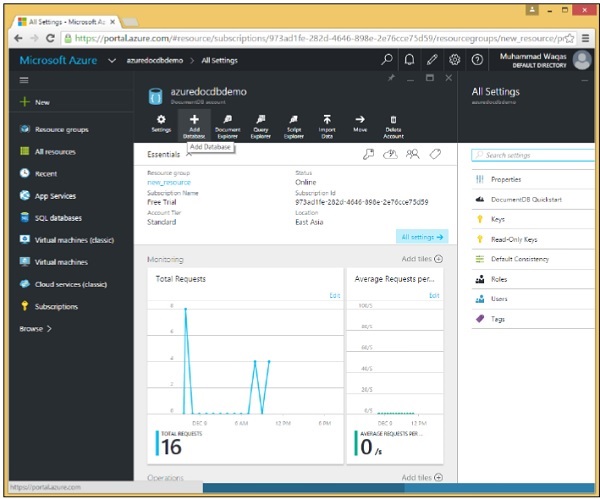
Step 3 − Select the Add Database option and provide the ID for your database.
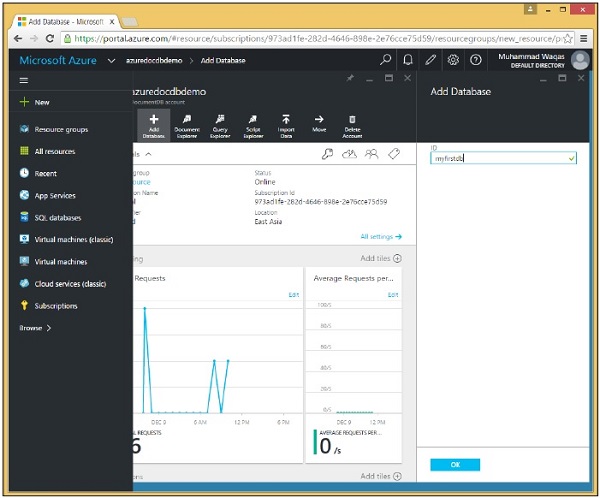
Step 4 − Click OK.
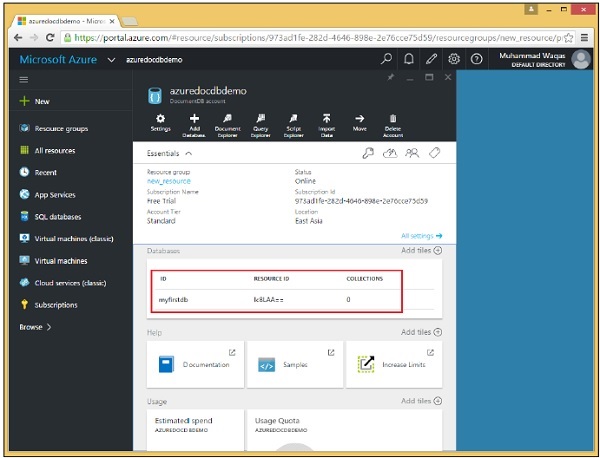
You can see that the database is added. At the moment, it has no collection, but we can add collections later which are the containers that will store our JSON documents. Notice that it has both an ID and a Resource ID.
Create a Database for DocumentDB Using .Net SDK
To create a database using .Net SDK, following are the steps.
Step 1 − Open the Console Application in Visual Studio from the last chapter.
Step 2 − Create the new database by creating a new database object. To create a new database, we only need to assign the Id property, which we are setting to “mynewdb” in a CreateDatabase task.
private async static Task CreateDatabase(DocumentClient client) {
   Console.WriteLine();
   Console.WriteLine("******** Create Database *******");

   var databaseDefinition = new Database { Id = "mynewdb" };
   var result = await client.CreateDatabaseAsync(databaseDefinition);
   var database = result.Resource;

   Console.WriteLine(" Database Id: {0}; Rid: {1}", database.Id, database.ResourceId);
   Console.WriteLine("******** Database Created *******");
}
Step 3 − Now pass this databaseDefinition on to CreateDatabaseAsync, and get back a result with a Resource property. All the create object methods return a Resource property that describes the item that was created, which is a database in this case.
We get the new database object from the Resource property and it is displayed on the Console along with the Resource ID that DocumentDB assigned to it.
Step 4 − Now call CreateDatabase task from the CreateDocumentClient task after DocumentClient is instantiated.
using (var client = new DocumentClient(new Uri(EndpointUrl), AuthorizationKey)) {
   await CreateDatabase(client);
}
Following is the complete Program.cs file so far.
using System;
using System.Collections.Generic;
using System.Linq;
using System.Text;
using System.Threading.Tasks;

using Microsoft.Azure.Documents;
using Microsoft.Azure.Documents.Client;
using Microsoft.Azure.Documents.Linq;
using Newtonsoft.Json;

namespace DocumentDBDemo {

   class Program {
      private const string EndpointUrl = "https://azuredocdbdemo.documents.azure.com:443/";

      private const string AuthorizationKey = "BBhjI0gxdVPdDbS4diTjdloJq7Fp4L5RO/
         StTt6UtEufDM78qM2CtBZWbyVwFPSJIm8AcfDu2O+AfV T+TYUnBQ==";

      static void Main(string[] args) {
         try {
            CreateDocumentClient().Wait();
         } catch (Exception e) {
            Exception baseException = e.GetBaseException();
            Console.WriteLine("Error: {0}, Message: {1}", e.Message, baseException.Message);
         }
         Console.ReadKey();
      }

      private static async Task CreateDocumentClient() {
         // Create a new instance of the DocumentClient
         using (var client = new DocumentClient(new Uri(EndpointUrl), AuthorizationKey)) {
            await CreateDatabase(client);
         }
      }

      private async static Task CreateDatabase(DocumentClient client) {
         Console.WriteLine();
         Console.WriteLine("******** Create Database *******");

         var databaseDefinition = new Database { Id = "mynewdb" };
         var result = await client.CreateDatabaseAsync(databaseDefinition);
         var database = result.Resource;

         Console.WriteLine(" Database Id: {0}; Rid: {1}", database.Id, database.ResourceId);
         Console.WriteLine("******** Database Created *******");
      }

   }
}
When the above code is compiled and executed, you will receive the following output which contains the Database and Resources IDs.
******** Create Database *******
 Database Id: mynewdb; Rid: ltpJAA==
******** Database Created *******
DocumentDB - List Databases
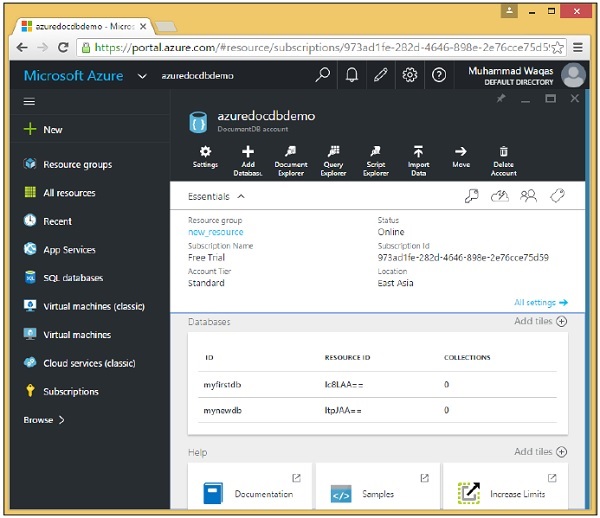
So far, we have created two databases in our DocumentDB account, first one is created using Azure portal while the second database is created using .Net SDK. Now to view these databases, you can use Azure portal.
Go to your DocumentDB account on Azure portal and you will see two databases now.
You can also view or list the databases from your code using .Net SDK. Following are the steps involved.
Step 1 − Issue a database Query with no parameters which returns a complete list, but you can also pass in a query to look for a specific database or specific databases.
private static void GetDatabases(DocumentClient client) {
   Console.WriteLine();
   Console.WriteLine();
   Console.WriteLine("******** Get Databases List ********");

   var databases = client.CreateDatabaseQuery().ToList();

   foreach (var database in databases) {
      Console.WriteLine(" Database Id: {0}; Rid: {1}", database.Id, database.ResourceId);
   }

   Console.WriteLine();
   Console.WriteLine("Total databases: {0}", databases.Count);
}
You will see that there are a bunch of these CreateQuery methods for locating collections, documents, users, and other resources. These methods don't actually execute the query, they just define the query and return an iterateable object.
It's the call to ToList() that actually executes the query, iterates the results, and returns them in a list.
Step 2 − Call GetDatabases method from the CreateDocumentClient task after DocumentClient is instantiated.
Step 3 − You also need to comment the CreateDatabase task or change the database id, otherwise you will get an error message that the database exists.
using (var client = new DocumentClient(new Uri(EndpointUrl), AuthorizationKey)) {
   //await CreateDatabase(client);
   GetDatabases(client);
}
Following is the complete Program.cs file so far.
using System;
using System.Collections.Generic;
using System.Linq;
using System.Text;
using System.Threading.Tasks;

using Microsoft.Azure.Documents;
using Microsoft.Azure.Documents.Client;
using Microsoft.Azure.Documents.Linq;
using Newtonsoft.Json;

namespace DocumentDBDemo {

   class Program {
      private const string EndpointUrl = "https://azuredocdbdemo.documents.azure.com:443/";

      private const string AuthorizationKey = "BBhjI0gxdVPdDbS4diTjdloJq7Fp4L5RO/
         StTt6UtEufDM78qM2CtBZWbyVwFPSJIm8AcfDu2O+AfV T+TYUnBQ==";

      static void Main(string[] args) {
         try {
            CreateDocumentClient().Wait();
         } catch (Exception e) {
            Exception baseException = e.GetBaseException();
            Console.WriteLine("Error: {0}, Message: {1}", e.Message, baseException.Message);
         }
         Console.ReadKey();
      }

      private static async Task CreateDocumentClient() {
         // Create a new instance of the DocumentClient
         using (var client = new DocumentClient(new Uri(EndpointUrl), AuthorizationKey)) {
            await CreateDatabase(client);
            GetDatabases(client);
         }
      }

      private async static Task CreateDatabase(DocumentClient client) {
         Console.WriteLine();
         Console.WriteLine("******** Create Database *******");

         var databaseDefinition = new Database { Id = "mynewdb" };
         var result = await client.CreateDatabaseAsync(databaseDefinition);
         var database = result.Resource;

         Console.WriteLine(" Database Id: {0}; Rid: {1}", database.Id, database.ResourceId);
         Console.WriteLine("******** Database Created *******");
      }

      private static void GetDatabases(DocumentClient client) {
         Console.WriteLine();
         Console.WriteLine();
         Console.WriteLine("******** Get Databases List ********");

         var databases = client.CreateDatabaseQuery().ToList();

         foreach (var database in databases) {
            Console.WriteLine(" Database Id: {0}; Rid: {1}",
               database.Id, database.ResourceId);
         }

         Console.WriteLine();
         Console.WriteLine("Total databases: {0}", databases.Count);
      }

   }
}
When the above code is compiled and executed you will receive the following output which contains the Database and Resources IDs of both the databases. In the end you will also see the total number of databases.
******** Get Databases List ********
 Database Id: myfirstdb; Rid: Ic8LAA==
 Database Id: mynewdb; Rid: ltpJAA==
Total databases: 2
DocumentDB - Drop Databases
You can drop a database or databases from the portal as well as from the code by using .Net SDK. Here, we will discuss, in a step-wise manner, how to drop a database in DocumentDB.
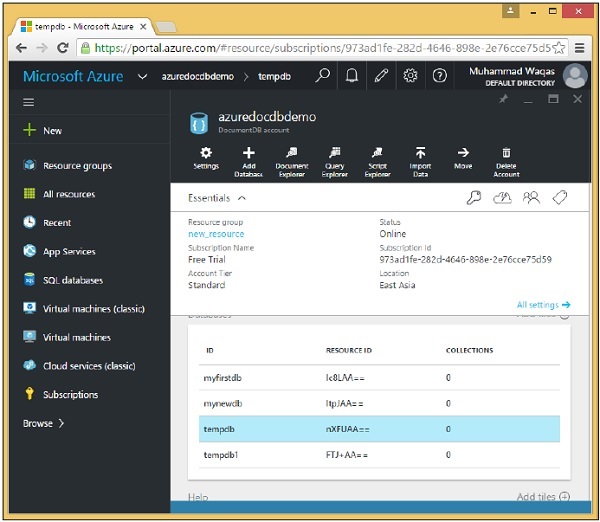
Step 1 − Go to your DocumentDB account on Azure portal. For the purpose of demo, I have added two more databases as seen in the following screenshot.
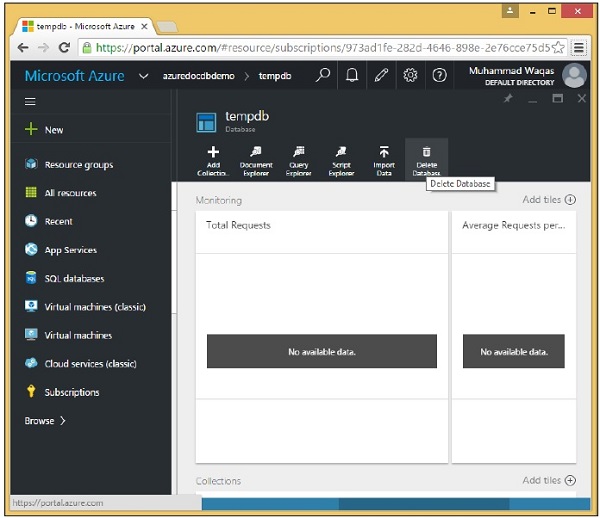
Step 2 − To drop any database, you need to click that database. Let’s select tempdb, you will see the following page, select the ‘Delete Database’ option.
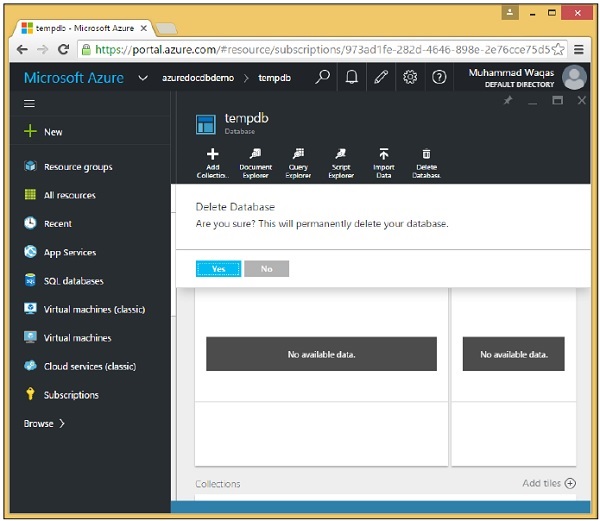
Step 3 − It will display the confirmation message, now click the ‘Yes’ button.
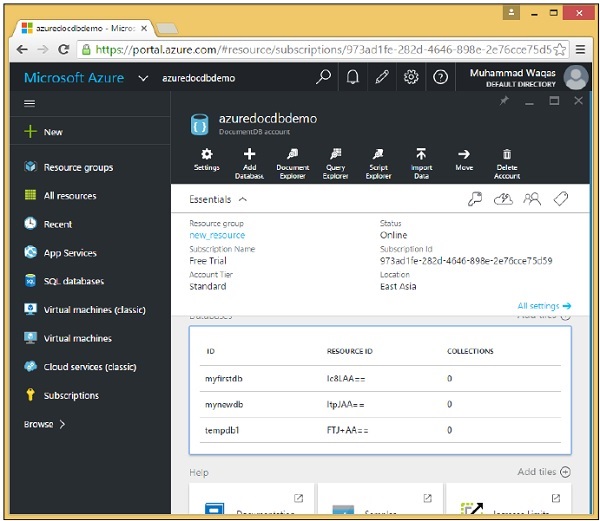
You will see that the tempdb is no more available in your dashboard.
You can also delete databases from your code using .Net SDK. To do following are the steps.
Step 1 − Let's delete the database by specifying the ID of the database we want to delete, but we need its SelfLink.
Step 2 − We are calling the CreateDatabaseQuery like before, but this time we are actually supplying a query to return just the one database with the ID tempdb1.
private async static Task DeleteDatabase(DocumentClient client) {
   Console.WriteLine("******** Delete Database ********");
   Database database = client
      .CreateDatabaseQuery("SELECT * FROM c WHERE c.id = 'tempdb1'")
      .AsEnumerable()
      .First();
   await client.DeleteDatabaseAsync(database.SelfLink);
}
Step 3 − This time, we can call AsEnumerable instead of ToList() because we don't actually need a list object. Expecting only result, calling AsEnumerable is sufficient so that we can get the first database object returned by the query with First(). This is the database object for tempdb1 and it has a SelfLink that we can use to call DeleteDatabaseAsync which deletes the database.
Step 4 − You also need to call DeleteDatabase task from the CreateDocumentClient task after DocumentClient is instantiated.
Step 5 − To view the list of databases after deleting the specified database, let’s call GetDatabases method again.
using (var client = new DocumentClient(new Uri(EndpointUrl), AuthorizationKey)) {
   //await CreateDatabase(client);

   GetDatabases(client);
   await DeleteDatabase(client);
   GetDatabases(client);
}
Following is the complete Program.cs file so far.
using System;
using System.Collections.Generic;
using System.Linq;
using System.Text;
using System.Threading.Tasks;

using Microsoft.Azure.Documents;
using Microsoft.Azure.Documents.Client;
using Microsoft.Azure.Documents.Linq;
using Newtonsoft.Json;

namespace DocumentDBDemo {

   class Program {

      private const string EndpointUrl = "https://azuredocdbdemo.documents.azure.com:443/";

      private const string AuthorizationKey = "BBhjI0gxdVPdDbS4diTjdloJq7Fp4L5RO/
         StTt6UtEufDM78qM2CtBZWbyVwFPSJIm8AcfDu2O+AfV T+TYUnBQ==";

      static void Main(string[] args) {
         try {
            CreateDocumentClient().Wait();
         } catch (Exception e) {
            Exception baseException = e.GetBaseException();
            Console.WriteLine("Error: {0}, Message: {1}", e.Message, baseException.Message);
         }
         Console.ReadKey();
      }

      private static async Task CreateDocumentClient() {
         // Create a new instance of the DocumentClient
         using (var client = new DocumentClient(new Uri(EndpointUrl), AuthorizationKey)) {
            //await CreateDatabase(client);
            GetDatabases(client);
            await DeleteDatabase(client);
            GetDatabases(client);
         }
      }

      private async static Task CreateDatabase(DocumentClient client) {
         Console.WriteLine();
         Console.WriteLine("******** Create Database *******");

         var databaseDefinition = new Database { Id = "mynewdb" };
         var result = await client.CreateDatabaseAsync(databaseDefinition);
         var database = result.Resource;

         Console.WriteLine(" Database Id: {0}; Rid: {1}",
            database.Id, database.ResourceId);
         Console.WriteLine("******** Database Created *******");
      }

      private static void GetDatabases(DocumentClient client) {
         Console.WriteLine();
         Console.WriteLine();
         Console.WriteLine("******** Get Databases List ********");

         var databases = client.CreateDatabaseQuery().ToList();

         foreach (var database in databases) {
            Console.WriteLine(" Database Id: {0}; Rid: {1}", database.Id,
               database.ResourceId);
         }

         Console.WriteLine();
         Console.WriteLine("Total databases: {0}", databases.Count);
      }

      private async static Task DeleteDatabase(DocumentClient client) {
         Console.WriteLine();
         Console.WriteLine("******** Delete Database ********");

         Database database = client
            .CreateDatabaseQuery("SELECT * FROM c WHERE c.id = 'tempdb1'")
            .AsEnumerable()
            .First();
         await client.DeleteDatabaseAsync(database.SelfLink);
      }

   }
}
When the above code is compiled and executed, you will receive the following output which contains the Database and Resources IDs of the three databases and total number of databases.
******** Get Databases List ********
 Database Id: myfirstdb; Rid: Ic8LAA==
 Database Id: mynewdb; Rid: ltpJAA==
 Database Id: tempdb1; Rid: 06JjAA==

Total databases: 3

******** Delete Database ********

******** Get Databases List ********
 Database Id: myfirstdb; Rid: Ic8LAA==
 Database Id: mynewdb; Rid: ltpJAA==

Total databases: 2
After deleting the database, you will also see at the end that only two databases are left in DocumentDB account.
DocumentDB - Create Collection
In this chapter, we will learn how to create a collection. It is similar to creating a database. You can create a collection either from the portal or from the code using .Net SDK.
Step 1 − Go to main dashboard on Azure portal.
Step 2 − Select myfirstdb from the databases list.
Step 3 − Click on the ‘Add Collection’ option and specify the ID for collection. Select the Pricing Tier for different option.
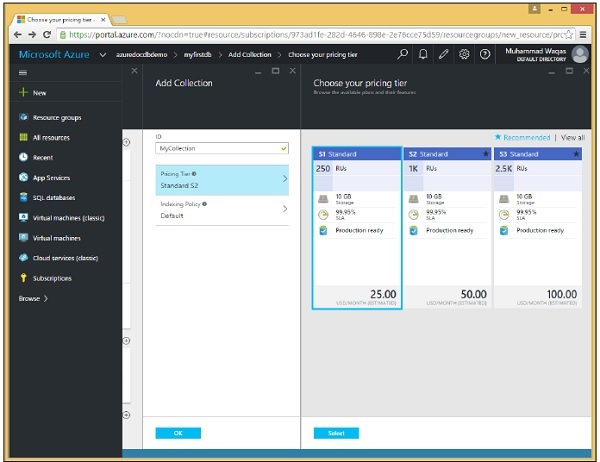
Step 4 − Let’s select S1 Standard and click Select → OK button.
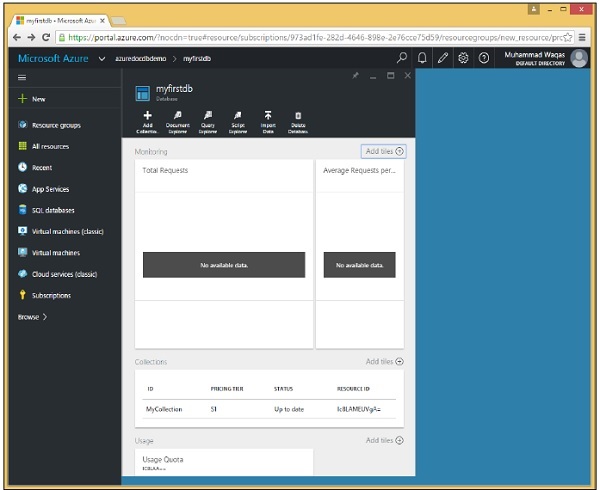
As you can see that MyCollection is added to the myfirstdb.
You can also create collection from the code by using .Net SDK. Let’s have a look at the following steps to add collections from the code.
Step 1 − Open the Console application in Visual Studio.
Step 2 − To create a collection, first retrieve the myfirstdb database by its ID in the CreateDocumentClient task.
private static async Task CreateDocumentClient() {

   // Create a new instance of the DocumentClient
   using (var client = new DocumentClient(new Uri(EndpointUrl), AuthorizationKey)) {
      database = client.CreateDatabaseQuery("SELECT * FROM c WHERE c.id =
         'myfirstdb'").AsEnumerable().First();

      await CreateCollection(client, "MyCollection1");
      await CreateCollection(client, "MyCollection2", "S2");
   }
}
Following is the implementation for CreateCollection task.
private async static Task CreateCollection(DocumentClient client, string collectionId,
   string offerType = "S1") {

   Console.WriteLine();
   Console.WriteLine("**** Create Collection {0} in {1} ****", collectionId, database.Id);

   var collectionDefinition = new DocumentCollection { Id = collectionId };
   var options = new RequestOptions { OfferType = offerType };
   var result = await client.CreateDocumentCollectionAsync(database.SelfLink,
      collectionDefinition, options);
   var collection = result.Resource;

   Console.WriteLine("Created new collection");
   ViewCollection(collection);
}
We create a new DocumentCollection object that defines the new collection with the desired Id for the CreateDocumentCollectionAsync method which also accepts an options parameter that we're using here to set the performance tier of the new collection, which we're calling offerType.
This defaults to S1 and since we didn't pass in an offerType, for MyCollection1, so this will be an S1 collection and for MyCollection2 we have passed S2 which make this one an S2 as shown above.
Following is the implementation of the ViewCollection method.
private static void ViewCollection(DocumentCollection collection) {
   Console.WriteLine("Collection ID: {0} ", collection.Id);
   Console.WriteLine("Resource ID: {0} ", collection.ResourceId);
   Console.WriteLine("Self Link: {0} ", collection.SelfLink);
   Console.WriteLine("Documents Link: {0} ", collection.DocumentsLink);
   Console.WriteLine("UDFs Link: {0} ", collection.UserDefinedFunctionsLink);
   Console.WriteLine(" StoredProcs Link: {0} ", collection.StoredProceduresLink);
   Console.WriteLine("Triggers Link: {0} ", collection.TriggersLink);
   Console.WriteLine("Timestamp: {0} ", collection.Timestamp);
}
Following is the complete implementation of program.cs file for collections.
using System;
using System.Collections.Generic;
using System.Linq;
using System.Text;
using System.Threading.Tasks;

using Microsoft.Azure.Documents;
using Microsoft.Azure.Documents.Client;
using Microsoft.Azure.Documents.Linq;

using Newtonsoft.Json;

namespace DocumentDBDemo {

   class Program {

      private const string EndpointUrl = "https://azuredocdbdemo.documents.azure.com:443/";

      private const string AuthorizationKey = "BBhjI0gxdVPdDbS4diTjdloJq7Fp4L5RO/
         StTt6UtEufDM78qM2CtBZWbyVwFPSJIm8AcfDu2O+AfV T+TYUnBQ==";

      private static Database database;

      static void Main(string[] args) {
         try {
            CreateDocumentClient().Wait();
         } catch (Exception e) {
            Exception baseException = e.GetBaseException();
            Console.WriteLine("Error: {0}, Message: {1}", e.Message, baseException.Message);
         }
         Console.ReadKey();
      }

      private static async Task CreateDocumentClient() {
         // Create a new instance of the DocumentClient
         using (var client = new DocumentClient(new Uri(EndpointUrl), AuthorizationKey)) {
            database = client.CreateDatabaseQuery("SELECT * FROM c WHERE c.id =
               'myfirstdb'").AsEnumerable().First();
            await CreateCollection(client, "MyCollection1");
            await CreateCollection(client, "MyCollection2", "S2");

            //await CreateDatabase(client);
            //GetDatabases(client);
            //await DeleteDatabase(client);
            //GetDatabases(client);
         }
      }

      private async static Task CreateCollection(DocumentClient client,
         string collectionId, string offerType = "S1") {

         Console.WriteLine();
         Console.WriteLine("**** Create Collection {0} in {1} ****", collectionId,
            database.Id);

         var collectionDefinition = new DocumentCollection { Id = collectionId };
         var options = new RequestOptions { OfferType = offerType };
         var result = await

			client.CreateDocumentCollectionAsync(database.SelfLink,
            collectionDefinition, options);
         var collection = result.Resource;

         Console.WriteLine("Created new collection");
         ViewCollection(collection);
      }

      private static void ViewCollection(DocumentCollection collection) {
         Console.WriteLine("Collection ID: {0} ", collection.Id);
         Console.WriteLine("Resource ID: {0} ", collection.ResourceId);
         Console.WriteLine("Self Link: {0} ", collection.SelfLink);
         Console.WriteLine("Documents Link: {0} ", collection.DocumentsLink);
         Console.WriteLine("UDFs Link: {0} ", collection.UserDefinedFunctionsLink);
         Console.WriteLine("StoredProcs Link: {0} ", collection.StoredProceduresLink);
         Console.WriteLine("Triggers Link: {0} ", collection.TriggersLink);
         Console.WriteLine("Timestamp: {0} ", collection.Timestamp);
      }

   }
}
When the above code is compiled and executed, you will receive the following output which contains all the information related to collection.
**** Create Collection MyCollection1 in myfirstdb ****
Created new collection
   Collection ID: MyCollection1
      Resource ID: Ic8LAPPvnAA=
         Self Link: dbs/Ic8LAA==/colls/Ic8LAPPvnAA=/
   Documents Link: dbs/Ic8LAA==/colls/Ic8LAPPvnAA=/docs/
         UDFs Link: dbs/Ic8LAA==/colls/Ic8LAPPvnAA=/udfs/
   StoredProcs Link: dbs/Ic8LAA==/colls/Ic8LAPPvnAA=/sprocs/
      Triggers Link: dbs/Ic8LAA==/colls/Ic8LAPPvnAA=/triggers/
         Timestamp: 12/10/2015 4:55:36 PM

**** Create Collection MyCollection2 in myfirstdb ****
Created new collection
   Collection ID: MyCollection2
      Resource ID: Ic8LAKGHDwE=
         Self Link: dbs/Ic8LAA==/colls/Ic8LAKGHDwE=/
   Documents Link: dbs/Ic8LAA==/colls/Ic8LAKGHDwE=/docs/
         UDFs Link: dbs/Ic8LAA==/colls/Ic8LAKGHDwE=/udfs/
   StoredProcs Link: dbs/Ic8LAA==/colls/Ic8LAKGHDwE=/sprocs/
      Triggers Link: dbs/Ic8LAA==/colls/Ic8LAKGHDwE=/triggers/
         Timestamp: 12/10/2015 4:55:38 PM
DocumentDB - Delete Collection
To drop collection or collections you can do the same from the portal as well as from the code by using .Net SDK.
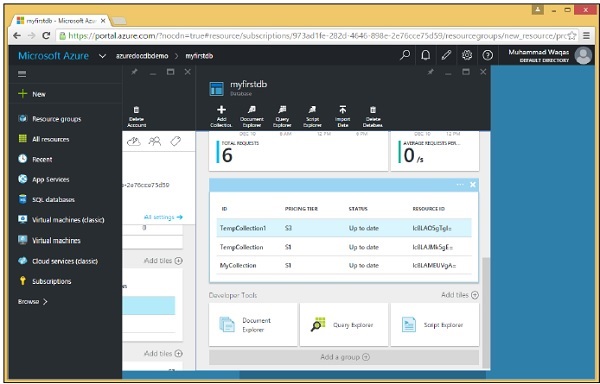
Step 1 − Go to your DocumentDB account on Azure portal. For the purpose of demo, I have added two more collections as seen in the following screenshot.
Step 2 − To drop any collection, you need to click on that collection. Let’s select TempCollection1. You will see the following page, select the ‘Delete Collection’ option.
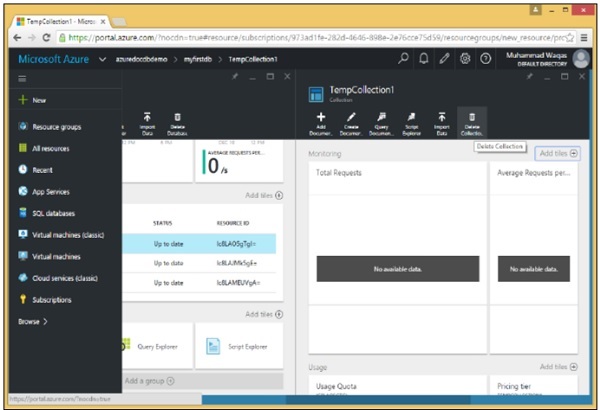
Step 3 − It will display the confirmation message. Now click ‘Yes’ button.

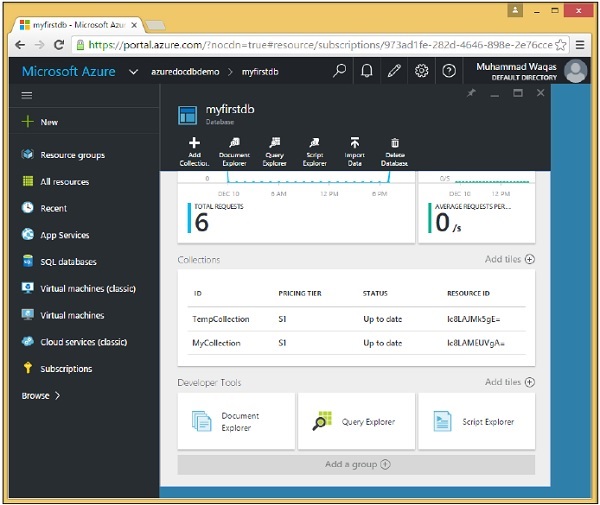
You will see that the TempCollection1 is no more available on your dashboard.
You can also delete collections from your code using .Net SDK. To do that, following are the following steps.
Step 1 − Let's delete the collection by specifying the ID of the collection we want to delete.
It's the usual pattern of querying by Id to obtain the selfLinks needed to delete a resource.
private async static Task DeleteCollection(DocumentClient client, string collectionId) {
   Console.WriteLine();
   Console.WriteLine("**** Delete Collection {0} in {1} ****", collectionId, database.Id);

   var query = new SqlQuerySpec {
      QueryText = "SELECT * FROM c WHERE c.id = @id",
         Parameters = new SqlParameterCollection {
         new SqlParameter {
            Name = "@id", Value = collectionId
         }
      }
   };

   DocumentCollection collection = client.CreateDocumentCollectionQuery(database.SelfLink,
      query).AsEnumerable().First();

   await client.DeleteDocumentCollectionAsync(collection.SelfLink);
   Console.WriteLine("Deleted collection {0} from database {1}", collectionId,
      database.Id);
}
Here we see the preferred way of constructing a parameterized query. We're not hardcoding the collectionId so this method can be used to delete any collection. We are querying for a specific collection by Id where the Id parameter is defined in this SqlParameterCollection assigned to the parameter's property of this SqlQuerySpec.
Then the SDK does the work of constructing the final query string for DocumentDB with the collectionId embedded inside of it.
Step 2 − Run the query and then use its SelfLink to delete the collection from the CreateDocumentClient task.
private static async Task CreateDocumentClient() {
   // Create a new instance of the DocumentClient

   using (var client = new DocumentClient(new Uri(EndpointUrl), AuthorizationKey)) {
      database = client.CreateDatabaseQuery("SELECT * FROM c WHERE c.id =
         'myfirstdb'").AsEnumerable().First();
      await DeleteCollection(client, "TempCollection");
   }
}
Following is the complete implementation of Program.cs file.
using System;
using System.Collections.Generic;
using System.Linq;
using System.Text;
using System.Threading.Tasks;

using Microsoft.Azure.Documents;
using Microsoft.Azure.Documents.Client;
using Microsoft.Azure.Documents.Linq;

using Newtonsoft.Json;

namespace DocumentDBDemo {

   class Program {

      private const string EndpointUrl = "https://azuredocdbdemo.documents.azure.com:443/";

      private const string AuthorizationKey = "BBhjI0gxdVPdDbS4diTjdloJq7Fp4L5RO/
         StTt6UtEufDM78qM2CtBZWbyVwFPSJIm8AcfDu2O+AfV T+TYUnBQ==";

      private static Database database;

      static void Main(string[] args) {
         try {
            CreateDocumentClient().Wait();
         } catch (Exception e) {
            Exception baseException = e.GetBaseException();
            Console.WriteLine("Error: {0}, Message: {1}", e.Message, baseException.Message);
         }
         Console.ReadKey();
      }

      private static async Task CreateDocumentClient() {
         // Create a new instance of the DocumentClient
         using (var client = new DocumentClient(new Uri(EndpointUrl), AuthorizationKey)) {
            database = client.CreateDatabaseQuery("SELECT * FROM c WHERE c.id =
               'myfirstdb'").AsEnumerable().First();
            await DeleteCollection(client, "TempCollection");

            //await CreateCollection(client, "MyCollection1");
            //await CreateCollection(client, "MyCollection2", "S2");
            ////await CreateDatabase(client);
            //GetDatabases(client);
            //await DeleteDatabase(client);
            //GetDatabases(client);
         }
      }

      private async static Task CreateCollection(DocumentClient client,
         string collectionId, string offerType = "S1") {

         Console.WriteLine();
         Console.WriteLine("**** Create Collection {0} in {1} ****", collectionId,
            database.Id);

         var collectionDefinition = new DocumentCollection { Id = collectionId };
         var options = new RequestOptions { OfferType = offerType };
         var result = await client.CreateDocumentCollectionAsync(database.SelfLink,
            collectionDefinition, options);

         var collection = result.Resource;

         Console.WriteLine("Created new collection");
         ViewCollection(collection);
      }

      private static void ViewCollection(DocumentCollection collection) {
         Console.WriteLine("Collection ID: {0} ", collection.Id);
         Console.WriteLine("Resource ID: {0} ", collection.ResourceId);
         Console.WriteLine("Self Link: {0} ", collection.SelfLink);
         Console.WriteLine("Documents Link: {0} ", collection.DocumentsLink);
         Console.WriteLine("UDFs Link: {0} ", collection.UserDefinedFunctionsLink);
         Console.WriteLine("StoredProcs Link: {0} ", collection.StoredProceduresLink);
         Console.WriteLine("Triggers Link: {0} ", collection.TriggersLink);
         Console.WriteLine("Timestamp: {0} ", collection.Timestamp);
      }

      private async static Task DeleteCollection(DocumentClient client,
         string collectionId) {

         Console.WriteLine();
         Console.WriteLine("**** Delete Collection {0} in {1} ****", collectionId,
            database.Id);

         var query = new SqlQuerySpec {
            QueryText = "SELECT * FROM c WHERE c.id = @id", Parameters = new
               SqlParameterCollection {
               new SqlParameter {
                  Name = "@id", Value = collectionId
               }
            }
         };

         DocumentCollection collection = client.CreateDocumentCollectionQuery
            (database.SelfLink, query).AsEnumerable().First();

         await client.DeleteDocumentCollectionAsync(collection.SelfLink);
         Console.WriteLine("Deleted collection {0} from database {1}", collectionId,
            database.Id);
      }

   }
}
When the above code is compiled and executed, you will receive the following output.
**** Delete Collection TempCollection in myfirstdb ****
Deleted collection TempCollection from database myfirstdb
DocumentDB - Insert Document
In this chapter, we will get to work with actual documents in a collection. You can create documents using either Azure portal or .Net SDK.
Creating Documents with the Azure Portal
Let’s take a look at the following steps to add document to your collection.
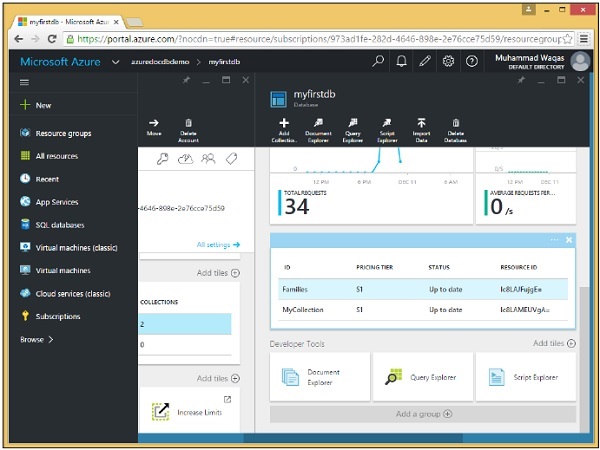
Step 1 − Add new collection Families of S1 pricing tier in myfirstdb.
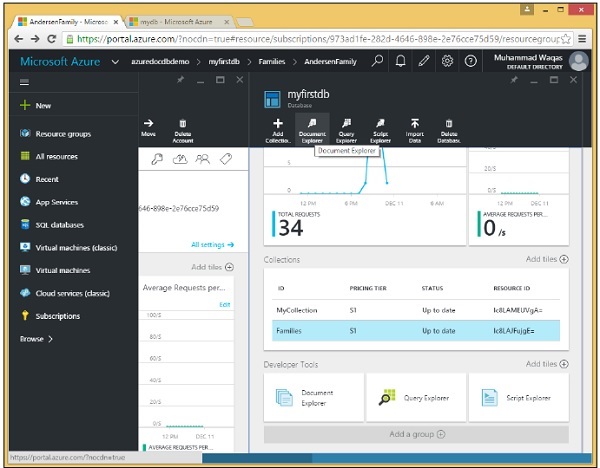
Step 2 − Select the Families collection and click on Create Document option to open the New Document blade.
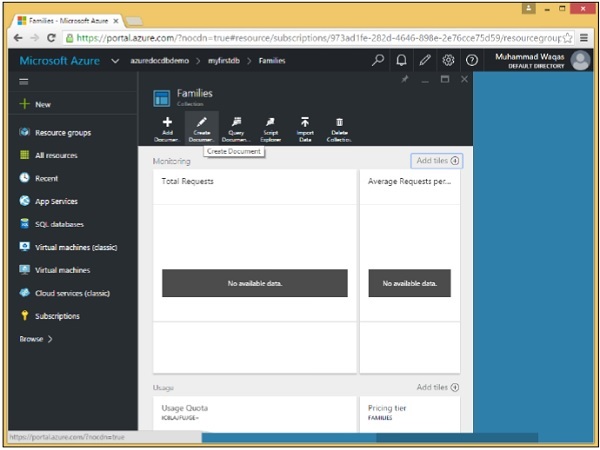
This is just a simple text editor that lets you type any JSON for a new document.
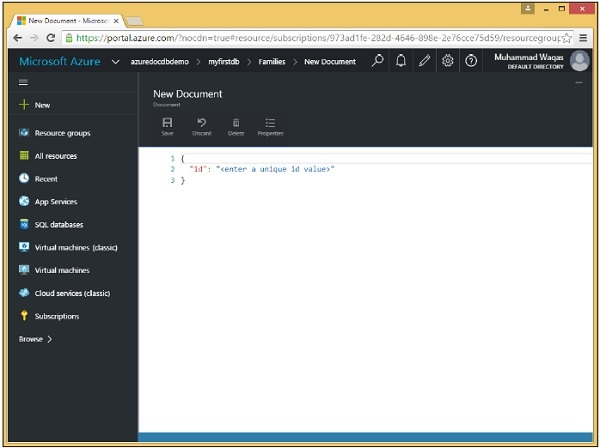
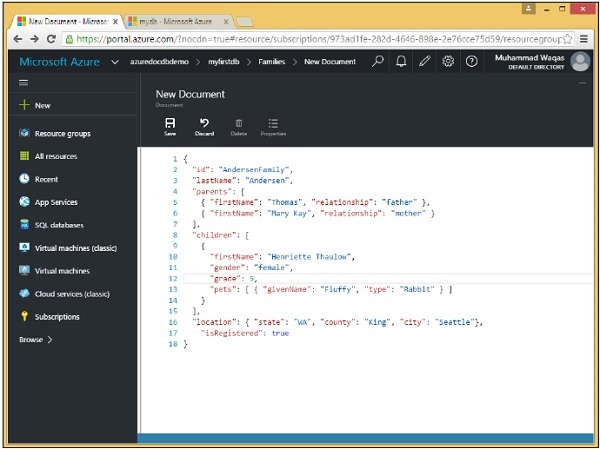
Step 3 − As this is raw data entry, let’s enter our first document.
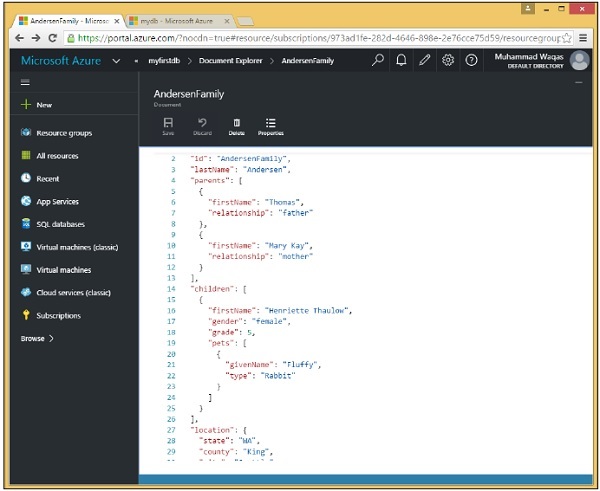
{
   "id": "AndersenFamily",
   "lastName": "Andersen",

   "parents": [
      { "firstName": "Thomas", "relationship": "father" },
      { "firstName": "Mary Kay", "relationship": "mother" }
   ],

   "children": [
      {
         "firstName": "Henriette Thaulow",
         "gender": "female",
         "grade": 5,
         "pets": [ { "givenName": "Fluffy", "type": "Rabbit" } ]
      }
   ],

   "location": { "state": "WA", "county": "King", "city": "Seattle"},
   "isRegistered": true
}
When you enter the above document, you will see the following screen.
Notice that we've supplied an id for the document. The id value is always required, and it must be unique across all other documents in the same collection. When you leave it out then DocumentDB would automatically generate one for you using a GUID or a Globally Unique Identifier.
The id is always a string and it can't be a number, date, Boolean, or another object, and it can't be longer than 255 characters.
Also notice the document's hierarchal structure which has a few top-level properties like the required id, as well as lastName and isRegistered, but it also has nested properties.
For instance, the parents property is supplied as a JSON array as denoted by the square brackets. We also have another array for children, even though there's only one child in the array in this example.
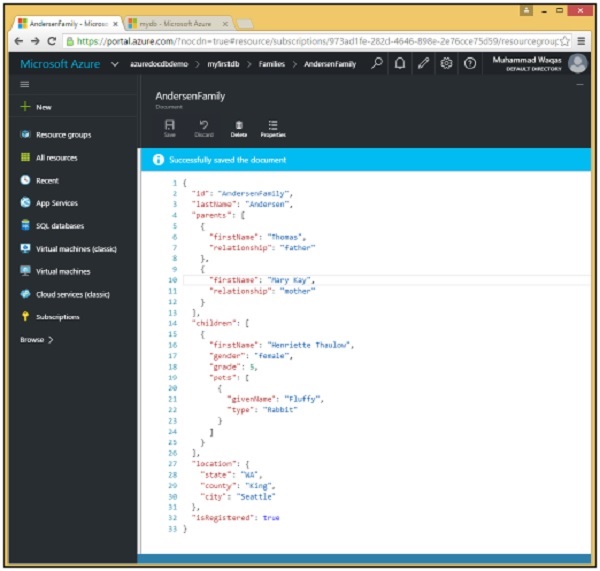
Step 4 − Click ‘Save’ button to save the document and we've created our first document.
As you can see that pretty formatting was applied to our JSON, which breaks up every property on its own line indented with a whitespace to convey the nesting level of each property.
The portal includes a Document Explorer, so let's use that now to retrieve the document we just created.
Step 5 − Choose a database and any collection within the database to view the documents in that collection. We currently have just one database named myfirstdb with one collection called Families, both of which have been preselected here in the dropdowns.
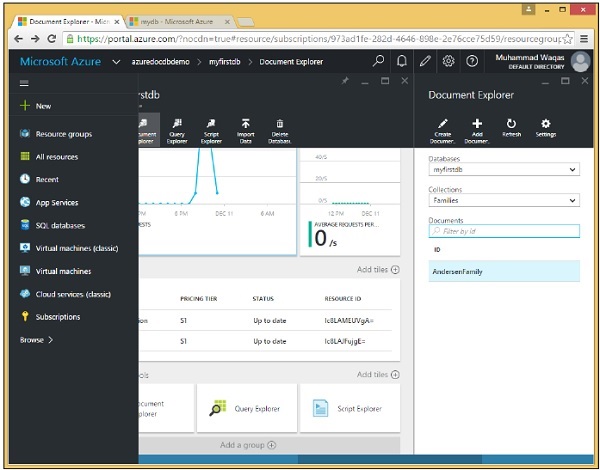
By default, the Document Explorer displays an unfiltered list of documents within the collection, but you can also search for any specific document by ID or multiple documents based on a wildcard search of a partial ID.
We have only one document in our collection so far, and we see its ID on the following screen, AndersonFamily.
Step 6 − Click on the ID to view the document.
Creating Documents with the .NET SDK
As you know that documents are just another type of resource and you've already become familiar with how to treat resources using the SDK.
The one big difference between documents and other resources is that, of course, they're schema free.
Thus there are a lot of options. Naturally, you can just work JSON object graphs or even raw strings of JSON text, but you can also use dynamic objects that lets you bind to properties at runtime without defining a class at compile time.
You can also work with real C# objects, or Entities as they are called, which might be your business domain classes.
Let’s start to create documents using .Net SDK. Following are the steps.
Step 1 − Instantiate DocumentClient then we will query for the myfirstdb database and then query for the MyCollection collection, which we store in this private variable collection so that it's accessible throughout the class.
private static async Task CreateDocumentClient() {
   // Create a new instance of the DocumentClient

   using (var client = new DocumentClient(new Uri(EndpointUrl), AuthorizationKey)) {
      database = client.CreateDatabaseQuery("SELECT * FROM c WHERE c.id =
         'myfirstdb'").AsEnumerable().First();

      collection = client.CreateDocumentCollectionQuery(database.CollectionsLink,
         "SELECT * FROM c WHERE c.id = 'MyCollection'").AsEnumerable().First();

      await CreateDocuments(client);
   }
}
Step 2 − Create some documents in CreateDocuments task.
private async static Task CreateDocuments(DocumentClient client) {
   Console.WriteLine();
   Console.WriteLine("**** Create Documents ****");
   Console.WriteLine();

   dynamic document1Definition = new {
      name = "New Customer 1", address = new {
         addressType = "Main Office",
         addressLine1 = "123 Main Street",
         location = new {
            city = "Brooklyn", stateProvinceName = "New York"
         }, postalCode = "11229", countryRegionName = "United States"
      },
   };

   Document document1 = await CreateDocument(client, document1Definition);
   Console.WriteLine("Created document {0} from dynamic object", document1.Id);
   Console.WriteLine();
}
The first document will be generated from this dynamic object. This might look like JSON, but of course it isn't. This is C# code and we're creating a real .NET object, but there's no class definition. Instead, the properties are inferred from the way the object is initialized.
Notice that we haven't supplied an Id property for this document.
Now let's have a look into CreateDocument. It looks like the same pattern we saw for creating databases and collections.
private async static Task<Document> CreateDocument(DocumentClient client,
   object documentObject) {

   var result = await client.CreateDocumentAsync(collection.SelfLink, documentObject);
   var document = result.Resource;

   Console.WriteLine("Created new document: {0}\r\n{1}", document.Id, document);
   return result;
}
Step 3 − This time we call CreateDocumentAsync specifying the SelfLink of the collection we want to add the document to. We get back a response with a resource property that, in this case, represents the new document with its system-generated properties.
The Document object is a defined class in the SDK that inherits from resource and so it has all the common resource properties, but it also includes the dynamic properties that define the schema-free document itself.
private async static Task CreateDocuments(DocumentClient client) {
   Console.WriteLine();
   Console.WriteLine("**** Create Documents ****");
   Console.WriteLine();

   dynamic document1Definition = new {
      name = "New Customer 1", address = new {
         addressType = "Main Office",
         addressLine1 = "123 Main Street",
         location = new {
            city = "Brooklyn", stateProvinceName = "New York"
         }, postalCode = "11229", countryRegionName = "United States"
      },
   };

   Document document1 = await CreateDocument(client, document1Definition);
   Console.WriteLine("Created document {0} from dynamic object", document1.Id);
   Console.WriteLine();
}
When the above code is compiled and executed you will receive the following output.
**** Create Documents ****
Created new document: 34e9873a-94c8-4720-9146-d63fb7840fad {
   "name": "New Customer 1",

   "address": {
      "addressType": "Main Office",
      "addressLine1": "123 Main Street",
      "location": {
         "city": "Brooklyn", "stateProvinceName": "New York"
      },
      "postalCode": "11229", "countryRegionName": "United States"
   },

   "id": "34e9873a-94c8-4720-9146-d63fb7840fad",
   "_rid": "Ic8LAMEUVgACAAAAAAAAAA==",
   "_ts": 1449812756,
   "_self": "dbs/Ic8LAA==/colls/Ic8LAMEUVgA=/docs/Ic8LAMEUVgACAAAAAAAAAA==/",
   "_etag": "\"00001000-0000-0000-0000-566a63140000\"",
   "_attachments": "attachments/"
}
Created document 34e9873a-94c8-4720-9146-d63fb7840fad from dynamic object
As you can see, we haven’t supplied an Id, however DocumentDB generated this one for us for the new document.
DocumentDB - Query Document
In DocumentDB, we actually use SQL to query for documents, so this chapter is all about querying using the special SQL syntax in DocumentDB. Although if you are doing .NET development, there is also a LINQ provider that can be used and which can generate appropriate SQL from a LINQ query.
Querying Document using Portal
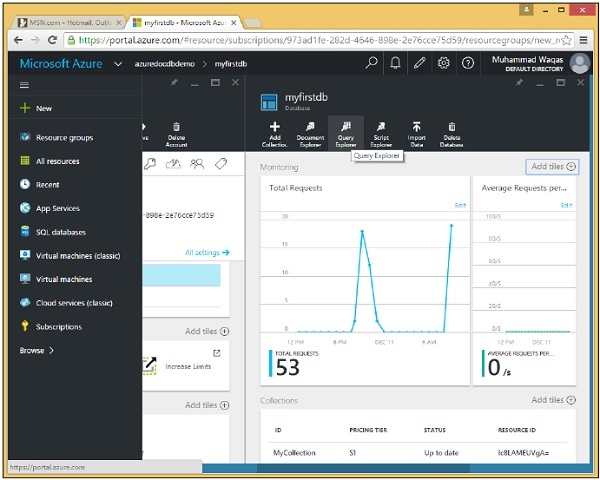
The Azure portal has a Query Explorer that lets you run any SQL query against your DocumentDB database.
We will use the Query Explorer to demonstrate the many different capabilities and features of the query language starting with the simplest possible query.
Step 1 − In the database blade, click to open the Query Explorer blade.
Remember that queries run within the scope of a collection, and so the Query Explorer lets you choose the collection in this dropdown.
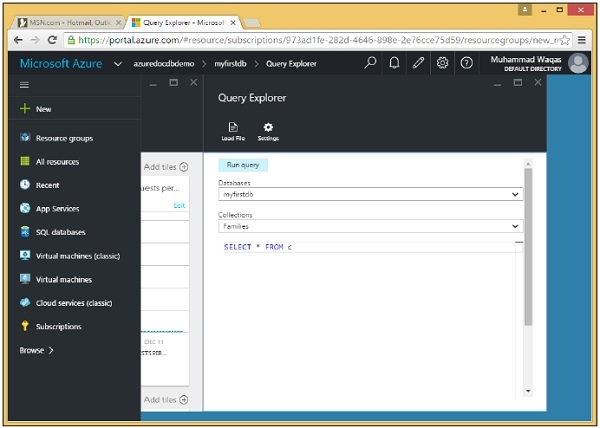
Step 2 − Select Families collection which is created earlier using the portal.
The Query Explorer opens up with this simple query SELECT * FROM c, which simply retrieves all documents from the collection.
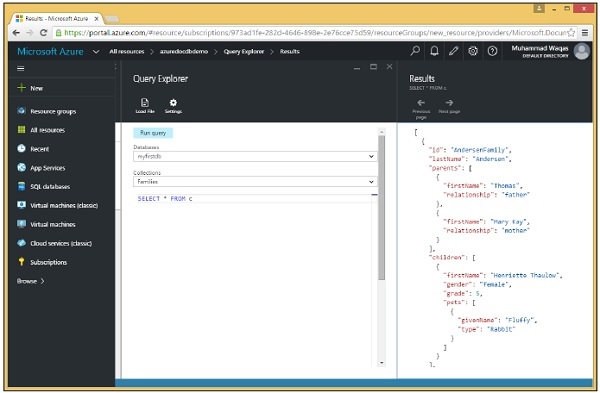
Step 3 − Execute this query by clicking the ‘Run query’ button. Then you will see that the complete document is retrieved in the Results blade.
Querying Document using .Net SDK
Following are the steps to run some document queries using .Net SDK.
In this example, we want to query for the newly created documents that we just added.
Step 1 − Call CreateDocumentQuery, passing in the collection to run the query against by its SelfLink and the query text.
private async static Task QueryDocumentsWithPaging(DocumentClient client) {
   Console.WriteLine();
   Console.WriteLine("**** Query Documents (paged results) ****");
   Console.WriteLine();
   Console.WriteLine("Quering for all documents");

   var sql = "SELECT * FROM c";
   var query = client.CreateDocumentQuery(collection.SelfLink, sql).AsDocumentQuery();

   while (query.HasMoreResults) {
      var documents = await query.ExecuteNextAsync();

      foreach (var document in documents) {
         Console.WriteLine(" Id: {0}; Name: {1};", document.id, document.name);
      }
   }

   Console.WriteLine();
}
This query is also returning all documents in the entire collection, but we're not calling .ToList on CreateDocumentQuery as before, which would issue as many requests as necessary to pull down all the results in one line of code.
Step 2 − Instead, call AsDocumentQuery and this method returns a query object with a HasMoreResults property.
Step 3 − If HasMoreResults is true, then call ExecuteNextAsync to get the next chunk and then dump all the contents of that chunk.
Step 4 − You can also query using LINQ instead of SQL if you prefer. Here we've defined a LINQ query in q, but it won't execute until we run .ToList on it.
private static void QueryDocumentsWithLinq(DocumentClient client) {
   Console.WriteLine();
   Console.WriteLine("**** Query Documents (LINQ) ****");
   Console.WriteLine();
   Console.WriteLine("Quering for US customers (LINQ)");

   var q =
      from d in client.CreateDocumentQuery<Customer>(collection.DocumentsLink)
      where d.Address.CountryRegionName == " United States"
      select new {
         Id = d.Id,
         Name = d.Name,
         City = d.Address.Location.City
      };

   var documents = q.ToList();
   Console.WriteLine("Found {0} UK customers", documents.Count);

   foreach (var document in documents) {
      var d = document as dynamic;
      Console.WriteLine(" Id: {0}; Name: {1}; City: {2}", d.Id, d.Name, d.City);
   }

   Console.WriteLine();
}
The SDK will convert our LINQ query into SQL syntax for DocumentDB, generating a SELECT and WHERE clause based on our LINQ syntax
Step 5 − Now call the above queries from the CreateDocumentClient task.
private static async Task CreateDocumentClient() {
   // Create a new instance of the DocumentClient

   using (var client = new DocumentClient(new Uri(EndpointUrl), AuthorizationKey)) {
      database = client.CreateDatabaseQuery("SELECT * FROM c WHERE c.id =
         'myfirstdb'").AsEnumerable().First();

      collection = client.CreateDocumentCollectionQuery(database.CollectionsLink,
         "SELECT * FROM c WHERE c.id = 'MyCollection'").AsEnumerable().First();

      //await CreateDocuments(client);
      await QueryDocumentsWithPaging(client);
      QueryDocumentsWithLinq(client);
   }

}
When the above code is executed, you will receive the following output.
**** Query Documents (paged results) ****
Quering for all documents
 Id: 7e9ad4fa-c432-4d1a-b120-58fd7113609f; Name: New Customer 1;
 Id: 34e9873a-94c8-4720-9146-d63fb7840fad; Name: New Customer 1;

**** Query Documents (LINQ) ****
Quering for US customers (LINQ)
Found 2 UK customers
 Id: 7e9ad4fa-c432-4d1a-b120-58fd7113609f; Name: New Customer 1; City: Brooklyn
 Id: 34e9873a-94c8-4720-9146-d63fb7840fad; Name: New Customer 1; City: Brooklyn
DocumentDB - Update Document
In this chapter, we will learn how to update the documents. Using Azure portal, you can easily update document by opening the document in Document explorer and updating it in editor like a text file.
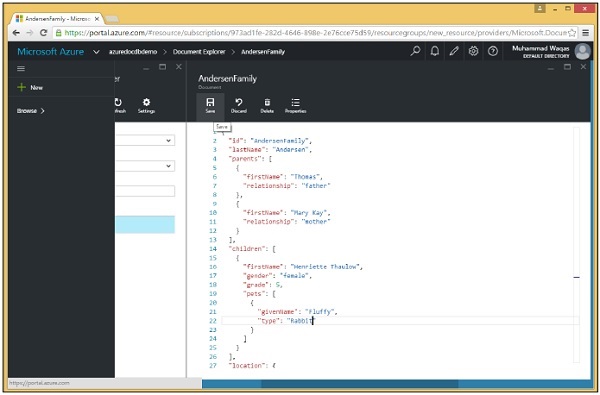
Click ‘Save’ button. Now when you need to change a document using .Net SDK you can just replace it. You don't need to delete and recreate it, which besides being tedious, would also change the resource id, which you wouldn't want to do when you're just modifying a document. Here are the following steps to update the document using .Net SDK.
Let’s take a look at the following ReplaceDocuments task where we will query for documents where the isNew property is true, but we will get none because there aren't any. So, let's modify the documents we added earlier, those whose names start with New Customer.
Step 1 − Add the isNew property to these documents and set its value to true.
private async static Task ReplaceDocuments(DocumentClient client) {

   Console.WriteLine();
   Console.WriteLine(">>> Replace Documents <<<");
   Console.WriteLine();
   Console.WriteLine("Quering for documents with 'isNew' flag");

   var sql = "SELECT * FROM c WHERE c.isNew = true";
   var documents = client.CreateDocumentQuery(collection.SelfLink, sql).ToList();

   Console.WriteLine("Documents with 'isNew' flag: {0} ", documents.Count);
   Console.WriteLine();
   Console.WriteLine("Quering for documents to be updated");

   sql = "SELECT * FROM c WHERE STARTSWITH(c.name, 'New Customer') = true";
   documents = client.CreateDocumentQuery(collection.SelfLink, sql).ToList();
   Console.WriteLine("Found {0} documents to be updated", documents.Count);

   foreach (var document in documents) {
      document.isNew = true;
      var result = await client.ReplaceDocumentAsync(document._self, document);
      var updatedDocument = result.Resource;
      Console.WriteLine("Updated document 'isNew' flag: {0}", updatedDocument.isNew);
   }

   Console.WriteLine();
   Console.WriteLine("Quering for documents with 'isNew' flag");

   sql = "SELECT * FROM c WHERE c.isNew = true";
   documents = client.CreateDocumentQuery(collection.SelfLink, sql).ToList();
   Console.WriteLine("Documents with 'isNew' flag: {0}: ", documents.Count);
   Console.WriteLine();
}
Step 2 − Get the documents to be updated using the same STARTSWITH query and that gives us the documents, which we are getting back here as dynamic objects.
Step 3 − Attach the isNew property and set it to true for each document.
Step 4 − Call ReplaceDocumentAsync, passing in the document's SelfLink, along with the updated document.
Now just to prove that this worked, query for documents where isNew equaled true. Let’s call the above queries from the CreateDocumentClient task.
private static async Task CreateDocumentClient() {
   // Create a new instance of the DocumentClient

   using (var client = new DocumentClient(new Uri(EndpointUrl), AuthorizationKey)) {
      database = client.CreateDatabaseQuery("SELECT * FROM c WHERE c.id =
         'myfirstdb'").AsEnumerable().First();

      collection = client.CreateDocumentCollectionQuery(database.CollectionsLink,
         "SELECT * FROM c WHERE c.id = 'MyCollection'").AsEnumerable().First();

      //await CreateDocuments(client);
      //QueryDocumentsWithSql(client);
      //await QueryDocumentsWithPaging(client);
      //QueryDocumentsWithLinq(client);
      await ReplaceDocuments(client);
   }

}
When the above code is compiled and executed, you will receive the following output.
**** Replace Documents ****
Quering for documents with 'isNew' flag
Documents with 'isNew' flag: 0
Quering for documents to be updated
Found 2 documents to be updated
Updated document ‘isNew’ flag: True
Updated document ‘isNew’ flag: True
Quering for documents with 'isNew' flag
Documents with 'isNew' flag: 2
DocumentDB - Delete Document
In this chapter, we will learn how to delete a document from your DocumentDB account. Using Azure Portal, you can easily delete any document by opening the document in Document Explorer and click the ‘Delete’ option.
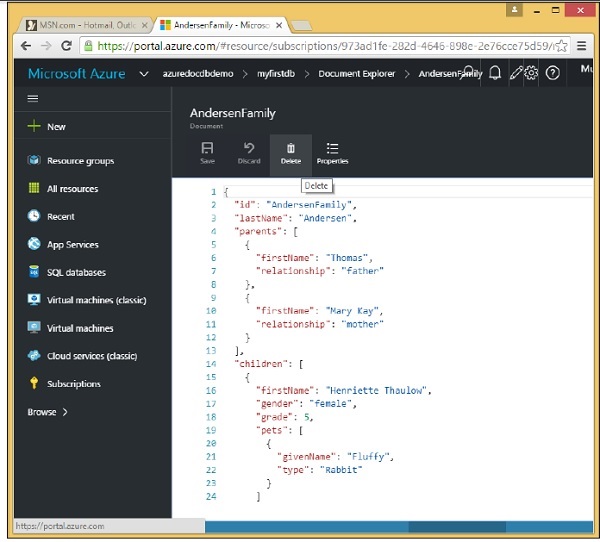
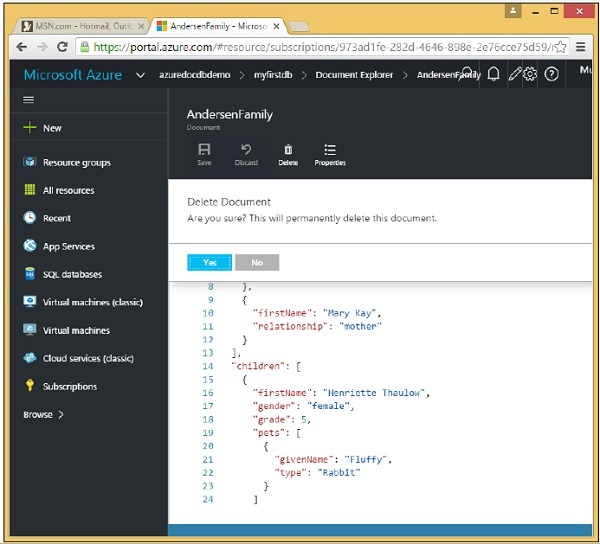
It will display the confirmation message. Now press the Yes button and you will see that the document is no longer available in your DocumentDB account.
Now when you want to delete a document using .Net SDK.
Step 1 − It's the same pattern as we've seen before where we'll query first to get the SelfLinks of each new document. We don't use SELECT * here, which would return the documents in their entirety, which we don't need.
Step 2 − Instead we're just selecting the SelfLinks into a list and then we just call DeleteDocumentAsync for each SelfLink, one at a time, to delete the documents from the collection.
private async static Task DeleteDocuments(DocumentClient client) {
   Console.WriteLine();
   Console.WriteLine(">>> Delete Documents <<<");
   Console.WriteLine();
   Console.WriteLine("Quering for documents to be deleted");

   var sql =
      "SELECT VALUE c._self FROM c WHERE STARTSWITH(c.name, 'New Customer') = true";

   var documentLinks =
      client.CreateDocumentQuery<string>(collection.SelfLink, sql).ToList();

   Console.WriteLine("Found {0} documents to be deleted", documentLinks.Count);

   foreach (var documentLink in documentLinks) {
      await client.DeleteDocumentAsync(documentLink);
   }

   Console.WriteLine("Deleted {0} new customer documents", documentLinks.Count);
   Console.WriteLine();
}
Step 3 − Now let’s call the above DeleteDocuments from the CreateDocumentClient task.
private static async Task CreateDocumentClient() {
   // Create a new instance of the DocumentClient
   using (var client = new DocumentClient(new Uri(EndpointUrl), AuthorizationKey)) {
      database = client.CreateDatabaseQuery("SELECT * FROM c WHERE c.id =
         'myfirstdb'").AsEnumerable().First();

      collection = client.CreateDocumentCollectionQuery(database.CollectionsLink,
         "SELECT * FROM c WHERE c.id = 'MyCollection'").AsEnumerable().First();

      await DeleteDocuments(client);
   }
}
When the above code is executed, you will receive the following output.
***** Delete Documents *****
Quering for documents to be deleted
Found 2 documents to be deleted
Deleted 2 new customer documents
DocumentDB - Data Modeling
While schema-free databases, like DocumentDB, make it super easy to embrace changes to your data model, you should still spend some time thinking about your data.
You have a lot of options. Naturally, you can just work JSON object graphs or even raw strings of JSON text, but you can also use dynamic objects that lets you bind to properties at runtime without defining a class at compile time.
You can also work with real C# objects, or Entities as they are called, which might be your business domain classes.
Relationships
Let’s take a look at the document's hierarchal structure. It has a few top-level properties like the required id, as well as lastName and isRegistered, but it also has nested properties.
{
   "id": "AndersenFamily",
   "lastName": "Andersen",

   "parents": [
      { "firstName": "Thomas", "relationship": "father" },
      { "firstName": "Mary Kay", "relationship": "mother" }
   ],

   "children": [
      {
         "firstName": "Henriette Thaulow",
         "gender": "female",
         "grade": 5,
         "pets": [ { "givenName": "Fluffy", "type": "Rabbit" } ]
      }
   ],

   "location": { "state": "WA", "county": "King", "city": "Seattle"},
   "isRegistered": true
}
For instance, the parents property is supplied as a JSON array as denoted by the square brackets.
We also have another array for children, even though there's only one child in the array in this example. So this is how you model the equivalent of one-to-many relationships within a document.
You simply use arrays where each element in the array could be a simple value or another complex object, even another array.
So one family can have multiple parents and multiple children and if you look at the child objects, they have a pet’s property that is itself a nested array for a oneto-many relationship between children and pets.
For the location property, we're combining three related properties, the state, county, and city into an object.
Embedding an object this way rather than embedding an array of objects is similar to having a one-to-one relationship between two rows in separate tables in a relational database.
Embedding Data
When you start modeling data in a document store, such as DocumentDB, try to treat your entities as self-contained documents represented in JSON. When working with relational databases, we always normalize data.
Normalizing your data typically involves taking an entity, such as a customer, and breaking it down into discreet pieces of data, like contact details and addresses.
To read a customer, with all their contact details and addresses, you need to use JOINS to effectively aggregate your data at run time.
Now let's take a look at how we would model the same data as a self-contained entity in a document database.
{
   "id": "1",
   "firstName": "Mark",
   "lastName": "Upston",

   "addresses": [
      {
         "line1": "232 Main Street",
         "line2": "Unit 1",
         "city": "Brooklyn",
         "state": "NY",
         "zip": 11229
      }
   ],

   "contactDetails": [
      {"email": "mark.upston@xyz.com"},
      {"phone": "+1 356 545-86455", "extension": 5555}
   ]
}
As you can see that we have denormalized the customer record where all the information of the customer is embedded into a single JSON document.
In NoSQL we have a free schema, so you can add contact details and addresses in different format as well. In NoSQL, you can retrieve a customer record from the database in a single read operation. Similarly, updating a record is also a single write operation.
Following are the steps to create documents using .Net SDK.
Step 1 − Instantiate DocumentClient. Then we will query for the myfirstdb database and also query for MyCollection collection, which we store in this private variable collection so that's it's accessible throughout the class.
private static async Task CreateDocumentClient() {
   // Create a new instance of the DocumentClient

   using (var client = new DocumentClient(new Uri(EndpointUrl), AuthorizationKey)) {
      database = client.CreateDatabaseQuery("SELECT * FROM c WHERE c.id =
         'myfirstdb'").AsEnumerable().First();

      collection = client.CreateDocumentCollectionQuery(database.CollectionsLink,
         "SELECT * FROM c WHERE c.id = 'MyCollection'").AsEnumerable().First();

      await CreateDocuments(client);
   }

}
Step 2 − Create some documents in CreateDocuments task.
private async static Task CreateDocuments(DocumentClient client) {
   Console.WriteLine();
   Console.WriteLine("**** Create Documents ****");
   Console.WriteLine();

   dynamic document1Definition = new {
      name = "New Customer 1", address = new {
         addressType = "Main Office",
         addressLine1 = "123 Main Street",
         location = new {
            city = "Brooklyn", stateProvinceName = "New York"
         },
         postalCode = "11229", countryRegionName = "United States"
      },
   };

   Document document1 = await CreateDocument(client, document1Definition);
   Console.WriteLine("Created document {0} from dynamic object", document1.Id);
   Console.WriteLine();
}
The first document will be generated from this dynamic object. This might look like JSON, but of course it isn't. This is C# code and we're creating a real .NET object, but there's no class definition. Instead the properties are inferred from the way the object is initialized. You can notice also that we haven't supplied an Id property for this document.
Step 3 − Now let's take a look at the CreateDocument and it looks like the same pattern we saw for creating databases and collections.
private async static Task<Document> CreateDocument(DocumentClient client,
   object documentObject) {
   var result = await client.CreateDocumentAsync(collection.SelfLink, documentObject);

   var document = result.Resource;
   Console.WriteLine("Created new document: {0}\r\n{1}", document.Id, document);

   return result;
}
Step 4 − This time we call CreateDocumentAsync specifying the SelfLink of the collection we want to add the document to. We get back a response with a resource property that, in this case, represents the new document with its system-generated properties.
In the following CreateDocuments task, we have created three documents.
In the first document, the Document object is a defined class in the SDK that inherits from resource and so it has all the common resource properties, but it also includes the dynamic properties that define the schema-free document itself.
private async static Task CreateDocuments(DocumentClient client) {
   Console.WriteLine();
   Console.WriteLine("**** Create Documents ****");
   Console.WriteLine();

   dynamic document1Definition = new {
      name = "New Customer 1", address = new {
         addressType = "Main Office",
         addressLine1 = "123 Main Street",
         location = new {
            city = "Brooklyn", stateProvinceName = "New York"
         },
         postalCode = "11229",
         countryRegionName = "United States"
      },
   };

   Document document1 = await CreateDocument(client, document1Definition);
   Console.WriteLine("Created document {0} from dynamic object", document1.Id);
   Console.WriteLine();

   var document2Definition = @" {
      ""name"": ""New Customer 2"",

      ""address"": {
         ""addressType"": ""Main Office"",
         ""addressLine1"": ""123 Main Street"",
         ""location"": {
            ""city"": ""Brooklyn"", ""stateProvinceName"": ""New York""
         },
         ""postalCode"": ""11229"",
         ""countryRegionName"": ""United States""
      }
   }";

   Document document2 = await CreateDocument(client, document2Definition);
   Console.WriteLine("Created document {0} from JSON string", document2.Id);
   Console.WriteLine();

   var document3Definition = new Customer {
      Name = "New Customer 3",

      Address = new Address {
         AddressType = "Main Office",
         AddressLine1 = "123 Main Street",
         Location = new Location {
            City = "Brooklyn", StateProvinceName = "New York"
         },
         PostalCode = "11229",
         CountryRegionName = "United States"
      },
   };

   Document document3 = await CreateDocument(client, document3Definition);
   Console.WriteLine("Created document {0} from typed object", document3.Id);
   Console.WriteLine();
}
This second document just works with a raw JSON string. Now we step into an overload for CreateDocument that uses the JavaScriptSerializer to de-serialize the string into an object, which it then passes on to the same CreateDocument method that we used to create the first document.
In the third document, we have used the C# object Customer which is defined in our application.
Let’s take a look at this customer, it has an Id and address property where the address is a nested object with its own properties including location, which is yet another nested object.
using Newtonsoft.Json;

using System;
using System.Collections.Generic;
using System.Linq;
using System.Text;
using System.Threading.Tasks;

namespace DocumentDBDemo {

   public class Customer {
      [JsonProperty(PropertyName = "id")]
      public string Id { get; set; }
      // Must be nullable, unless generating unique values for new customers on client
      [JsonProperty(PropertyName = "name")]
      public string Name { get; set; }
      [JsonProperty(PropertyName = "address")]
      public Address Address { get; set; }
   }

   public class Address {
      [JsonProperty(PropertyName = "addressType")]
      public string AddressType { get; set; }

      [JsonProperty(PropertyName = "addressLine1")]
      public string AddressLine1 { get; set; }

      [JsonProperty(PropertyName = "location")]
      public Location Location { get; set; }

      [JsonProperty(PropertyName = "postalCode")]
      public string PostalCode { get; set; }

      [JsonProperty(PropertyName = "countryRegionName")]
      public string CountryRegionName { get; set; }
   }

   public class Location {
      [JsonProperty(PropertyName = "city")]
      public string City { get; set; }

      [JsonProperty(PropertyName = "stateProvinceName")]
      public string StateProvinceName { get; set; }
   }
}
We also have JSON property attributes in place because we want to maintain proper conventions on both sides of the fence.
So I just create my New Customer object along with its nested child objects and call into CreateDocument once more. Although our customer object does have an Id property we didn't supply a value for it and so DocumentDB generated one based on the GUID, just like it did for the previous two documents.
When the above code is compiled and executed you will receive the following output.
**** Create Documents ****
Created new document: 575882f0-236c-4c3d-81b9-d27780206b2c
{
  "name": "New Customer 1",
  "address": {
    "addressType": "Main Office",
    "addressLine1": "123 Main Street",
    "location": {
      "city": "Brooklyn",
      "stateProvinceName": "New York"
    },
    "postalCode": "11229",
    "countryRegionName": "United States"
  },
  "id": "575882f0-236c-4c3d-81b9-d27780206b2c",
  "_rid": "kV5oANVXnwDGPgAAAAAAAA==",
  "_ts": 1450037545,
  "_self": "dbs/kV5oAA==/colls/kV5oANVXnwA=/docs/kV5oANVXnwDGPgAAAAAAAA==/",
  "_etag": "\"00006fce-0000-0000-0000-566dd1290000\"",
  "_attachments": "attachments/"
}
Created document 575882f0-236c-4c3d-81b9-d27780206b2c from dynamic object
Created new document: 8d7ad239-2148-4fab-901b-17a85d331056
{
  "name": "New Customer 2",
  "address": {
    "addressType": "Main Office",
    "addressLine1": "123 Main Street",
    "location": {
      "city": "Brooklyn",
      "stateProvinceName": "New York"
    },
    "postalCode": "11229",
    "countryRegionName": "United States"
  },
  "id": "8d7ad239-2148-4fab-901b-17a85d331056",
  "_rid": "kV5oANVXnwDHPgAAAAAAAA==",
  "_ts": 1450037545,
  "_self": "dbs/kV5oAA==/colls/kV5oANVXnwA=/docs/kV5oANVXnwDHPgAAAAAAAA==/",
  "_etag": "\"000070ce-0000-0000-0000-566dd1290000\"",
  "_attachments": "attachments/"
}
Created document 8d7ad239-2148-4fab-901b-17a85d331056 from JSON string
Created new document: 49f399a8-80c9-4844-ac28-cd1dee689968
{
  "id": "49f399a8-80c9-4844-ac28-cd1dee689968",
  "name": "New Customer 3",
  "address": {
    "addressType": "Main Office",
    "addressLine1": "123 Main Street",
    "location": {
      "city": "Brooklyn",
      "stateProvinceName": "New York"
    },
    "postalCode": "11229",
    "countryRegionName": "United States"
  },
  "_rid": "kV5oANVXnwDIPgAAAAAAAA==",
  "_ts": 1450037546,
  "_self": "dbs/kV5oAA==/colls/kV5oANVXnwA=/docs/kV5oANVXnwDIPgAAAAAAAA==/",
  "_etag": "\"000071ce-0000-0000-0000-566dd12a0000\"",
  "_attachments": "attachments/"
}
Created document 49f399a8-80c9-4844-ac28-cd1dee689968 from typed object
DocumentDB - Data Types
JSON or JavaScript Object Notation is a lightweight text-based open standard designed for human-readable data interchange and also easy for machines to parse and generate. JSON is at the heart of DocumentDB. We transmit JSON over the wire, we store JSON as JSON, and we index the JSON tree allowing queries on the full JSON document.
JSON format supports the following data types −
| S.No. | Type & Description |
|---|---|
| 1 | Number Double-precision floating-point format in JavaScript |
| 2 | String Double-quoted Unicode with backslash escaping |
| 3 | Boolean True or false |
| 4 | Array An ordered sequence of values |
| 5 | Value It can be a string, a number, true or false, null, etc. |
| 6 | Object An unordered collection of key:value pairs |
| 7 | Whitespace It can be used between any pair of tokens |
| 8 | Null Empty |
Let’s take a look at a simple example DateTime type. Add birth date to the customer class.
public class Customer {
   [JsonProperty(PropertyName = "id")]
   public string Id { get; set; }

   // Must be nullable, unless generating unique values for new customers on client
   [JsonProperty(PropertyName = "name")]
   public string Name { get; set; }

   [JsonProperty(PropertyName = "address")]
   public Address Address { get; set; }

   [JsonProperty(PropertyName = "birthDate")]
   public DateTime BirthDate { get; set; }
}
We can store, retrieve, and query using DateTime as shown in the following code.
private async static Task CreateDocuments(DocumentClient client) {
   Console.WriteLine();
   Console.WriteLine("**** Create Documents ****");
   Console.WriteLine();

   var document3Definition = new Customer {
      Id = "1001",
      Name = "Luke Andrew",

      Address = new Address {
         AddressType = "Main Office",
         AddressLine1 = "123 Main Street",
         Location = new Location {
            City = "Brooklyn",
            StateProvinceName = "New York"
         },
         PostalCode = "11229",
         CountryRegionName = "United States"
      },

      BirthDate = DateTime.Parse(DateTime.Today.ToString()),
   };

   Document document3 = await CreateDocument(client, document3Definition);
   Console.WriteLine("Created document {0} from typed object", document3.Id);
   Console.WriteLine();
}
When the above code is compiled and executed, and the document is created, you will see that birth date is added now.
**** Create Documents ****
Created new document: 1001
{
   "id": "1001",
   "name": "Luke Andrew",
   "address": {
      "addressType": "Main Office",
      "addressLine1": "123 Main Street",
      "location": {
         "city": "Brooklyn",
         "stateProvinceName": "New York"
      },
      "postalCode": "11229",
      "countryRegionName": "United States"
   },
   "birthDate": "2015-12-14T00:00:00",
   "_rid": "Ic8LAMEUVgAKAAAAAAAAAA==",
   "_ts": 1450113676,
   "_self": "dbs/Ic8LAA==/colls/Ic8LAMEUVgA=/docs/Ic8LAMEUVgAKAAAAAAAAAA==/",
   "_etag": "\"00002d00-0000-0000-0000-566efa8c0000\"",
   "_attachments": "attachments/"
}
Created document 1001 from typed object
DocumentDB - Limiting Records
Microsoft has recently added a number of improvements on how you can query Azure DocumentDB, such as the TOP keyword to SQL grammar, which made queries run faster and consume fewer resources, increased the limits for query operators, and added support for additional LINQ operators in the .NET SDK.
Let’s take a look at a simple example in which we will retrieve only the first two records. If you have a number of records and you want to retrieve only some of them, then you can use the Top keyword. In this example, we have a lot of records of earthquakes.
Now we want to show the first two records only
Step 1 − Go to the query explorer and run this query.
SELECT * FROM c
WHERE c.magnitude > 2.5
You will see that it has retrieved four records because we have not specified TOP keyword yet.
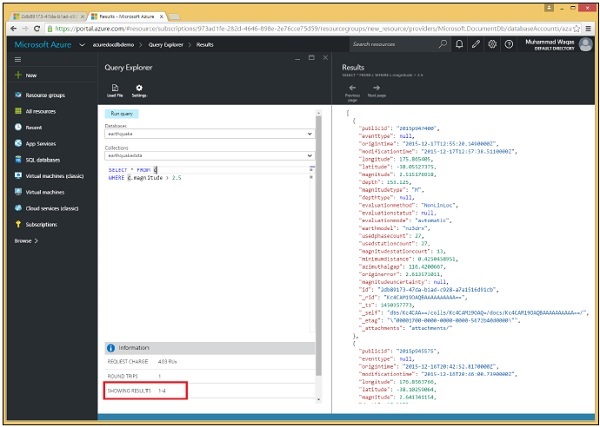
Step 2 − Now use the TOP keyword with same query. Here we have specified the TOP keyword and ‘2’ means that we want two records only.
SELECT TOP 2 * FROM c
WHERE c.magnitude > 2.5
Step 3 − Now run this query and you will see that only two records are retrieved.
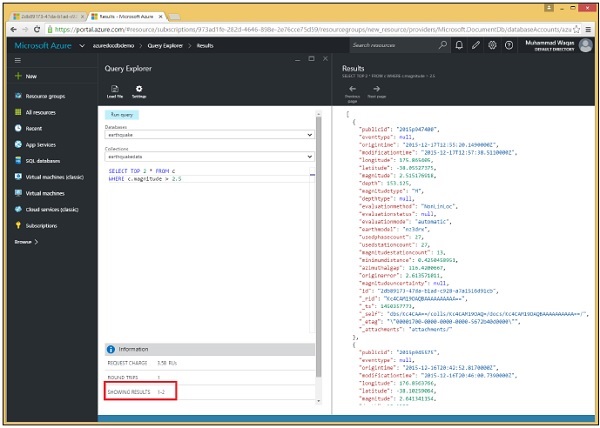
Similarly, you can use TOP keyword in code using .Net SDK. Following is the implementation.
private async static Task QueryDocumentsWithPaging(DocumentClient client) {
   Console.WriteLine();
   Console.WriteLine("**** Query Documents (paged results) ****");
   Console.WriteLine();
   Console.WriteLine("Quering for all documents");

   var sql = "SELECT TOP 3 * FROM c";
   var query = client
      .CreateDocumentQuery(collection.SelfLink, sql)
      .AsDocumentQuery();

   while (query.HasMoreResults) {
      var documents = await query.ExecuteNextAsync();

      foreach (var document in documents) {
         Console.WriteLine(" PublicId: {0}; Magnitude: {1};", document.publicid,
            document.magnitude);
      }
   }

   Console.WriteLine();
}
Following is the CreateDocumentClient task in which are instantiated the DocumentClient and earthquake database.
private static async Task CreateDocumentClient() {
   // Create a new instance of the DocumentClient
   using (var client = new DocumentClient(new Uri(EndpointUrl), AuthorizationKey)) {
      database = client.CreateDatabaseQuery("SELECT * FROM c WHERE c.id =
         'earthquake'").AsEnumerable().First();

      collection = client.CreateDocumentCollectionQuery(database.CollectionsLink,
         "SELECT * FROM c WHERE c.id = 'earthquakedata'").AsEnumerable().First();

      await QueryDocumentsWithPaging(client);
   }
}
When the above code is compiled and executed, you will see that only three records are retrieved.
**** Query Documents (paged results) ****

Quering for all documents
PublicId: 2015p947400; Magnitude: 2.515176918;
PublicId: 2015p947373; Magnitude: 1.506774108;
PublicId: 2015p947329; Magnitude: 1.593394461;
DocumentDB - Sorting Records
Microsoft Azure DocumentDB supports querying documents using SQL over JSON documents. You can sort documents in the collection on numbers and strings using an ORDER BY clause in your query. The clause can include an optional ASC/DESC argument to specify the order in which results must be retrieved.
Let’s take a look at the following example in which we have a JSON document.
{
   "id": "Food Menu",
   "description": "Grapes, red or green (European type, such as Thompson seedless), raw",

   "tags": [
      {
         "name": "grapes"
      },

      {
         "name": "red or green (european type"
      },

      {
         "name": "such as thompson seedless)"
      },

      {
         "name": "raw"
      }
   ],

   "foodGroup": "Fruits and Fruit Juices",

   "servings": [
      {
         "amount": 1,
         "description": "cup",
         "weightInGrams": 151
      },

      {
         "amount": 10,
         "description": "grapes",
         "weightInGrams": 49
      },

      {
         "amount": 1,
         "description": "NLEA serving",
         "weightInGrams": 126
      }
   ]

}
Following is the SQL query to sort the result in a descending order.
SELECT f.description, f.foodGroup,
   f.servings[2].description AS servingDescription,
   f.servings[2].weightInGrams AS servingWeight

FROM f
ORDER BY f.servings[2].weightInGrams DESC
When the above query is executed, you will receive the following output.
[
   {
      "description": "Grapes, red or green (European type, such as Thompson
         seedless), raw",
      "foodGroup": "Fruits and Fruit Juices",
      "servingDescription": "NLEA serving",
      "servingWeight": 126
   }
]
DocumentDB - Indexing Records
By default, DocumentDB automatically indexes every property in a document as soon as the document is added to the database. However, you can take control and fine tune your own indexing policy that reduces storage and processing overhead when there are specific documents and/or properties that never needs to be indexed.
The default indexing policy that tells DocumentDB to index every property automatically is suitable for many common scenarios. But you can also implement a custom policy that exercises fine control over exactly what gets indexed and what doesn't and other functionality with regards to indexing.
DocumentDB supports the following types of indexing −
- Hash
- Range
Hash
Hash index enables efficient querying for equality, i.e., while searching for documents where a given property equals an exact value, rather than matching on a range of values like less than, greater than or between.
You can perform range queries with a hash index, but DocumentDB will not be able to use the hash index to find matching documents and will instead need to sequentially scan each document to determine if it should be selected by the range query.
You won't be able to sort your documents with an ORDER BY clause on a property that has just a hash index.
Range
Range index defined for the property, DocumentDB allows to efficiently query for documents against a range of values. It also allows you to sort the query results on that property, using ORDER BY.
DocumentDB allows you to define both a hash and a range index on any or all properties, which enables efficient equality and range queries, as well as ORDER BY.
Indexing Policy
Every collection has an indexing policy that dictates which types of indexes are used for numbers and strings in every property of every document.
You can also control whether or not documents get indexed automatically as they are added to the collection.
Automatic indexing is enabled by default, but you can override that behavior when adding a document, telling DocumentDB not to index that particular document.
You can disable automatic indexing so that by default, documents are not indexed when added to the collection. Similarly, you can override this at the document level and instruct DocumentDB to index a particular document when adding it to the collection. This is known as manual indexing.
Include / Exclude Indexing
An indexing policy can also define which path or paths should be included or excluded from the index. This is useful if you know that there are certain parts of a document that you never query against and certain parts that you do.
In these cases, you can reduce indexing overhead by telling DocumentDB to index just those particular portions of each document added to the collection.
Automatic Indexing
Let’s take a look at a simple example of automatic indexing.
Step 1 − First we create a collection called autoindexing and without explicitly supplying a policy, this collection uses the default indexing policy, which means that automatic indexing is enabled on this collection.
Here we are using ID-based routing for the database self-link so we don't need to know its resource ID or query for it before creating the collection. We can just use the database ID, which is mydb.
Step 2 − Now let’s create two documents, both with the last name of Upston.
private async static Task AutomaticIndexing(DocumentClient client) {
   Console.WriteLine();
   Console.WriteLine("**** Override Automatic Indexing ****");

   // Create collection with automatic indexing

   var collectionDefinition = new DocumentCollection {
      Id = "autoindexing"
   };

   var collection = await client.CreateDocumentCollectionAsync("dbs/mydb",
      collectionDefinition);

   // Add a document (indexed)
   dynamic indexedDocumentDefinition = new {
      id = "MARK",
      firstName = "Mark",
      lastName = "Upston",
      addressLine = "123 Main Street",
      city = "Brooklyn",
      state = "New York",
      zip = "11229",
   };

   Document indexedDocument = await client
      .CreateDocumentAsync("dbs/mydb/colls/autoindexing", indexedDocumentDefinition);

   // Add another document (request no indexing)
   dynamic unindexedDocumentDefinition = new {
      id = "JANE",
      firstName = "Jane",
      lastName = "Upston",
      addressLine = "123 Main Street",
      city = "Brooklyn",
      state = "New York",
      zip = "11229",
   };

   Document unindexedDocument = await client
      .CreateDocumentAsync("dbs/mydb/colls/autoindexing", unindexedDocumentDefinition,
      new RequestOptions { IndexingDirective = IndexingDirective.Exclude });

   //Unindexed document won't get returned when querying on non-ID (or selflink) property

   var doeDocs = client.CreateDocumentQuery("dbs/mydb/colls/autoindexing", "SELECT *
      FROM c WHERE c.lastName = 'Doe'").ToList();

   Console.WriteLine("Documents WHERE lastName = 'Doe': {0}", doeDocs.Count);

   // Unindexed document will get returned when using no WHERE clause

   var allDocs = client.CreateDocumentQuery("dbs/mydb/colls/autoindexing",
      "SELECT * FROM c").ToList();
   Console.WriteLine("All documents: {0}", allDocs.Count);

   // Unindexed document will get returned when querying by ID (or self-link) property

   Document janeDoc = client.CreateDocumentQuery("dbs/mydb/colls/autoindexing",
      "SELECT * FROM c WHERE c.id = 'JANE'").AsEnumerable().FirstOrDefault();
   Console.WriteLine("Unindexed document self-link: {0}", janeDoc.SelfLink);

   // Delete the collection

   await client.DeleteDocumentCollectionAsync("dbs/mydb/colls/autoindexing");
}
This first one, for Mark Upston, gets added to the collection and is then immediately indexed automatically based on the default indexing policy.
But when the second document for Mark Upston is added, we have passed the request options with IndexingDirective.Exclude which explicitly instructs DocumentDB not to index this document, despite the collection's indexing policy.
We have different types of queries for both the documents at the end.
Step 3 − Let’s call the AutomaticIndexing task from CreateDocumentClient.
private static async Task CreateDocumentClient() {
   // Create a new instance of the DocumentClient
   using (var client = new DocumentClient(new Uri(EndpointUrl), AuthorizationKey)) {
      await AutomaticIndexing(client);
   }
}
When the above code is compiled and executed, you will receive the following output.
**** Override Automatic Indexing ****
Documents WHERE lastName = 'Upston': 1
All documents: 2
Unindexed document self-link: dbs/kV5oAA==/colls/kV5oAOEkfQA=/docs/kV5oAOEkfQACA
AAAAAAAAA==/
As you can see we have two such documents, but the query returns only the one for Mark because the one for Mark isn't indexed. If we query again, without a WHERE clause to retrieve all the documents in the collection, then we get a result set with both documents and this is because unindexed documents are always returned by queries that have no WHERE clause.
We can also retrieve unindexed documents by their ID or self-link. So when we query for Mark's document by his ID, MARK, we see that DocumentDB returns the document even though it isn't indexed in the collection.
Manual Indexing
Let’ take a look at a simple example of manual indexing by overriding automatic indexing.
Step 1 − First we'll create a collection called manualindexing and override the default policy by explicitly disabling automatic indexing. This means that, unless we request otherwise, new documents added to this collection will not be indexed.
private async static Task ManualIndexing(DocumentClient client) {
   Console.WriteLine();
   Console.WriteLine("**** Manual Indexing ****");
   // Create collection with manual indexing

   var collectionDefinition = new DocumentCollection {
      Id = "manualindexing",
      IndexingPolicy = new IndexingPolicy {
         Automatic = false,
      },
   };

   var collection = await client.CreateDocumentCollectionAsync("dbs/mydb",
      collectionDefinition);

   // Add a document (unindexed)
   dynamic unindexedDocumentDefinition = new {
      id = "MARK",
      firstName = "Mark",
      lastName = "Doe",
      addressLine = "123 Main Street",
      city = "Brooklyn",
      state = "New York",
      zip = "11229",
   };

   Document unindexedDocument = await client
      .CreateDocumentAsync("dbs/mydb/colls/manualindexing", unindexedDocumentDefinition);

   // Add another document (request indexing)
   dynamic indexedDocumentDefinition = new {
      id = "JANE",
      firstName = "Jane",
      lastName = "Doe",
      addressLine = "123 Main Street",
      city = "Brooklyn",
      state = "New York",
      zip = "11229",
   };

   Document indexedDocument = await client.CreateDocumentAsync
      ("dbs/mydb/colls/manualindexing", indexedDocumentDefinition, new RequestOptions {
      IndexingDirective = IndexingDirective.Include });

   //Unindexed document won't get returned when querying on non-ID (or selflink) property

   var doeDocs = client.CreateDocumentQuery("dbs/mydb/colls/manualindexing",
      "SELECT * FROM c WHERE c.lastName = 'Doe'").ToList();
   Console.WriteLine("Documents WHERE lastName = 'Doe': {0}", doeDocs.Count);

   // Unindexed document will get returned when using no WHERE clause

   var allDocs = client.CreateDocumentQuery("dbs/mydb/colls/manualindexing",
      "SELECT * FROM c").ToList();
   Console.WriteLine("All documents: {0}", allDocs.Count);

   // Unindexed document will get returned when querying by ID (or self-link) property

   Document markDoc = client
      .CreateDocumentQuery("dbs/mydb/colls/manualindexing",
      "SELECT * FROM c WHERE c.id = 'MARK'")
      .AsEnumerable().FirstOrDefault();
   Console.WriteLine("Unindexed document self-link: {0}", markDoc.SelfLink);
   await client.DeleteDocumentCollectionAsync("dbs/mydb/colls/manualindexing");
}
Step 2 − Now we will again create the same two documents as before. We will not supply any special request options for Mark's document this time, because of the collection's indexing policy, this document will not get indexed.
Step 3 − Now when we add the second document for Mark, we use RequestOptions with IndexingDirective.Include to tell DocumentDB that it should index this document, which overrides the collection's indexing policy that says that it shouldn't.
We have different types of queries for both the documents at the end.
Step 4 − Let’s call the ManualIndexing task from CreateDocumentClient.
private static async Task CreateDocumentClient() {
   // Create a new instance of the DocumentClient
   using (var client = new DocumentClient(new Uri(EndpointUrl), AuthorizationKey)) {
      await ManualIndexing(client);
   }
}
When the above code is compiled and executed you will receive the following output.
**** Manual Indexing ****
Documents WHERE lastName = 'Upston': 1
All documents: 2
Unindexed document self-link: dbs/kV5oAA==/colls/kV5oANHJPgE=/docs/kV5oANHJPgEBA
AAAAAAAAA==/
Again, the query returns only one of the two documents, but this time, it returns Jane Doe, which we explicitly requested to be indexed. But again as before, querying without a WHERE clause retrieves all the documents in the collection, including the unindexed document for Mark. We can also query for the unindexed document by its ID, which DocumentDB returns even though it's not indexed.
DocumentDB - Geospatial Data
Microsoft added geospatial support, which lets you store location data in your documents and perform spatial calculations for distance and intersections between points and polygons.
Spatial data describes the position and shape of objects in space.
Typically, it can be used to represent the location of a person, a place of interest, or the boundary of a city, or a lake.
Common use cases often involve proximity queries. For e.g., "find all universities near my current location".
A Point denotes a single position in space which represents the exact location, e.g. street address of particular university. A point is represented in DocumentDB using its coordinate pair (longitude and latitude). Following is an example of JSON point.
{
   "type":"Point",
   "coordinates":[ 28.3, -10.7 ]
}
Let’s take a look at a simple example which contains the location of a university.
{
   "id":"case-university",
   "name":"CASE: Center For Advanced Studies In Engineering",
   "city":"Islamabad",

   "location": {
      "type":"Point",
      "coordinates":[ 33.7194136, -73.0964862 ]
   }
}
To retrieve the university name based on the location, you can use the following query.
SELECT c.name FROM c

WHERE c.id = "case-university" AND ST_ISVALID({
      "type":"Point",
      "coordinates":[ 33.7194136, -73.0964862 ]})
When the above query is executed you will receive the following output.
[
   {
      "name": "CASE: Center For Advanced Studies In Engineering"
   }
]
Create Document with Geospatial Data in .NET
You can create a document with geospatial data, let’s take a look at a simple example in which a university document is created.
private async static Task CreateDocuments(DocumentClient client) {
   Console.WriteLine();
   Console.WriteLine("**** Create Documents ****");
   Console.WriteLine();

   var uniDocument = new UniversityProfile {
      Id = "nust",
      Name = "National University of Sciences and Technology",
      City = "Islamabad",
      Loc = new Point(33.6455715, 72.9903447)
   };

   Document document = await CreateDocument(client, uniDocument);
   Console.WriteLine("Created document {0} from typed object", document.Id);
   Console.WriteLine();
}
Following is the implementation for the UniversityProfile class.
public class UniversityProfile {
   [JsonProperty(PropertyName = "id")]
   public string Id { get; set; }

   [JsonProperty("name")]
   public string Name { get; set; }

   [JsonProperty("city")]
   public string City { get; set; }

   [JsonProperty("location")]
   public Point Loc { get; set; }
}
When the above code is compiled and executed, you will receive the following output.
**** Create Documents ****
Created new document: nust
{
   "id": "nust",
   "name": "National University of Sciences and Technology",
   "city": "Islamabad",
   "location": {
      "type": "Point",
      "coordinates": [
         33.6455715,
         72.9903447
      ]
   },
   "_rid": "Ic8LAMEUVgANAAAAAAAAAA==",
   "_ts": 1450200910,
   "_self": "dbs/Ic8LAA==/colls/Ic8LAMEUVgA=/docs/Ic8LAMEUVgANAAAAAAAAAA==/",
   "_etag": "\"00004100-0000-0000-0000-56704f4e0000\"",
   "_attachments": "attachments/"
}
Created document nust from typed object
DocumentDB - Partitioning
When your database starts to grow beyond 10GB, you can scale out simply by creating new collections and then spreading or partitioning your data across more and more collections.
Sooner or later a single collection, which has a 10GB capacity, will not be enough to contain your database. Now 10GB may not sound like a very large number, but remember that we're storing JSON documents, which is just plain text and you can fit a lot of plain text documents in 10GB, even when you consider the storage overhead for the indexes.
Storage isn't the only concern when it comes to scalability. The maximum throughput available on a collection is two and a half thousand request units per second that you get with an S3 collection. Hence, if you need higher throughput, then you will also need to scale out by partitioning with multiple collections. Scale out partitioning is also called horizontal partitioning.
There are many approaches that can be used for partitioning data with Azure DocumentDB. Following are most common strategies −
- Spillover Partitioning
- Range Partitioning
- Lookup Partitioning
- Hash Partitioning
Spillover Partitioning
Spillover partitioning is the simplest strategy because there is no partition key. It's often a good choice to start with when you're unsure about a lot of things. You might not know if you'll even ever need to scale out beyond a single collection or how many collections you may need to add or how fast you may need to add them.
Spillover partitioning starts with a single collection and there is no partition key.
The collection starts to grow and then grows some more, and then some more, until you start getting close to the 10GB limit.
When you reach 90 percent capacity, you spill over to a new collection and start using it for new documents.
Once your database scales out to a larger number of collections, you'll probably want to shift to a strategy that's based on a partition key.
When you do that you'll need to rebalance your data by moving documents to different collections based on whatever strategy you're migrating to.
Range Partitioning
One of the most common strategies is range partitioning. With this approach you determine the range of values that a document's partition key might fall in and direct the document to a collection corresponding to that range.
Dates are very typically used with this strategy where you create a collection to hold documents that fall within the defined range of dates. When you define ranges that are small enough, where you're confident that no collection will ever exceed its 10GB limit. For example, there may be a scenario where a single collection can reasonably handle documents for an entire month.
It may also be the case that most users are querying for current data, which would be data for this month or perhaps last month, but users are rarely searching for much older data. So you start off in June with an S3 collection, which is the most expensive collection you can buy and delivers the best throughput you can get.
In July you buy another S3 collection to store the July data and you also scale the June data down to a less-expensive S2 collection. Then in August, you get another S3 collection and scale July down to an S2 and June all the way down to an S1. It goes, month after month, where you're always keeping the current data available for high throughput and older data is kept available at lower throughputs.
As long as the query provides a partition key, only the collection that needs to be queried will get queried and not all the collections in the database like it happens with spillover partitioning.
Lookup Partitioning
With lookup partitioning you can define a partition map that routes documents to specific collections based on their partition key. For example, you could partition by region.
Store all US documents in one collection, all European documents in another collection, and all documents from any other region in a third collection.
Use this partition map and a lookup partition resolver can figure out which collection to create a document in and which collections to query, based on the partition key, which is the region property contained in each document.
Hash Partitioning
In hash partitioning, partitions are assigned based on the value of a hash function, allowing you to evenly distribute requests and data across a number of partitions.
This is commonly used to partition data produced or consumed from a large number of distinct clients, and is useful for storing user profiles, catalog items, etc.
Let’s take a look at a simple example of range partitioning using the RangePartitionResolver supplied by the .NET SDK.
Step 1 − Create a new DocumentClient and we will create two collections in CreateCollections task. One will contain documents for users that have user IDs beginning with A through M and the other for user IDs N through Z.
private static async Task CreateCollections(DocumentClient client) {
   await client.CreateDocumentCollectionAsync(“dbs/myfirstdb”, new DocumentCollection {
      Id = “CollectionAM” });

   await client.CreateDocumentCollectionAsync(“dbs/myfirstdb”, new DocumentCollection {
      Id = “CollectionNZ” });
}
Step 2 − Register the range resolver for the database.
Step 3 − Create a new RangePartitionResolver<string>, which is the datatype of our partition key. The constructor takes two parameters, the property name of the partition key and a dictionary that is the shard map or partition map, which is just a list of the ranges and corresponding collections that we are predefining for the resolver.
private static void RegisterRangeResolver(DocumentClient client) {

   //Note: \uffff is the largest UTF8 value, so M\ufff includes all strings that start with M.

   var resolver = new RangePartitionResolver<string>(
      "userId", new Dictionary<Range<string>, string>() {
      { new Range<string>("A", "M\uffff"), "dbs/myfirstdb/colls/CollectionAM" },
      { new Range<string>("N", "Z\uffff"), "dbs/myfirstdb/colls/CollectionNZ" },
   });

   client.PartitionResolvers["dbs/myfirstdb"] = resolver;
 }
It's necessary to encode the largest possible UTF-8 value here. Or else the first range wouldn't match on any Ms except the one single M, and likewise for Z in the second range. So, you can just think of this encoded value here as a wildcard for matching on the partition key.
Step 4 − After creating the resolver, register it for the database with the current DocumentClient. To do that just assign it to the PartitionResolver's dictionary property.
We'll create and query for documents against the database, not a collection as you normally do, the resolver will use this map to route requests to the appropriate collections.
Now let's create some documents. First we will create one for userId Kirk, and then one for Spock.
private static async Task CreateDocumentsAcrossPartitions(DocumentClient client) {
   Console.WriteLine();
   Console.WriteLine("**** Create Documents Across Partitions ****");

   var kirkDocument = await client.CreateDocumentAsync("dbs/myfirstdb", new { userId =
      "Kirk", title = "Captain" });
   Console.WriteLine("Document 1: {0}", kirkDocument.Resource.SelfLink);

   var spockDocument = await client.CreateDocumentAsync("dbs/myfirstdb", new { userId =
      "Spock", title = "Science Officer" });
   Console.WriteLine("Document 2: {0}", spockDocument.Resource.SelfLink);
}
The first parameter here is a self-link to the database, not a specific collection. This is not possible without a partition resolver, but with one it just works seamlessly.
Both documents were saved to the database myfirstdb, but we know that Kirk is being stored in the collection for A through M and Spock is being stored in the collection for N to Z, if our RangePartitionResolver is working properly.
Let’s call these from the CreateDocumentClient task as shown in the following code.
private static async Task CreateDocumentClient() {
   // Create a new instance of the DocumentClient
   using (var client = new DocumentClient(new Uri(EndpointUrl), AuthorizationKey)) {
      await CreateCollections(client);
      RegisterRangeResolver(client);
      await CreateDocumentsAcrossPartitions(client);
   }
}
When the above code is executed, you will receive the following output.
**** Create Documents Across Partitions ****
Document 1: dbs/Ic8LAA==/colls/Ic8LAO2DxAA=/docs/Ic8LAO2DxAABAAAAAAAAAA==/
Document 2: dbs/Ic8LAA==/colls/Ic8LAP12QAE=/docs/Ic8LAP12QAEBAAAAAAAAAA==/
As seen the self-links of the two documents have different resource IDs because they exist in two separate collections.
DocumentDB - Data Migration
With the DocumentDB Data Migration tool, you can easily migrate data to DocumentDB. The DocumentDB Data Migration Tool is a free and open source utility you can download from the Microsoft Download Center https://www.microsoft.com/
The Migration Tool supports many data sources, some of them are listed below −
- SQL Server
- JSON files
- Flat files of Comma-separated Values (CSV)
- MongoDB
- Azure Table Storage
- Amazon DynamoDB
- HBase, and even other DocumentDB databases
After downloading the DocumentDB Data Migration tool, extract the zip file.
You can see two executables in this folder as shown in the following screenshot.
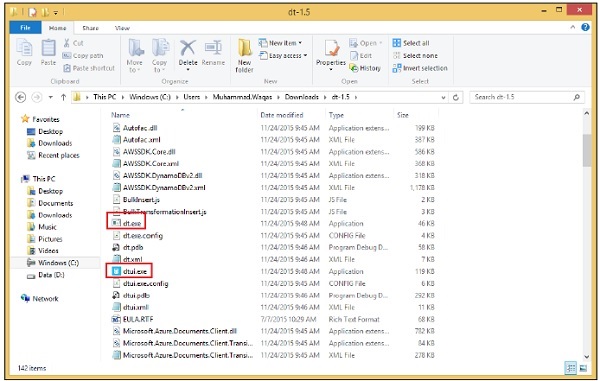
First, there is dt.exe, which is the console version with a command line interface, and then there is dtui.exe, which is the desktop version with a graphical user interface.
Let's launch the GUI version.
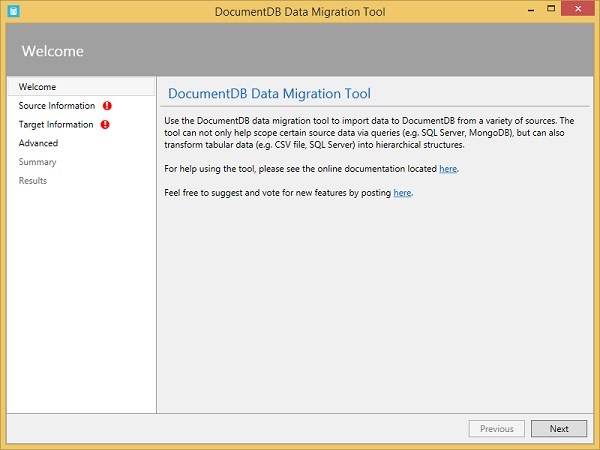
You can see the Welcome page. Click ‘Next’ for the Source Information page.
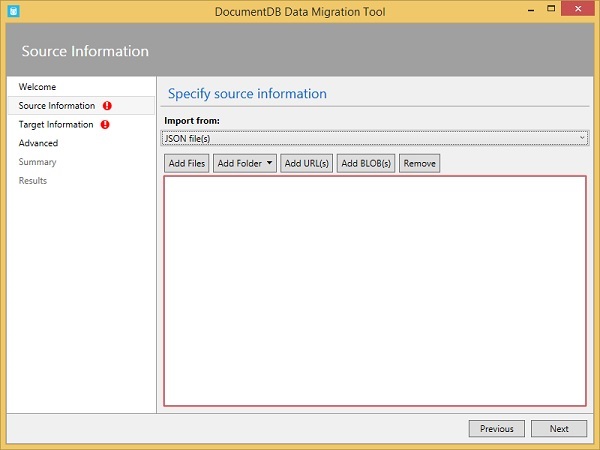
Here's where you configure your data source, and you can see the many supported choices from the dropdown menu.
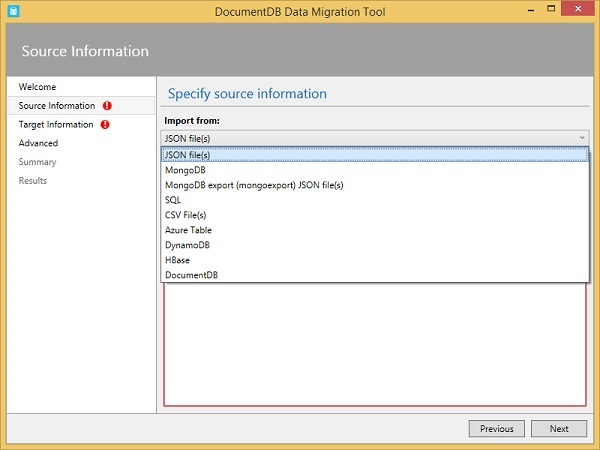
When you make a selection, the rest of the Source Information page changes accordingly.
It is very easy to import data to DocumentDB using the DocumentDB Data Migration Tool. We recommend you exercise the above examples and use the other data files as well.
DocumentDB - Access Control
DocumentDB provides the concepts to control access to DocumentDB resources. Access to DocumentDB resources is governed by a master key token or a resource token. Connections based on resource tokens can only access the resources specified by the tokens and no other resources. Resource tokens are based on user permissions.
First you create one or more users, and these are defined at the database level.
Then you create one or more permissions for each user, based on the resources that you want to allow each user to access.
Each permission generates a resource token that allows either read-only or full access to a given resource and that can be any user resource within the database.
Users are defined at the database level and permissions are defined for each user.
Users and permissions apply to all collections in the database.
Let’s take a look at a simple example in which we will learn how to define users and permissions to achieve granular security in DocumentDB.
We will start with a new DocumentClient and query for the myfirstdb database.
private static async Task CreateDocumentClient() {
   // Create a new instance of the DocumentClient
   using (var client = new DocumentClient(new Uri(EndpointUrl), AuthorizationKey)) {
      database = client.CreateDatabaseQuery("SELECT * FROM c WHERE c.id =
         'myfirstdb'").AsEnumerable().First();

      collection = client.CreateDocumentCollectionQuery(database.CollectionsLink,
         "SELECT * FROM c WHERE c.id = 'MyCollection'").AsEnumerable().First();

      var alice = await CreateUser(client, "Alice");
      var tom = await CreateUser(client, "Tom");
   }
}
Following is the implementation for CreateUser.
private async static Task<User> CreateUser(DocumentClient client, string userId) {
   Console.WriteLine();
   Console.WriteLine("**** Create User {0} in {1} ****", userId, database.Id);

   var userDefinition = new User { Id = userId };
   var result = await client.CreateUserAsync(database.SelfLink, userDefinition);
   var user = result.Resource;

   Console.WriteLine("Created new user");
   ViewUser(user);

   return user;
}
Step 1 − Create two users, Alice and Tom like any resource we create, we construct a definition object with the desired Id and call the create method and in this case we're calling CreateUserAsync with the database's SelfLink and the userDefinition. We get back the result from whose resource property we obtain the newly created user object.
Now to see these two new users in the database.
private static void ViewUsers(DocumentClient client) {
   Console.WriteLine();
   Console.WriteLine("**** View Users in {0} ****", database.Id);

   var users = client.CreateUserQuery(database.UsersLink).ToList();
   var i = 0;

   foreach (var user in users) {
      i++;
      Console.WriteLine();
      Console.WriteLine("User #{0}", i);
      ViewUser(user);
   }

   Console.WriteLine();
   Console.WriteLine("Total users in database {0}: {1}", database.Id, users.Count);
}

private static void ViewUser(User user) {
   Console.WriteLine("User ID: {0} ", user.Id);
   Console.WriteLine("Resource ID: {0} ", user.ResourceId);
   Console.WriteLine("Self Link: {0} ", user.SelfLink);
   Console.WriteLine("Permissions Link: {0} ", user.PermissionsLink);
   Console.WriteLine("Timestamp: {0} ", user.Timestamp);
}
Step 2 − Call CreateUserQuery, against the database's UsersLink to retrieve a list of all users. Then loop through them and view their properties.
Now we have to create them first. So let's say that we wanted to allow Alice read/write permissions to the MyCollection collection, but Tom can only read documents in the collection.
await CreatePermission(client, alice, "Alice Collection Access", PermissionMode.All,
   collection);

await CreatePermission(client, tom, "Tom Collection Access", PermissionMode.Read,
   collection);
Step 3− Create a permission on a resource that is MyCollection collection so we need to get that resource a SelfLink.
Step 4 − Then create a Permission.All on this collection for Alice and a Permission.Read on this collection for Tom.
Following is the implementation for CreatePermission.
private async static Task CreatePermission(DocumentClient client, User user,
   string permId, PermissionMode permissionMode, string resourceLink) {
   Console.WriteLine();
   Console.WriteLine("**** Create Permission {0} for {1} ****", permId, user.Id);

   var permDefinition = new Permission {
      Id = permId,
      PermissionMode = permissionMode,
      ResourceLink = resourceLink
   };

   var result = await client.CreatePermissionAsync(user.SelfLink, permDefinition);
   var perm = result.Resource;
   Console.WriteLine("Created new permission");
   ViewPermission(perm);
}
As you should come to expect by now, we do this by creating a definition object for the new permission, which includes an Id and a permissionMode, which is either Permission.All or Permission.Read, and the SelfLink of the resource that's being secured by the permission.
Step 5 − Call CreatePermissionAsync and get the created permission from the resource property in the result.
To view the created permission, following is the implementation of ViewPermissions.
private static void ViewPermissions(DocumentClient client, User user) {
   Console.WriteLine();
   Console.WriteLine("**** View Permissions for {0} ****", user.Id);

   var perms = client.CreatePermissionQuery(user.PermissionsLink).ToList();
   var i = 0;

   foreach (var perm in perms) {
      i++;
      Console.WriteLine();
      Console.WriteLine("Permission #{0}", i);
      ViewPermission(perm);
   }

   Console.WriteLine();
   Console.WriteLine("Total permissions for {0}: {1}", user.Id, perms.Count);
}

private static void ViewPermission(Permission perm) {
   Console.WriteLine("Permission ID: {0} ", perm.Id);
   Console.WriteLine("Resource ID: {0} ", perm.ResourceId);
   Console.WriteLine("Permission Mode: {0} ", perm.PermissionMode);
   Console.WriteLine("Token: {0} ", perm.Token);
   Console.WriteLine("Timestamp: {0} ", perm.Timestamp);
}
This time, it's a permission query against the user's permissions link and we simply list each permission returned for the user.
Let's delete the Alice’s and Tom’s permissions.
await DeletePermission(client, alice, "Alice Collection Access");
await DeletePermission(client, tom, "Tom Collection Access");
Following is the implementation for DeletePermission.
private async static Task DeletePermission(DocumentClient client, User user,
   string permId) {
   Console.WriteLine();
   Console.WriteLine("**** Delete Permission {0} from {1} ****", permId, user.Id);

   var query = new SqlQuerySpec {
      QueryText = "SELECT * FROM c WHERE c.id = @id",
      Parameters = new SqlParameterCollection {
         new SqlParameter { Name = "@id", Value = permId }
      }
   };

   Permission perm = client.CreatePermissionQuery(user.PermissionsLink, query)
      .AsEnumerable().First();
   await client.DeletePermissionAsync(perm.SelfLink);
   Console.WriteLine("Deleted permission {0} from user {1}", permId, user.Id);
}
Step 6 − To delete permissions, query by permission Id to get the SelfLink, and then using the SelfLink to delete the permission.
Next, let’s delete the users themselves. Let’s delete both the users.
await DeleteUser(client, "Alice");
await DeleteUser(client, "Tom");
Following is the implementation for DeleteUser.
private async static Task DeleteUser(DocumentClient client, string userId) {
   Console.WriteLine();
   Console.WriteLine("**** Delete User {0} in {1} ****", userId, database.Id);

   var query = new SqlQuerySpec {
      QueryText = "SELECT * FROM c WHERE c.id = @id",
      Parameters = new SqlParameterCollection {
         new SqlParameter { Name = "@id", Value = userId }
      }
   };

   User user = client.CreateUserQuery(database.SelfLink, query).AsEnumerable().First();
   await client.DeleteUserAsync(user.SelfLink);
   Console.WriteLine("Deleted user {0} from database {1}", userId, database.Id);
}
Step 7 − First query to get her SelfLink and then call DeleteUserAsync to delete her user object.
Following is the implementation of CreateDocumentClient task in which we call all the above tasks.
private static async Task CreateDocumentClient() {
   // Create a new instance of the DocumentClient
   using (var client = new DocumentClient(new Uri(EndpointUrl), AuthorizationKey)) {
      database = client.CreateDatabaseQuery("SELECT * FROM c WHERE c.id =
         'myfirstdb'").AsEnumerable().First();

      collection = client.CreateDocumentCollectionQuery(database.CollectionsLink,
         "SELECT * FROM c WHERE c.id = 'MyCollection'").AsEnumerable().First();

      ViewUsers(client);

      var alice = await CreateUser(client, "Alice");
      var tom = await CreateUser(client, "Tom");
      ViewUsers(client);

      ViewPermissions(client, alice);
      ViewPermissions(client, tom);

      string collectionLink = client.CreateDocumentCollectionQuery(database.SelfLink,
         "SELECT VALUE c._self FROM c WHERE c.id = 'MyCollection'")
         .AsEnumerable().First().Value;

      await CreatePermission(client, alice, "Alice Collection Access", PermissionMode.All,
         collectionLink);

      await CreatePermission(client, tom, "Tom Collection Access", PermissionMode.Read,
         collectionLink);

      ViewPermissions(client, alice);
      ViewPermissions(client, tom);

      await DeletePermission(client, alice, "Alice Collection Access");
      await DeletePermission(client, tom, "Tom Collection Access");

      await DeleteUser(client, "Alice");
      await DeleteUser(client, "Tom");
   }
}
When the above code is compiled and executed you will receive the following output.
**** View Users in myfirstdb ****

Total users in database myfirstdb: 0

**** Create User Alice in myfirstdb ****
Created new user
          User ID: Alice
      Resource ID: kV5oAC56NwA=
        Self Link: dbs/kV5oAA==/users/kV5oAC56NwA=/
 Permissions Link: dbs/kV5oAA==/users/kV5oAC56NwA=/permissions/
        Timestamp: 12/17/2015 5:44:19 PM

**** Create User Tom in myfirstdb ****
Created new user
          User ID: Tom
      Resource ID: kV5oAALxKgA=
        Self Link: dbs/kV5oAA==/users/kV5oAALxKgA=/
 Permissions Link: dbs/kV5oAA==/users/kV5oAALxKgA=/permissions/
        Timestamp: 12/17/2015 5:44:21 PM

**** View Users in myfirstdb ****

User #1
          User ID: Tom
      Resource ID: kV5oAALxKgA=
        Self Link: dbs/kV5oAA==/users/kV5oAALxKgA=/
 Permissions Link: dbs/kV5oAA==/users/kV5oAALxKgA=/permissions/
        Timestamp: 12/17/2015 5:44:21 PM

User #2
          User ID: Alice
      Resource ID: kV5oAC56NwA=
        Self Link: dbs/kV5oAA==/users/kV5oAC56NwA=/
 Permissions Link: dbs/kV5oAA==/users/kV5oAC56NwA=/permissions/
        Timestamp: 12/17/2015 5:44:19 PM

Total users in database myfirstdb: 2

**** View Permissions for Alice ****

Total permissions for Alice: 0

**** View Permissions for Tom ****

Total permissions for Tom: 0

**** Create Permission Alice Collection Access for Alice ****
Created new permission
    Permission ID: Alice Collection Access
      Resource ID: kV5oAC56NwDON1RduEoCAA==
  Permission Mode: All
            Token: type=resource&ver=1&sig=zB6hfvvleC0oGGbq5cc67w==;Zt3Lx
Ol14h8pd6/tyF1h62zbZKk9VwEIATIldw4ZyipQGW951kirueAKdeb3MxzQ7eCvDfvp7Y/ZxFpnip/D G
JYcPyim5cf+dgLvos6fUuiKSFSul7uEKqp5JmJqUCyAvD7w+qt1Qr1PmrJDyAIgbZDBFWGe2VT9FaBH o
PYwrLjRlnH0AxfbrR+T/UpWMSSHtLB8JvNFZNSH8hRjmQupuTSxCTYEC89bZ/pS6fNmNg8=;
        Timestamp: 12/17/2015 5:44:28 PM

**** Create Permission Tom Collection Access for Tom ****
Created new permission
    Permission ID: Tom Collection Access
      Resource ID: kV5oAALxKgCMai3JKWdfAA==
  Permission Mode: Read
            Token: type=resource&ver=1&sig=ieBHKeyi6EY9ZOovDpe76w==;92gwq
V4AxKaCJ2dLS02VnJiig/5AEbPcfo1xvOjR10uK3a3FUMFULgsaK8nzxdz6hLVCIKUj6hvMOTOSN8Lt 7
i30mVqzpzCfe7JO3TYSJEI9D0/5HbMIEgaNJiCu0JPPwsjVecTytiLN56FHPguoQZ7WmUAhVTA0IMP6 p
jQpLDgJ43ZaG4Zv3qWJiO689balD+egwiU2b7RICH4j6R66UVye+GPxq/gjzqbHwx79t54=;
        Timestamp: 12/17/2015 5:44:30 PM

**** View Permissions for Alice ****

Permission #1
    Permission ID: Alice Collection Access
      Resource ID: kV5oAC56NwDON1RduEoCAA==
  Permission Mode: All
            Token: type=resource&ver=1&sig=BSzz/VNe9j4IPJ9M31Mf4Q==;Tcq/B
X50njB1vmANZ/4aHj/3xNkghaqh1OfV95JMi6j4v7fkU+gyWe3mJasO3MJcoop9ixmVnB+RKOhFaSxE l
P37SaGuIIik7GAWS+dcEBWglMefc95L2YkeNuZsjmmW5b+a8ELCUg7N45MKbpzkp5BrmmGVJ7h4Z4pf D
rdmehYLuxSPLkr9ndbOOrD8E3bux6TgXCsgYQscpIlJHSKCKHUHfXWBP2Y1LV2zpJmRjis=;
        Timestamp: 12/17/2015 5:44:28 PM

Total permissions for Alice: 1

**** View Permissions for Tom ****
Permission #1
    Permission ID: Tom Collection Access
      Resource ID: kV5oAALxKgCMai3JKWdfAA==
  Permission Mode: Read
            Token: type=resource&ver=1&sig=NPkWNJp1mAkCASE8KdR6PA==;ur/G2
V+fDamBmzECux000VnF5i28f8WRbPwEPxD1DMpFPqYcu45wlDyzT5A5gBr3/R3qqYkEVn8bU+een6Gl j
L6vXzIwsZfL12u/1hW4mJT2as2PWH3eadry6Q/zRXHAxV8m+YuxSzlZPjBFyJ4Oi30mrTXbBAEafZhA 5
yvbHkpLmQkLCERy40FbIFOzG87ypljREpwWTKC/z8RSrsjITjAlfD/hVDoOyNJwX3HRaz4=;
        Timestamp: 12/17/2015 5:44:30 PM

Total permissions for Tom: 1

**** Delete Permission Alice Collection Access from Alice ****
Deleted permission Alice Collection Access from user Alice

**** Delete Permission Tom Collection Access from Tom ****
Deleted permission Tom Collection Access from user Tom

**** Delete User Alice in myfirstdb ****
Deleted user Alice from database myfirstdb

**** Delete User Tom in myfirstdb ****
Deleted user Tom from database myfirstdb
DocumentDB - Visualize Data
In this chapter, we will learn how to visualize data which is stored in DocumentDB. Microsoft provided Power BI Desktop tool which transforms your data into rich visuals. It also enables you to retrieve data from various data sources, merge and transform the data, create powerful reports and visualizations, and publish the reports to Power BI.
In the latest version of Power BI Desktop, Microsoft has added support for DocumentDB as well in which you can now connect to your DocumentDB account. You can download this tool from the link, https://powerbi.microsoft.com
Let’s take a look at an example in which we will visualize the earthquakes data imported in the last chapter.
Step 1 − Once the tool is downloaded, launch the Power BI desktop.
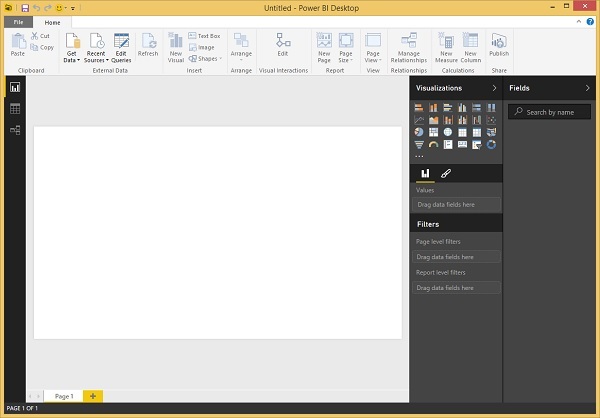
Step 2 − Click ‘Get Data’ option which is on the Home tab under External Data group and it will display the Get Data page.
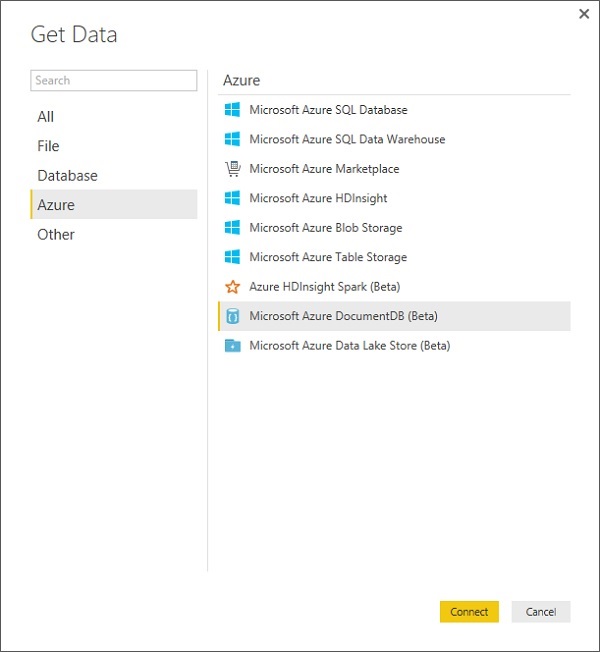
Step 3 − Select the Microsoft Azure DocumentDB (Beta) option and click ‘Connect’ button.
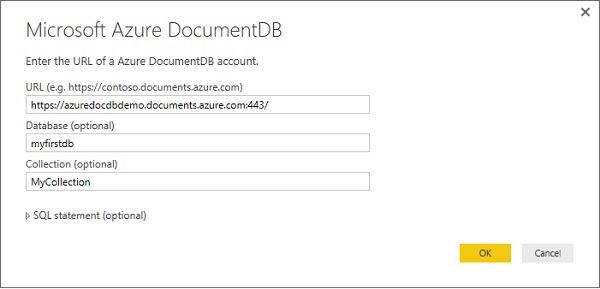
Step 4 − Enter the URL of your Azure DocumentDB account, Database and Collection from which you want visualize data and press Ok.
If you are connecting to this endpoint for the first time, you will be prompted for the account key.
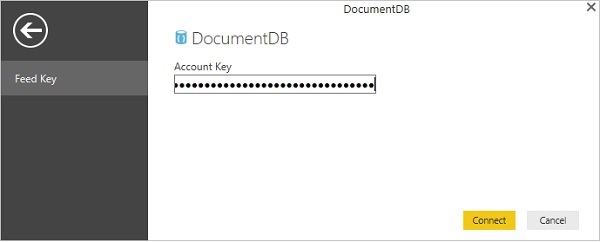
Step 5 − Enter the account key (primary key) which is unique for each DocumentDB account available on Azure portal, and then click Connect.
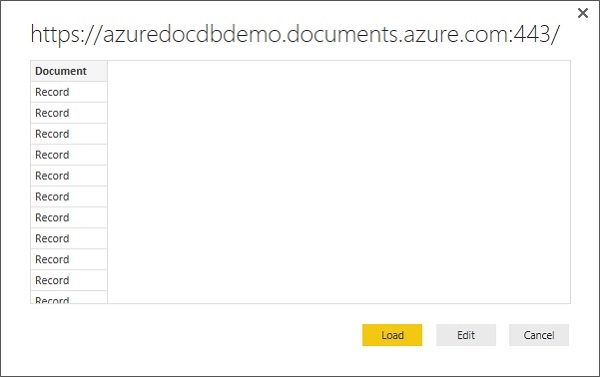
When the account is successfully connected, it will retrieve the data from specified database. The Preview pane shows a list of Record items, a Document is represented as a Record type in Power BI.
Step 6 − Click ‘Edit’ button which will launch the Query Editor.
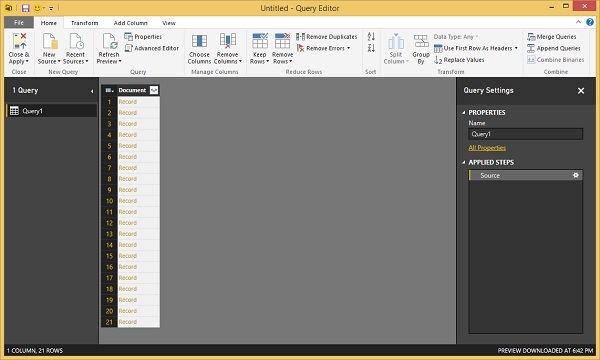
Step 7 − In the Power BI Query Editor, you should see a Document column in the center pane, click on the expander at the right side of the Document column header and select the columns which you want display.
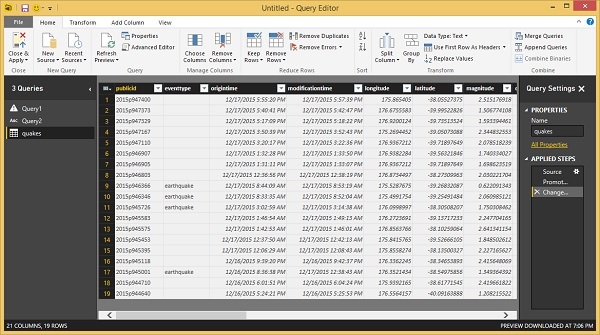
As you can see that we have latitude and longitude as separate column but we visualize data in latitude, longitude coordinates form.
Step 8 − To do that, click ‘Add Column’ tab.
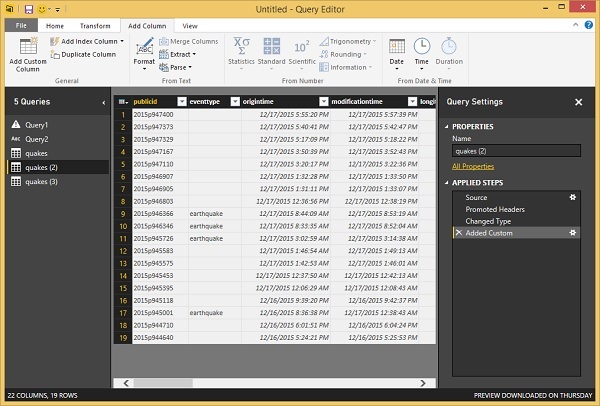
Step 9 − Select the Add Custom Column which will display the following page.
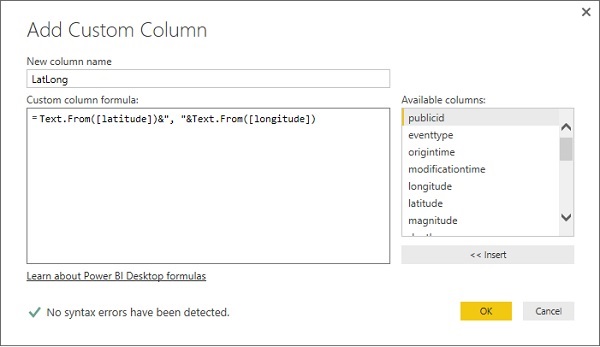
Step 10 − Specify the new column name, let’s say LatLong and also the formula which will combine the latitude and longitude in one column separated by a comma. Following is the formula.
Text.From([latitude])&", "&Text.From([longitude])
Step 11 − Click OK to continue and you will see that the new column is added.
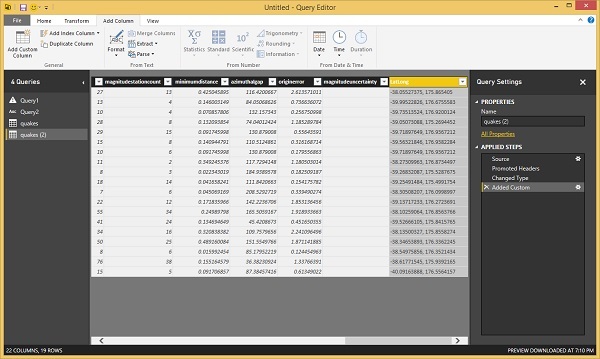
Step 12 − Go to the Home tab and click ‘Close & Apply’ option.
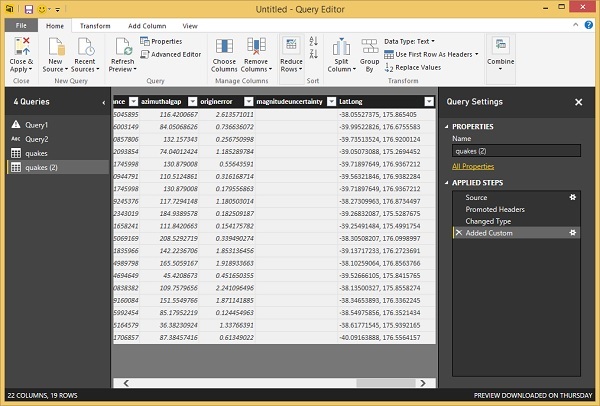
Step 13 − You can create reports by dragging and dropping fields into the Report canvas. You can see on the right, there are two panes − one Visualizations pane and the other is Fields pane.
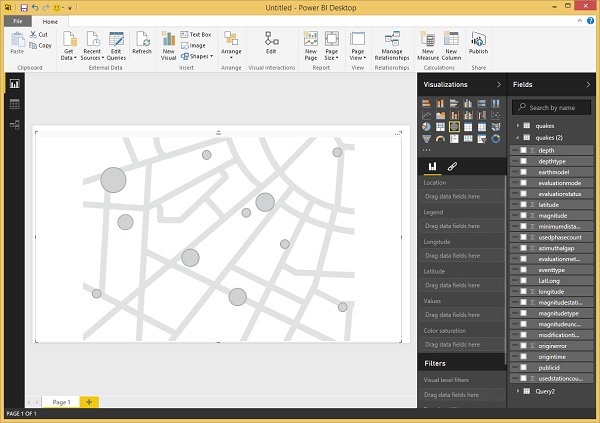
Let’s create a map view showing the location of each earthquake.
Step 14 − Drag the map visual type from the Visualizations pane.
Step 15 − Now, drag and drop the LatLong field from the Fields pane to the Location property in Visualizations pane. Then, drag and drop the magnitude field to the Values property.
Step 16 − Drag and drop the depth field to the Color saturation property.
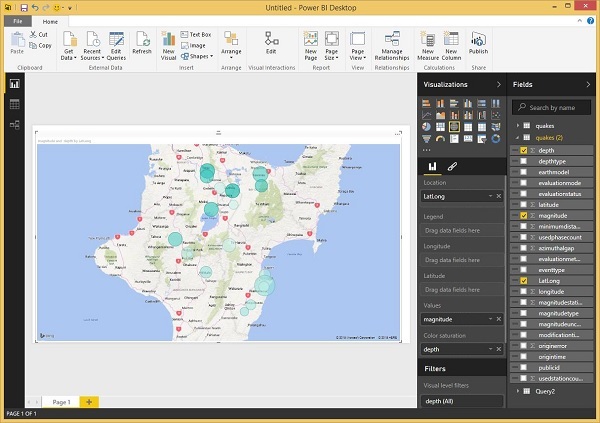
You will now see the Map visual showing a set of bubbles indicating the location of each earthquake.