- DocumentDB Tutorial
- DocumentDB - Home
- DocumentDB - Introduction
- DocumentDB - Advantages
- DocumentDB - Environment Setup
- DocumentDB - Create Account
- DocumentDB - Connect Account
- DocumentDB - Create Database
- DocumentDB - List Databases
- DocumentDB - Drop Databases
- DocumentDB - Create Collection
- DocumentDB - Delete Collection
- DocumentDB - Insert Document
- DocumentDB - Query Document
- DocumentDB - Update Document
- DocumentDB - Delete Document
- DocumentDB - Data Modeling
- DocumentDB - Data Types
- DocumentDB - Limiting Records
- DocumentDB - Sorting Records
- DocumentDB - Indexing Records
- DocumentDB - Geospatial Data
- DocumentDB - Partitioning
- DocumentDB - Data Migration
- DocumentDB - Access Control
- DocumentDB - Visualize Data
- DocumentDB Useful Resources
- DocumentDB - Quick Guide
- DocumentDB - Useful Resources
- DocumentDB - Discussion
DocumentDB - Create Account
To use Microsoft Azure DocumentDB, you must create a DocumentDB account. In this chapter, we will create a DocumentDB account using Azure portal.
Step 1 − Log in to the online https://portal.azure.com if you already have an Azure subscription otherwise you need to sign in first.
You will see the main Dashboard. It is fully customizable so you can arrange these tiles any way you like, resize them, add and remove tiles for things you frequently use or no longer do.
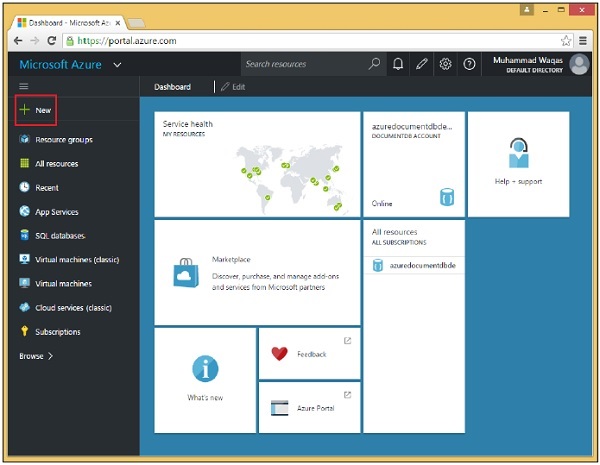
Step 2 − Select the ‘New’ option on the top left side of the page.
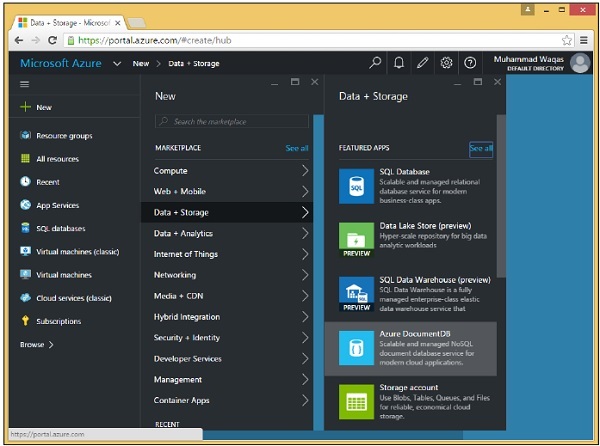
Step 3 − Now select Data + Storage > Azure DocumentDB option and you see the following New DocumentDB account section.
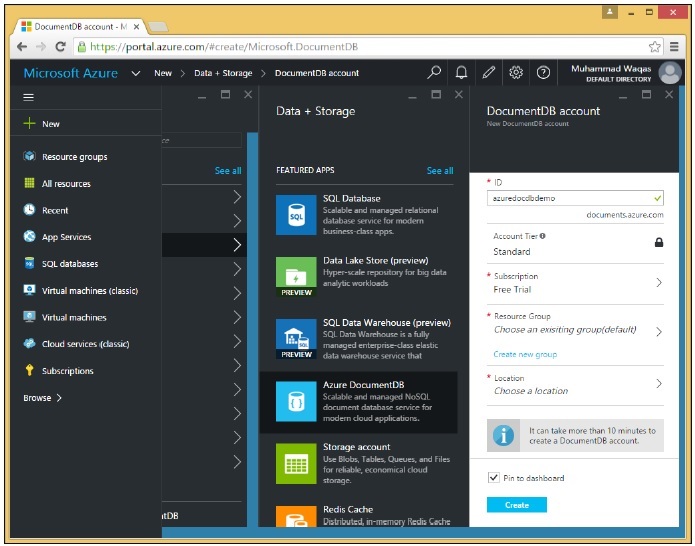
We need to come up with a globally unique name (ID), which combined with .documents.azure.com is the publicly addressable endpoint to our DocumentDB account. All the databases we create beneath that account can be accessed over the internet using this endpoint.
Step 4 − Let’s name it azuredocdbdemo and click on Resource Group → new_resource.
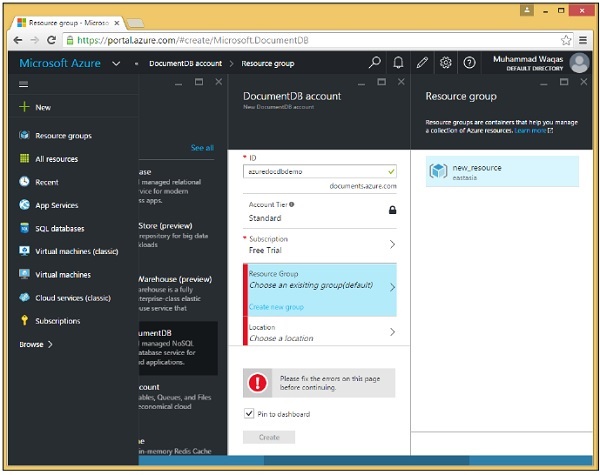
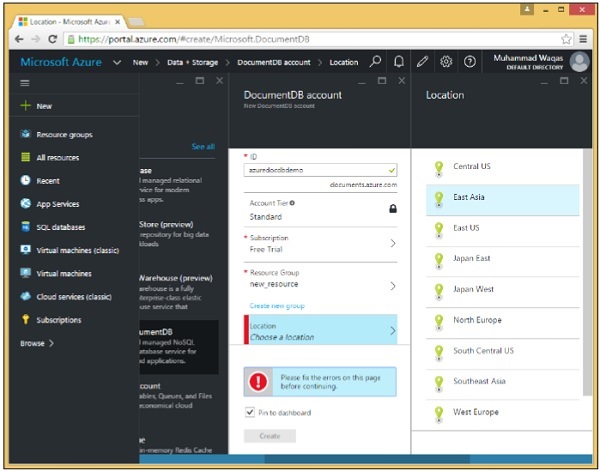
Step 5 − Choose the location i.e., which Microsoft data center you want this account to be hosted. Select the location and choose your region.
Step 6 − Check Pin to dashboard checkbox and just go ahead and click Create button.
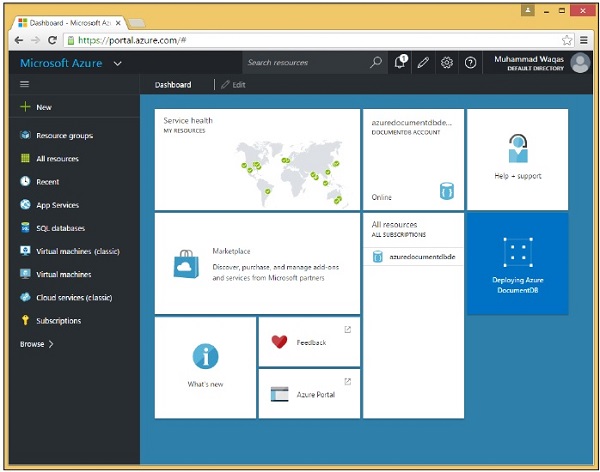
You can see that the tile has already been added to the Dashboard, and it's letting us know that the account is being created. It can actually take a few minutes to set things up for a new account while DocumentDB allocates the endpoint, provisions replicas, and performs other work in the background.
Once it is done, you will see the dashboard.
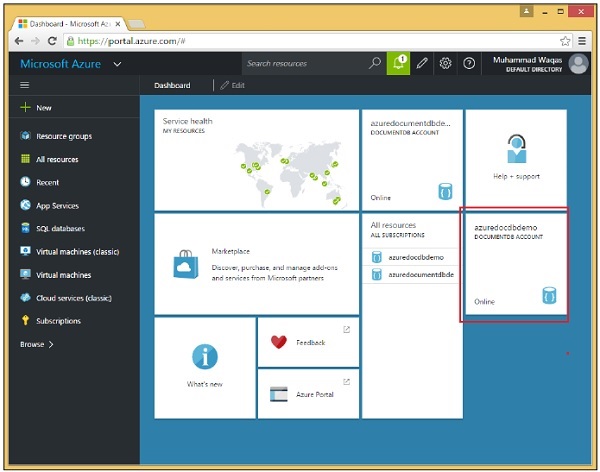
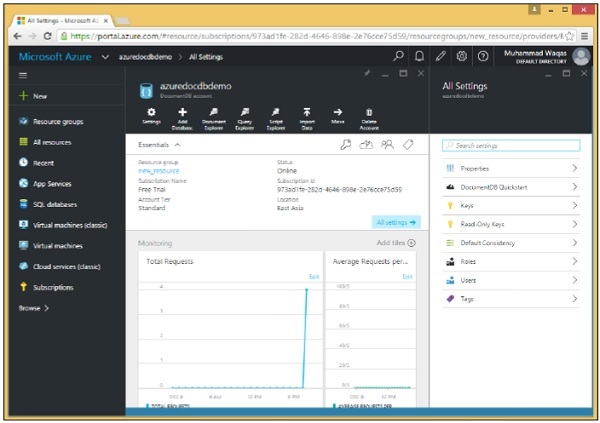
Step 7 − Now click on the created DocumentDB account and you will see a detailed screen as the following image.