- Blue Prism Tutorial
- Blue Prism - Home
- Blue Prism - Introduction to RPA
- Blue Prism - Introduction
- Blue Prism - Object Studio
- Blue Prism - Application Modeller
- Blue Prism - Process Studio
- Blue Prism - Exceptions Handling
- Blue Prism - Work Queues
- Blue Prism - Credentials Manager
- User, Role and Log Management
- Email and Surface Automation
- Blue Prism - Schedule Management
- Blue Prism Useful Resources
- Blue Prism - Quick Guide
- Blue Prism - Useful Resources
- Blue Prism - Discussion
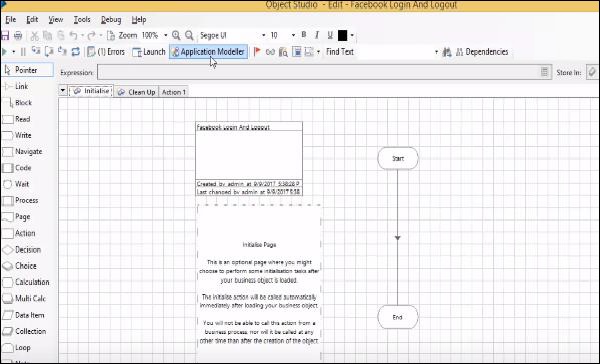
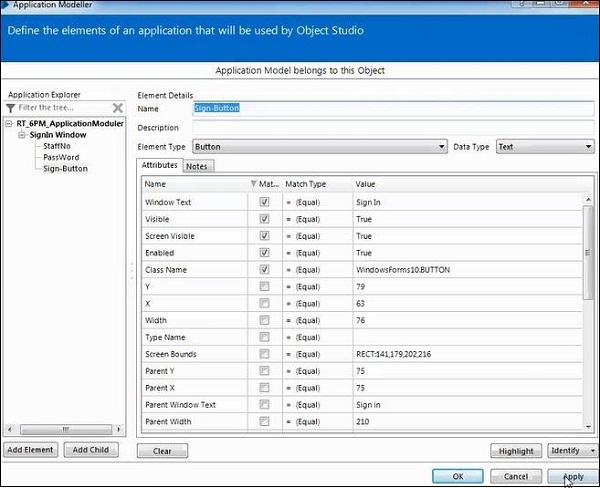
Blue Prism - Application Modeller
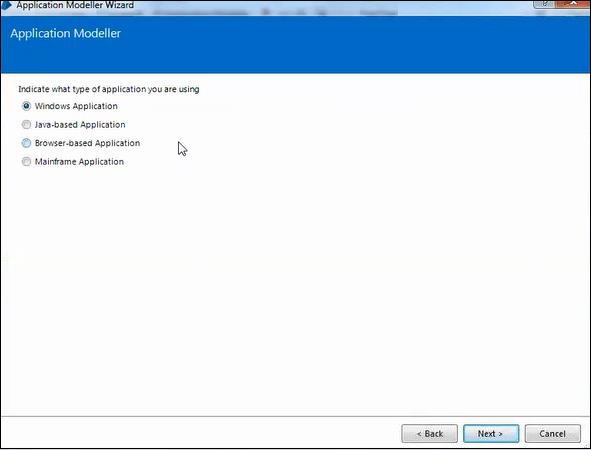
Application modeller is used for spying the applications. Spying is identifying the elements in the Applications.
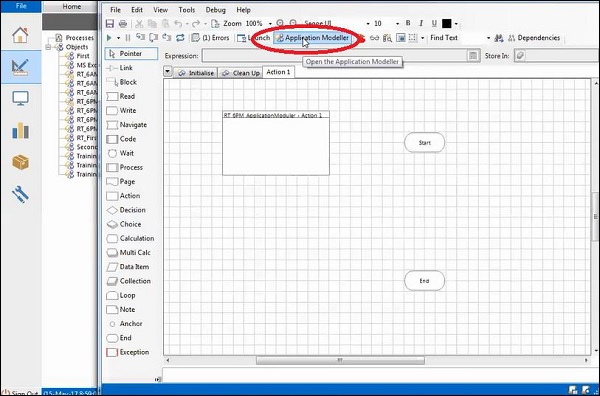
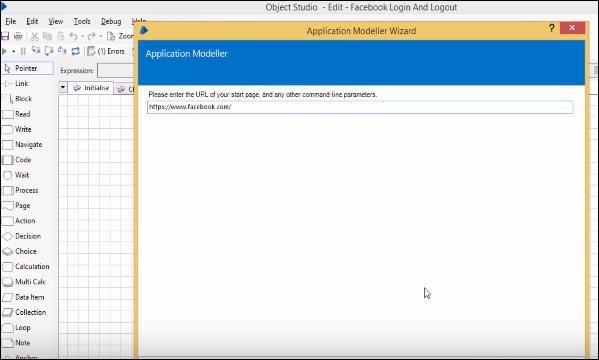
Application modeller window is as follows −

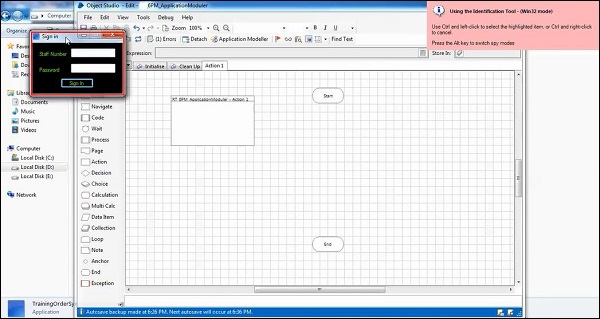
Spying Modes
We have 4 different types of spying modes as shown below −
Win32 Mode
HTML Mode
Accessibility Mode
Region Mode
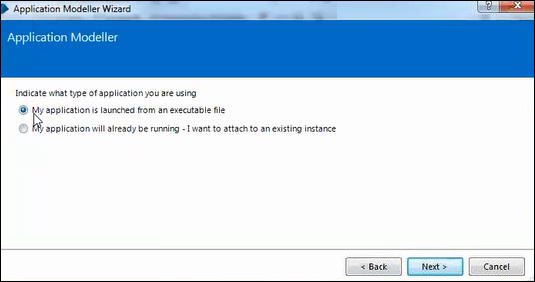
Follow the below steps to select any of the spying modes or to switch between different modes −
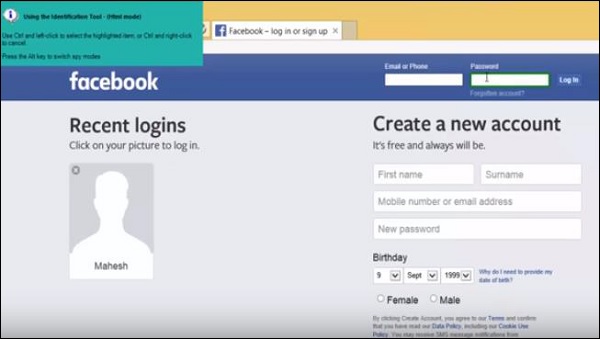
Use Ctrl and Left-Click to select the highlighted item in spying modes.
Use Ctrl and Right-Click to Cancel.
Press the Alt Key to switch spy modes.
Working with Web Applications
We shall now discuss how to work with web applications −
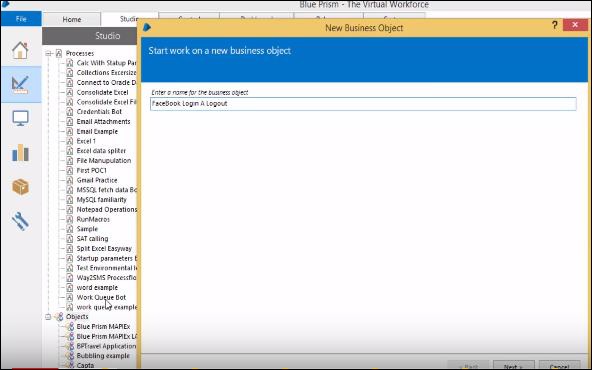
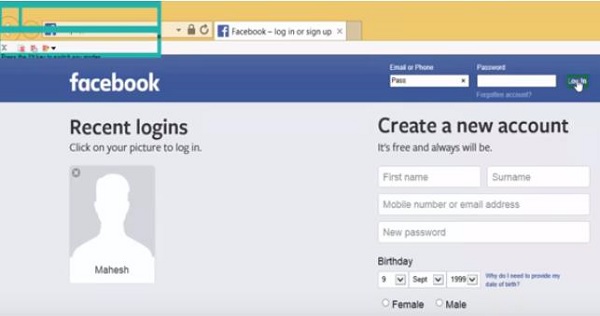
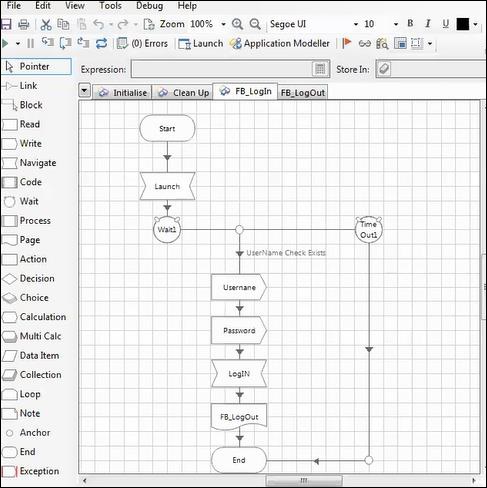
Facebook login and logout
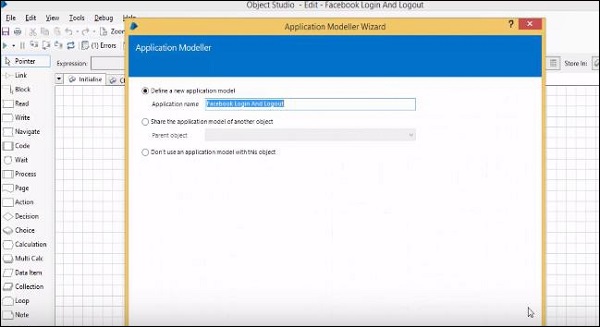
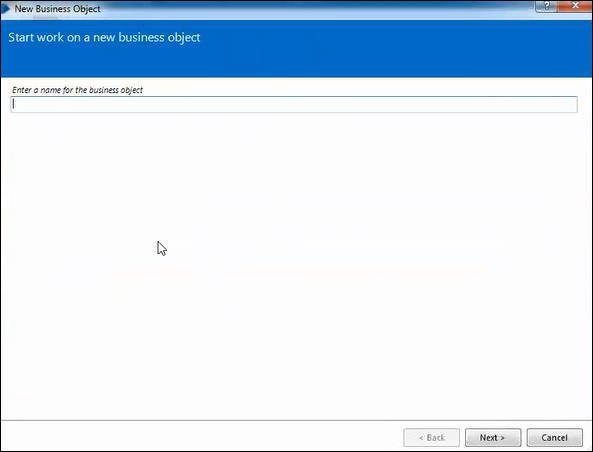
First, let us create a business object and enter a name for it.
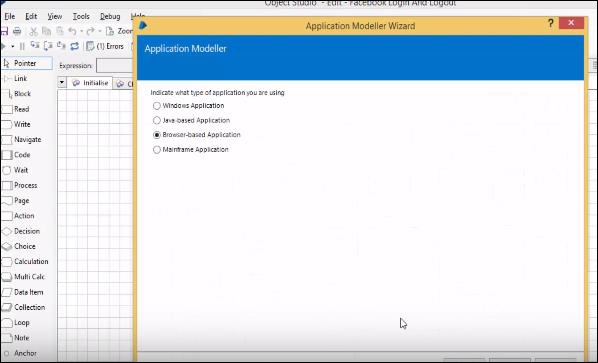
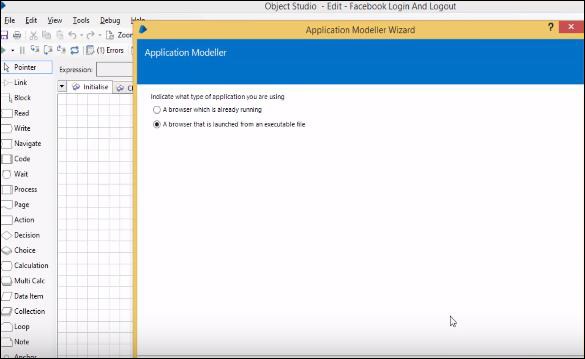
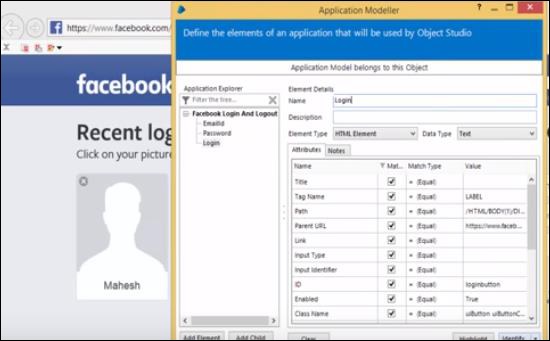
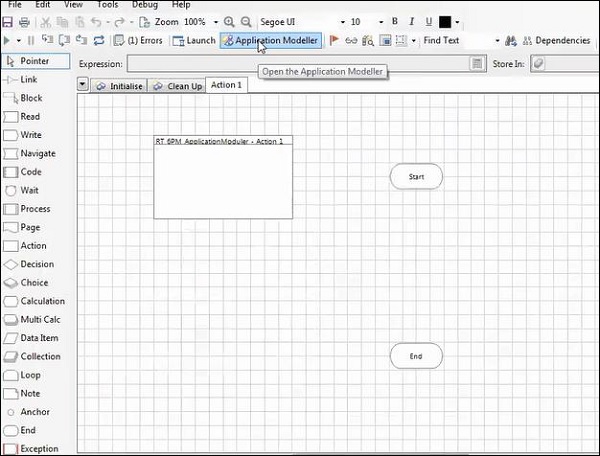
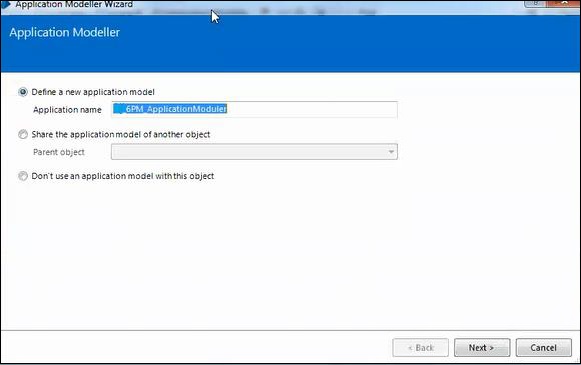
We need to configure the Application Modeller.
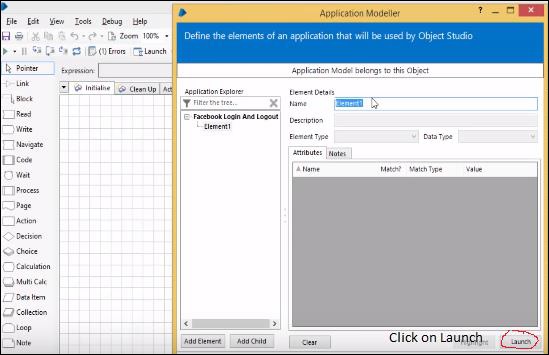
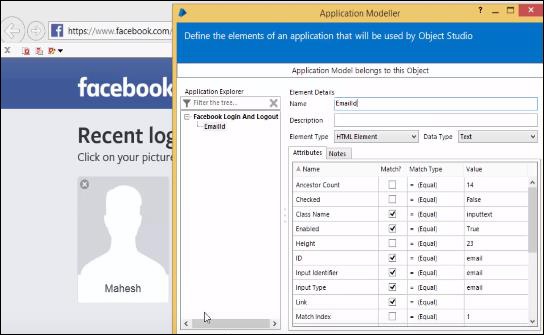
Now we are going to spy the login button, username and password fields.


Now, we shall start the implementation part.
Create data items for email and passwords.
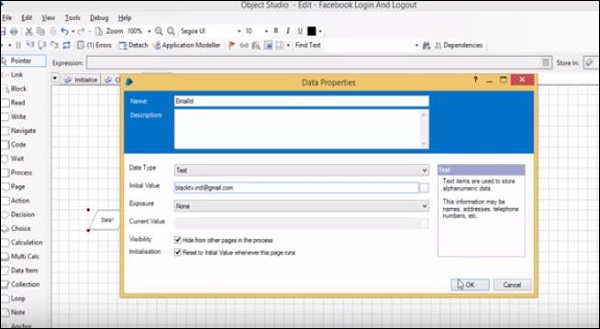
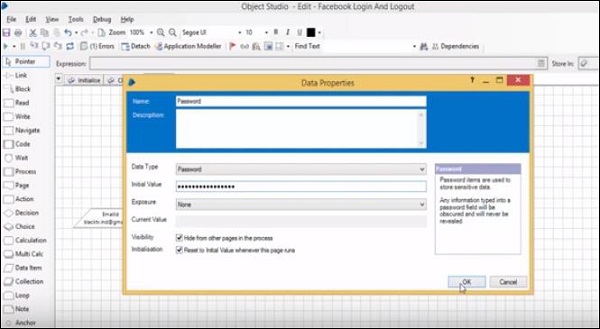
Use 'write stage' to type email id and password into Facebook site.
Click on Login button using Navigate Stage.
We are not getting the Click Actions in Navigate Stage.
So, go to Application Modeller and change the Login Element type to button.
Here, we are using the wait stage to load the site before launching the website.
Now login to Facebook site.
To logout from account, we need to prepare the element in Application Modeller.
Spy the required elements, first check what are the elements required for logout.
Then, we need to spy the arrow and sign-out option.
Use Navigate stage to click on arrow and click on logout.
After login button the site will take some time to load Account information. It depends on our network mean internet speed.
After login use conditional wait to hold the bold until the logout arrow will exists.
Working with Windows Applications and Multiple Windows
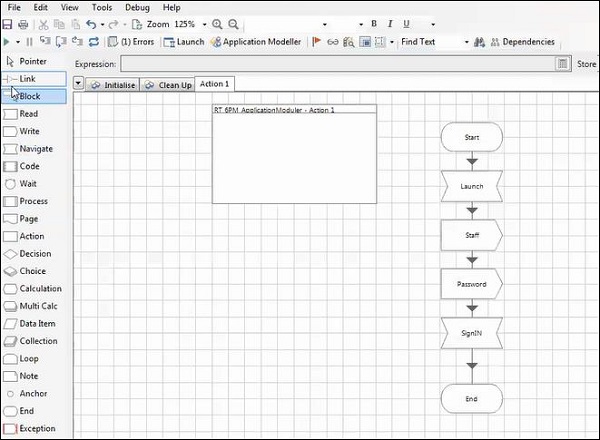
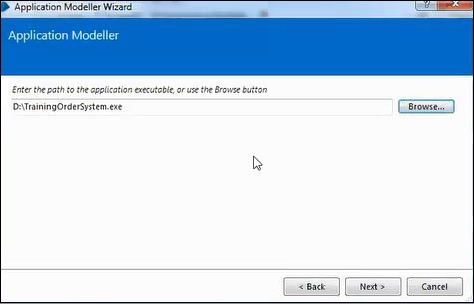
We shall learn how to automate the training order system with the step-wise procedure given below. The screenshots given in the subsequent sections help you understand the process clearly.
Step 1 − Create the business object.
Step 2 − Configure the Application modeller.
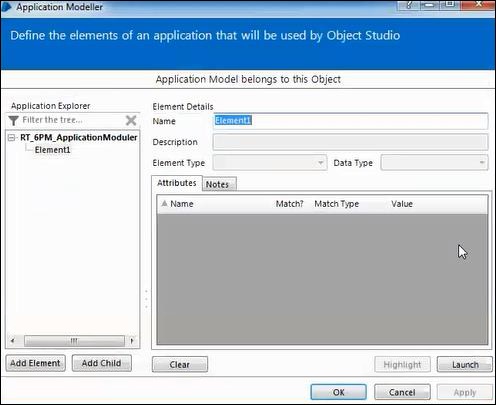
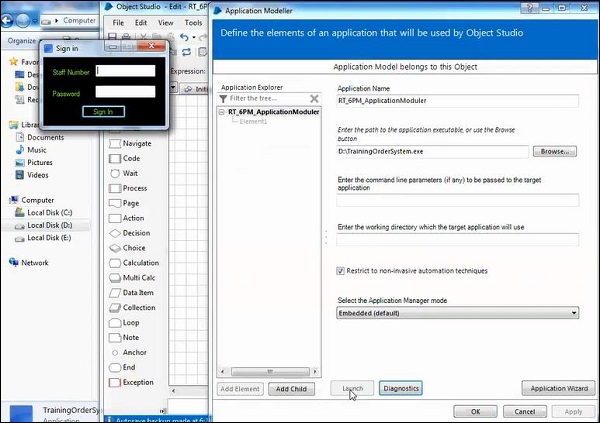
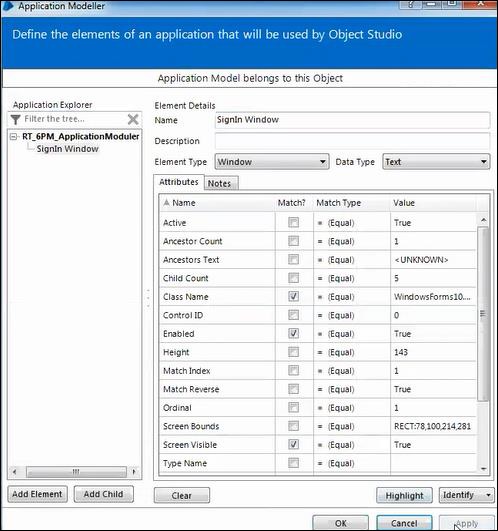
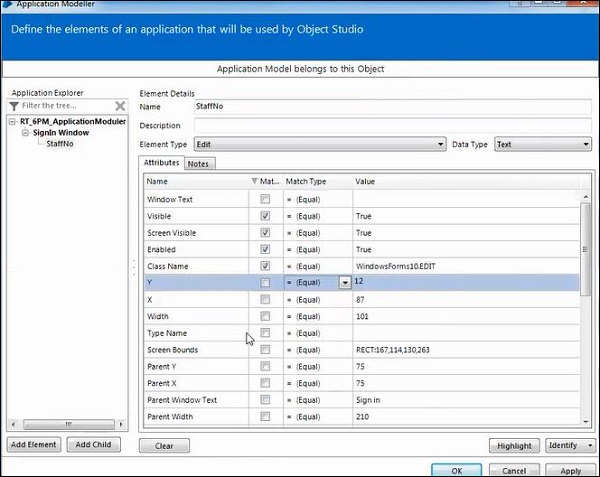
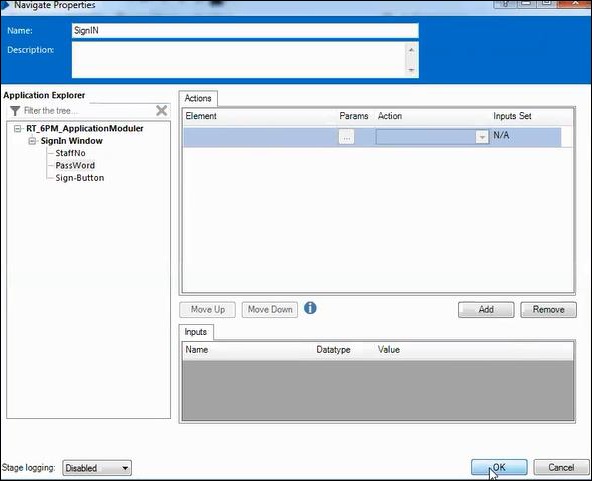
Step 3 − Spying the Sign in window.
Use Ctrl+Left to highlight the element, and ordinal element is used to Unique Identification.
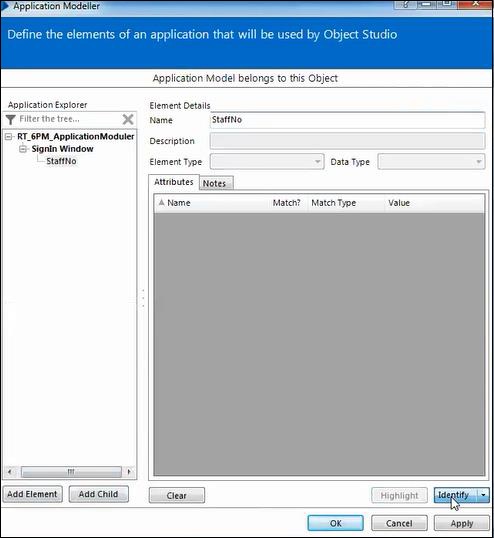
Step 4 − Spying the staff number.
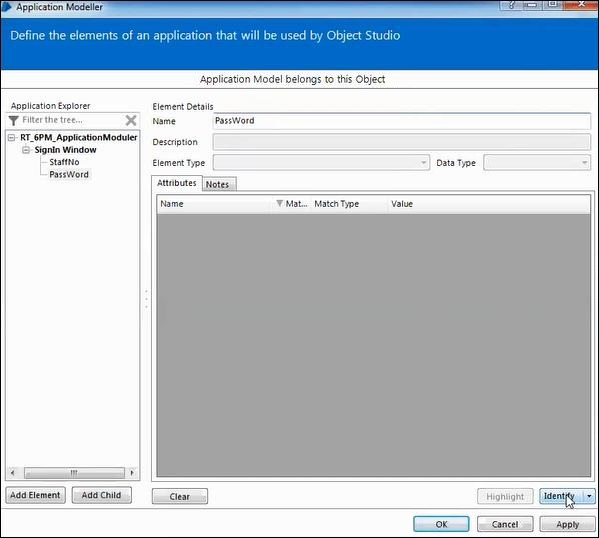
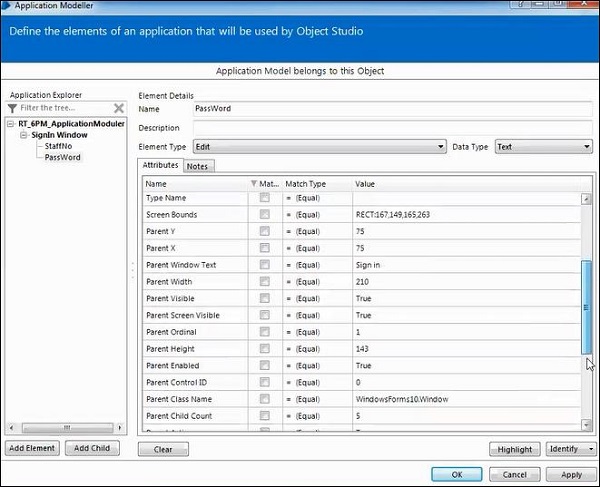
Step 5 − Spying the password.
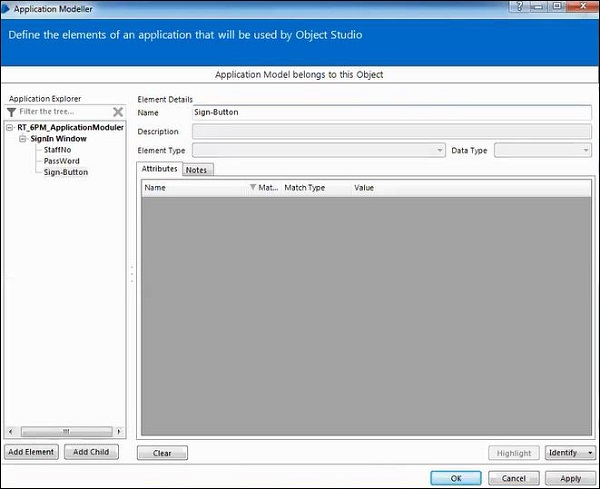
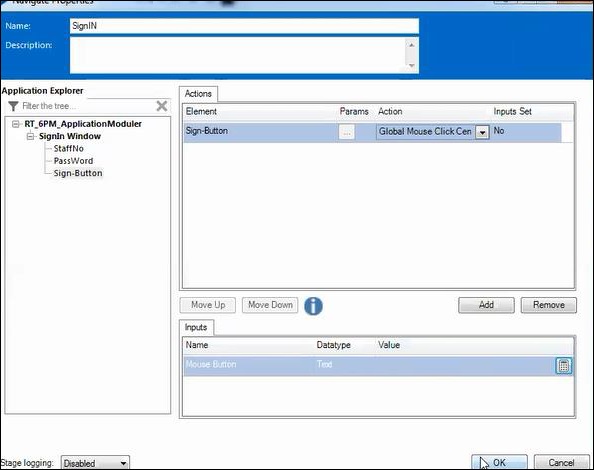
Step 6 − Spying the sign in button.
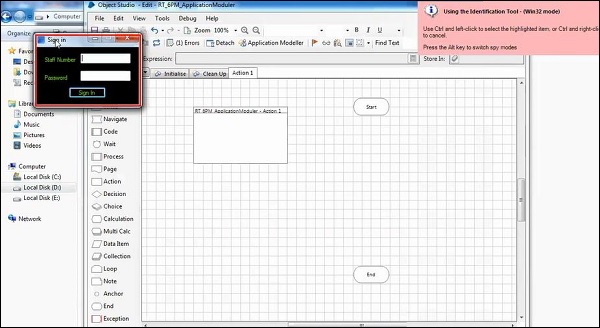
Now we start the implementation part.
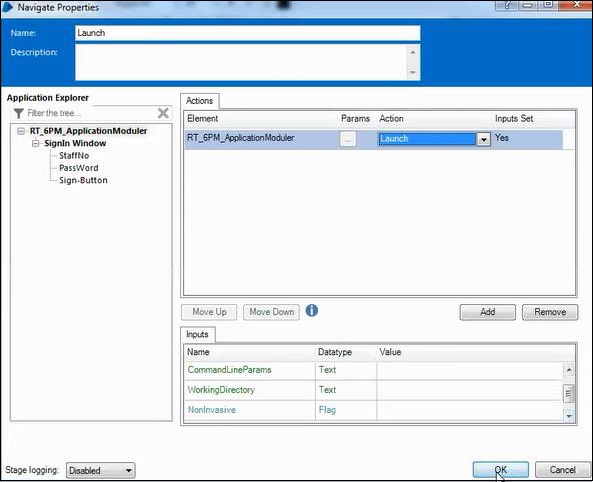
Step 7 − Using the Navigation stage to launch the application.
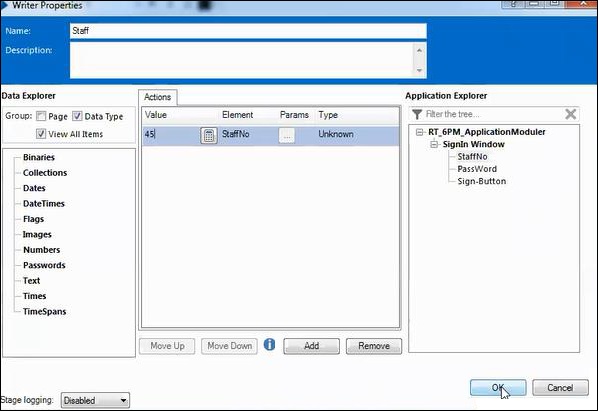
Step 8 − Using write stage to configure the staff number.
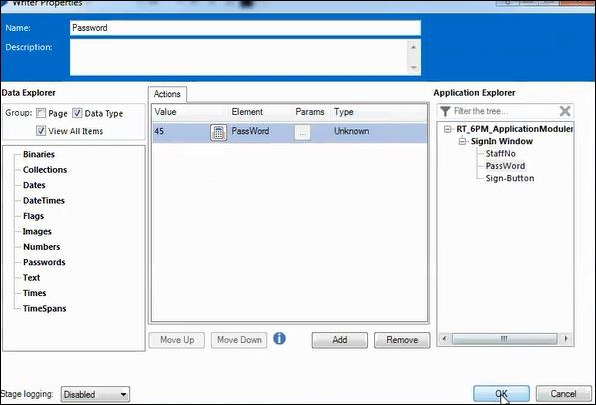
Step 9 − Using another write stage to configure the Password.
Step 10 − Using Navigate stage to Sign IN.
Step 11 − Link the process.