- AWS ElastiCache Tutorial
- Home
- Overview
- Environment
- Interfaces
- Launching Cluster
- Viewing Cluster Details
- Cluster Endpoints
- Accessing Cluster
- Modifying Cluster
- Rebooting Cluster
- Adding Nodes
- Removing Nodes
- Scaling the Clusters
- Delete Cluster
- Redis Shards
- Parameter Group
- Listing Parameters
- Deleting Parameters
- Engine Parameters
- Backup and Restore
- Monitoring Node - Metrics
- Memcached & Redis
- Accessing Memcached Cluster
- Lazy Loading
- Write Through
- Add TTL
- Memcached VPC
- Creating Memcached Cluster
- Connecting to Cluster in VPC
- Delete Memcached Cluster
- IAM policies
- SNS Notifications
- Events
- Managing Tags
- Managing Costs
- AWS ElastiCache - Resources
- Quick Guide
- Useful Resources
- Discussion
AWS ElastiCache - Launching Cluster
A Redis cluster is a logical grouping of one or more ElastiCache shards. Data is partitioned across the shards in a Redis cluster. But you can also run Redis with the cluster mode enabled or disabled. With cluster mode disabled, we call it a standalone Redis cluster. With cluster mode enabled, it is called Redis cluster with multiple shards.
Before we start creating the cluster, we need to finalize the requirements for the cluster which will help us configure the cluster while creating it. The factors that needs to be decided for this step are as below.
Memory − The total memory you need to hold the data in cache.
Version − The version of Redis you need to run. As different versions have some feature differences which you may need in your application.
Write Efficiency − If your application needs to write new data or update existing data frequently, then you needs significantly higher amount of memory allocation.
Cluster mode − Whether it is a standalone cluster or a cluster with Shards.
In this chapter we are creating a standalone Redis cluster. Below are the steps to create such a cluster.
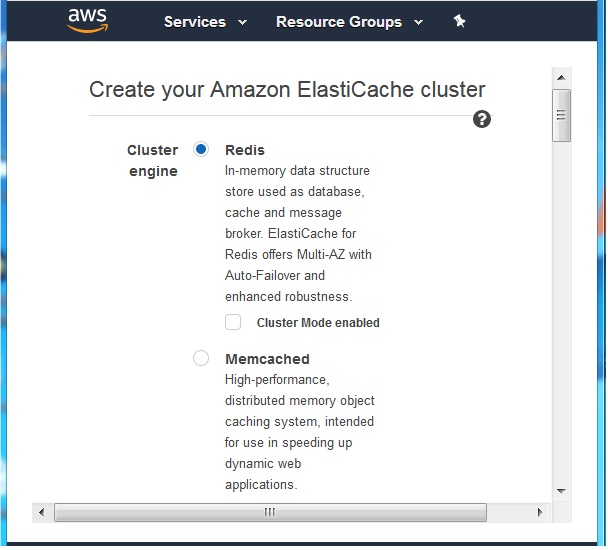
Choose Cluster Type
After your login to your Amazon account, navigate to the ElastiCache home page and choose create ElastiCache cluster. The below screen pops-up which needs us to select the cluster engine. We choose Redis as shown below.
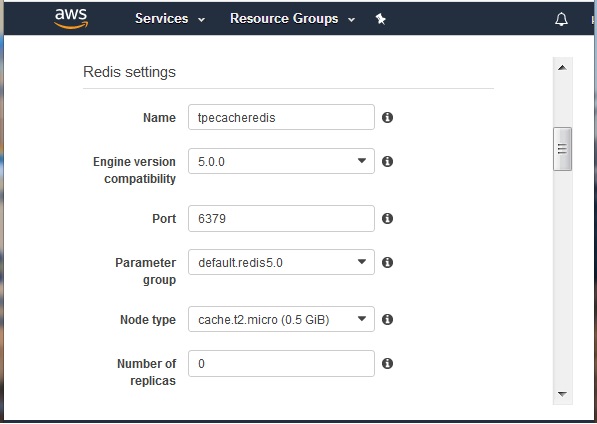
Redis Settings
Next, we choose the settings to select the Redis engine version, Node type et. The important points in this step is to select the correct engine version and the node type which will decide the type of computing power you are utilising for the cluster and hence the cost. The port number in this step is the default value of 6379 that is assigned by the platform. The below diagram shows the inputs.
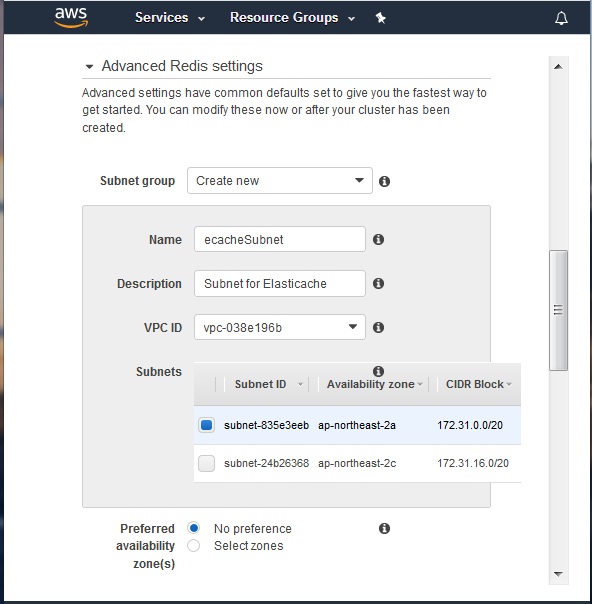
Advanced Redis Settings
The advanced Redis settings step asks for the details like the VPC and the subnet we are going to use for this cluster. We choose one of the existing VPC ID ID we have already created in the AWS account. We choose one of the subnets from one of the availability zones.
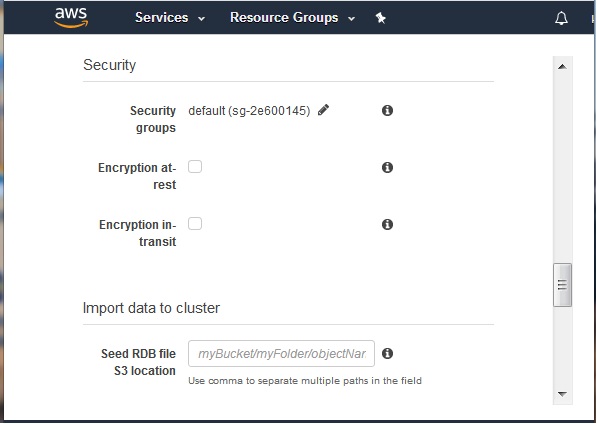
Security Group
In the next step we are required to select the security group and encryption options. For our purpose we choose the default security group and leave the encryptions options blank.
Backup Configuration
In this step we choose how and when to do backup of the cache cluster. There is a option to enable the automatic backup in which case the platform will carry out backup without any user intervention. We can aslo suggest a maintenance window where we specify the exact timings of the backup. We can aslo leave the maintenance window without any preference. We also have option to set up SNS notification in this step. We will leave it blank in this step.
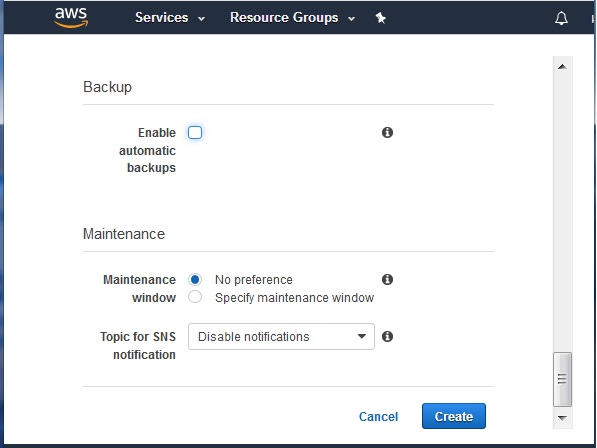
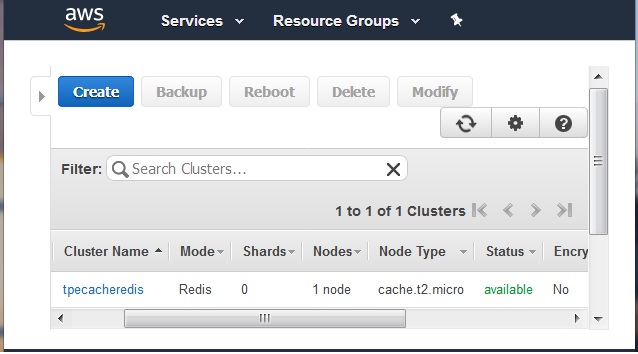
At the end of this step we click the create button so that the creation of the cluster begins will the configurations we have set above.
The below diagram shows the status of the cluster as available after few minutes.