- Aurelia Tutorial
- Aurelia - Home
- Aurelia - Overview
- Aurelia - Environment Setup
- Aurelia - First Application
- Aurelia - Components
- Aurelia - Component Lifecycle
- Aurelia - Custom Elements
- Aurelia - Dependency Injections
- Aurelia - Configuration
- Aurelia - Plugins
- Aurelia - Data Binding
- Aurelia - Binding Behavior
- Aurelia - Converters
- Aurelia - Events
- Aurelia - Event Aggregator
- Aurelia - Forms
- Aurelia - HTTP
- Aurelia - Refs
- Aurelia - Routing
- Aurelia - History
- Aurelia - Animations
- Aurelia - Dialog
- Aurelia - Localization
- Aurelia - Tools
- Aurelia - Bundling
- Aurelia - Debugging
- Aurelia - Community
- Aurelia - Best Practices
- Aurelia Useful Resources
- Aurelia - Quick Guide
- Aurelia - Useful Resources
- Aurelia - Discussion
Aurelia - Quick Guide
Aurelia - Overview
The best definition of the framework can be found in Aurelia official docs −
Well, it's actually simple. Aurelia is just JavaScript. However, it's not yesterday's JavaScript, but the JavaScript of tomorrow. By using modern tooling we've been able to write Aurelia from the ground up in ECMAScript 2016. This means we have native modules, classes, decorators and more at our disposal...and you have them too.
Not only is Aurelia written in modern and future JavaScript, but it also takes a modern approach to architecture. In the past, frameworks have been monolithic beasts. Not Aurelia though. It's built as a series of collaborating libraries. Taken together, they form a powerful and robust framework for building Single Page Apps (SPAs). However, Aurelia's libraries can often be used individually, in traditional web sites or even on the server-side through technologies such as NodeJS.
Aurelia - Features
Components − Components are building blocks of Aurelia framework. It is composed of HTML view and JavaScript view-model pairs.
Web Standards − This is one of the cleanest modern frameworks, completely focused on web standards without unnecessary abstractions.
Extensible − The framework offers an easy way to integrate with the other needed tools.
Commercial Support − Aurelia offers commercial and enterprise support. It is an official product of Durandal Inc.
License − Aurelia is open sourced and licensed under MIT license.
Aurelia - Advantages
Aurelia is very clean. If you follow the frameworks conventions, you can focus on your app without the framework getting in your way.
It is also easily extensible. You can add or remove any tools that the framework offers and you can also add any other tools that aren't part of the framework.
Aurelia is very easy to work with. It is directed towards developers’ experience. It saves you lots of time.
The framework itself is directed towards web standards so you will always stay up to date with modern concepts.
Aurelia doesn’t have the largest community out there, but it is very agile, knowledgeable and willing to help within short notice.
Limitations
There are no major limitations. The Framework is powerful and easy to work with.
Aurelia - Environment Setup
In this chapter, you will learn how to get started with Aurelia framework. Before you do that, you will need NodeJS installed on your system.
| Sr.No | Software & Description |
|---|---|
| 1 |
NodeJS and NPM NodeJS is the platform needed for Aurelia development. Checkout our NodeJS Environment Setup. |
Step 1 - Download Aurelia Package
Before we download Aurelia package, let's create a folder on desktop where our app will be placed.
C:\Users\username\Desktop>mkdir aureliaApp
Now we can download the package from official Aurelia website.
Aurelia supports ES2016 and TypeScript. We will use ES2016. Extract the downloaded files inside the aureliaApp folder that we created above.
Step 2 - Install the Web Server
First we need to install the web server from command prompt window.
C:\Users\username\Desktop\aureliaApp>npm install http-server -g
Step 3 - Start the Web Server
To start the web server, we need to run the following code in command prompt.
C:\Users\username\Desktop\aureliaApp>http-server -o -c-1
We can see our first Aurelia app in the browser.
Aurelia - First Application
In this chapter, we will explain Aurelia starting app created in our last chapter. We will also guide you through the folder structure, so you can grasp the core concepts behind Aurelia framework.
Folder Structure
package.json represents documentation about npm packages installed. It also shows the version of those packages and provides an easy way to add, delete, change version or automatically install all packages when the app needs to be shared between developers.
index.html is the default page of the app like in most of the HTML based apps. It is a place where scripts and stylesheets are loaded.
config.js is Aurelia loader configuration file. You will not spend much time working with this file.
jspm_packages is the directory for the SystemJS loaded modules.
styles is the default styling directory. You can always change the place where you keep your styling files.
src folder is a place where you will spend most of your development time. It keeps HTML and js files.
Source Files
As we already stated, the src directory is the place where your app logic will be held. If you look at the default app you can see that app.js and app.html are very simple.
Aurelia allows us to use JavaScript core language for class definitions. Following default example shows EC6 class.
app.js
export class App {
   message = 'Welcome to Aurelia!';
}
The message property is bound to the HTML template using ${message}syntax. This syntax represents one-way binding converted into string and showed inside the template view.
app.html
<template>
   <h1>${message}</h1>
</template>
As we already discussed in the last chapter, we can start the server by running the following command in the command prompt window.
C:\Users\username\Desktop\aureliaApp>http-server -o -c-1
Application will be rendered on the screen.
Aurelia - Components
Components are the main building blocks of Aurelia framework. In this chapter, you will learn how to create simple components.
Simple Component
As already discussed in the previous chapter, each component contains view-model which is written in JavaScript, and view written in HTML. You can see the following view-model definition. It is an ES6 example but you can also use TypeScript.
app.js
export class MyComponent {
   header = "This is Header";
   content = "This is content";
}
We can bind our values to the view as shown in the following example. ${header}syntax will bind the defined header value from MyComponent. The same concept is applied for content.
app.html
<template>
   <h1>${header}</h1>
   <p>${content}</p>
</template>
The above code will produce the following output.
Component Functions
If you want to update the header and footer when the user clicks the button, you can use the following example. This time we are defining header and footer inside EC6 class constructor.
app.js
export class App{
constructor() {
this.header = 'This is Header';
this.content = 'This is content';
}
updateContent() {
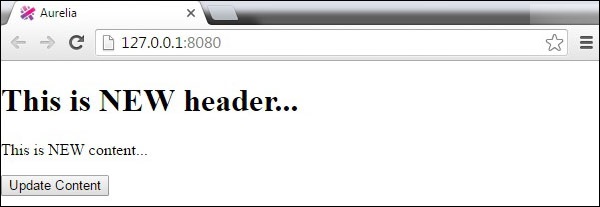
this.header = 'This is NEW header...'
this.content = 'This is NEW content...';
}
}
We can add click.delegate() to connect updateContent() function with the button. More on this in one of our subsequent chapters.
app.html
<template>
   <h1>${header}</h1>
   <p>${content}</p>
   <button click.delegate = "updateContent()">Update Content</button>
</template>
When the button is clicked, the header and content will be updated.
Aurelia - Component Lifecycle
Aurelia uses component lifecycle methods to manipulate the component lifecycle. In this chapter, we will show you those methods and explain the component lifecycle.
constructor() − Constructor method is used for initializing an object created with a class. This method is called first. If you don't specify this method, the default constructor will be used.
created(owningView, myView) − This is called once the view and view-model are created and connected to the controller. This method takes two arguments. The first one is the view where the component is declared (owningView). The second one is the component view (myView).
bind(bindingContext, overrideContext) − At this point of time, the binding has started. The first argument represents the binding context of the component. The second one is overrideContext. This argument is used for adding additional contextual properties.
attached() − Attached method is invoked once the component is attached to the DOM.
detached() − This method is opposite to attached. It is invoked when the component is removed from the DOM.
unbind() − The last lifecycle method is unbind. It is called when the component is unbound.
The lifecycle methods are useful when you want to have higher control over your component. You can use them when you need to trigger some functionalities at certain point of component lifecycle.
All lifecycle methods are shown below.
app.js
export class App {
   constructor(argument) {
      // Create and initialize your class object here...
   }

   created(owningView, myView) {
      // Invoked once the component is created...
   }

   bind(bindingContext, overrideContext) {
      // Invoked once the databinding is activated...
   }

   attached(argument) {
      // Invoked once the component is attached to the DOM...
   }

   detached(argument) {
      // Invoked when component is detached from the dom
   }

   unbind(argument) {
      // Invoked when component is unbound...
   }
}
Aurelia - Custom Elements
Aurelia offers a way to add components dynamically. You can reuse a single component on different parts of your app without the need to include HTML multiple times. In this chapter, you will learn how to achieve this.
Step 1 - Create the Custom Component
Let's create new components directory inside src folder.
C:\Users\username\Desktop\aureliaApp\src>mkdir components
Inside this directory, we will create custom-component.html. This component will be inserted later in the HTML page.
custom-component.html
<template>
   <p>This is some text from dynamic component...</p>
</template>
Step 2 - Create the Main Component
We will create simple component in app.js. It will be used to render header and footer text on screen.
app.js
export class MyComponent {
   header = "This is Header";
   content = "This is content";
}
Step 3 - Add the Custom Component
Inside our app.html file, we need to require the custom-component.html to be able to insert it dynamically. Once we do that, we can add a new element custom-component.
app.html
<template>
   <require from = "./components/custom-component.html"></require>

   <h1>${header}</h1>
   <p>${content}</p>
   <custom-component></custom-component>
</template>
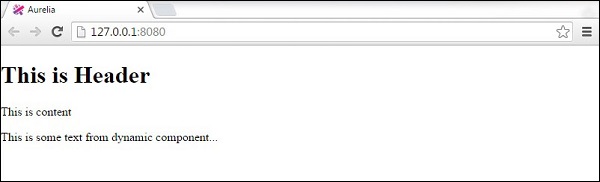
Following is the output. Header and Footer text is rendered from myComponent inside app.js. The additional text is rendered from the custom-component.js.
Aurelia - Dependency Injections
In this chapter, you will learn how to use Aurelia dependency injection library.
First, we need to create new file dependency-test.js inside src folder. In this file, we will create a simple class DependencyTest. This class will be later injected as a dependency.
src/dependency-test.js
export class DependencyTest {
   constructor() {
      this.test = "Test is succesfull!!!";
   }
}
Inject
In our app.js file, we are importing inject library and DependencyTest class that we created above. To inject the class we are using @inject() function. Our App class will just log it to the developer console.
import {inject} from 'aurelia-framework';
import {DependencyTest} from './dependency-test';

@inject(DependencyTest)

export class App {
   constructor(DependencyTest) {
      console.log(DependencyTest);
   }
}
We can check the console to see that the DependencyTest class is injected.

There will more examples of Aurelia dependency injection in the next chapters.
Aurelia - Configuration
In this chapter, we will show you how to configure Aurelia framework for your needs. Sometimes you will need to set an initial configuration or run some code before the app is rendered to the users.
Step 1 - Create main.js
Let's create main.js file inside src folder. Inside this file we will configure Aurelia.
You also need to tell Aurelia to load configuration module. You can see the commented part in the following example.
index.html
<!DOCTYPE html>
<html>
   <head>
      <title>Aurelia</title>
      <link rel = "stylesheet" href = "styles/styles.css">
      <meta name = "viewport" content = "width=device-width, initial-scale = 1">
   </head>

   <body aurelia-app = "main">
      <!--Add "main" value to "aurelia-app" attribute... -->
      <script src = "jspm_packages/system.js"></script>
      <script src = "config.js"></script>

      <script>
         SystemJS.import('aurelia-bootstrapper');
      </script>
   </body>
</html>
Step 2 - Default Configuration
The code below shows how to use default configuration. configure function allows to set the configuration manually. We are setting use property to specify what we need.
main.js
export function configure(aurelia) {
   aurelia.use
   .standardConfiguration()
   .developmentLogging();

   aurelia.start().then(() => aurelia.setRoot());
}
Step 3 - Advanced Configuration
There are lots of configuration options we could use. It is out of the scope of this article to show you all of it so we will explain how the configuration works on the following example. We are basically telling Aurelia to use default data binding language, default resources, development logging, router, history and event aggregator. These are standard set of plugins.
export function configure(aurelia) {
   aurelia.use
   .defaultBindingLanguage()
   .defaultResources()
   .developmentLogging()
   .router()
   .history()
   .eventAggregator();

   aurelia.start().then(() => aurelia.setRoot());
}
Note − These settings will be explained in detail in the next chapter.
Aurelia - Plugins
When you start building your app, most of the time you will want to use some additional plugins. In this chapter, you will learn how to use plugins in Aurelia framework.
Standard Plugins
In the last chapter, we saw how to use default configuration in Aurelia framework. If you are using default configuration, standard set of plugins will be available.
defaultBindingLanguage() − This plugin offers an easy way to connect view-model with view. You already saw one-way data-binding syntax (${someValue}). Even though you could use some other binding language, it is a recommended practice to use default binding language.
defaultResources() − Default resources give us some primitive constructs such as if, repeat, compose, etc. You can even build these constructs on your own, but since they are so commonly used, Aurelia already created it inside this library.
Router() − Most of the applications use some kind of routing. Hence, Router is a part of the standard plugins. You can check more about routing in a subsequent chapter.
History() − History plugin is usually used together with router.
eventAggregator() − This plugin is used for cross-component communication. It handles publishing and subscribing to messages or channels inside your app.
Official Plugins
These plugins aren't part of the default configuration but are frequently used.
fetch() − Fetch plugin is used for handling HTTP requests. You can use some other AJAX library if you want.
animatorCSS() − This plugin offers a way of handling CSS animations.
animator-velocity() − Instead of CSS animations, you can use Velocity animation library. These plugins enable us to use Velocity inside Aurelia apps.
dialog() − Dialog plugin offers a highly customizable modal window.
i18n() − This is the plugin for internalization and localization.
ui-virtualization() − Virtualization is a useful library for handling large performance heavy UI tasks.
validation() − Use this plugin when you need to validate your data.
All plugins explained above are officially maintained by the Aurelia Core Team at the moment of writing this tutorial. There will be some other useful plugins added in future. Following example shows how to configure your app to use plugins.
Installing Plugins
If, for example, we want to use animator-css and animator-velocity, we need to install it first.
C:\Users\username\Desktop\aureliaApp>jspm install aurelia-animator-css
C:\Users\username\Desktop\aureliaApp>jspm install aurelia-animator-velocity
In the last chapter, you learnt how to use manual configuration. We can add our plugins in main.js file.
main.js
export function configure(aurelia) {
   aurelia.use
   .defaultBindingLanguage()
   .defaultResources()
   .developmentLogging()
   .router()
   .history()
   .eventAggregator()
   .plugin('aurelia-animatorCSS')
   .plugin('aurelia-animator-velocity')

   aurelia.start().then(() => aurelia.setRoot());
}
Aurelia - Data Binding
Aurelia has its own data-binding system. In this chapter, you will learn how to bind data with Aurelia, and also explain the different binding mechanics.
Simple Binding
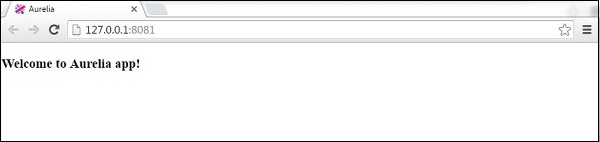
You already saw simple binding in some of our previous chapters. ${...}syntax is used to link veiw-model and view.
app.js
export class App {
   constructor() {
      this.myData = 'Welcome to Aurelia app!';
   }
}
app.html
<template>
   <h3>${myData}</h3>
</template>
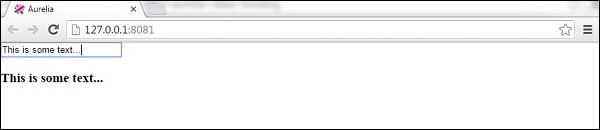
Two-Way Binding
The beauty of Aurelia is in its simplicity. The two-way data binding is automatically set, when we bind to input fields
app.js
export class App {
   constructor() {
      this.myData = 'Enter some text!';
   }
}
app.html
<template>
   <input id = "name" type = "text" value.bind = "myData" />
   <h3>${myData}</h3>
</template>
Now, we have our view-model and view linked. Whenever we enter some text inside the input field, the view will be updated.
Aurelia - Binding Behavior
In this chapter, you will learn how to use behaviors. You can think of binding behavior as a filter that can change the binding data and display it in a different format.
Throttle
This behavior is used to set how often should some binding update take place. We can use throttle to slow down the rate of updating input view-model. Consider the example from the last chapter. The default rate is 200 ms. We can change that to 2 sec by adding & throttle:2000 to our input.
app.js
export class App {
   constructor() {
      this.myData = 'Enter some text!';
   }
}
app.html
<template>
   <input id = "name" type = "text" value.bind = "myData & throttle:2000" />
   <h3>${myData}</h3>
</template>
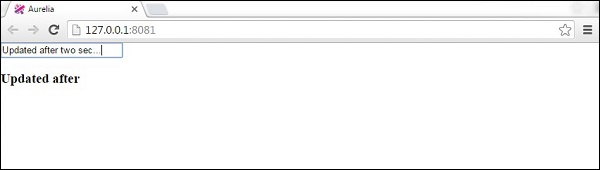
Debounce
debounce is almost the same as throttle. The difference being, debounce will update the binding after the user has stopped typing. The following example will update the binding if the user stops typing for two seconds.
app.js
export class App {
   constructor() {
      this.myData = 'Enter some text!';
   }
}
app.html
<template>
   <input id = "name" type = "text" value.bind = "myData & debounce:2000" />
   <h3>${myData}</h3>
</template>
oneTime
oneTime is the most efficient behavior performance wise. You should always use it when you know that data should be bound only once.
app.js
export class App {
   constructor() {
      this.myData = 'Enter some text!';
   }
}
app.html
<template>
   <input id = "name" type = "text" value.bind = "myData & oneTime" />
   <h3>${myData}</h3>
</template>
The above example will bind the text to the view. However, if we change the default text, nothing will happen since it is bound only once.
Aurelia - Converters
If you need to convert some values in Aurelia app, you can use converters instead of manually converting values to a desired format.
Convert Date
When we want to convert the default date value to some specific format, we can use momentJS library. This is a small library used for manipulating dates.
C:\Users\username\Desktop\aureliaApp>jspm install moment
Let's create a new file converters.js. We will use this file to add converter specific code. Use the following command or create the file manually.
C:\Users\username\Desktop\aureliaApp>touch converters.js
converter.js
Inside this file, we will import moment library and set DateFormatValueConverter to return only month, day and year values without additional data. Important thing to note is that Aurelia can recognize any class that ends with ValueConverter. This is why our class name is DateFormatValueConverter. This class will be registered as dateFormat and we can later use it inside view.
converters.js
import moment from 'moment';

export class DateFormatValueConverter {
   toView(value) {
      return moment(value).format('M/D/YYYY');
   }
}
In app.js, we will just use the current date. This will be our view-model.
app.js
export class App {
   constructor() {
      this.currentDate = new Date();
   }
}
We already discussed require in custom-elements chapter. The pipe symbol | is used to apply the converter. We are only using dateFormat since this is how Aurelia is registering DateFormatValueConverter.
app.html
<template>
   <require from = "./converters"></require>

   <h3>${currentDate | dateFormat}</h3>
</template>

Convert Currency
This is an example of currency formatting. You will notice that the concept is the same as in the above example. First, we need to install numeral library from the command prompt.
C:\Users\username\Desktop\aureliaApp>jspm install numeral
The Converter will set the currency format.
converters.js
import numeral from 'numeral';

export class CurrencyFormatValueConverter {
   toView(value) {
      return numeral(value).format('($0,0.00)');
   }
}
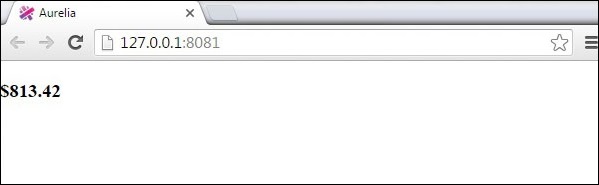
View-model will just generate a random number. We will use this as currency value and update it every second.
app.js
export class App {
   constructor() {
      this.update();
      setInterval(() => this.update(), 1000);
   }
   update() {
      this.myCurrency = Math.random() * 1000;
   }
}
Our view will show the randomly generated number transformed as a currency.
app.html
<template>
   <require from = "./converters"></require>

   <h3>${myCurrency | currencyFormat}</h3>
</template>
Aurelia - Events
In this chapter, you will learn about Aurelia events.
Event Delegate
Even delegation is a useful concept where the event handler is attached to one top level element instead of multiple elements on the DOM. This will improve the application memory efficiency and should be used whenever possible.
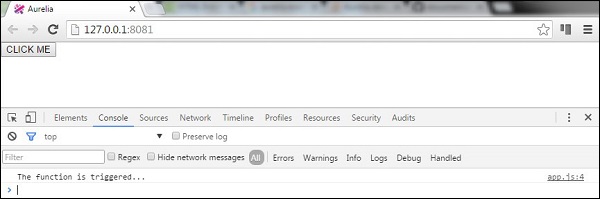
This is a simple example of using event delegation with Aurelia framework. Our view will have a button with click.delegate event attached.
app.html
<template>
   <button click.delegate = "myFunction()">CLICK ME</button>
</template>
Once the button is clicked, myFunction() will be called.
app.js
export class App {
   myFunction() {
      console.log('The function is triggered...');
   }
}
We will get the following output.
Event Trigger
There are some cases when you can't use delegation. Some JavaScript events don’t support delegation; IOS supports it for some elements. To find out which events allow delegation, you can search for a bubble property of any event here. In these cases, you can use trigger() method.
The same functionality from the above example can be created with click.trigger.
app.html
<template>
   <button click.trigger = "myFunction()">CLICK ME</button>
</template>
app.js
export class App {
   myFunction() {
      console.log('The function is triggered...');
   }
}
Aurelia - Event Aggregator
Event aggregator should be used when your events need to be attached to more listeners or when you need to observe some functionality of your app and wait for the data update.
Aurelia event aggregator has three methods. The publish method will fire off events and can be used by multiple subscribers. For subscribing to an event, we can use the subscribe method. And finally, we can use the dispose method to detach the subscribers. The following example demonstrates this.
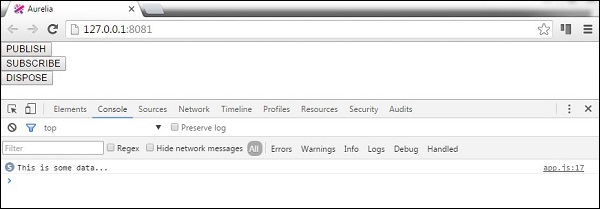
Our view will just have three buttons for each of the three functionalities.
app.html
<template>
   <button click.delegate = "publish()">PUBLISH</button><br/>
   <button click.delegate = "subscribe()">SUBSCRIBE</button><br/>
   <button click.delegate = "dispose()">DISPOSE</button>
</template>
We need to import eventAggregator and inject it before we are able to use it.
app.js
import {inject} from 'aurelia-framework';
import {EventAggregator} from 'aurelia-event-aggregator';

@inject(EventAggregator)
export class App {
   constructor(eventAggregator) {
      this.eventAggregator = eventAggregator;
   }
   publish() {
      var payload = 'This is some data...';
      this.eventAggregator.publish('myEventName', payload);
   }
   subscribe() {
      this.subscriber = this.eventAggregator.subscribe('myEventName', payload => {
         console.log(payload);
      });
   }
   dispose() {
      this.subscriber.dispose();
      console.log('Disposed!!!');
   }
}
We need to click the SUBSCRIBE button to listen for data that will be published in future. Once the subscriber is attached, whenever new data is sent, the console will log it. If we click the PUBLISH button five times, we will see that it is logged every time.
We can also detach our subscriber by clicking the DISPOSE button.
Aurelia - Forms
In this chapter, you will learn how to use forms in Aurelia framework.
Text Input
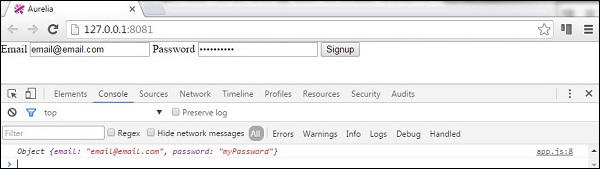
First, we will see how to submit an input form. The view will have two input forms for username and password. We will use value.bind for data binding.
app.html
<template>
   <form role = "form" submit.delegate = "signup()">

      <label for = "email">Email</label>
      <input type = "text" value.bind = "email" placeholder = "Email">

      <label for = "password">Password</label>
      <input type = "password" value.bind = "password" placeholder = "Password">

      <button type = "submit">Signup</button>
   </form>
</template>
The signup function will just take the username and password values from the inputs and log it in the developer’s console.
export class App {
   email = '';
   password = '';

   signup() {
      var myUser = { email: this.email, password: this.password }
      console.log(myUser);
   };
}
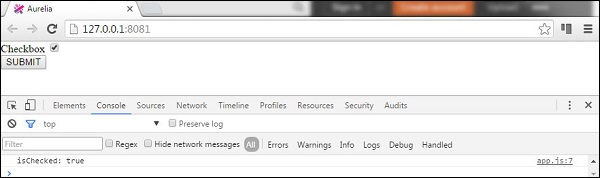
Checkbox
The following example will demonstrate how to submit a checkbox with Aurelia framework. We will create one checkbox and bind the checked value to our view-model.
app.html
<template>
   <form role = "form" submit.delegate = "submit()">

      <label for = "checkbox">Checkbox</label>
      <input type = "checkbox" id = "checkbox" checked.bind = "isChecked"><br/>
      <button type = "submit">SUBMIT</button>

   </form>
</template>
Form submitting will just log the checked value in the console.
app.js
export class App  {
   constructor() {
      this.isChecked = false;
   }
   submit() {
      console.log("isChecked: " + this.isChecked);
   }
}
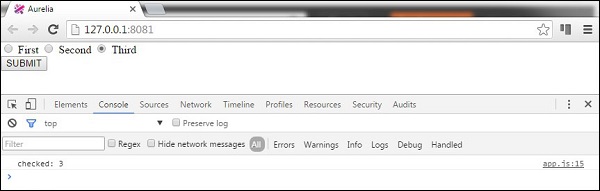
Radio Buttons
The following example will demonstrate how to submit radio buttons. The syntax repeat.for = "option of options" will repeat through an array of objects and create a radio button for each object. This is a neat way of dynamically creating elements in Aurelia framework. Rest is the same as in the previous examples. We are binding the model and the checked values.
app.html
<template>
   <form role = "form" submit.delegate = "submit()">

      <label repeat.for = "option of options">
         <input type = "radio" name = "myOptions"
            model.bind = "option" checked.bind = "$parent.selectedOption"/>
            ${option.text}
      </label>
      <br/>

      <button type = "submit">SUBMIT</button>
   </form>
</template>
In our view-model, we will create an array of objects this.options and specify that the first radio button is checked. Again, the SUBMIT button will just log in the console which radio button is checked.
app.js
export class PeriodPanel {
   options = [];
   selectedOption = {};

   constructor() {
      this.options = [
         {id:1, text:'First'},
         {id:2, text:'Second'},
         {id:3, text:'Third'}
      ];
      this.selectedOption = this.options[0];
   }
   submit() {
      console.log('checked: ' + this.selectedOption.id);
   }
}
If we check the third radio button and submit our form, the console will show it.
Aurelia - HTTP
In this chapter, you will learn how to work with HTTP requests in Aurelia framework.
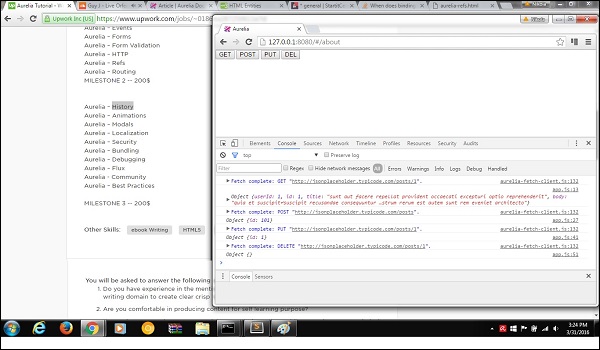
Step 1 - Create a View
Let's create four buttons that will be used for sending requests to our API.
app.html
<template>
   <button click.delegate = "getData()">GET</button>
   <button click.delegate = "postData()">POST</button>
   <button click.delegate = "updateData()">PUT</button>
   <button click.delegate = "deleteData()">DEL</button>
</template>
Step 2 - Create a View-model
For sending requests to the server, Aurelia recommends fetch client. We are creating functions for every requests we need (GET, POST, PUT and DELETE).
import 'fetch';
import {HttpClient, json} from 'aurelia-fetch-client';

let httpClient = new HttpClient();

export class App {
   getData() {
      httpClient.fetch('http://jsonplaceholder.typicode.com/posts/1')
      .then(response => response.json())
      .then(data => {
         console.log(data);
      });
   }
   myPostData = {
      id: 101
   }
	postData(myPostData) {
      httpClient.fetch('http://jsonplaceholder.typicode.com/posts', {
         method: "POST",
         body: JSON.stringify(myPostData)
      })

      .then(response => response.json())
      .then(data => {
         console.log(data);
      });
   }
   myUpdateData = {
      id: 1
   }
	updateData(myUpdateData) {
      httpClient.fetch('http://jsonplaceholder.typicode.com/posts/1', {
         method: "PUT",
         body: JSON.stringify(myUpdateData)
      })

      .then(response => response.json())
      .then(data => {
         console.log(data);
      });
   }
   deleteData() {
      httpClient.fetch('http://jsonplaceholder.typicode.com/posts/1', {
         method: "DELETE"
      })
      .then(response => response.json())
      .then(data => {
         console.log(data);
      });
   }
}
We can run the app and click GET, POST, PUT and DEL buttons, respectively. We can see in the console that every request is successful, and the result is logged.
Aurelia - Refs
In this chapter, you will see some simple examples of Aurelia refs. You can use it to create a reference to a particular object. You can create a reference to elements or attributes, as seen in the following table.
Reference Table
| Sr.No | Example & Description |
|---|---|
| 1 |
ref = "myRef" Used for creating a reference to DOM element. |
| 2 |
attribute-name.ref = "myRef" Used for creating a reference to custom attribute's view-model. |
| 3 |
view-model.ref = "myRef Used for creating a reference to custom element's view-model. |
| 4 |
view.ref = "myRef" Used for creating a reference to custom elements view instance. |
| 5 |
rcontroller.ref = "myRef" Used for creating a reference to custom element's controller instance. |
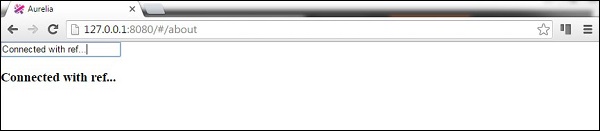
In the following example, we will create a reference to the input element. We will use the default class syntax as a view-model.
app.js
export class App { }
We are creating a reference to the input element by adding the ref = "name" attribute.
app.html
<template>
   <input type = "text" ref = "name"><br/>
   <h3>${name.value}</h3>
</template>
When we run the app, we will see that the text entered into the input field is rendered on the screen.
Aurelia - Routing
Routing is an important part of every application. In this chapter, you will learn how to use the router in Aurelia framework.
Step 1 - Create Pages
We have already created a components folder in one of the former chapters. If you don't have it created already, you should place it inside the src folder.
C:\Users\username\Desktop\aureliaApp\src>mkdir components
Inside this folder, we will create home and about directories.
C:\Users\username\Desktop\aureliaApp\src\components>mkdir home
C:\Users\username\Desktop\aureliaApp\src\components>mkdir about
Inside the home folder, we need to create view and view-model files.
C:\Users\username\Desktop\aureliaApp\src\components\home>touch home.js
C:\Users\username\Desktop\aureliaApp\src\components\home>touch home.html
We also need view and view-model for about page.
C:\Users\username\Desktop\aureliaApp\src\components\about>touch about.js
C:\Users\username\Desktop\aureliaApp\src\components\about>touch about.html
Note − You can also create all the above folders manually.
Step 2 - Pages
Next, we need to add some default code to the files we created.
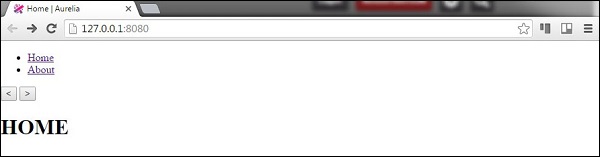
home.html
<template>
   <h1>HOME</h1>
</template>
home.js
export class Home {}
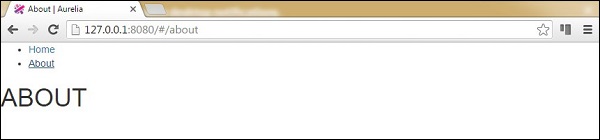
about.html
<template>
   <h1>ABOUT</h1>
</template>
about.js
export class About {}
Step 3 - Router
We will create view-model for router inside app.js file.
app.js
export class App {
   configureRouter(config, router) {
      config.title = 'Aurelia';

      config.map([
         { route: ['','home'],  name: 'home',
            moduleId: './components/home/home',  nav: true, title:'Home' },
         { route: 'about',  name: 'about',
            moduleId: './components/about/about',    nav: true, title:'About' }
      ]);

      this.router = router;
   }
}
Our router view will be placed in app.html.
app.html
<template>
   <nav>
      <ul>
         <li repeat.for = "row of router.navigation">
            <a href.bind = "row.href">${row.title}</a>
         </li>
      </ul>
   </nav>
   <router-view></router-view>
</template>
When we run the app, we will can change the routes by clicking home or about links.
Aurelia - History
In this chapter, you will learn how to use aurelia-history plugin.
Step 1 - Install the Plugin
This plugin is already available as a part of the standard configuration. If you have set aurelia.use.standardConfiguration() as a part of a manual configuration, you are ready to go.
main.js
export function configure(aurelia) {
   aurelia.use
   .standardConfiguration()
   .developmentLogging();

   aurelia.start().then(() => aurelia.setRoot());
}
Step 2 - Using the History
We will use an example from the last chapter (Aurelia - Routing). If we want to set the functionality for navigating back or forward, we can use the history object with back() and forward() methods. We will add this after a router configuration.
app.js
export class App {
   configureRouter(config, router) {
      config.title = 'Aurelia';
      config.map([
         { route: ['','home'],  name: 'home',
            moduleId: './pages/home/home',  nav: true, title:'Home' },
         { route: 'about',  name: 'about',
            moduleId: './pages/about/about',    nav: true, title:'About' }
      ]);
      this.router = router;
   }
   goBack() {
      history.back();
   }
	goForward() {
      history.forward();
   }
}
Now, let's add two buttons to our view.
app.html
<template>
   <nav>
      <ul>
         <li repeat.for = "row of router.navigation">
            <a href.bind = "row.href">${row.title}</a>
         </li>
      </ul>
   </nav>

   <button click.delegate = "goBack()"></button>
   //The button used for navigationg back...

   <button click.delegate = "goForward()"></button>
   //The button used for navigationg forward...

   <router-view></router-view>
</template>
The users can navigate back and forward by clicking the buttons we added.
Aurelia - Animations
In this chapter, you will learn how to use CSS animations in Aurelia framework.
Step 1 - View
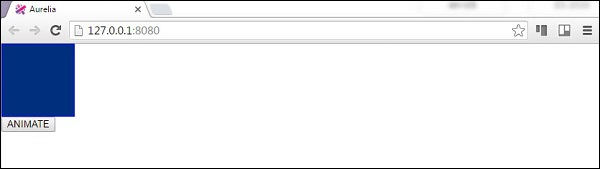
Our view will have one element that will be animated and a button to trigger the animateElement() function.
app.html
<template>
   <div class = "myElement"></div>
   <button click.delegate = "animateElement()">ANIMATE</button>
</template>
Step 2 - View-model
Inside our JavaScript file, we will import CssAnimator plugin and inject it as a dependency. The animateElement function will call the animator to start animation. The animation will be created in the next step.
import {CssAnimator} from 'aurelia-animator-css';
import {inject} from 'aurelia-framework';

@inject(CssAnimator, Element)
export class App {
   constructor(animator, element) {
      this.animator = animator;
      this.element = element;
   }

   animateElement() {
      var myElement = this.element.querySelector('.myElement');
      this.animator.animate(myElement, 'myAnimation');
   }
}
Step 3 − Style
We will write CSS inside styles/styles.css file. .myAnimation-add is the starting point of an animation while .myAnimation-remove is called when the animation is complete.
styles.css
.myElement {
   width:100px;
   height: 100px;
   border:1px solid blue;
}

.myAnimation-add {
   -webkit-animation: changeBack 3s;
   animation: changeBack 3s;
}

.myAnimation-remove {
   -webkit-animation: fadeIn 3s;
   animation: fadeIn 3s;
}

@-webkit-keyframes changeBack {
   0% { background-color: #e6efff; }
   25% { background-color: #4d91ff; }
   50% { background-color: #0058e6; }
   75% { background-color: #003180; }
   100% { background-color: #000a1a; }
}

@keyframes changeBack {
   0% { background-color: #000a1a; }
   25% { background-color: #003180; }
   50% { background-color: #0058e6; }
   75% { background-color: #4d91ff; }
   100% { background-color: #e6efff; }
}
Once the ANIMATE button is clicked, the background color will be changed from light blue to a dark shade. When this animation is complete after three seconds, the element will fade to its starting state.
Aurelia - Dialog
Aurelia offers a way to implement dialog (modal) window. In this chapter, we will show you how to use it.
Step 1 - Install a Dialog Plugin
Dialog plugin can be installed from the command prompt window.
C:\Users\username\Desktop\aureliaApp>jspm install aurelia-dialog
For this plugin to work, we need to use manual bootstrapping. We covered this in the Configuration chapter. Inside main.js file, we need to add the aurelia-dialog plugin.
main.js
export function configure(aurelia) {
   aurelia.use
   .standardConfiguration()
   .developmentLogging()
   .plugin('aurelia-dialog');

   aurelia.start().then(() => aurelia.setRoot());
}
Step 2 - Create Folders and Files
First, we will make a new directory called modal. Let's place it inside the components folder. Open the command prompt and run the following code.
C:\Users\username\Desktop\aureliaApp\src\components>mkdir modal
In this folder, we will create two new files. These files will represent view and view-model for our modal.
C:\Users\username\Desktop\aureliaApp\src\components\modal>touch my-modal.html
C:\Users\username\Desktop\aureliaApp\src\components\modal>touch my-modal.js
Step 3 - Create a Modal
First, let's add view-model code. We need to import and inject dialog-controller. This controller is used for handling modal specific functionalities. In the following example, we are using it to centralize a modal horizontally.
my-modal.js
import {inject} from 'aurelia-framework';
import {DialogController} from 'aurelia-dialog';

@inject(DialogController)

export class Prompt {
   constructor(controller) {
      this.controller = controller;
      this.answer = null;

      controller.settings.centerHorizontalOnly = true;
   }
   activate(message) {
      this.message = message;
   }
}
The view code will look like this. The buttons when clicked will open or close the modal.
my-modal.html
<template>
   <ai-dialog>
      <ai-dialog-body>
         <h2>${message}</h2>
      </ai-dialog-body>

      <ai-dialog-footer>
         <button click.trigger = "controller.cancel()">Cancel</button>
         <button click.trigger = "controller.ok(message)">Ok</button>
      </ai-dialog-footer>
   </ai-dialog>
</template>
Step 4 - Trigger a Modal
The last step is a function for triggering our modal. We need to import and inject DialogService. This service has method open, where we can pass view-model from my-modal file and model, so we can dynamically bind the data.
app.js
import {DialogService} from 'aurelia-dialog';
import {inject} from 'aurelia-framework';
import {Prompt} from './components/modal/my-modal';

@inject(DialogService)

export class App {
   constructor(dialogService) {
      this.dialogService = dialogService;
   }
   openModal() {
      this.dialogService.open( {viewModel: Prompt, model: 'Are you sure?' }).then(response => {
         console.log(response);

         if (!response.wasCancelled) {
            console.log('OK');
         } else {
            console.log('cancelled');
         }
         console.log(response.output);
      });
   }
};
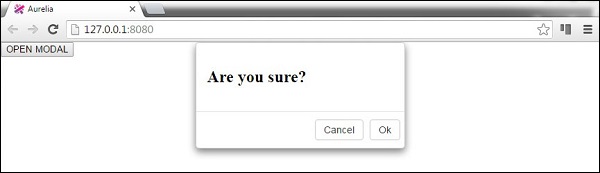
Finally, we will create a button so we can call openModal function.
app.html
<template>
   <button click.trigger = "openModal()">OPEN MODAL</button>
<template>
If we run the app, we can click the OPEN MODAL button to trigger a new modal window.
Aurelia - Localization
Aurelia offers i18n plugin. In this chapter, you will learn how to localize your app using this plugin.
Step 1 - Install a Plugin
Open the command prompt window and run the following code to install i18n plugin.
C:\Users\username\Desktop\aureliaApp>jspm install aurelia-i18n
We also need to install backend plugin.
C:\Users\username\Desktop\aureliaApp>jspm install npm:i18next-xhr-backend
Step 2 - Create Folders and Files
In the project root folder, we need to create a locale directory.
C:\Users\username\Desktop\aureliaApp>mkdir locale
In this folder, you need to add new folders for any language you want. We will create en with translation.js file inside.
C:\Users\username\Desktop\aureliaApp\locale>mkdir en
C:\Users\username\Desktop\aureliaApp\locale\en>touch translation.json
Step 3 - Use a Plugin
You need to use manual bootstrapping to be able to use this plugin. Check the Configuration chapter for more information. We need to add i18n plugin to the main.js file.
main.js
import {I18N} from 'aurelia-i18n';
import XHR from 'i18next-xhr-backend';

export function configure(aurelia) {
   aurelia.use
   .standardConfiguration()
   .developmentLogging()

   .plugin('aurelia-i18n', (instance) => {
      // register backend plugin
      instance.i18next.use(XHR);

      // adapt options to your needs (see http://i18next.com/docs/options/)
      instance.setup({
         backend: {
            loadPath: '/locales/{{lng}}/{{ns}}.json',
         },

         lng : 'de',
         attributes : ['t','i18n'],
         fallbackLng : 'en',
         debug : false
      });
   });

   aurelia.start().then(a => a.setRoot());
}
Step 4 - Translation JSON File
This is the file where you can set translation values. We will use an example from an official documentation. The de-DE folder should actually be used for translating to German language, however we will use English phrases instead, for easier understanding.
translation.json
{
   "score": "Score: {{score}}",
   "lives": "{{count}} life remaining",
   "lives_plural": "{{count}} lives remaining",
   "lives_indefinite": "a life remaining",
   "lives_plural_indefinite": "some lives remaining",
   "friend": "A friend",
   "friend_male": "A boyfriend",
   "friend_female": "A girlfriend"
}
Step 5 - Set Locale
We just need to import i18n plugin and set it to use JSON code from de-DE folder.
app.js
import {I18N} from 'aurelia-i18n';

export class App {
   static inject = [I18N];

   constructor(i18n) {
      this.i18n = i18n;
      this.i18n
      .setLocale('de-DE')

      .then( () => {
         console.log('Locale is ready!');
      });
   }
}
Step 6 - View
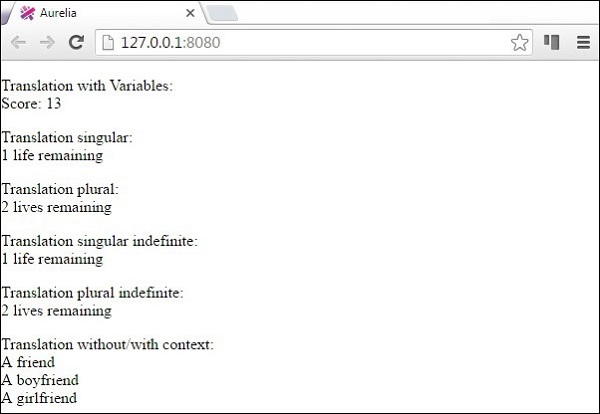
There are couple of ways to translate data. We will use a custom ValueConverter named t. You can see in the following example various ways of formatting data. Compare this with the translation.json file and you will notice the patterns used for formatting.
<template>
   <p>
      Translation with Variables: <br />
      ${ 'score' | t: {'score': 13}}
   </p>

   <p>
      Translation singular: <br />
      ${ 'lives' | t: { 'count': 1 } }
   </p>

   <p>
      Translation plural: <br />
      ${ 'lives' | t: { 'count': 2 } }
   </p>

   <p>
      Translation singular indefinite: <br />
      ${ 'lives' | t: { 'count': 1, indefinite_article: true  } }
   </p>

   <p>
      Translation plural indefinite: <br />
      ${ 'lives' | t: { 'count': 2, indefinite_article: true } }
   </p>

   <p>
      Translation without/with context: <br />
      ${ 'friend' | t } <br />
      ${ 'friend' | t: { context: 'male' } } <br />
      ${ 'friend' | t: { context: 'female' } }
   </p>

</template>
When we run the app, we will get the following output.
Aurelia - Tools
In this chapter, you will learn how to set up and use aurelia-tools.
Step 1 - Root Folder
Let's create a root folder where we will keep all Aurelia apps.
C:\Users\username\Desktop>mkdir aurelia-projects
Step 2 - Aurelia Tools
Inside aurelia-projects folder, we will clone aurelia-tools repository from github.
C:\Users\username\Desktop\aurelia-projects>git clone https://github.com/aurelia/tools.git
Step 3 - Create a New Project
To start a new Aurelia project, the recommended way is to use one of the aurelia-skeletons. Let's clone Aurelia skeletons from git.
C:\Users\username\Desktop\aurelia-projects>git clone https://github.com/aurelia/skeleton-navigation.git
We also need to install packages, modules, and dependencies. You can choose between various skeleton apps. We will use skeleton-es2016.
C:\Users\username\Desktop\aurelia-projects\skeleton-navigation\skeleton-es2016>npm install
C:\Users\username\Desktop\aurelia-projects\skeleton-navigation\skeleton-es2016>jspm install
Finally, we need to run the following code to build the development environment.
C:\Users\username\Desktop\aurelia-projects\skeleton-navigation\skeleton-es2016>gulp build-dev-env
Step 4 - Update
Update local repositories using the following command.
C:\Users\username\Desktop\aurelia-projects\skeleton-navigation\skeleton-es2016>gulp update-own-deps
Step 5 - Pull
We can also pull Aurelia dependency without building.
C:\Users\username\Desktop\aurelia-projects\skeleton-navigation\skeleton-es2016>gulp pull-dev-env
Aurelia - Bundling
In this chapter, you will learn how to use bundling in Aurelia framework.
Step 1 - Installing Prerequisites
You can install aurelia-bundler by running the following command in the command prompt.
C:\Users\username\Desktop\aureliaApp>npm install aurelia-bundler --save-dev
If you don't have gulp installed, you can install it by running this code.
C:\Users\username\Desktop\aureliaApp>npm install gulp
You can also install require-dir package from npm.
C:\Users\username\Desktop\aureliaApp>npm install require-dir
Step 2 - Create Folders and Files
First, create gulpfile.js file in apps root directory.
C:\Users\username\Desktop\aureliaApp>touch gulpfile.js
You will need the build folder. In this directory, add another folder named tasks.
C:\Users\username\Desktop\aureliaApp>mkdir build
C:\Users\username\Desktop\aureliaApp\build>mkdir tasks
You need to create bundle.js file inside tasks folder.
C:\Users\username\Desktop\aureliaApp\build\tasks>touch bundle.js
Step 3 - Gulp
Use gulp as the task runner. You need to tell it to run the code from build\tasks\bundle.js.
gulpfile.js
require('require-dir')('build/tasks');
Now, create the task that you need. This task will take the app, create dist/appbuild.js and dist/vendor-build.js files. After the bundling process is complete, the config.js file will also be updated. You can include all files and plugins you want to inject and minify.
bundle.js
var gulp = require('gulp');
var bundle = require('aurelia-bundler').bundle;

var config = {
   force: true,
   baseURL: '.',
   configPath: './config.js',

   bundles: {
      "dist/app-build": {
         includes: [
            '[*.js]',
            '*.html!text',
            '*.css!text',
         ],
         options: {
            inject: true,
            minify: true
         }
      },
		"dist/vendor-build": {
         includes: [
            'aurelia-bootstrapper',
            'aurelia-fetch-client',
            'aurelia-router',
            'aurelia-animator-css',
         ],
         options: {
            inject: true,
            minify: true
         }
      }
   }
};

gulp.task('bundle', function() {
   return bundle(config);
});
The command prompt will inform us when bundling is complete.

Aurelia - Debugging
In this chapter, you will learn how to add Aurelia context debugger as a chrome extension.
Note − Before adding the extension, you need to have aurelia-tools files. If you don't have it, you can check Tools chapter.
Step 1 - Open Chrome Extensions
The easiest way to open chrome extensions is to run the following code in browser’s URL bar.
chrome://extensions
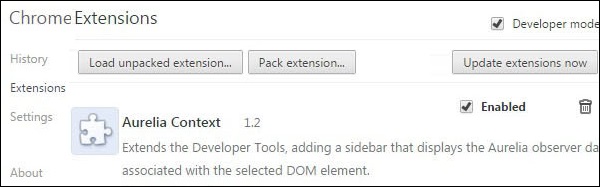
Step 2 - Add Extension
Since this extension isn't yet available from Chrome store, check developermode checkbox and click Load Unpacked Extensions. This will open a small window where you can choose the extension to add.
For this example, let us choose Desktop/aurelia-projects/tools/context-debugger folder and open it.
Now, we can see that the extension is loaded in the browser.
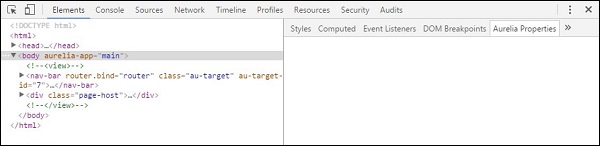
We can also check the developers console. When we click elements tab, we will see aurelia-properties at the bottom right corner.
Aurelia - Community
Community is one of the most important factors to consider when choosing a framework. Aurelia offers fantastic support for its customers. In this chapter, you will learn how you can get help when you are stuck.
Aurelia - Official Documentation
You can find Aurelia docs on this link − https://aurelia.io/docs.html
Aurelia Gitter - Channel
If you need a fast answer, you can always submit a question to aurelia gitter channel. This channel can be found on the following link − https://gitter.im/Aurelia/Discuss
Aurelia - Github
You can also submit an issue to official Aurelia github repository https://github.com/aurelia
Aurelia - Blog
If you want to keep track of any updates and changes of Aurelia, you can follow Durandal's official blog http://blog.durandal.io/
Aurelia - Rob Eisenberg Blog
You can also follow the official blog of Rob Eisenberg, creator of Aurelia framework http://eisenbergeffect.bluespire.com/
Aurelia - Enterprise Support
Aurelia offers enterprise support for teams and individuals. If you are interested, send an email to the following address −
support@durandal.io
Aurelia - Hire Dev Team
You can hire Aurelia Expert Developers by sending an email to this address.
consulting@durandal.io
Aurelia - Training
If you want Aurelia official training for your team, you can send an email to this address.
training@durandal.io
Aurelia - Best Practices
Aurelia is a new framework hence, the best practices are yet to be established. In this chapter, you will find some useful guidelines to follow.
Starting a New Project
Aurelia offers aurelia-skeletons. There are a couple of skeletons to choose from. The team behind Aurelia is actively supporting the skeletons, and they are always up-to-date with the newest version of the framework.
Aurelia Skeletons
skeleton-es2016-webpack allows you to write ES2016 code and use npm for package management and webpack for bundling.
skeleton-es2016 allows you to write ES2016 code and use jspm for package management and SystemJS for loading and bundling.
skeleton-typescript-webpack allows you to write TypeScript code and use npm for package management and webpack for bundling.
skeleton-typescript allows you to write TypeScript code and use jspm for package management and SystemJS for loading and bundling.
skeleton-typescript-asp.net5 allows you to write TypeScript code and use jspm for package management and SystemJS for loading and bundling. The ASP.NET backend is also integrated.
skeleton-es2016-asp.net5 allows you to write ES2016 code and use jspm for package management and SystemJS for loading and bundling. The ASP.NET backend is integrated.
You can clone all skeletons from GitHub. The installation instructions can be found inside README.md files for each skeleton.
C:\Users\username\Desktop>git clone https://github.com/aurelia/skeleton-navigation.git
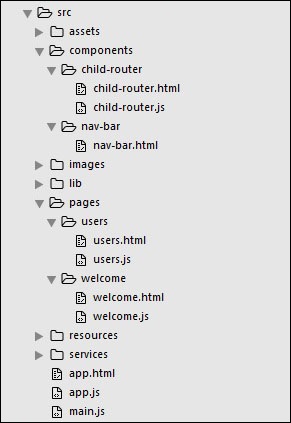
Folder Structure
You are free to use any folder structure you want. If you are not sure where to start, you can use the following folder structure. The image represents files and folder in the src directory.
Web Standards
Aurelia is a framework oriented to web standards. This was one of the main goals of the team behind it. They will make sure that the framework always follows modern web. This is extremely good for the developers, since we can rely on the usability of the framework in the future. It also helps us be up-to-date with the browsers and the web.
EcmaScript 6
This is a good practice not just for Aurelia but for any other JavaScript framework. ES6 offers new functionalities that can help in the development process. You can also use TypeScript, if you like strongly typed languages.