- ASP.NET MVC Tutorial
- ASP.NET MVC - Home
- ASP.NET MVC - Overview
- ASP.NET MVC - Pattern
- ASP.NET MVC - Environment Setup
- ASP.NET MVC - Getting Started
- ASP.NET MVC - Life Cycle
- ASP.NET MVC - Routing
- ASP.NET MVC - Controllers
- ASP.NET MVC - Actions
- ASP.NET MVC - Filters
- ASP.NET MVC - Selectors
- ASP.NET MVC - Views
- ASP.NET MVC - Data Model
- ASP.NET MVC - Helpers
- ASP.NET MVC - Model Binding
- ASP.NET MVC - Databases
- ASP.NET MVC - Validation
- ASP.NET MVC - Security
- ASP.NET MVC - Caching
- ASP.NET MVC - Razor
- ASP.NET MVC - Data Annotations
- Nuget Package Management
- ASP.NET MVC - Web API
- ASP.NET MVC - Scaffolding
- ASP.NET MVC - Bootstrap
- ASP.NET MVC - Unit Testing
- ASP.NET MVC - Deployment
- ASP.NET MVC - Self-hosting
- ASP.NET MVC Useful Resources
- ASP.NET MVC - Quick Guide
- ASP.NET MVC - Useful Resources
- ASP.NET MVC - Discussion
ASP.NET MVC - Quick Guide
ASP.NET MVC - Overview
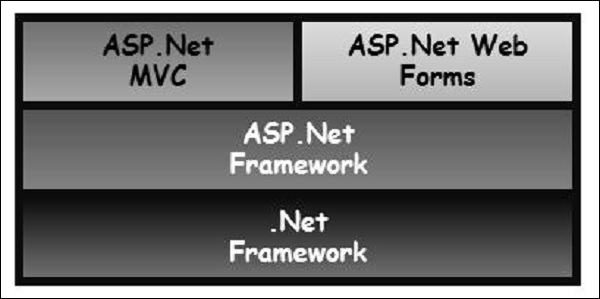
ASP.NET MVC is basically a web development framework from Microsoft, which combines the features of MVC (Model-View-Controller) architecture, the most up-to-date ideas and techniques from Agile development, and the best parts of the existing ASP.NET platform.
ASP.NET MVC is not something, which is built from ground zero. It is a complete alternative to traditional ASP.NET Web Forms. It is built on the top of ASP.NET, so developers enjoy almost all the ASP.NET features while building the MVC application.
History
ASP.NET 1.0 was released on January 5, 2002, as part of .Net Framework version 1.0. At that time, it was easy to think of ASP.NET and Web Forms as one and the same thing. ASP.NET has however always supported two layers of abstraction −
System.Web.UI − The Web Forms layer, comprising server controls, ViewState, and so on.
System.Web − It supplies the basic web stack, including modules, handlers, the HTTP stack, etc.
By the time ASP.NET MVC was announced in 2007, the MVC pattern was becoming one of the most popular ways of building web frameworks.
In April 2009, the ASP.NET MVC source code was released under the Microsoft Public License (MS-PL). "ASP.NET MVC framework is a lightweight, highly testable presentation framework that is integrated with the existing ASP.NET features.
Some of these integrated features are master pages and membership-based authentication. The MVC framework is defined in the System.Web.Mvc assembly.
In March 2012, Microsoft had released part of its web stack (including ASP.NET MVC, Razor and Web API) under an open source license (Apache License 2.0). ASP.NET Web Forms was not included in this initiative.
Why ASP.NET MVC?
Microsoft decided to create their own MVC framework for building web applications. The MVC framework simply builds on top of ASP.NET. When you are building a web application with ASP.NET MVC, there will be no illusions of state, there will not be such a thing as a page load and no page life cycle at all, etc.
Another design goal for ASP.NET MVC was to be extensible throughout all aspects of the framework. So when we talk about views, views have to be rendered by a particular type of view engine. The default view engine is still something that can take an ASPX file. But if you don't like using ASPX files, you can use something else and plug in your own view engine.
There is a component inside the MVC framework that will instantiate your controllers. You might not like the way that the MVC framework instantiates your controller, you might want to handle that job yourself. So, there are lots of places in MVC where you can inject your own custom logic to handle tasks.
The whole idea behind using the Model View Controller design pattern is that you maintain a separation of concerns. Your controller is no longer encumbered with a lot of ties to the ASP.NET runtime or ties to the ASPX page, which is very hard to test. You now just have a class with regular methods on it that you can invoke in unit tests to find out if that controller is going to behave correctly.
Benefits of ASP.NET MVC
Following are the benefits of using ASP.NET MVC −
Makes it easier to manage complexity by dividing an application into the model, the view, and the controller.
Enables full control over the rendered HTML and provides a clean separation of concerns.
Direct control over HTML also means better accessibility for implementing compliance with evolving Web standards.
Facilitates adding more interactivity and responsiveness to existing apps.
Provides better support for test-driven development (TDD).
Works well for Web applications that are supported by large teams of developers and for Web designers who need a high degree of control over the application behavior.
ASP.NET MVC - Pattern
The MVC (Model-View-Controller) design pattern has actually been around for a few decades, and it's been used across many different technologies. Everything from Smalltalk to C++ to Java, and now C Sharp and .NET use this design pattern to build a user interface.
Following are some salient features of the MVC pattern −
Originally it was named Thing-Model-View-Editor in 1979, and then it was later simplified to Model- View-Controller.
It is a powerful and elegant means of separating concerns within an application (for example, separating data access logic from display logic) and applies itself extremely well to web applications.
Its explicit separation of concerns does add a small amount of extra complexity to an application’s design, but the extraordinary benefits outweigh the extra effort.
The MVC architectural pattern separates the user interface (UI) of an application into three main parts.
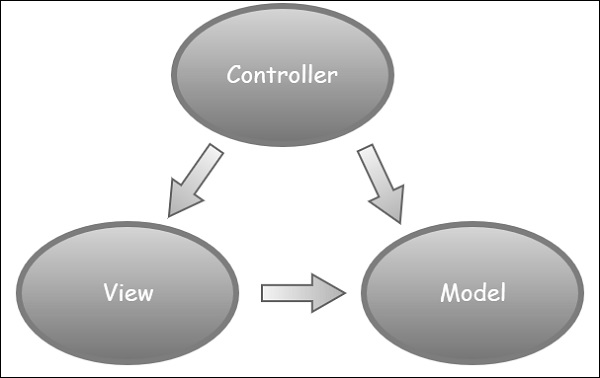
The Model − A set of classes that describes the data you are working with as well as the business logic.
The View − Defines how the application’s UI will be displayed. It is a pure HTML, which decides how the UI is going to look like.
The Controller − A set of classes that handles communication from the user, overall application flow, and application-specific logic.
Idea Behind MVC
The idea is that you'll have a component called the view, which is solely responsible for rendering this user interface whether that be HTML or whether it actually be UI widgets on a desktop application.
The view talks to a model, and that model contains all of the data that the view needs to display. Views generally don't have much logic inside of them at all.
In a web application, the view might not have any code associated with it at all. It might just have HTML and then some expressions of where to take pieces of data from the model and plug them into the correct places inside the HTML template that you've built in the view.
The controller that organizes is everything. When an HTTP request arrives for an MVC application, that request gets routed to a controller, and then it's up to the controller to talk to either the database, the file system, or the model.
ASP.NET MVC - Environment Setup
MVC development tool is included with Visual Studio 2012 and onwards. It can also be installed on Visual Studio 2010 SP1/Visual Web Developer 2010 Express SP1. If you are using Visual Studio 2010, you can install MVC 4 using the Web Platform Installer http://www.microsoft.com
Microsoft provides a free version of Visual Studio, which also contains SQL Server and it can be downloaded from https://www.visualstudio.com
Installation
Step 1 − Once downloading is complete, run the installer. The following dialog will be displayed.
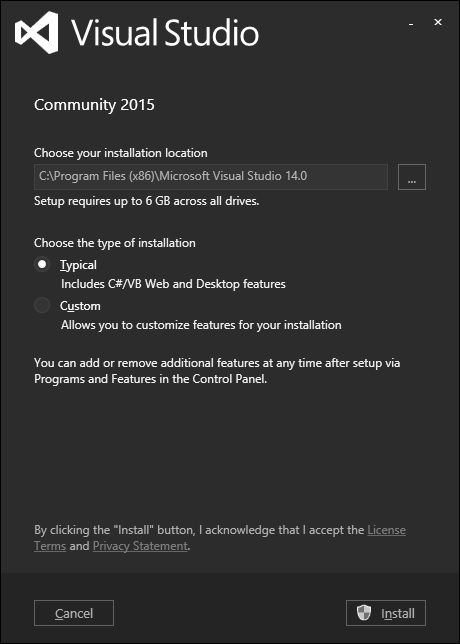
Step 2 − Click the ‘Install’ button and it will start the installation process.

Once the installation process is completed successfully, you will see the following dialog.
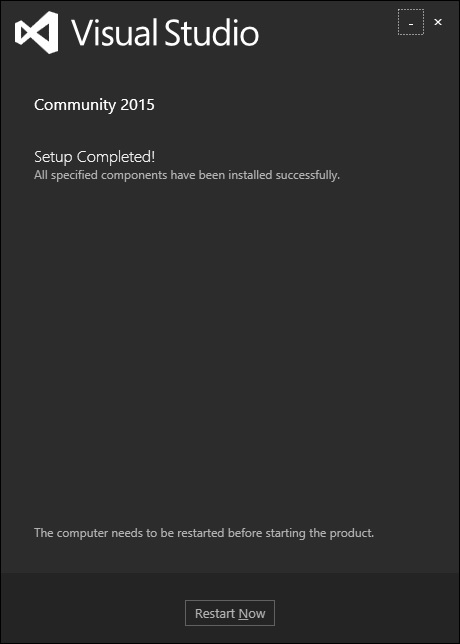
Step 3 − Close this dialog and restart your computer if required.
Step 4 − Open Visual Studio from the Start Menu, which will open the following dialog. It will take a while for the first time only for preparation.
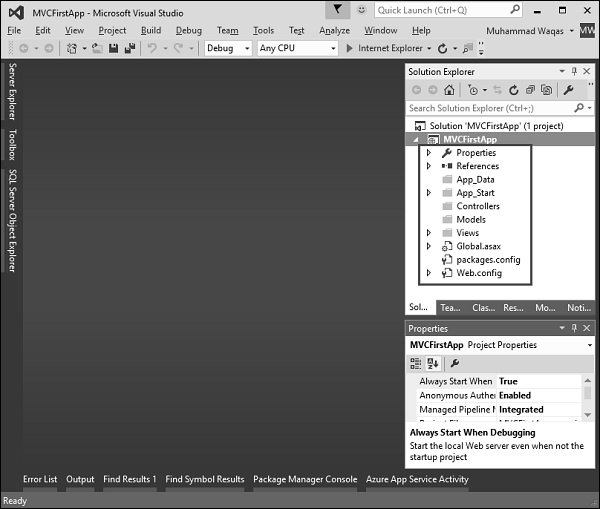
Once all is done, you will see the main window of Visual Studio as shown in the following screenshot.
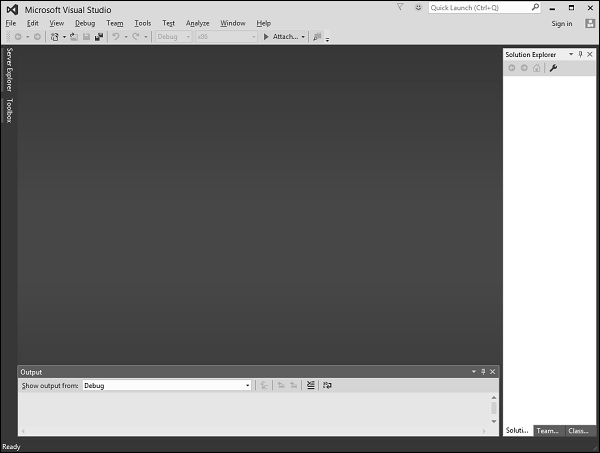
You are now ready to start your application.
ASP.NET MVC - Getting Started
In this chapter, we will look at a simple working example of ASP.NET MVC. We will be building a simple web app here. To create an ASP.NET MVC application, we will use Visual Studio 2015, which contains all of the features you need to create, test, and deploy an MVC Framework application.
Create ASP.Net MVC Application
Following are the steps to create a project using project templates available in Visual Studio.
Step 1 − Open the Visual Studio. Click File → New → Project menu option.
A new Project dialog opens.
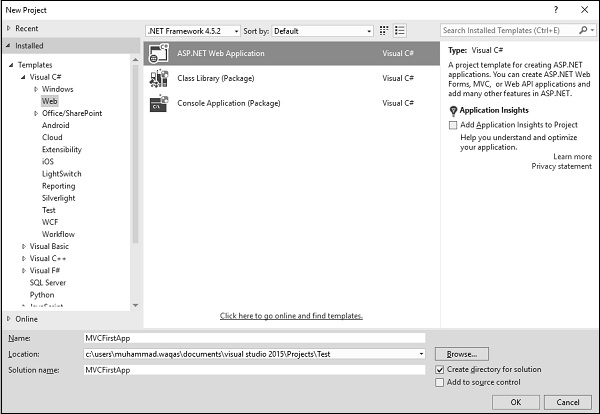
Step 2 − From the left pane, select Templates → Visual C# → Web.
Step 3 − In the middle pane, select ASP.NET Web Application.
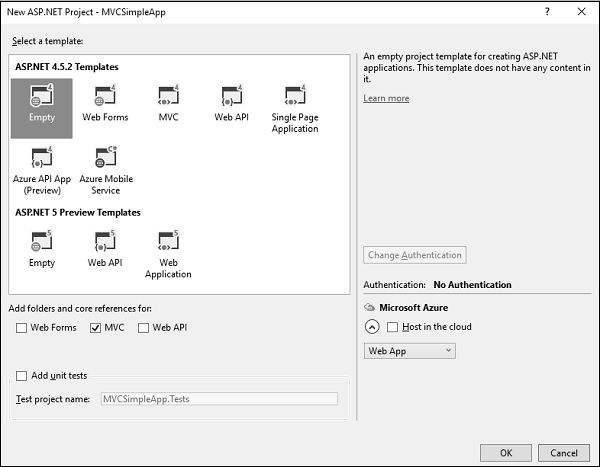
Step 4 − Enter the project name, MVCFirstApp, in the Name field and click ok to continue. You will see the following dialog which asks you to set the initial content for the ASP.NET project.
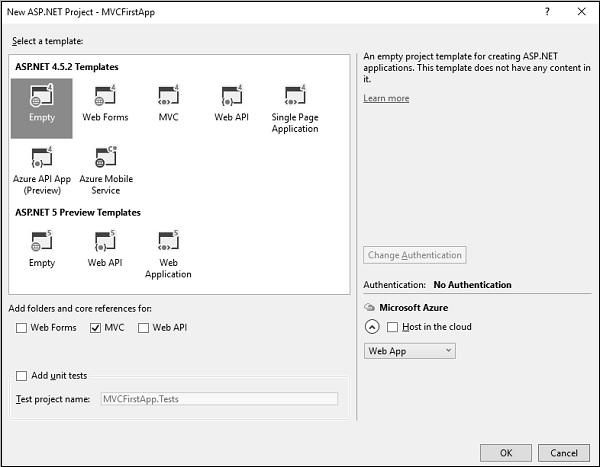
Step 5 − To keep things simple, select the ‘Empty’ option and check the MVC checkbox in the Add folders and core references section. Click Ok.
It will create a basic MVC project with minimal predefined content.
Once the project is created by Visual Studio, you will see a number of files and folders displayed in the Solution Explorer window.
As you know that we have created ASP.Net MVC project from an empty project template, so for the moment the application does not contain anything to run.
Step 6 − Run this application from Debug → Start Debugging menu option and you will see a 404 Not Found Error.
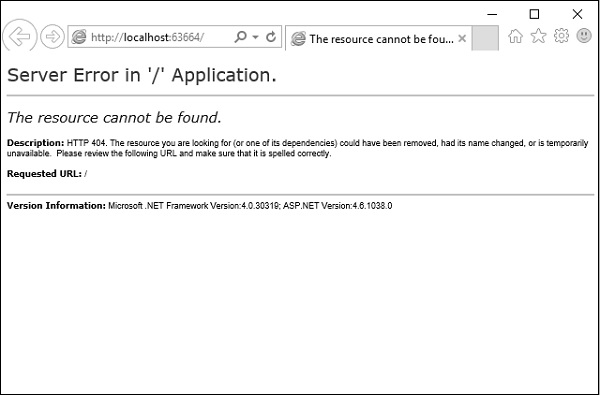
The default browser is, Internet Explorer, but you can select any browser that you have installed from the toolbar.
Add Controller
To remove the 404 Not Found error, we need to add a controller, which handles all the incoming requests.
Step 1 − To add a controller, right-click on the controller folder in the solution explorer and select Add → Controller.
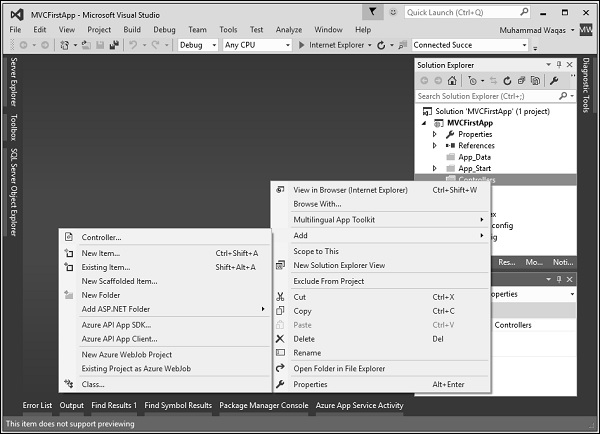
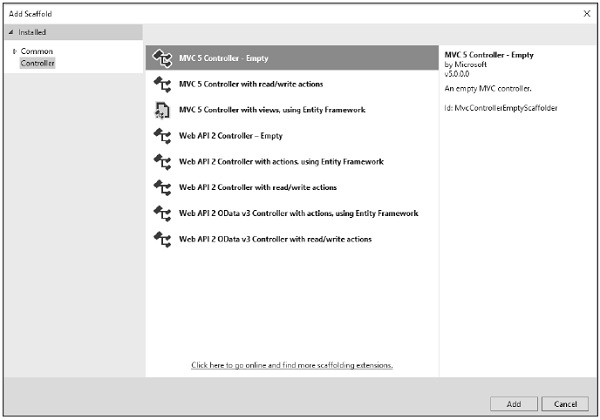
It will display the Add Scaffold dialog.

Step 2 − Select the MVC 5 Controller – Empty option and click ‘Add’ button.
The Add Controller dialog will appear.
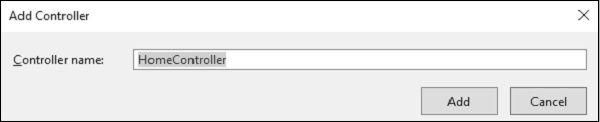
Step 3 − Set the name to HomeController and click the Add button.
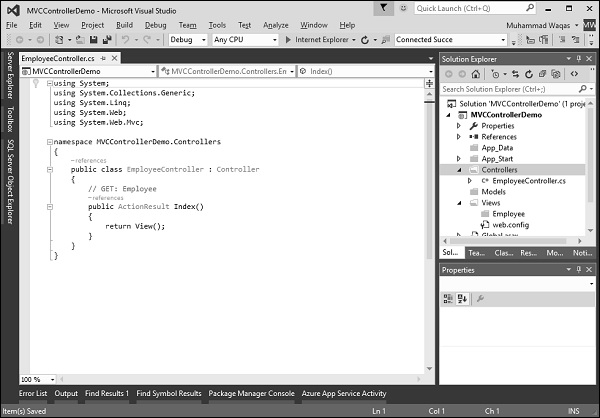
You will see a new C# file HomeController.cs in the Controllers folder, which is open for editing in Visual Studio as well.
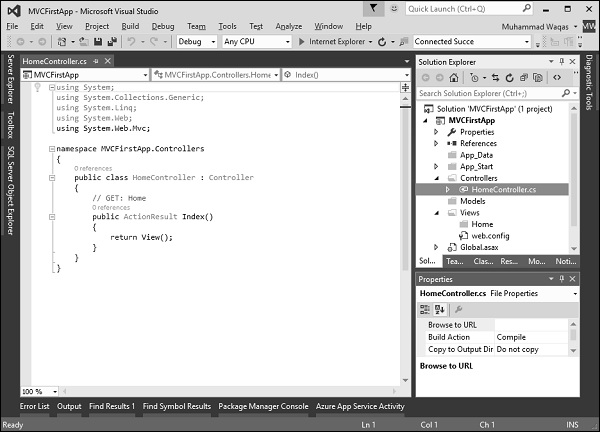
Step 4 − To make this a working example, let’s modify the controller class by changing the action method called Index using the following code.
using System;
using System.Collections.Generic;
using System.Linq;
using System.Web;
using System.Web.Mvc;
namespace MVCFirstApp.Controllers {
public class HomeController : Controller {
// GET: Home
public string Index(){
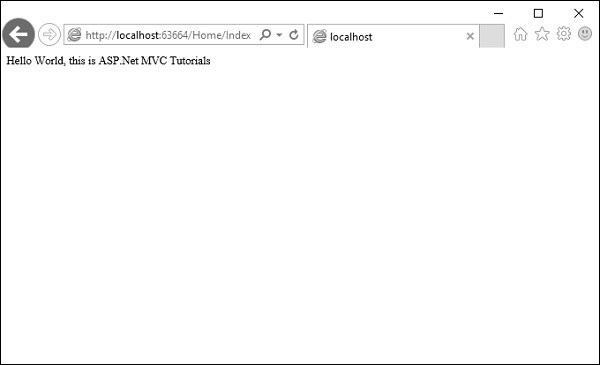
return "Hello World, this is ASP.Net MVC Tutorials";
}
}
}
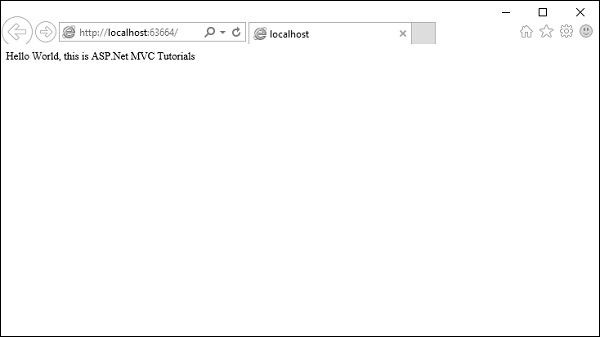
Step 5 − Run this application and you will see that the browser is displaying the result of the Index action method.
ASP.NET MVC - Life Cycle
In this chapter, we will discuss the overall MVC pipeline and the life of an HTTP request as it travels through the MVC framework in ASP.NET. At a high level, a life cycle is simply a series of steps or events used to handle some type of request or to change an application state. You may already be familiar with various framework life cycles, the concept is not unique to MVC.
For example, the ASP.NET webforms platform features a complex page life cycle. Other .NET platforms, like Windows phone apps, have their own application life cycles. One thing that is true for all these platforms regardless of the technology is that understanding the processing pipeline can help you better leverage the features available and MVC is no different.
MVC has two life cycles −
- The application life cycle
- The request life cycle
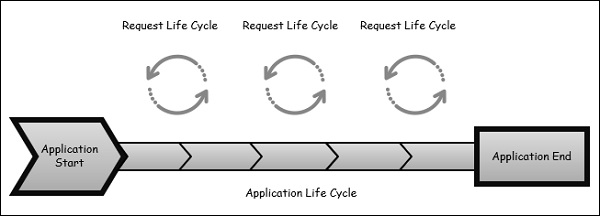
The Application Life Cycle
The application life cycle refers to the time at which the application process actually begins running IIS until the time it stops. This is marked by the application start and end events in the startup file of your application.
The Request Life Cycle
It is the sequence of events that happen every time an HTTP request is handled by our application.
The entry point for every MVC application begins with routing. After the ASP.NET platform has received a request, it figures out how it should be handled through the URL Routing Module.
Modules are .NET components that can hook into the application life cycle and add functionality. The routing module is responsible for matching the incoming URL to routes that we define in our application.
All routes have an associated route handler with them and this is the entry point to the MVC framework.
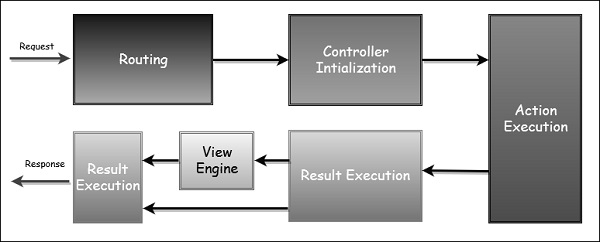
The MVC framework handles converting the route data into a concrete controller that can handle requests. After the controller has been created, the next major step is Action Execution. A component called the action invoker finds and selects an appropriate Action method to invoke the controller.
After our action result has been prepared, the next stage triggers, which is Result Execution. MVC separates declaring the result from executing the result. If the result is a view type, the View Engine will be called and it's responsible for finding and rending our view.
If the result is not a view, the action result will execute on its own. This Result Execution is what generates an actual response to the original HTTP request.
ASP.NET MVC - Routing
Routing is the process of directing an HTTP request to a controller and the functionality of this processing is implemented in System.Web.Routing. This assembly is not part of ASP.NET MVC. It is actually part of the ASP.NET runtime, and it was officially released with the ASP.NET as a .NET 3.5 SP1.
System.Web.Routing is used by the MVC framework, but it's also used by ASP.NET Dynamic Data. The MVC framework leverages routing to direct a request to a controller. The Global.asax file is that part of your application, where you will define the route for your application.
This is the code from the application start event in Global.asax from the MVC App which we created in the previous chapter.
using System;
using System.Collections.Generic;
using System.Linq;

using System.Web;
using System.Web.Mvc;
using System.Web.Routing;

namespace MVCFirstApp {
   public class MvcApplication : System.Web.HttpApplication {
      protected void Application_Start(){
         AreaRegistration.RegisterAllAreas();
         RouteConfig.RegisterRoutes(RouteTable.Routes);
      }
   }
}
Following is the implementation of RouteConfig class, which contains one method RegisterRoutes.
using System;
using System.Collections.Generic;
using System.Linq;

using System.Web;
using System.Web.Mvc;
using System.Web.Routing;

namespace MVCFirstApp {
   public class RouteConfig {
      public static void RegisterRoutes(RouteCollection routes){
         routes.IgnoreRoute("{resource}.axd/{*pathInfo}");
         routes.MapRoute(
            name: "Default",
            url: "{controller}/{action}/{id}",
            defaults: new{ controller = "Home", action = "Index", id = UrlParameter.Optional});
      }
   }
}
You will define the routes and those routes will map URLs to a specific controller action. An action is just a method on the controller. It can also pick parameters out of that URL and pass them as parameters into the method.
So this route that is defined in the application is the default route. As seen in the above code, when you see a URL arrive in the form of (something)/(something)/(something), then the first piece is the controller name, second piece is the action name, and the third piece is an ID parameter.
Understanding Routes
MVC applications use the ASP.NET routing system, which decides how URLs map to controllers and actions.
When Visual Studio creates the MVC project, it adds some default routes to get us started. When you run your application, you will see that Visual Studio has directed the browser to port 63664. You will almost certainly see a different port number in the URL that your browser requests because Visual Studio allocates a random port when the project is created.

In the last example, we have added a HomeController, so you can also request any of the following URLs, and they will be directed to the Index action on the HomeController.
http://localhost:63664/Home/
http://localhost:63664/Home/Index
When a browser requests http://mysite/ or http://mysite/Home, it gets back the output from HomeController’s Index method.
You can try this as well by changing the URL in the browser. In this example, it is http://localhost:63664/, except that the port might be different.
If you append /Home or /Home/Index to the URL and press ‘Enter’ button, you will see the same result from the MVC application.
As you can see in this case, the convention is that we have a controller called HomeController and this HomeController will be the starting point for our MVC application.
The default routes that Visual Studio creates for a new project assumes that you will follow this convention. But if you want to follow your own convention then you would need to modify the routes.
Custom Convention
You can certainly add your own routes. If you don't like these action names, if you have different ID parameters or if you just in general have a different URL structure for your site, then you can add your own route entries.
Let’s take a look at a simple example. Consider we have a page that contains the list of processes. Following is the code, which will route to the process page.
routes.MapRoute(
   "Process",
   "Process/{action}/{id}",
   defaults: new{
      controller = "Process", action = "List ", id = UrlParameter.Optional}
);
When someone comes in and looks for a URL with Process/Action/Id, they will go to the Process Controller. We can make the action a little bit different, the default action, we can make that a List instead of Index.
Now a request that arrives looks like localhosts/process. The routing engine will use this routing configuration to pass that along, so it's going to use a default action of List.
Following is the complete class implementation.
using System;
using System.Collections.Generic;
using System.Linq;

using System.Web;
using System.Web.Mvc;
using System.Web.Routing;

namespace MVCFirstApp{
   public class RouteConfig{
      public static void RegisterRoutes(RouteCollection routes){
         routes.IgnoreRoute("{resource}.axd/{*pathInfo}");

         routes.MapRoute(
            "Process", "Process/{action}/{id}",
            defaults: new{
               controller = " Process", action = "List ", id =
               UrlParameter.Optional});

         routes.MapRoute(
            name: "Default", url: "{controller}/{action}/{id}",
            defaults: new{
               controller = "Home", action = "Index", id =
               UrlParameter.Optional});
      }
   }
}
Step 1 − Run this and request for a process page with the following URL http://localhost:63664/Process
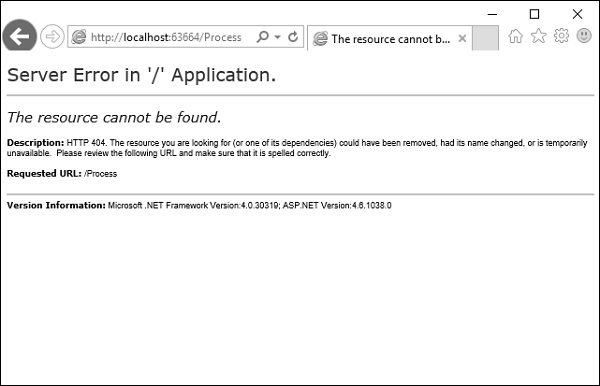
You will see an HTTP 404, because the routing engine is looking for ProcessController, which is not available.
Step 2 − Create ProcessController by right-clicking on Controllers folder in the solution explorer and select Add → Controller.

It will display the Add Scaffold dialog.

Step 3 − Select the MVC 5 Controller – Empty option and click ‘Add’ button.
The Add Controller dialog will appear.
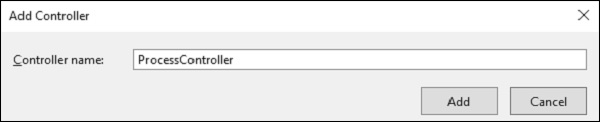
Step 4 − Set the name to ProcessController and click ‘Add’ button.
Now you will see a new C# file ProcessController.cs in the Controllers folder, which is open for editing in Visual Studio as well.
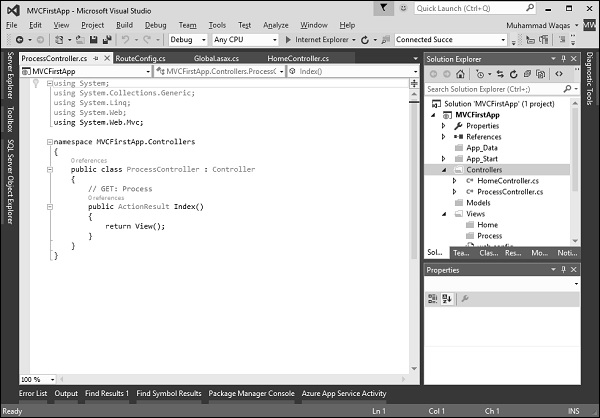
Now our default action is going to be List, so we want to have a List action here instead of Index.
Step 5 − Change the return type from ActionResult to string and also return some string from this action method using the following code.
using System;
using System.Collections.Generic;
using System.Linq;
using System.Web;
using System.Web.Mvc;
namespace MVCFirstApp.Controllers{
public class ProcessController : Controller{
// GET: Process
public string List(){
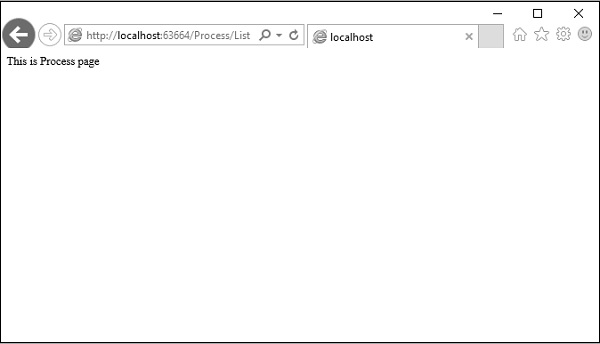
return "This is Process page";
}
}
}
Step 6 − When you run this application, again you will see the result from the default route. When you specify the following URL, http://localhost:63664/Process/List, then you will see the result from the ProcessController.
ASP.NET MVC - Controllers
Controllers are essentially the central unit of your ASP.NET MVC application. It is the 1st recipient, which interacts with incoming HTTP Request. So, the controller decides which model will be selected, and then it takes the data from the model and passes the same to the respective view, after that view is rendered. Actually, controllers are controlling the overall flow of the application taking the input and rendering the proper output.
Controllers are C# classes inheriting from System.Web.Mvc.Controller, which is the builtin controller base class. Each public method in a controller is known as an action method, meaning you can invoke it from the Web via some URL to perform an action.
The MVC convention is to put controllers in the Controllers folder that Visual Studio created when the project was set up.
Let’s take a look at a simple example of Controller by creating a new ASP.Net MVC project.
Step 1 − Open the Visual Studio and click on File → New → Project menu option.
A new Project dialog opens.
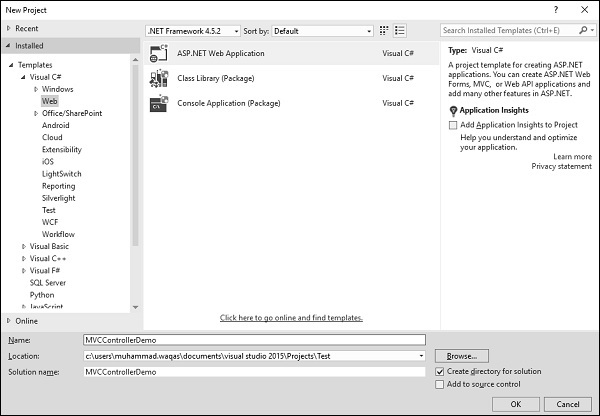
Step 2 − From the left pane, select Templates → Visual C# → Web.
Step 3 − In the middle pane, select ASP.NET Web Application.
Step 4 − Enter the project name ‘MVCControllerDemo’ in the Name field and click ok to continue. You will see the following dialog, which asks you to set the initial content for the ASP.NET project.
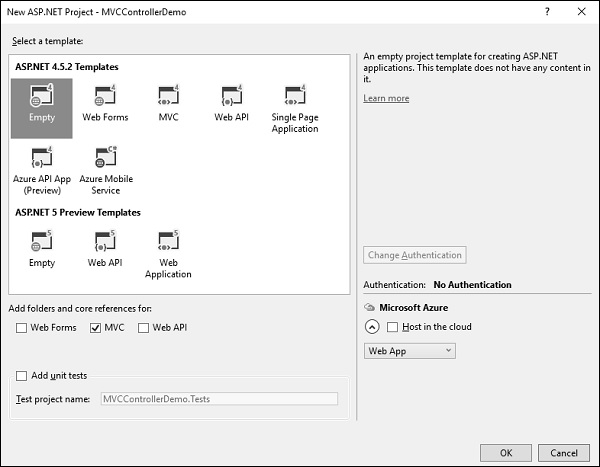
Step 5 − To keep things simple, select the Empty option and check the MVC checkbox in the ‘Add folders and core references for’ section and click Ok.
It will create a basic MVC project with minimal predefined content.
Once the project is created by Visual Studio you will see a number of files and folders displayed in the Solution Explorer window.
Since we have created ASP.Net MVC project from an empty project template, so at the moment, the application does not contain anything to run.
Step 6 − Add EmployeeController by right-clicking on Controllers folder in the solution explorer. Select Add → Controller.
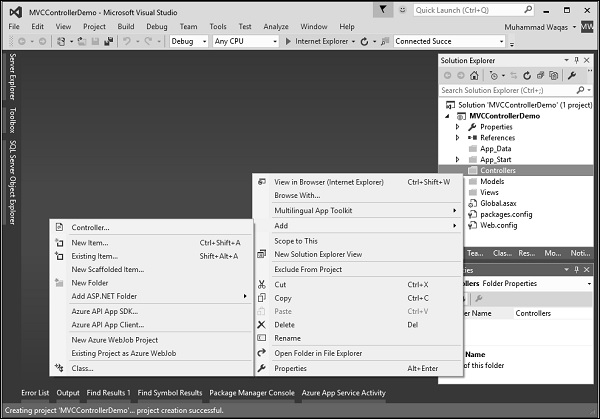
It will display the Add Scaffold dialog.
Step 7 − Select the MVC 5 Controller – Empty option and click ‘Add’ button.
The Add Controller dialog will appear.

Step 8 − Set the name to EmployeeController and click ‘Add’ button.
You will see a new C# file EmployeeController.cs in the Controllers folder, which is open for editing in Visual Studio as well.
Now, in this application we will add a custom route for Employee controller with the default Route.
Step 1 − Go to “RouteConfig.cs” file under “App_Start” folder and add the following route.
routes.MapRoute(
   "Employee", "Employee/{name}", new{
      controller = "Employee", action = "Search", name =
      UrlParameter.Optional });
Following is the complete implementation of RouteConfig.cs file.
using System;
using System.Collections.Generic;
using System.Linq;

using System.Web;
using System.Web.Mvc;
using System.Web.Routing;

namespace MVCControllerDemo {
   public class RouteConfig {
      public static void RegisterRoutes(RouteCollection routes){
         routes.IgnoreRoute("{resource}.axd/{*pathInfo}");

         routes.MapRoute(
            "Employee", "Employee/{name}", new{
               controller = "Employee", action = "Search", name = UrlParameter.Optional });

         routes.MapRoute(
            name: "Default", url: "{controller}/{action}/{id}", defaults: new{
               controller = "Home", action = "Index", id = UrlParameter.Optional });
      }
   }
}
Consider a scenario wherein any user comes and searches for an employee, specifying the URL “Employee/Mark”. In this case, Mark will be treated as a parameter name not like Action method. So in this kind of scenario our default route won’t work significantly.
To fetch the incoming value from the browser when the parameter is getting passed, MVC framework provides a simple way to address this problem. It is by using the parameter inside the Action method.
Step 2 − Change the EmployeeController class using the following code.
using System;
using System.Collections.Generic;
using System.Linq;

using System.Web;
using System.Web.Mvc;

namespace MVCControllerDemo.Controllers  {
   public class EmployeeController : Controller {
      // GET: Employee
      public ActionResult Search(string name){
         var input = Server.HtmlEncode(name);
         return Content(input);
      }
   }
}
If you add a parameter to an action method, then the MVC framework will look for the value that matches the parameter name. It will apply all the possible combination to find out the parameter value. It will search in the Route data, query string, etc.
Hence, if you request for /Employee/Mark”, then the MVC framework will decide that I need a parameter with “UserInput”, and then Mark will get picked from the URL and that will get automatically passed.
Server.HtmlEncode will simply convert any kind of malicious script in plain text. When the above code is compiled and executed and requests the following URL http://localhost:61465/Employee/Mark, you will get the following output.

As you can see in the above screenshot, Mark is picked from the URL.
ASP.NET MVC - Actions
ASP.NET MVC Action Methods are responsible to execute requests and generate responses to it. By default, it generates a response in the form of ActionResult. Actions typically have a one-to-one mapping with user interactions.
For example, enter a URL into the browser, click on any particular link, and submit a form, etc. Each of these user interactions causes a request to be sent to the server. In each case, the URL of the request includes information that the MVC framework uses to invoke an action method. The one restriction on action method is that they have to be instance method, so they cannot be static methods. Also there is no return value restrictions. So you can return the string, integer, etc.
Request Processing
Actions are the ultimate request destination in an MVC application and it uses the controller base class. Let's take a look at the request processing.
When a URL arrives, like /Home/index, it is the UrlRoutingModule that inspects and understands that something configured within the routing table knows how to handle that URL.
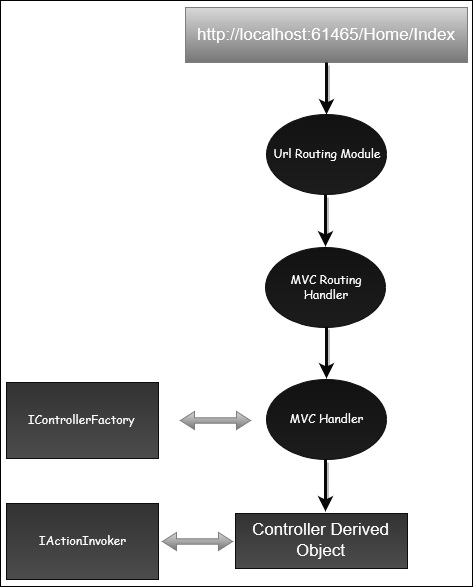
The UrlRoutingModule puts together the information we've configured in the routing table and hands over control to the MVC route handler.
The MVC route handler passes the controller over to the MvcHandler which is an HTTP handler.
MvcHandler uses a controller factory to instantiate the controller and it knows what controller to instantiate because it looks in the RouteData for that controller value.
Once the MvcHandler has a controller, the only thing that MvcHandler knows about is IController Interface, so it simply tells the controller to execute.
When it tells the controller to execute, that's been derived from the MVC's controller base class. The Execute method creates an action invoker and tells that action invoker to go and find a method to invoke, find an action to invoke.
The action invoker, again, looks in the RouteData and finds that action parameter that's been passed along from the routing engine.
Types of Action
Actions basically return different types of action results. The ActionResult class is the base for all action results. Following is the list of different kind of action results and its behavior.
| Sr.No. | Name and Behavior |
|---|---|
| 1 | ContentResult Returns a string |
| 2 | FileContentResult Returns file content |
| 3 | FilePathResult Returns file content |
| 4 | FileStreamResult Returns file content |
| 5 | EmptyResult Returns nothing |
| 6 | JavaScriptResult Returns script for execution |
| 7 | JsonResult Returns JSON formatted data |
| 8 | RedirectToResult Redirects to the specified URL |
| 9 | HttpUnauthorizedResult Returns 403 HTTP Status code |
| 10 | RedirectToRouteResult Redirects to different action/different controller action |
| 11 | ViewResult Received as a response for view engine |
| 12 | PartialViewResult Received as a response for view engine |
Let’s have a look at a simple example from the previous chapter in which we have created an EmployeeController.
using System;
using System.Collections.Generic;
using System.Linq;

using System.Web;
using System.Web.Mvc;

namespace MVCControllerDemo.Controllers {
   public class EmployeeController : Controller{
      // GET: Employee
      public ActionResult Search(string name){
         var input = Server.HtmlEncode(name);
         return Content(input);
      }
   }
}
When you request the following URL http://localhost:61465/Employee/Mark, then you will receive the following output as an action.

Add Controller
Let us add one another controller.
Step 1 − Right-click on Controllers folder and select Add → Controller.

It will display the Add Scaffold dialog.

Step 2 − Select the MVC 5 Controller – Empty option and click ‘Add’ button.
The Add Controller dialog will appear.

Step 3 − Set the name to CustomerController and click ‘Add’ button.
Now you will see a new C# file ‘CustomerController.cs’ in the Controllers folder, which is open for editing in Visual Studio as well.
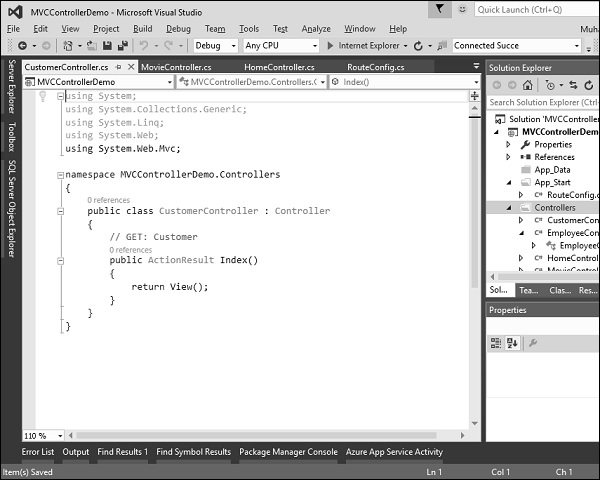
Similarly, add one more controller with name HomeController. Following is the HomeController.cs class implementation.
using System;
using System.Collections.Generic;
using System.Linq;
using System.Web;
using System.Web.Mvc;
namespace MVCControllerDemo.Controllers {
public class HomeController : Controller{
// GET: Home
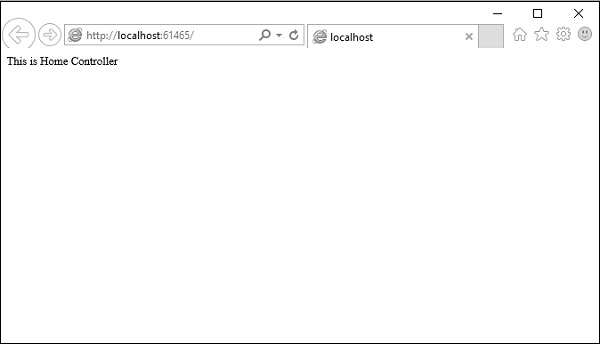
public string Index(){
return "This is Home Controller";
}
}
}
Step 4 − Run this application and you will receive the following output.
Step 5 − Add the following code in Customer controller, which we have created above.
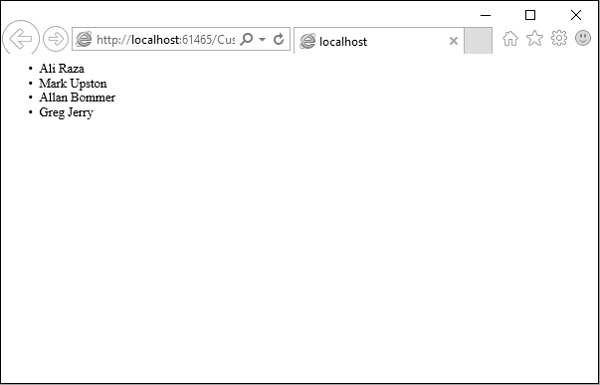
public string GetAllCustomers(){
   return @"<ul>
      <li>Ali Raza</li>
      <li>Mark Upston</li>
      <li>Allan Bommer</li>
      <li>Greg Jerry</li>
   </ul>";
}
Step 6 − Run this application and request for http://localhost:61465/Customer/GetAllCustomers. You will see the following output.
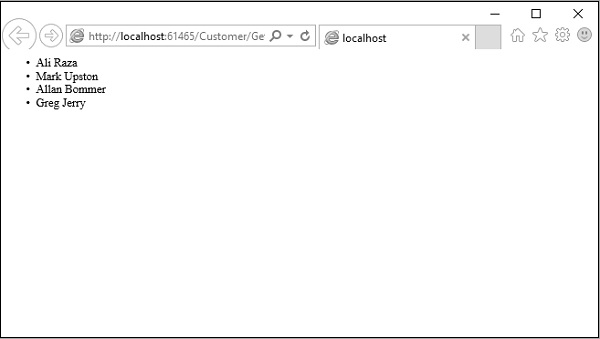
You can also redirect to actions for the same controller or even for a different controller.
Following is a simple example in which we will redirect from HomeController to Customer Controller by changing the code in HomeController using the following code.
using System;
using System.Collections.Generic;
using System.Linq;

using System.Web;
using System.Web.Mvc;

namespace MVCControllerDemo.Controllers{
   public class HomeController : Controller{
      // GET: Home
      public ActionResult Index(){
         return RedirectToAction("GetAllCustomers","Customer");
      }
   }
}
As you can see, we have used the RedirectToAction() method ActionResult, which takes two parameters, action name and controller name.
When you run this application, you will see the default route will redirect it to /Customer/GetAllCustomers
ASP.NET MVC - Filters
In ASP.NET MVC, controllers define action methods that usually have a one-to-one relationship with possible user interactions, but sometimes you want to perform logic either before an action method is called or after an action method runs.
To support this, ASP.NET MVC provides filters. Filters are custom classes that provide both a declarative and programmatic means to add pre-action and post-action behavior to controller action methods.
Action Filters
An action filter is an attribute that you can apply to a controller action or an entire controller that modifies the way in which the action is executed. The ASP.NET MVC framework includes several action filters −
OutputCache − Caches the output of a controller action for a specified amount of time.
HandleError − Handles errors raised when a controller action is executed.
Authorize − Enables you to restrict access to a particular user or role.
Types of Filters
The ASP.NET MVC framework supports four different types of filters −
Authorization Filters − Implements the IAuthorizationFilter attribute.
Action Filters − Implements the IActionFilter attribute.
Result Filters − Implements the IResultFilter attribute.
Exception Filters − Implements the IExceptionFilter attribute.
Filters are executed in the order listed above. For example, authorization filters are always executed before action filters and exception filters are always executed after every other type of filter.
Authorization filters are used to implement authentication and authorization for controller actions. For example, the Authorize filter is an example of an Authorization filter.
Let’s take a look at a simple example by creating a new ASP.Net MVC project.
Step 1 − Open the Visual Studio and click File → New → Project menu option.
A new Project dialog opens.
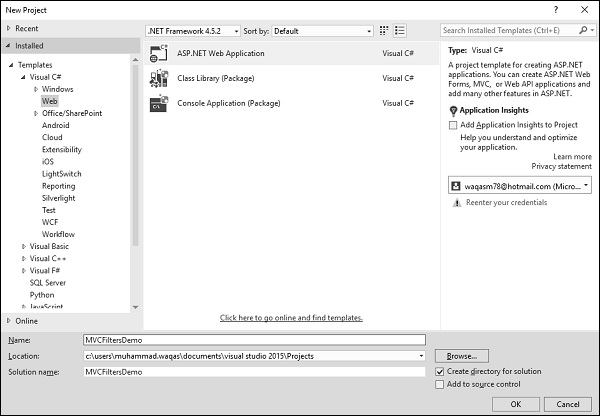
Step 2 − From the left pane, select Templates → Visual C# → Web.
Step 3 − In the middle pane, select ASP.NET Web Application.
Step 4 − Enter project name MVCFiltersDemo in the Name field and click ok to continue and you will see the following dialog which asks you to set the initial content for the ASP.NET project.

Step 5 − To keep things simple, select the Empty option and check the MVC checkbox in the ‘Add folders and core references for’ section and click Ok.
It will create a basic MVC project with minimal predefined content.
Step 6 − To add a controller, right-click on the controller folder in the solution explorer and select Add → Controller.
It will display the Add Scaffold dialog.

Step 7 − Select the MVC 5 Controller – Empty option and click ‘Add’ button.
The Add Controller dialog will appear.
Step 8 − Set the name to HomeController and click ‘Add’ button.
You will see a new C# file ‘HomeController.cs’ in the Controllers folder, which is open for editing in Visual Studio as well.
Apply Action Filter
An action filter can be applied to either an individual controller action or an entire controller. For example, an action filter OutputCache is applied to an action named Index() that returns the string. This filter causes the value returned by the action to be cached for 15 seconds.
To make this a working example, let’s modify the controller class by changing the action method called Index using the following code.
using System;
using System.Collections.Generic;
using System.Linq;
using System.Web;
using System.Web.Mvc;
namespace MVCFiltersDemo.Controllers {
public class HomeController : Controller{
// GET: Home
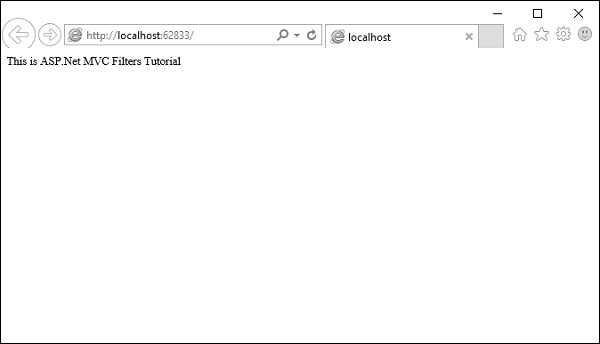
[OutputCache(Duration = 15)]
public string Index(){
return "This is ASP.Net MVC Filters Tutorial";
}
}
}
When you run this application, you will see that the browser is displaying the result of the Index action method.
Let’s add another action method, which will display the current time.
namespace MVCFiltersDemo.Controllers{
   public class HomeController : Controller{
      // GET: Home

      [OutputCache(Duration = 15)]
      public string Index(){
         return "This is ASP.Net MVC Filters Tutorial";
      }

      [OutputCache(Duration = 20)]
      public string GetCurrentTime(){
         return DateTime.Now.ToString("T");
      }
   }
}
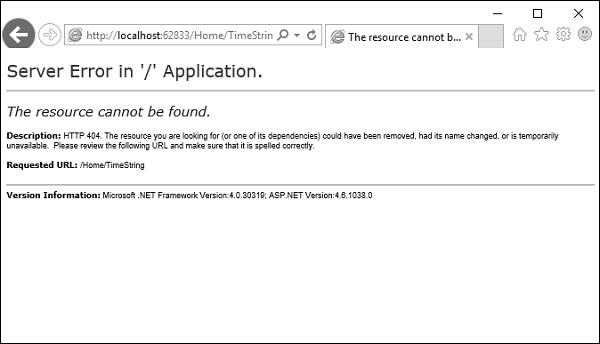
Request for the following URL, http://localhost:62833/Home/GetCurrentTime, and you will receive the following output.
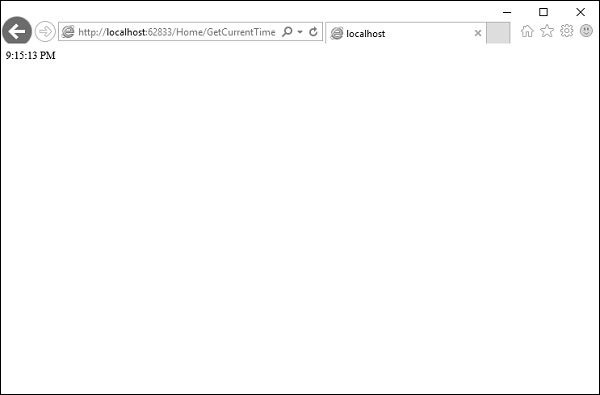
If you refresh the browser, you will see the same time because the action is cached for 20 seconds. It will be updated when you refresh it after 20 seconds.
Custom Filters
To create your own custom filter, ASP.NET MVC framework provides a base class which is known as ActionFilterAttribute. This class implements both IActionFilter and IResultFilter interfaces and both are derived from the Filter class.
Let’s take a look at a simple example of custom filter by creating a new folder in your project with ActionFilters. Add one class for which right-click on ActionFilters folder and select Add → Class.
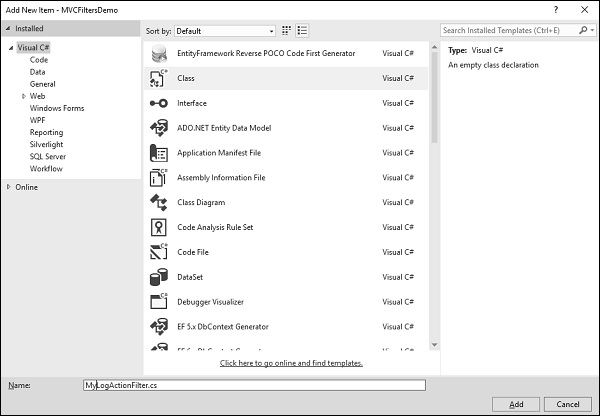
Enter ‘MyLogActionFilter’ in the name field and click ‘Add’ button.
This class will be derived from the ActionFilterAttribute, which is a base class and overrides the following method. Following is the complete implementation of MyLogActionFilter.
using System;
using System.Collections.Generic;
using System.Diagnostics;
using System.Linq;

using System.Web;
using System.Web.Mvc;
using System.Web.Routing;

namespace MVCFiltersDemo.ActionFilters {
   public class MyLogActionFilter : ActionFilterAttribute{
      public override void OnActionExecuting(ActionExecutingContext filterContext){
         Log("OnActionExecuting", filterContext.RouteData);
      }

      public override void OnActionExecuted(ActionExecutedContext filterContext){
         Log("OnActionExecuted", filterContext.RouteData);
      }

      public override void OnResultExecuting(ResultExecutingContext filterContext){
         Log("OnResultExecuting", filterContext.RouteData);
      }

      public override void OnResultExecuted(ResultExecutedContext filterContext){
         Log("OnResultExecuted", filterContext.RouteData);
      }

      private void Log(string methodName, RouteData routeData){
         var controllerName = routeData.Values["controller"];
         var actionName = routeData.Values["action"];

         var message = String.Format(
            "{0} controller:{1} action:{2}", methodName, controllerName, actionName);

         Debug.WriteLine(message, "Action Filter Log");
      }
   }
}
Let us now apply the log filter to the HomeController using the following code.
using MVCFiltersDemo.ActionFilters;
using System;
using System.Collections.Generic;
using System.Linq;

using System.Web;
using System.Web.Mvc;

namespace MVCFiltersDemo.Controllers {
   [MyLogActionFilter]
   public class HomeController : Controller{
      // GET: Home

      [OutputCache(Duration = 10)]
      public string Index(){
         return "This is ASP.Net MVC Filters Tutorial";
      }

      [OutputCache(Duration = 10)]
      public string GetCurrentTime(){
         return DateTime.Now.ToString("T");
      }
   }
}
Run the application and then observe the output window.

As seen in the above screenshot, the stages of processing the action are logged to the Visual Studio output window.
ASP.NET MVC - Selectors
Action selectors are attributes that can be applied to action methods and are used to influence which action method gets invoked in response to a request. It helps the routing engine to select the correct action method to handle a particular request.
It plays a very crucial role when you are writing your action methods. These selectors will decide the behavior of the method invocation based on the modified name given in front of the action method. It is usually used to alias the name of the action method.
There are three types of action selector attributes −
- ActionName
- NonAction
- ActionVerbs
ActionName
This class represents an attribute that is used for the name of an action. It also allows developers to use a different action name than the method name.
Let’s take a look at a simple example from the last chapter in which we have HomeController containing two action methods.
using System;
using System.Collections.Generic;
using System.Linq;

using System.Web;
using System.Web.Mvc;

namespace MVCFiltersDemo.Controllers {
   public class HomeController : Controller{
      // GET: Home
      public string Index(){
         return "This is ASP.Net MVC Filters Tutorial";
      }

      public string GetCurrentTime(){
         return DateTime.Now.ToString("T");
      }
   }
}
Let’s apply the the ActionName selector for GetCurrentTime by writing [ActionName("CurrentTime")] above the GetCurrentTime() as shown in the following code.
using System;
using System.Collections.Generic;
using System.Linq;

using System.Web;
using System.Web.Mvc;

namespace MVCFiltersDemo.Controllers {
   public class HomeController : Controller{
      // GET: Home
      public string Index(){
         return "This is ASP.Net MVC Filters Tutorial";
      }

      [ActionName("CurrentTime")]
      public string GetCurrentTime(){
         return DateTime.Now.ToString("T");
      }
   }
}
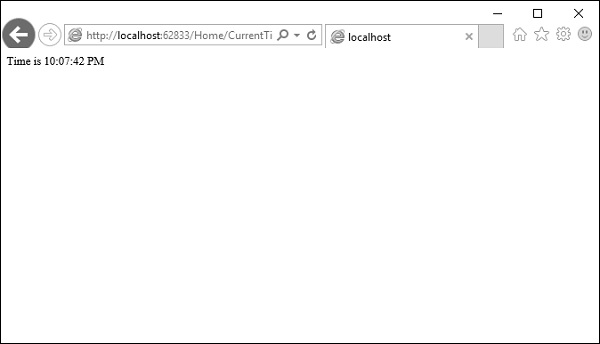
Now run this application and enter the following URL in the browser http://localhost:62833/Home/CurrentTime, you will receive the following output.

You can see that we have used the CurrentTime instead of the original action name, which is GetCurrentTime in the above URL.
NonAction
NonAction is another built-in attribute, which indicates that a public method of a Controller is not an action method. It is used when you want that a method shouldn’t be treated as an action method.
Let’s take a look at a simple example by adding another method in HomeController and also apply the NonAction attribute using the following code.
using MVCFiltersDemo.ActionFilters;
using System;
using System.Collections.Generic;
using System.Linq;

using System.Web;
using System.Web.Mvc;

namespace MVCFiltersDemo.Controllers {
   public class HomeController : Controller{
      // GET: Home
      public string Index(){
         return "This is ASP.Net MVC Filters Tutorial";
      }

      [ActionName("CurrentTime")]
      public string GetCurrentTime(){
         return TimeString();
      }

      [NonAction]
      public string TimeString(){
         return "Time is " + DateTime.Now.ToString("T");
      }
   }
}
The new method TimeString is called from the GetCurrentTime() but you can’t use it as action in URL.
Let’s run this application and specify the following URL http://localhost:62833/Home/CurrentTime in the browser. You will receive the following output.
Let us now check the /TimeString as action in the URL and see what happens.
You can see that it gives ‘404—Not Found’ error.
ActionVerbs
Another selector filter that you can apply is the ActionVerbs attributes. So this restricts the indication of a specific action to specific HttpVerbs. You can define two different action methods with the same name but one action method responds to an HTTP Get request and another action method responds to an HTTP Post request.
MVC framework supports the following ActionVerbs.
- HttpGet
- HttpPost
- HttpPut
- HttpDelete
- HttpOptions
- HttpPatch
Let’s take a look at a simple example in which we will create EmployeeController.
using System;
using System.Collections.Generic;
using System.Linq;

using System.Web;
using System.Web.Mvc;

namespace MVCControllerDemo.Controllers {
   public class EmployeeController : Controller{
      // GET: Employee
      public ActionResult Search(string name = “No name Entered”){
         var input = Server.HtmlEncode(name);
         return Content(input);
      }
   }
}
Now let’s add another action method with the same name using the following code.
using System;
using System.Collections.Generic;
using System.Linq;
using System.Web;
using System.Web.Mvc;
namespace MVCControllerDemo.Controllers {
public class EmployeeController : Controller{
// GET: Employee
//public ActionResult Index()
//{
// return View();
//}
public ActionResult Search(string name){
var input = Server.HtmlEncode(name);
return Content(input);
}
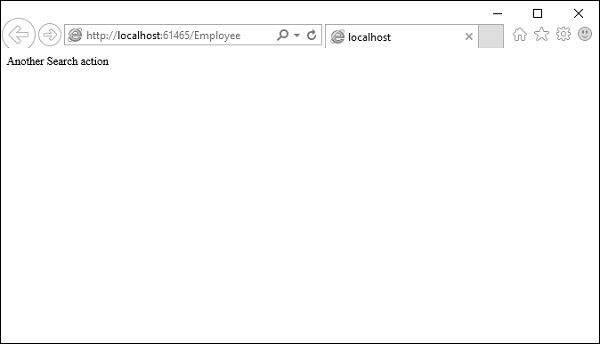
public ActionResult Search(){
var input = "Another Search action";
return Content(input);
}
}
}
When you run this application, it will give an error because the MVC framework is unable to figure out which action method should be picked up for the request.
Let us specify the HttpGet ActionVerb with the action you want as response using the following code.
using System;
using System.Collections.Generic;
using System.Linq;

using System.Web;
using System.Web.Mvc;

namespace MVCControllerDemo.Controllers {
   public class EmployeeController : Controller{
      // GET: Employee
      //public ActionResult Index()
      //{
         // return View();
      //}

      public ActionResult Search(string name){
         var input = Server.HtmlEncode(name);
         return Content(input);
      }

      [HttpGet]
      public ActionResult Search(){
         var input = "Another Search action";
         return Content(input);
      }
   }
}
When you run this application, you will receive the following output.
ASP.NET MVC - Views
In an ASP.NET MVC application, there is nothing like a page and it also doesn’t include anything that directly corresponds to a page when you specify a path in URL. The closest thing to a page in an ASP.NET MVC application is known as a View.
In ASP.NET MVC application, all incoming browser requests are handled by the controller and these requests are mapped to controller actions. A controller action might return a view or it might also perform some other type of action such as redirecting to another controller action.
Let’s take a look at a simple example of View by creating a new ASP.NET MVC project.
Step 1 − Open the Visual Studio and click File → New → Project menu option.
A new Project dialog opens.

Step 2 − From the left pane, select Templates → Visual C# → Web.
Step 3 − In the middle pane, select ASP.NET Web Application.
Step 4 − Enter the project name ‘MVCViewDemo’ in the Name field and click Ok to continue. You will see the following dialog which asks you to set the initial content for the ASP.NET project.

Step 5 − To keep things simple, select the Empty option and check the MVC checkbox in the ‘Add folders and core references for’ section and click Ok.
It will create a basic MVC project with minimal predefined content. We now need to add controller.
Step 6 − Right-click on the controller folder in the solution explorer and select Add → Controller.
It will display the Add Scaffold dialog.

Step 7 − Select the MVC 5 Controller – Empty option and click ‘Add’ button.
The Add Controller dialog will appear.
Step 8 − Set the name to HomeController and click ‘Add’ button.
You will see a new C# file ‘HomeController.cs’ in the Controllers folder which is open for editing in Visual Studio as well.
Let’s update the HomeController.cs file, which contains two action methods as shown in the following code.
using System;
using System.Collections.Generic;
using System.Linq;
using System.Web;
using System.Web.Mvc;
namespace MVCViewDemo.Controllers {
public class HomeController : Controller{
// GET: Home
public ActionResult Index(){
return View();
}
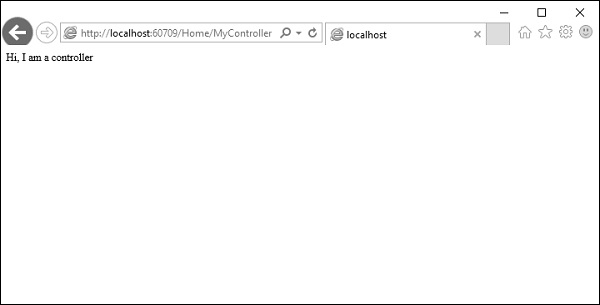
public string Mycontroller(){
return "Hi, I am a controller";
}
}
}
Step 9 − Run this application and apend /Home/MyController to the URL in the browser and press enter. You will receive the following output.
As MyController action simply returns the string, to return a View from the action we need to add a View first.
Step 10 − Before adding a view let’s add another action, which will return a default view.
using System;
using System.Collections.Generic;
using System.Linq;

using System.Web;
using System.Web.Mvc;

namespace MVCViewDemo.Controllers {
   public class HomeController : Controller{
      // GET: Home
      public ActionResult Index(){
         return View();
      }

      public string Mycontroller(){
         return "Hi, I am a controller";
      }

      public ActionResult MyView(){
         return View();
      }
   }
}
Step 11 − Run this application and apend /Home/MyView to the URL in the browser and press enter. You will receive the following output.
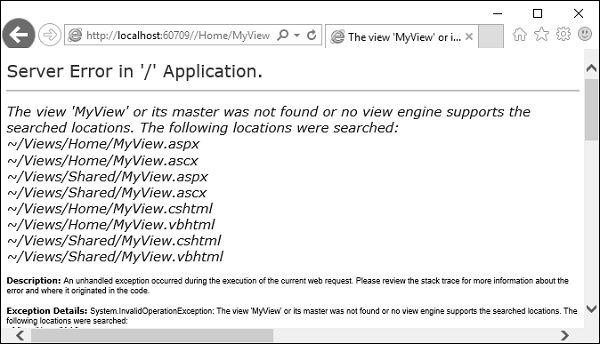
You can see here that we have an error and this error is actually quite descriptive, which tells us it can't find the MyView view.
Step 12 − To add a view, right-click inside the MyView action and select Add view.
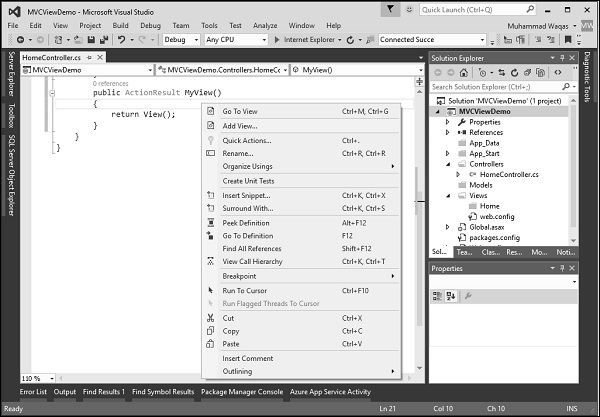
It will display the Add View dialog and it is going to add the default name.
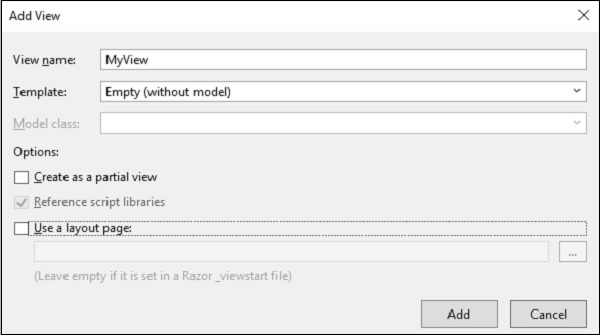
Step 13 − Uncheck the ‘Use a layout page’ checkbox and click ‘Add’ button.
We now have the default code inside view.
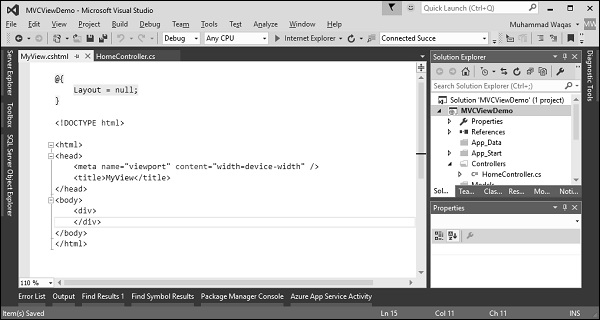
Step 14 − Add some text in this view using the following code.
@{
   Layout = null;
}

<!DOCTYPE html>
<html>
   <head>
      <meta name = "viewport" content = "width = device-width" />
      <title>MyView</title>
   </head>

   <body>
      <div>
         Hi, I am a view
      </div>
   </body>

</html>
Step 15 − Run this application and apend /Home/MyView to the URL in the browser. Press enter and you will receive the following output.
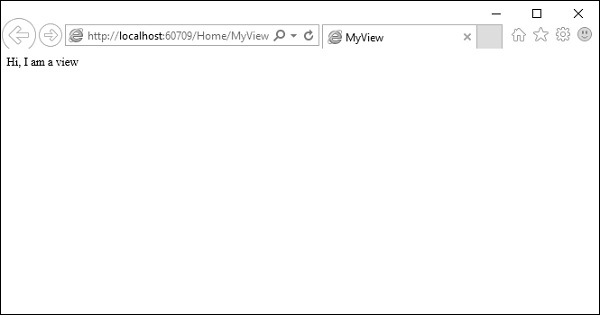
You can now see the text from the View.
ASP.NET MVC - Data Model
In this chapter, we will discuss about building models in an ASP.NET MVC Framework application. A model stores data that is retrieved according to the commands from the Controller and displayed in the View.
Model is a collection of classes wherein you will be working with data and business logic. Hence, basically models are business domain-specific containers. It is used to interact with database. It can also be used to manipulate the data to implement the business logic.
Let’s take a look at a simple example of Model by creating a new ASP.Net MVC project.
Step 1 − Open the Visual Studio. Click File → New → Project menu option.
A new Project dialog opens.

Step 2 − From the left pane, select Templates → Visual C# → Web.
Step 3 − In the middle pane, select ASP.NET Web Application.
Step 4 − Enter the project name ‘MVCSimpleApp’ in the Name field and click Ok to continue. You will see the following dialog which asks you to set the initial content for the ASP.NET project.
Step 5 − To keep things simple, select the Empty option and check the MVC checkbox in the ‘Add folders and core references for’ section and click Ok.
It will create a basic MVC project with minimal predefined content.
We need to add a controller now.
Step 6 − Right-click on the controller folder in the solution explorer and select Add → Controller.
It will display the Add Scaffold dialog.
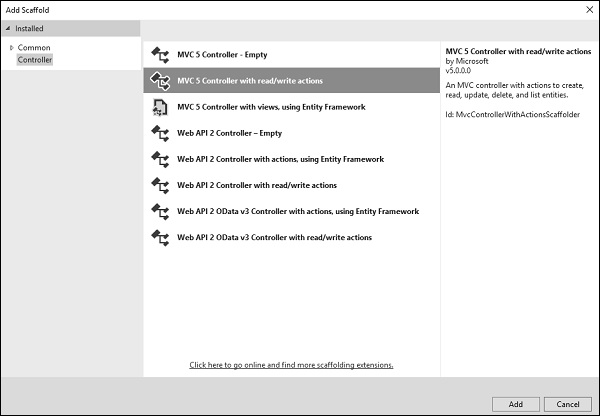
Step 7 − Select the MVC 5 Controller – with read/write actions option. This template will create an Index method with default action for Controller. This will also list other methods like Edit/Delete/Create as well.
Step 8 − Click ‘Add’ button and Add Controller dialog will appear.

Step 9 − Set the name to EmployeeController and click the ‘Add’ button.
Step 10 − You will see a new C# file ‘EmployeeController.cs’ in the Controllers folder, which is open for editing in Visual Studio with some default actions.
using System;
using System.Collections.Generic;
using System.Linq;

using System.Web;
using System.Web.Mvc;

namespace MVCSimpleApp.Controllers {
   public class EmployeeController : Controller{
      // GET: Employee
      public ActionResult Index(){
         return View();
      }

      // GET: Employee/Details/5
      public ActionResult Details(int id){
         return View();
      }

      // GET: Employee/Create
      public ActionResult Create(){
         return View();
      }

      // POST: Employee/Create
      [HttpPost]
      public ActionResult Create(FormCollection collection){
         try{
            // TODO: Add insert logic here
            return RedirectToAction("Index");
         }catch{
            return View();
         }
      }

      // GET: Employee/Edit/5
      public ActionResult Edit(int id){
         return View();
      }

      // POST: Employee/Edit/5
      [HttpPost]
      public ActionResult Edit(int id, FormCollection collection){
         try{
            // TODO: Add update logic here
            return RedirectToAction("Index");
         }catch{
            return View();
         }
      }

      // GET: Employee/Delete/5
      public ActionResult Delete(int id){
         return View();
      }

      // POST: Employee/Delete/5
      [HttpPost]
      public ActionResult Delete(int id, FormCollection collection){
         try{
            // TODO: Add delete logic here
            return RedirectToAction("Index");
         }catch{
            return View();
         }
      }
   }
}
Let’s add a model.
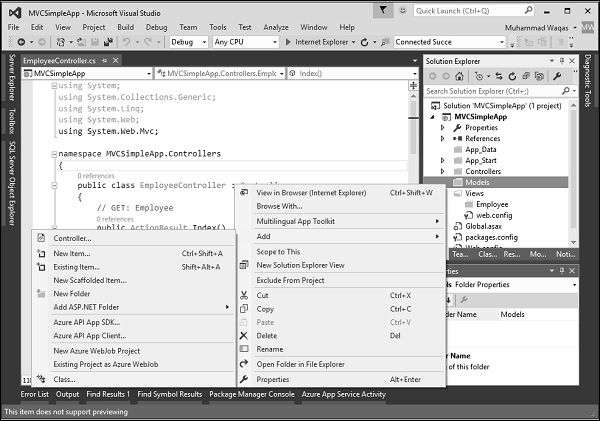
Step 11 − Right-click on the Models folder in the solution explorer and select Add → Class.
You will see the Add New Item dialog.

Step 12 − Select Class in the middle pan and enter Employee.cs in the name field.
Step 13 − Add some properties to Employee class using the following code.
using System;
using System.Collections.Generic;
using System.Linq;
using System.Web;

namespace MVCSimpleApp.Models {
   public class Employee{
      public int ID { get; set; }
      public string Name { get; set; }
      public DateTime JoiningDate { get; set; }
      public int Age { get; set; }
   }
}
Let’s update the EmployeeController.cs file by adding one more method, which will return the list of employee.
[NonAction]
public List<Employee> GetEmployeeList(){
   return new List<Employee>{
      new Employee{
         ID = 1,
         Name = "Allan",
         JoiningDate = DateTime.Parse(DateTime.Today.ToString()),
         Age = 23
      },

      new Employee{
         ID = 2,
         Name = "Carson",
         JoiningDate = DateTime.Parse(DateTime.Today.ToString()),
         Age = 45
      },

      new Employee{
         ID = 3,
         Name = "Carson",
         JoiningDate = DateTime.Parse(DateTime.Today.ToString()),
         Age = 37
      },

      new Employee{
         ID = 4,
         Name = "Laura",
         JoiningDate = DateTime.Parse(DateTime.Today.ToString()),
         Age = 26
      },
   };
}
Step 14 − Update the index action method as shown in the following code.
public ActionResult Index(){
   var employees = from e in GetEmployeeList()
   orderby e.ID
   select e;
   return View(employees);
}
Step 15 − Run this application and append /employee to the URL in the browser and press Enter. You will see the following output.

As seen in the above screenshot, there is an error and this error is actually quite descriptive which tells us it can't find the Index view.
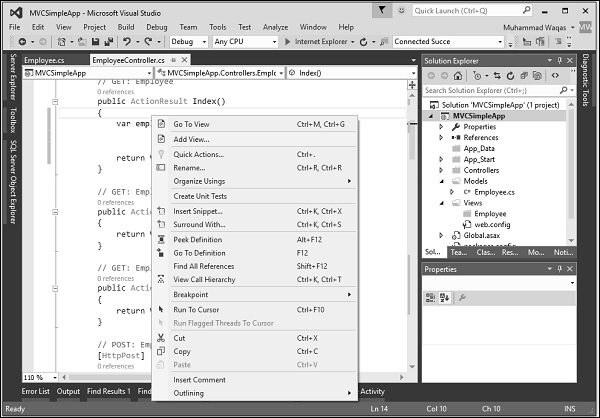
Step 16 − Hence to add a view, right-click inside the Index action and select Add view.
It will display the Add View dialog and it is going to add the default name.
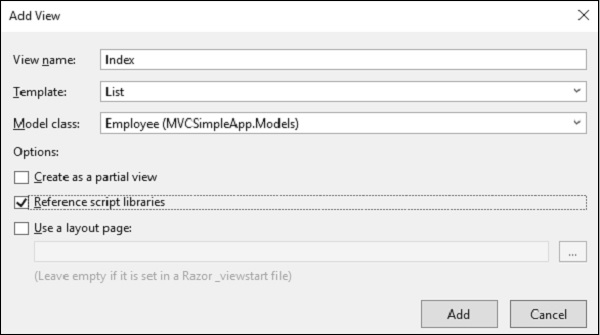
Step 17 − Select the List from the Template dropdown and Employee in Model class dropdown and also uncheck the ‘Use a layout page’ checkbox and click ‘Add’ button.
It will add some default code for you in this view.
@model IEnumerable<MVCSimpleApp.Models.Employee>
@{
   Layout = null;
}

<!DOCTYPE html>
<html>
   <head>
      <meta name = "viewport" content = "width = device-width" />
      <title>Index</title>
   </head>

   <body>
      <p>@Html.ActionLink("Create New", "Create")</p>
         <table class = "table">
         <tr>
            <th>
               @Html.DisplayNameFor(model => model.Name)
            </th>

            <th>
               @Html.DisplayNameFor(model => model.JoiningDate)
            </th>

            <th>
               @Html.DisplayNameFor(model => model.Age)
            </th>

            <th></th>
         </tr>

         @foreach (var item in Model) {
            <tr>
               <td>
                  @Html.DisplayFor(modelItem => item.Name)
               </td>

               <td>
                  @Html.DisplayFor(modelItem => item.JoiningDate)
               </td>

               <td>
                  @Html.DisplayFor(modelItem => item.Age)
               </td>

               <td>
                  @Html.ActionLink("Edit", "Edit", new { id = item.ID }) |
                  @Html.ActionLink("Details", "Details", new { id = item.ID }) |
                  @Html.ActionLink("Delete", "Delete", new { id = item.ID })
               </td>

            </tr>
         }

      </table>
   </body>
</html>
Step 18 − Run this application and you will receive the following output.
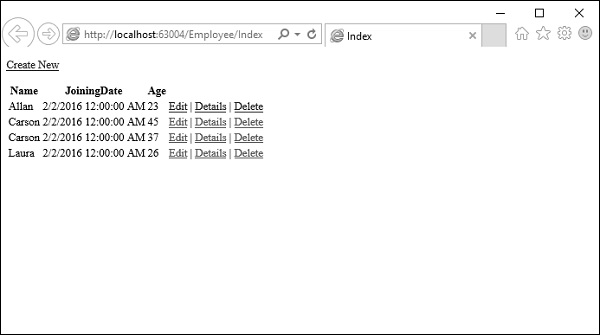
A list of employees will be displayed.
ASP.NET MVC - Helpers
In ASP.Net web forms, developers are using the toolbox for adding controls on any particular page. However, in ASP.NET MVC application there is no toolbox available to drag and drop HTML controls on the view. In ASP.NET MVC application, if you want to create a view it should contain HTML code. So those developers who are new to MVC especially with web forms background finds this a little hard.
To overcome this problem, ASP.NET MVC provides HtmlHelper class which contains different methods that help you create HTML controls programmatically. All HtmlHelper methods generate HTML and return the result as a string. The final HTML is generated at runtime by these functions. The HtmlHelper class is designed to generate UI and it should not be used in controllers or models.
There are different types of helper methods.
Createinputs − Creates inputs for text boxes and buttons.
Createlinks − Creates links that are based on information from the routing tables.
Createforms − Create form tags that can post back to our action, or to post back to an action on a different controller.
| Sr.No. | Method and Description |
|---|---|
| 1 | Action(String) Overloaded. Invokes the specified child action method and returns the result as an HTML string. (Defined by ChildActionExtensions) |
| 2 | Action(String, Object) Overloaded. Invokes the specified child action method with the specified parameters and returns the result as an HTML string. (Defined by ChildActionExtensions) |
| 3 | Action(String, RouteValueDictionary) Overloaded. Invokes the specified child action method using the specified parameters and returns the result as an HTML string. (Defined by ChildActionExtensions) |
| 4 | Action(String, String) Overloaded. Invokes the specified child action method using the specified controller name and returns the result as an HTML string. (Defined by ChildActionExtensions) |
| 5 | Action(String, String, Object) Overloaded. Invokes the specified child action method using the specified parameters and controller name and returns the result as an HTML string. (Defined by ChildActionExtensions) |
| 6 | Action(String, String, RouteValueDictionary) Overloaded. Invokes the specified child action method using the specified parameters and controller name and returns the result as an HTML string. (Defined by ChildActionExtensions) |
| 7 | ActionLink(String, String) Overloaded. (Defined by LinkExtensions) |
| 8 | ActionLink(String, String, Object) Overloaded. (Defined by LinkExtensions) |
| 9 | ActionLink(String, String, Object, Object) Overloaded. (Defined by LinkExtensions) |
| 10 | ActionLink(String, String, RouteValueDictionary) Overloaded. (Defined by LinkExtensions) |
| 11 | ActionLink(String, String, RouteValueDictionary, IDictionary<String, Object>) Overloaded. (Defined by LinkExtensions) |
| 12 | ActionLink(String, String, String) Overloaded. (Defined by LinkExtensions) |
| 13 | ActionLink(String, String, String, Object, Object) Overloaded. (Defined by LinkExtensions) |
| 14 | ActionLink(String, String, String, RouteValueDictionary, IDictionary<String, Object>) Overloaded. (Defined by LinkExtensions) |
| 15 | ActionLink(String, String, String, String, String, String, Object, Object) Overloaded. (Defined by LinkExtensions) |
| 16 | ActionLink(String, String, String, String, String, String, RouteValueDictionary, IDictionary<String, Object>) Overloaded. (Defined by LinkExtensions) |
| 17 | BeginForm() Overloaded. Writes an opening <form> tag to the response. The form uses the POST method, and the request is processed by the action method for the view. (Defined by FormExtensions) |
| 18 | BeginForm(Object) Overloaded. Writes an opening <form> tag to the response and includes the route values in the action attribute. The form uses the POST method, and the request is processed by the action method for the view. (Defined by FormExtensions) |
| 19 | BeginForm(RouteValueDictionary) Overloaded. Writes an opening <form> tag to the response and includes the route values from the route value dictionary in the action attribute. The form uses the POST method, and the request is processed by the action method for the view. (Defined by FormExtensions.) |
| 20 | BeginForm(String, String) Overloaded. Writes an opening <form> tag to the response and sets the action tag to the specified controller and action. The form uses the POST method. (Defined by FormExtensions) |
| 21 | BeginForm(String, String, FormMethod) Overloaded. Writes an opening <form> tag to the response and sets the action tag to the specified controller and action. The form uses the specified HTTP method. (Defined by FormExtensions) |
| 22 | BeginForm(String, String, FormMethod, IDictionary<String, Object>) Overloaded. Writes an opening <form> tag to the response and sets the action tag to the specified controller and action. The form uses the specified HTTP method and includes the HTML attributes from a dictionary. (Defined by FormExtensions) |
| 23 | BeginForm(String, String, FormMethod, Object) Overloaded. Writes an opening <form> tag to the response and sets the action tag to the specified controller and action. The form uses the specified HTTP method and includes the HTML attributes. (Defined by FormExtensions) |
| 24 | BeginForm(String, String, Object) Overloaded. Writes an opening <form> tag to the response, and sets the action tag to the specified controller, action, and route values. The form uses the POST method. (Defined by FormExtensions) |
| 25 | BeginForm(String, String, Object, FormMethod) Overloaded. Writes an opening <form> tag to the response and sets the action tag to the specified controller, action, and route values. The form uses the specified HTTP method. (Defined by FormExtensions) |
| 26 | BeginForm(String, String, Object, FormMethod, Object) Overloaded. Writes an opening <form> tag to the response and sets the action tag to the specified controller, action, and route values. The form uses the specified HTTP method and includes the HTML attributes. (Defined by FormExtensions) |
| 27 | BeginForm(String, String, RouteValueDictionary) Overloaded. Writes an opening <form> tag to the response, and sets the action tag to the specified controller, action, and route values from the route value dictionary. The form uses the POST method. (Defined by FormExtensions) |
| 28 | BeginForm(String, String, RouteValueDictionary, FormMethod) Overloaded. Writes an opening <form> tag to the response, and sets the action tag to the specified controller, action, and route values from the route value dictionary. The form uses the specified HTTP method. (Defined by FormExtensions) |
| 29 | BeginForm(String, String, RouteValueDictionary, FormMethod, IDictionary<String, Object>) Overloaded. Writes an opening <form> tag to the response, and sets the action tag to the specified controller, action, and route values from the route value dictionary. The form uses the specified HTTP method, and includes the HTML attributes from the dictionary. (Defined by FormExtensions) |
| 30 | BeginRouteForm(Object) Overloaded. Writes an opening <form> tag to the response. When the user submits the form, the request will be processed by the route target. (Defined by FormExtensions) |
| 31 | BeginRouteForm(RouteValueDictionary) Overloaded. Writes an opening <form> tag to the response. When the user submits the form, the request will be processed by the route target. (Defined by FormExtensions) |
| 32 | BeginRouteForm(String) Overloaded. Writes an opening <form> tag to the response. When the user submits the form, the request will be processed by the route target. (Defined by FormExtensions) |
| 33 | BeginRouteForm(String, FormMethod) Overloaded. Writes an opening <form> tag to the response. When the user submits the form, the request will be processed by the route target. (Defined by FormExtensions) |
| 34 | BeginRouteForm(String, FormMethod, IDictionary<String, Object>) Overloaded. Writes an opening <form> tag to the response. When the user submits the form, the request will be processed by the route target. (Defined by FormExtensions) |
| 35 | BeginRouteForm(String, FormMethod, Object) Overloaded. Writes an opening <form> tag to the response. When the user submits the form, the request will be processed by the route target. (Defined by FormExtensions) |
| 36 | BeginRouteForm(String, Object) Overloaded. Writes an opening <form> tag to the response. When the user submits the form, the request will be processed by the route target. (Defined by FormExtensions) |
| 37 | BeginRouteForm(String, Object, FormMethod) Overloaded. Writes an opening <form> tag to the response. When the user submits the form, the request will be processed by the route target. (Defined by FormExtensions) |
| 38 | BeginRouteForm(String, Object, FormMethod, Object) Overloaded. Writes an opening <form> tag to the response. When the user submits the form, the request will be processed by the route target. (Defined by FormExtensions) |
| 39 | BeginRouteForm(String, RouteValueDictionary) Overloaded. Writes an opening <form> tag to the response. When the user submits the form, the request will be processed by the route target. (Defined by FormExtensions) |
| 40 | BeginRouteForm(String, RouteValueDictionary, FormMethod) Overloaded. Writes an opening <form> tag to the response. When the user submits the form, the request will be processed by the route target. (Defined by FormExtensions) |
| 41 | BeginRouteForm(String, RouteValueDictionary, FormMethod, IDictionary<String, Object>) Overloaded. Writes an opening <form> tag to the response. When the user submits the form, the request will be processed by the route target. (Defined by FormExtensions) |
| 42 | CheckBox(String) Overloaded. Returns a checkbox input element by using the specified HTML helper and the name of the form field. (Defined by InputExtensions) |
| 43 | CheckBox(String, Boolean) Overloaded. Returns a checkbox input element by using the specified HTML helper, the name of the form field, and a value to indicate whether the check box is selected. (Defined by InputExtensions) |
| 44 | CheckBox(String, Boolean, IDictionary<String, Object>) Overloaded. Returns a checkbox input element by using the specified HTML helper, the name of the form field, a value to indicate whether the check box is selected, and the HTML attributes. (Defined by InputExtensions) |
| 45 | CheckBox(String, Boolean, Object) Overloaded. Returns a checkbox input element by using the specified HTML helper, the name of the form field, a value that indicates whether the check box is selected, and the HTML attributes. (Defined by InputExtensions) |
| 46 | CheckBox(String, IDictionary<String, Object>) Overloaded. Returns a checkbox input element by using the specified HTML helper, the name of the form field, and the HTML attributes. (Defined by InputExtensions) |
| 47 | CheckBox(String, Object) Overloaded. Returns a checkbox input element by using the specified HTML helper, the name of the form field, and the HTML attributes. (Defined by InputExtensions) |
| 48 | Display(String) Overloaded. Returns HTML markup for each property in the object that is represented by a string expression. (Defined by DisplayExtensions) |
| 49 | Display(String, Object) Overloaded. Returns HTML markup for each property in the object that is represented by a string expression, using additional view data. (Defined by DisplayExtensions) |
| 50 | Display(String, String) Overloaded. Returns HTML markup for each property in the object that is represented by the expression, using the specified template. (Defined by DisplayExtensions) |
| 51 | Display(String, String, Object) Overloaded. Returns HTML markup for each property in the object that is represented by the expression, using the specified template and additional view data. (Defined by DisplayExtensions) |
| 52 | Display(String, String, String) Overloaded. Returns HTML markup for each property in the object that is represented by the expression, using the specified template and an HTML field ID. (Defined by DisplayExtensions) |
| 53 | Display(String, String, String, Object) Overloaded. Returns HTML markup for each property in the object that is represented by the expression, using the specified template, HTML field ID, and additional view data. (Defined by DisplayExtensions) |
| 54 | DisplayForModel() Overloaded. Returns HTML markup for each property in the model. (Defined by DisplayExtensions) |
| 55 | DisplayForModel(Object) Overloaded. Returns HTML markup for each property in the model, using additional view data. (Defined by DisplayExtensions) |
| 56 | DisplayForModel(String) Overloaded. Returns HTML markup for each property in the model using the specified template. (Defined by DisplayExtensions) |
| 57 | DisplayForModel(String, Object) Overloaded. Returns HTML markup for each property in the model, using the specified template and additional view data. (Defined by DisplayExtensions) |
| 58 | DisplayForModel(String, String) Overloaded. Returns HTML markup for each property in the model using the specified template and HTML field ID. (Defined by DisplayExtensions) |
| 59 | DisplayForModel(String, String, Object) Overloaded. Returns HTML markup for each property in the model, using the specified template, an HTML field ID, and additional view data. (Defined by DisplayExtensions) |
| 60 | DisplayName(String) Gets the display name. (Defined by DisplayNameExtensions) |
| 61 | DisplayNameForModel() Gets the display name for the model. (Defined by DisplayNameExtensions) |
| 62 | DisplayText(String) Returns HTML markup for each property in the object that is represented by the specified expression. (Defined by DisplayTextExtensions) |
| 63 | DropDownList(String) Overloaded. Returns a single-selection select element using the specified HTML helper and the name of the form field. (Defined by SelectExtensions) |
| 64 | DropDownList(String, IEnumerable<SelectListItem>) Overloaded. Returns a single-selection select element using the specified HTML helper, the name of the form field, and the specified list items. (Defined by SelectExtensions) |
| 65 | DropDownList(String, IEnumerable<SelectListItem>, IDictionary<String, Object>) Overloaded. Returns a single-selection select element using the specified HTML helper, the name of the form field, the specified list items, and the specified HTML attributes. (Defined by SelectExtensions) |
| 66 | DropDownList(String, IEnumerable<SelectListItem>, Object) Overloaded. Returns a single-selection select element using the specified HTML helper, the name of the form field, the specified list items, and the specified HTML attributes. (Defined by SelectExtensions) |
| 67 | DropDownList(String, IEnumerable<SelectListItem>, String) Overloaded. Returns a single-selection select element using the specified HTML helper, the name of the form field, the specified list items, and an option label. (Defined by SelectExtensions) |
| 68 | DropDownList(String, IEnumerable<SelectListItem>, String, IDictionary<String, Object>) Overloaded. Returns a single-selection select element using the specified HTML helper, the name of the form field, the specified list items, an option label, and the specified HTML attributes. (Defined by SelectExtensions) |
| 69 | DropDownList(String, IEnumerable<SelectListItem>, String, Object) Overloaded. Returns a single-selection select element using the specified HTML helper, the name of the form field, the specified list items, an option label, and the specified HTML attributes. (Defined by SelectExtensions) |
| 70 | DropDownList(String, String) Overloaded. Returns a single-selection select element using the specified HTML helper, the name of the form field, and an option label. (Defined by SelectExtensions) |
| 71 | Editor(String) Overloaded. Returns an HTML input element for each property in the object that is represented by the expression. (Defined by EditorExtensions) |
| 72 | Editor(String, Object) Overloaded. Returns an HTML input element for each property in the object that is represented by the expression, using additional view data. (Defined by EditorExtensions) |
| 73 | Editor(String, String) Overloaded. Returns an HTML input element for each property in the object that is represented by the expression, using the specified template. (Defined by EditorExtensions) |
| 74 | Editor(String, String, Object) Overloaded. Returns an HTML input element for each property in the object that is represented by the expression, using the specified template and additional view data. (Defined by EditorExtensions) |
| 75 | Editor(String, String, String) Overloaded. Returns an HTML input element for each property in the object that is represented by the expression, using the specified template and HTML field name. (Defined by EditorExtensions) |
| 76 | Editor(String, String, String, Object) Overloaded. Returns an HTML input element for each property in the object that is represented by the expression, using the specified template, HTML field name, and additional view data. (Defined by EditorExtensions) |
| 77 | EditorForModel() Overloaded. Returns an HTML input element for each property in the model. (Defined by EditorExtensions) |
| 78 | EditorForModel(Object) Overloaded. Returns an HTML input element for each property in the model, using additional view data. (Defined by EditorExtensions) |
| 79 | EditorForModel(String) Overloaded. Returns an HTML input element for each property in the model, using the specified template. (Defined by EditorExtensions) |
| 80 | EditorForModel(String, Object) Overloaded. Returns an HTML input element for each property in the model, using the specified template and additional view data. (Defined by EditorExtensions) |
| 81 | EditorForModel(String, String) Overloaded. Returns an HTML input element for each property in the model, using the specified template name and HTML field name. (Defined by EditorExtensions) |
| 82 | EditorForModel(String, String, Object) Overloaded. Returns an HTML input element for each property in the model, using the template name, HTML field name, and additional view data. (Defined by EditorExtensions) |
| 83 | EndForm() Renders the closing </form> tag to the response. (Defined by FormExtensions) |
| 84 | Hidden(String) Overloaded. Returns a hidden input element by using the specified HTML helper and the name of the form field. (Defined by InputExtensions) |
| 85 | Hidden(String, Object) Overloaded. Returns a hidden input element by using the specified HTML helper, the name of the form field, and the value. (Defined by InputExtensions) |
| 86 | Hidden(String, Object, IDictionary<String, Object>) Overloaded. Returns a hidden input element by using the specified HTML helper, the name of the form field, the value, and the HTML attributes. (Defined by InputExtensions) |
| 87 | Hidden(String, Object, Object) Overloaded. Returns a hidden input element by using the specified HTML helper, the name of the form field, the value, and the HTML attributes. (Defined by InputExtensions) |
| 88 | Id(String) Gets the ID of the HtmlHelper string. (Defined by NameExtensions) |
| 89 | IdForModel() Gets the ID of the HtmlHelper string. (Defined by NameExtensions) |
| 90 | Label(String) Overloaded. Returns an HTML label element and the property name of the property that is represented by the specified expression. (Defined by LabelExtensions) |
| 91 | Label(String, IDictionary<String, Object>) Overloaded. Returns an HTML label element and the property name of the property that is represented by the specified expression. (Defined by LabelExtensions) |
| 92 | Label(String, Object) Overloaded. Returns an HTML label element and the property name of the property that is represented by the specified expression. (Defined by LabelExtensions) |
| 93 | Label(String, String) Overloaded. Returns an HTML label element and the property name of the property that is represented by the specified expression using the label text. (Defined by LabelExtensions) |
| 94 | Label(String, String, IDictionary<String, Object>) Overloaded. Returns an HTML label element and the property name of the property that is represented by the specified expression. (Defined by LabelExtensions) |
| 95 | Label(String, String, Object) Overloaded. Returns an HTML label element and the property name of the property that is represented by the specified expression. (Defined by LabelExtensions) |
| 96 | LabelForModel() Overloaded. Returns an HTML label element and the property name of the property that is represented by the model. (Defined by LabelExtensions) |
| 97 | LabelForModel(IDictionary<String, Object>) Overloaded. Returns an HTML label element and the property name of the property that is represented by the specified expression. (Defined by LabelExtensions) |
| 98 | LabelForModel(Object) Overloaded. Returns an HTML label element and the property name of the property that is represented by the specified expression. (Defined by LabelExtensions) |
| 99 | LabelForModel(String) Overloaded. Returns an HTML label element and the property name of the property that is represented by the specified expression using the label text. (Defined by LabelExtensions) |
| 100 | LabelForModel(String, IDictionary<String, Object>) Overloaded. Returns an HTML label element and the property name of the property that is represented by the specified expression. (Defined by LabelExtensions) |
| 101 | LabelForModel(String, Object) Overloaded. Returns an HTML label element and the property name of the property that is represented by the specified expression. (Defined by LabelExtensions) |
| 102 | ListBox(String) Overloaded. Returns a multi-select select element using the specified HTML helper and the name of the form field. (Defined by SelectExtensions) |
| 103 | ListBox(String, IEnumerable<SelectListItem>) Overloaded. Returns a multi-select select element using the specified HTML helper, the name of the form field, and the specified list items. (Defined by SelectExtensions) |
| 104 | ListBox(String, IEnumerable<SelectListItem>, IDictionary<String, Object>) Overloaded. Returns a multi-select select element using the specified HTML helper, the name of the form field, the specified list items, and the specified HMTL attributes. (Defined by SelectExtensions) |
| 105 | ListBox(String, IEnumerable<SelectListItem>, Object) Overloaded. Returns a multi-select select element using the specified HTML helper, the name of the form field, and the specified list items. (Defined by SelectExtensions) |
| 106 | Name(String) Gets the full HTML field name for the object that is represented by the expression. (Defined by NameExtensions) |
| 107 | NameForModel() Gets the full HTML field name for the object that is represented by the expression. (Defined by NameExtensions.) |
| 108 | Partial(String) Overloaded. Renders the specified partial view as an HTMLencoded string. (Defined by PartialExtensions) |
| 109 | Partial(String, Object) Overloaded. Renders the specified partial view as an HTMLencoded string. (Defined by PartialExtensions) |
| 110 | Partial(String, Object, ViewDataDictionary) Overloaded. Renders the specified partial view as an HTMLencoded string. (Defined by PartialExtensions) |
| 111 | Partial(String, ViewDataDictionary) Overloaded. Renders the specified partial view as an HTMLencoded string. (Defined by PartialExtensions) |
| 112 | Password(String) Overloaded. Returns a password input element by using the specified HTML helper and the name of the form field. (Defined by InputExtensions) |
| 113 | Password(String, Object) Overloaded. Returns a password input element by using the specified HTML helper, the name of the form field, and the value. (Defined by InputExtensions) |
| 114 | Password(String, Object, IDictionary<String, Object>) Overloaded. Returns a password input element by using the specified HTML helper, the name of the form field, the value, and the HTML attributes. (Defined by InputExtensions) |
| 115 | Password(String, Object, Object) Overloaded. Returns a password input element by using the specified HTML helper, the name of the form field, the value, and the HTML attributes. (Defined by InputExtensions) |
| 116 | RadioButton(String, Object) Overloaded. Returns a radio button input element that is used to present mutually exclusive options. (Defined by InputExtensions) |
| 117 | RadioButton(String, Object, Boolean) Overloaded. Returns a radio button input element that is used to present mutually exclusive options. (Defined by InputExtensions) |
| 118 | RadioButton(String, Object, Boolean, IDictionary<String, Object>) Overloaded. Returns a radio button input element that is used to present mutually exclusive options. (Defined by InputExtensions) |
| 119 | RadioButton(String, Object, Boolean, Object) Overloaded. Returns a radio button input element that is used to present mutually exclusive options. (Defined by InputExtensions) |
| 120 | RadioButton(String, Object, IDictionary<String, Object>) Overloaded. Returns a radio button input element that is used to present mutually exclusive options. (Defined by InputExtensions) |
| 121 | RadioButton(String, Object, Object) Overloaded. Returns a radio button input element that is used to present mutually exclusive options. (Defined by InputExtensions) |
| 122 | RenderAction(String) Overloaded. Invokes the specified child action method and renders the result inline in the parent view. (Defined by ChildActionExtensions) |
| 123 | RenderAction(String, Object) Overloaded. Invokes the specified child action method using the specified parameters and renders the result inline in the parent view. (Defined by ChildActionExtensions) |
| 124 | RenderAction(String, RouteValueDictionary) Overloaded. Invokes the specified child action method using the specified parameters and renders the result inline in the parent view. (Defined by ChildActionExtensions) |
| 125 | RenderAction(String, String) Overloaded. Invokes the specified child action method using the specified controller name and renders the result inline in the parent view. (Defined by ChildActionExtensions) |
| 126 | RenderAction(String, String, Object) Overloaded. Invokes the specified child action method using the specified parameters and controller name and renders the result inline in the parent view. (Defined by ChildActionExtensions) |
| 127 | RenderAction(String, String, RouteValueDictionary) Overloaded. Invokes the specified child action method using the specified parameters and controller name and renders the result inline in the parent view. (Defined by ChildActionExtensions) |
| 128 | RenderPartial(String) Overloaded. Renders the specified partial view by using the specified HTML helper. (Defined by RenderPartialExtensions) |
| 129 | RenderPartial(String, Object) Overloaded. Renders the specified partial view, passing it a copy of the current ViewDataDictionary object, but with the Model property set to the specified model. (Defined by RenderPartialExtensions) |
| 130 | RenderPartial(String, Object, ViewDataDictionary) Overloaded. Renders the specified partial view, replacing the partial view's ViewData property with the specified ViewDataDictionary object and setting the Model property of the view data to the specified model. (Defined by RenderPartialExtensions) |
| 131 | RenderPartial(String, ViewDataDictionary) Overloaded. Renders the specified partial view, replacing its ViewData property with the specified ViewDataDictionary object. (Defined by RenderPartialExtensions) |
| 132 | RouteLink(String, Object) Overloaded. (Defined by LinkExtensions) |
| 133 | RouteLink(String, Object, Object) Overloaded. (Defined by LinkExtensions) |
| 134 | RouteLink(String, RouteValueDictionary) Overloaded. (Defined by LinkExtensions) |
| 135 | RouteLink(String, RouteValueDictionary, IDictionary<String, Object>) Overloaded. (Defined by LinkExtensions) |
| 136 | RouteLink(String, String) Overloaded. (Defined by LinkExtensions) |
| 137 | RouteLink(String, String, Object) Overloaded. (Defined by LinkExtensions) |
| 138 | RouteLink(String, String, Object, Object) Overloaded. (Defined by LinkExtensions) |
| 139 | RouteLink(String, String, RouteValueDictionary) Overloaded. (Defined by LinkExtensions) |
| 140 | RouteLink(String, String, RouteValueDictionary, IDictionary<String, Object>) Overloaded. (Defined by LinkExtensions) |
| 141 | RouteLink(String, String, String, String, String, Object, Object) Overloaded. (Defined by LinkExtensions) |
| 142 | RouteLink(String, String, String, String, String, RouteValueDictionary, IDictionary<String, Object>) Overloaded. (Defined by LinkExtensions) |
| 143 | TextArea(String) Overloaded. Returns the specified textarea element by using the specified HTML helper and the name of the form field. (Defined by TextAreaExtensions.) |
| 144 | TextArea(String, IDictionary<String, Object>) Overloaded. Returns the specified textarea element by using the specified HTML helper, the name of the form field, and the specified HTML attributes. (Defined by TextAreaExtensions) |
| 145 | TextArea(String, Object) Overloaded. Returns the specified textarea element by using the specified HTML helper and HTML attributes. (Defined by TextAreaExtensions) |
| 146 | TextArea(String, String) Overloaded. Returns the specified textarea element by using the specified HTML helper, the name of the form field, and the text content. (Defined by TextAreaExtensions) |
| 147 | TextArea(String, String, IDictionary<String, Object>) Overloaded. Returns the specified textarea element by using the specified HTML helper, the name of the form field, the text content, and the specified HTML attributes. (Defined by TextAreaExtensions) |
| 148 | TextArea(String, String, Int32, Int32, IDictionary<String, Object>) Overloaded. Returns the specified textarea element by using the specified HTML helper, the name of the form field, the text content, the number of rows and columns, and the specified HTML attributes. (Defined by TextAreaExtensions) |
| 149 | TextArea(String, String, Int32, Int32, Object) Overloaded. Returns the specified textarea element by using the specified HTML helper, the name of the form field, the text content, the number of rows and columns, and the specified HTML attributes. (Defined by TextAreaExtensions) |
| 150 | TextArea(String, String, Object) Overloaded. Returns the specified textarea element by using the specified HTML helper, the name of the form field, the text content, and the specified HTML attributes. (Defined by TextAreaExtensions) |
| 151 | TextBox(String) Overloaded. Returns a text input element by using the specified HTML helper and the name of the form field. (Defined by InputExtensions) |
| 152 | TextBox(String, Object) Overloaded. Returns a text input element by using the specified HTML helper, the name of the form field, and the value. (Defined by InputExtensions) |
| 153 | TextBox(String, Object, IDictionary<String, Object>) Overloaded. Returns a text input element by using the specified HTML helper, the name of the form field, the value, and the HTML attributes. (Defined by InputExtensions) |
| 154 | TextBox(String, Object, Object) Overloaded. Returns a text input element by using the specified HTML helper, the name of the form field, the value, and the HTML attributes. (Defined by InputExtensions) |
| 155 | TextBox(String, Object, String) Overloaded. Returns a text input element. (Defined by InputExtensions) |
| 156 | TextBox(String, Object, String, IDictionary<String, Object>) Overloaded. Returns a text input element. (Defined by InputExtensions) |
| 157 | TextBox(String, Object, String, Object) Overloaded. Returns a text input element. (Defined by InputExtensions) |
| 158 | Validate(String) Retrieves the validation metadata for the specified model and applies each rule to the data field. (Defined by ValidationExtensions) |
| 159 | ValidationMessage(String) Overloaded. Displays a validation message if an error exists for the specified field in the ModelStateDictionary object. (Defined by ValidationExtensions) |
| 160 | ValidationMessage(String, IDictionary<String, Object>) Overloaded. Displays a validation message if an error exists for the specified field in the ModelStateDictionary object. (Defined by ValidationExtensions.) |
| 161 | ValidationMessage(String, IDictionary<String, Object>, String) Overloaded. Displays a validation message if an error exists for the specified entry in the ModelStateDictionary object. (Defined by ValidationExtensions) |
| 162 | ValidationMessage(String, Object) Overloaded. Displays a validation message if an error exists for the specified field in the ModelStateDictionary object. (Defined by ValidationExtensions) |
| 163 | ValidationMessage(String, Object, String) Overloaded. Displays a validation message if an error exists for the specified entry in the ModelStateDictionary object. (Defined by ValidationExtensions) |
| 164 | ValidationMessage(String, String) Overloaded. Displays a validation message if an error exists for the specified field in the ModelStateDictionary object. (Defined by ValidationExtensions) |
| 165 | ValidationMessage(String, String, IDictionary<String, Object>) Overloaded. Displays a validation message if an error exists for the specified field in the ModelStateDictionary object. (Defined by ValidationExtensions) |
| 166 | ValidationMessage(String, String, IDictionary<String, Object>, String) Overloaded. Displays a validation message if an error exists for the specified entry in the ModelStateDictionary object. (Defined by ValidationExtensions) |
| 167 | ValidationMessage(String, String, Object) Overloaded. Displays a validation message if an error exists forthe specified field in the ModelStateDictionary object. (Definedby ValidationExtensions) |
| 168 | ValidationMessage(String, String, Object, String) Overloaded. Displays a validation message if an error exists for the specified entry in the ModelStateDictionary object. (Defined by ValidationExtensions) |
| 169 | ValidationMessage(String, String, String) Overloaded. Displays a validation message if an error exists for the specified entry in the ModelStateDictionary object. (Defined by ValidationExtensions) |
| 170 | ValidationSummary() Overloaded. Returns an unordered list (ul element) of validation messages that are in the ModelStateDictionary object. (Defined by ValidationExtensions) |
| 171 | ValidationSummary(Boolean) Overloaded. Returns an unordered list (ul element) of validation messages that are in the ModelStateDictionary object and optionally displays only model-level errors. (Defined by ValidationExtensions) |
| 172 | ValidationSummary(Boolean, String) Overloaded. Returns an unordered list (ul element) of validation messages that are in the ModelStateDictionary object and optionally displays only model-level errors. (Defined by ValidationExtensions) |
| 173 | ValidationSummary(Boolean, String, IDictionary<String, Object>) Overloaded. Returns an unordered list (ul element) of validation messages that are in the ModelStateDictionary object and optionally displays only model-level errors. (Defined by ValidationExtensions) |
| 174 | ValidationSummary(Boolean, String, IDictionary<String, Object>, String) Overloaded. (Defined by ValidationExtensions) |
| 175 | ValidationSummary(Boolean, String, Object) Overloaded. Returns an unordered list (ul element) of validation messages that are in the ModelStateDictionary object and optionally displays only model-level errors. (Defined by ValidationExtensions) |
| 176 | ValidationSummary(Boolean, String, Object, String) Overloaded. (Defined by ValidationExtensions) |
| 177 | ValidationSummary(Boolean, String, String) Overloaded. (Defined by ValidationExtensions) |
| 178 | ValidationSummary(String) Overloaded. Returns an unordered list (ul element) of validation messages that are in the ModelStateDictionary object. (Defined by ValidationExtensions) |
| 179 | ValidationSummary(String, IDictionary<String, Object>) Overloaded. Returns an unordered list (ul element) of validation messages that are in the ModelStateDictionary object. (Defined by ValidationExtensions) |
| 180 | ValidationSummary(String, IDictionary<String, Object>, String) Overloaded. (Defined by ValidationExtensions) |
| 181 | ValidationSummary(String, Object) Overloaded. Returns an unordered list (ul element) of validation messages in the ModelStateDictionary object. (Defined by ValidationExtensions) |
| 182 | ValidationSummary(String, Object, String) Overloaded. (Defined by ValidationExtensions) |
| 183 | ValidationSummary(String, String) Overloaded. (Defined by ValidationExtensions) |
| 184 | Value(String) Overloaded. Provides a mechanism to create custom HTML markup compatible with the ASP.NET MVC model binders and templates. (Defined by ValueExtensions) |
| 185 | Value(String, String) Overloaded. Provides a mechanism to create custom HTML markup compatible with the ASP.NET MVC model binders and templates. (Defined by ValueExtensions) |
| 186 | ValueForModel() Overloaded. Provides a mechanism to create custom HTML markup compatible with the ASP.NET MVC model binders and templates. (Defined by ValueExtensions) |
| 187 | ValueForModel(String) Overloaded. Provides a mechanism to create custom HTML markup compatible with the ASP.NET MVC model binders and templates. (Defined by ValueExtensions) |
If you look at the view from the last chapter which we have generated from EmployeeController index action, you will see the number of operations that started with Html, like Html.ActionLink and Html.DisplayNameFor, etc. as shown in the following code.
@model IEnumerable<MVCSimpleApp.Models.Employee>
@{
   Layout = null;
}

<!DOCTYPE html>
<html>
   <head>
      <meta name = "viewport" content = "width = device-width" />
      <title>Index</title>
   </head>

   <body>
      <p>
         @Html.ActionLink("Create New", "Create")
      </p>

      <table class = "table">
         <tr>
            <th>
               @Html.DisplayNameFor(model => model.Name)
            </th>

            <th>
               @Html.DisplayNameFor(model => model.JoiningDate)
            </th>

            <th>
               @Html.DisplayNameFor(model => model.Age)
            </th>

            <th></th>
         </tr>

         @foreach (var item in Model) {
            <tr>
               <td>
                  @Html.DisplayFor(modelItem => item.Name)
               </td>

               <td>
                  @Html.DisplayFor(modelItem => item.JoiningDate)
               </td>

               <td>
                  @Html.DisplayFor(modelItem => item.Age)
               </td>

               <td>
                  @Html.ActionLink("Edit", "Edit", new { id = item.ID }) |
                  @Html.ActionLink("Details", "Details", new { id = item.ID }) |
                  @Html.ActionLink("Delete", "Delete", new { id = item.ID })
               </td>
            </tr>
         }

      </table>
   </body>
</html>
This HTML is a property that we inherit from the ViewPage base class. So, it's available in all of our views and it returns an instance of a type called HTML Helper.
Let’s take a look at a simple example in which we will enable the user to edit the employee. Hence, this edit action will be using significant numbers of different HTML Helpers.
If you look at the above code, you will see at the end the following HTML Helper methods
@Html.ActionLink("Edit", "Edit", new { id = item.ID })
In the ActionLink helper, the first parameter is of the link which is “Edit”, the second parameter is the action method in the Controller, which is also “Edit”, and the third parameter ID is of any particular employee you want to edit.
Let’s change the EmployeeController class by adding a static list and also change the index action using the following code.
public static List<Employee> empList = new List<Employee>{
   new Employee{
      ID = 1,
      Name = "Allan",
      JoiningDate = DateTime.Parse(DateTime.Today.ToString()),
      Age = 23
   },

   new Employee{
      ID = 2,
      Name = "Carson",
      JoiningDate = DateTime.Parse(DateTime.Today.ToString()),
      Age = 45
   },

   new Employee{
      ID = 3,
      Name = "Carson",
      JoiningDate = DateTime.Parse(DateTime.Today.ToString()),
      Age = 37
   },

   new Employee{
      ID = 4,
      Name = "Laura",
      JoiningDate = DateTime.Parse(DateTime.Today.ToString()),
      Age = 26
   },

};

public ActionResult Index(){
   var employees = from e in empList
   orderby e.ID
   select e;
   return View(employees);
}
Let’s update the Edit action. You will see two Edit actions one for GET and one for POST. Let’s update the Edit action for Get, which has only Id in the parameter as shown in the following code.
// GET: Employee/Edit/5
public ActionResult Edit(int id){
   List<Employee> empList = GetEmployeeList();
   var employee = empList.Single(m => m.ID == id);
   return View(employee);
}
Now, we know that we have action for Edit but we don’t have any view for these actions. So we need to add a View as well. To do this, right-click on the Edit action and select Add View.

You will see the default name for view. Select Edit from the Template dropdown and Employee from the Model class dropdown.
Following is the default implementation in the Edit view.
@model MVCSimpleApp.Models.Employee
@{
   Layout = null;
}

<!DOCTYPE html>
<html>
   <head>
      <meta name = "viewport" content = "width = device-width" />
      <title>Edit</title>
   </head>

   <body>
      @using (Html.BeginForm()){
         @Html.AntiForgeryToken()
         <div class = "form-horizontal">
            <h4>Employee</h4>
            <hr />
            @Html.ValidationSummary(
               true, "", new { @class = "text-danger" })

            @Html.HiddenFor(model => model.ID)

            <div class = "form-group">
               @Html.LabelFor(
                  model => model.Name, htmlAttributes: new{
                     @class = "control-label col-md-2" })

               <div class = "col-md-10">
                  @Html.EditorFor(model => model.Name, new{
                     htmlAttributes = new {
                        @class = "form-control" } })

                  @Html.ValidationMessageFor(model => model.Name, "", new{
                        @class = "text-danger" })
               </div>

            </div>

            <div class = "form-group">
               @Html.LabelFor(
                  model => model.JoiningDate, htmlAttributes: new{
                     @class = "control-label col-md-2" })

               <div class = "col-md-10">
                  @Html.EditorFor(
                     model => model.JoiningDate, new{
                        htmlAttributes = new{ @class = "form-control" } })

                  @Html.ValidationMessageFor(
                     model => model.JoiningDate, "", new{
                        @class = "text-danger" })
               </div>

            </div>

            <div class = "form-group">
               @Html.LabelFor(
                  model => model.Age, htmlAttributes: new{
                     @class = "control-label col-md-2" })

               <div class = "col-md-10">
                  @Html.EditorFor(
                     model => model.Age, new{
                        htmlAttributes = new{ @class = "form-control" } })

                  @Html.ValidationMessageFor(
                     model => model.Age, "", new{
                        @class = "text-danger" })
               </div>

            </div>

            <div class = "form-group">
               <div class = "col-md-offset-2 col-md-10">
                  <input type = "submit" value = "Save" class = "btn btn-default"/>
               </div>
            </div>

         </div>
      }

      <div>
         @Html.ActionLink("Back to List", "Index")
      </div>

   </body>
</html>
As you can see that there are many helper methods used. So, here “HTML.BeginForm” writes an opening Form Tag. It also ensures that the method is going to be “Post”, when the user clicks on the “Save” button.
Html.BeginForm is very useful, because it enables you to change the URL, change the method, etc.
In the above code, you will see one more HTML helper and that is “@HTML.HiddenFor”, which emits the hidden field.
MVC Framework is smart enough to figure out that this ID field is mentioned in the model class and hence it needs to be prevented from getting edited, that is why it is marked as hidden.
The Html.LabelFor HTML Helper creates the labels on the screen. The Html.ValidationMessageFor helper displays proper error message if anything is wrongly entered while making the change.
We also need to change the Edit action for POST because once you update the employee then it will call this action.
// POST: Employee/Edit/5
[HttpPost]
public ActionResult Edit(int id, FormCollection collection){
   try{
      var employee = empList.Single(m => m.ID == id);
      if (TryUpdateModel(employee)){
         //To Do:- database code
         return RedirectToAction("Index");
      }
      return View(employee);
   }catch{
      return View();
   }
}
Let’s run this application and request for the following URL http://localhost:63004/employee. You will receive the following output.
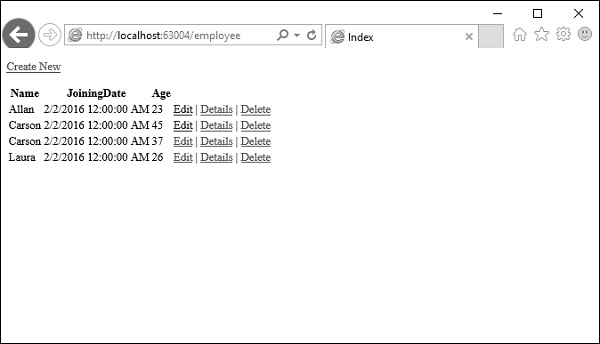
Click on the edit link on any particular employee, let’s say click on Allan edit link. You will see the following view.

Let’s change the age from 23 to 29 and click ‘Save’ button, then you will see the updated age on the Index View.
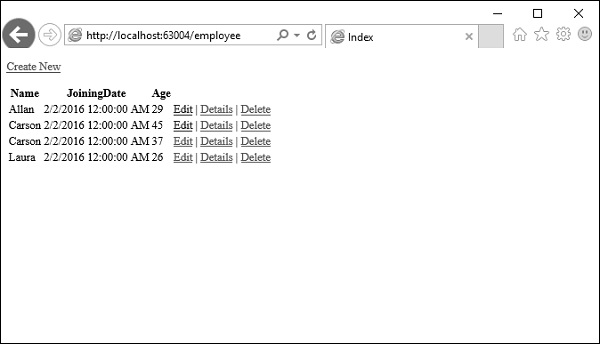
ASP.NET MVC - Model Binding
ASP.NET MVC model binding allows you to map HTTP request data with a model. It is the process of creating .NET objects using the data sent by the browser in an HTTP request. The ASP.NET Web Forms developers who are new to ASP.Net MVC are mostly confused how the values from View get converted to the Model class when it reaches the Action method of the Controller class, so this conversion is done by the Model binder.
Model binding is a well-designed bridge between the HTTP request and the C# action methods. It makes it easy for developers to work with data on forms (views), because POST and GET is automatically transferred into a data model you specify. ASP.NET MVC uses default binders to complete this behind the scene.
Let’s take a look at a simple example in which we add a ‘Create View’ in our project from the last chapter and we will see how we get these values from the View to the EmployeeController action method.
Following is the Create Action method for POST.
// POST: Employee/Create
[HttpPost]
public ActionResult Create(FormCollection collection){
   try{
      // TODO: Add insert logic here
      return RedirectToAction("Index");
   }catch{
      return View();
   }
}
Right-click on the Create Action method and select Add View…
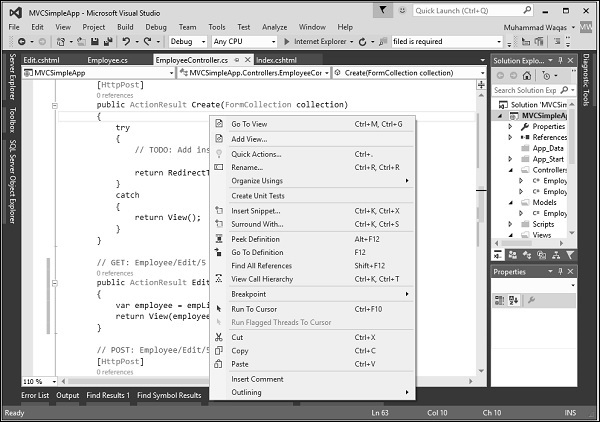
It will display the Add View dialog.

As you can see in the above screenshot, the default name is already mentioned. Now select Create from the Template dropdown and Employee from the Model class dropdown.
You will see the default code in the Create.cshtml view.
@model MVCSimpleApp.Models.Employee
@{
   Layout = null;
}

<!DOCTYPE html>
<html>
   <head>
      <meta name = "viewport" content = "width = device-width" />
      <title>Create</title>
   </head>

   <body>
      @using (Html.BeginForm()){
         @Html.AntiForgeryToken()
         <div class = "form-horizontal">
            <h4>Employee</h4>
            <hr />
            @Html.ValidationSummary(true, "", new { @class = "text-danger" })

            <div class = "form-group">
               @Html.LabelFor(model => model.Name, htmlAttributes:
                  new{ @class = "control-label col-md-2" })

               <div class = "col-md-10">
                  @Html.EditorFor(model => model.Name, new{ htmlAttributes =
                     new { @class = "form-control" } })

                  @Html.ValidationMessageFor(model => model.Name, "",
                     new{ @class = "text-danger" })
               </div>
            </div>

            <div class = "form-group">
               @Html.LabelFor(model => model.JoiningDate, htmlAttributes:
                  new{ @class = "control-label col-md-2" })

               <div class = "col-md-10">
                  @Html.EditorFor(model => model.JoiningDate, new{ htmlAttributes =
                     new { @class = "form-control" } })

                  @Html.ValidationMessageFor(model => model.JoiningDate, "",
                     new { @class = "text-danger" })
               </div>
            </div>

            <div class = "form-group">
               @Html.LabelFor(model => model.Age, htmlAttributes:
                  new { @class = "control-label col-md-2" })

               <div class = "col-md-10">
                  @Html.EditorFor(model => model.Age, new { htmlAttributes =
                     new { @class = "form-control" } })

                  @Html.ValidationMessageFor(model => model.Age, "", new{ @class = "text-danger" })
               </div>
            </div>

            <div class = "form-group">
               <div class = "col-md-offset-2 col-md-10">
                  <input type = "submit" value = "Create" class = "btn btn-default"/>
               </div>
            </div>

         </div>
      }

      <div>
         @Html.ActionLink("Back to List", "Index")
      </div>

   </body>
</html>
When the user enters values on Create View then it is available in FormCollection as well as Request.Form. We can use any of these values to populate the employee info from the view.
Let’s use the following code to create the Employee using FormCollection.
// POST: Employee/Create
[HttpPost]
public ActionResult Create(FormCollection collection){
   try {
      Employee emp = new Employee();
      emp.Name = collection["Name"];
      DateTime jDate;
      DateTime.TryParse(collection["DOB"], out jDate);
      emp.JoiningDate = jDate;
      string age = collection["Age"];
      emp.Age = Int32.Parse(age);
      empList.Add(emp);
      return RedirectToAction("Index");
   }catch {
      return View();
   }
}
Run this application and request for this URL http://localhost:63004/Employee/. You will receive the following output.

Click the ‘Create New’ link on top of the page and it will go to the following view.
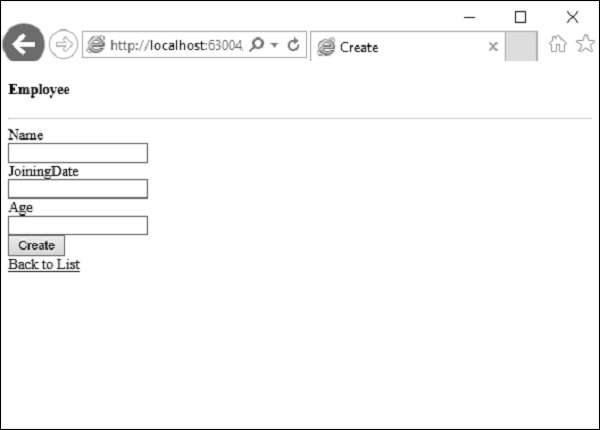
Let’s enter data for another employee you want to add.
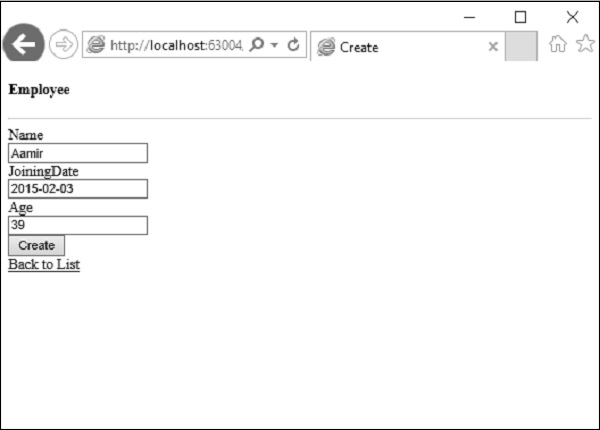
Click on the create button and you will see that the new employee is added in your list.
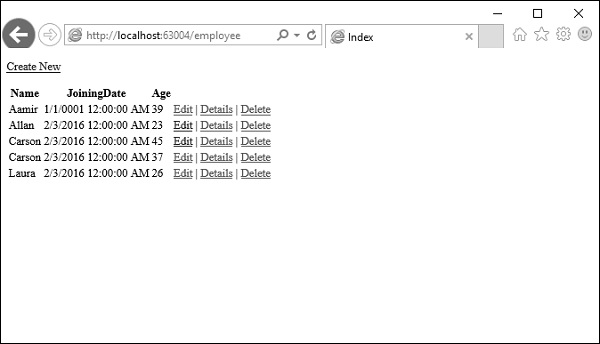
In the above example, we are getting all the posted values from the HTML view and then mapping these values to the Employee properties and assigning them one by one.
In this case, we will also be doing the type casting wherever the posted values are not of the same format as of the Model property.
This is also known as manual binding and this type of implementation might not be that bad for simple and small data model. However, if you have huge data models and need a lot of type casting then we can utilize the power and ease-of-use of ASP.NET MVC Model binding.
Let’s take a look at the same example we did for Model binding.
We need to change the parameter of Create Method to accept the Employee Model object rather than FormCollection as shown in the following code.
// POST: Employee/Create
[HttpPost]
public ActionResult Create(Employee emp){
   try{
      empList.Add(emp);
      return RedirectToAction("Index");
   }catch{
      return View();
   }
}
Now the magic of Model Binding depends on the id of HTML variables that are supplying the values.
For our Employee Model, the id of the HTML input fields should be the same as the Property names of the Employee Model and you can see that Visual Studio is using the same property names of the model while creating a view.
@Html.EditorFor(model => model.Name, new { htmlAttributes = new { @class = "form-control" } })
The mapping will be based on the Property name by default. This is where we will find HTML helper methods very helpful because these helper methods will generate the HTML, which will have proper Names for the Model Binding to work.
Run this application and request for the URL http://localhost:63004/Employee/. You will see the following output.
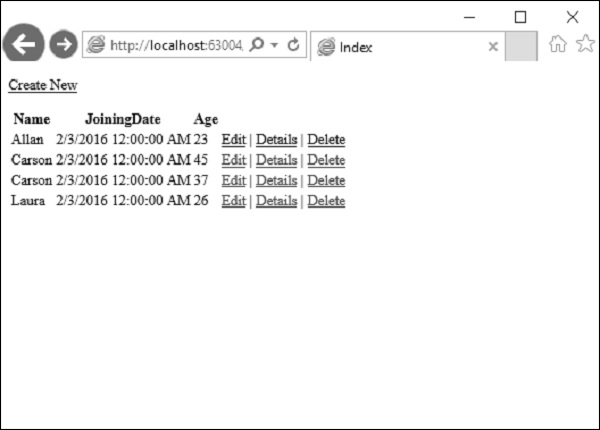
Let’s click on the Create New link on the top of the page and it will go to the following view.

Let’s enter data for another employee that we want to add.
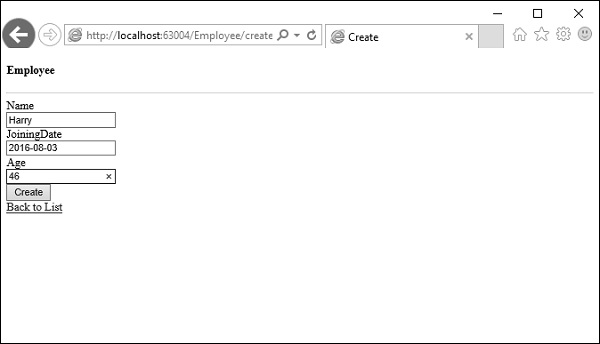
Now click the create button and you will see that the new employee is added to your list using the ASP.Net MVC model binding.
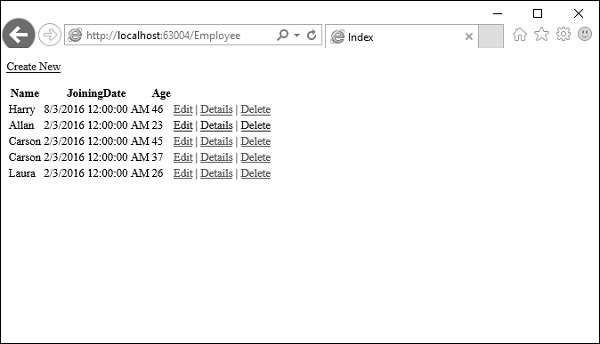
ASP.NET MVC - Databases
In all ASP.NET MVC applications created in this tutorial we have been passing hard-coded data from the Controllers to the View templates. But, in order to build a real Web application, you might want to use a real database. In this chapter, we will see how to use a database engine in order to store and retrieve the data needed for your application.
To store and retrieve data, we will use a .NET Framework data-access technology known as the Entity Framework to define and work with Models.
The Entity Framework (EF) supports Code First technique, which allows you to create model objects by writing simple classes and then the database will be created on the fly from your classes, which enables a very clean and rapid development workflow.
Let’s take a look at a simple example in which we will add support for Entity framework in our example.
Step 1 − To install the Entity Framework, right-click on your project and select NuGet Package Manager → Manage NuGet Packages for Solution…
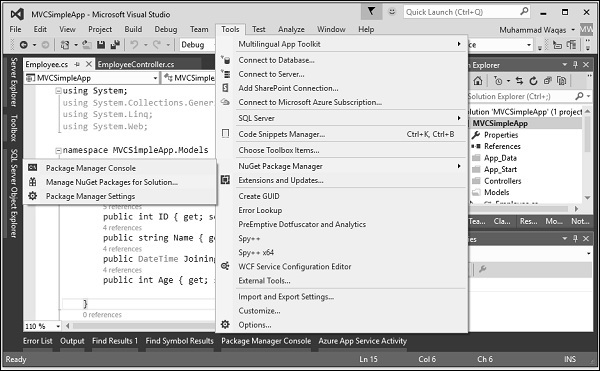
It will open the NuGet Package Manager. Search for Entity framework in the search box.

Select the Entity Framework and click ‘Install’ button. It will open the Preview dialog.
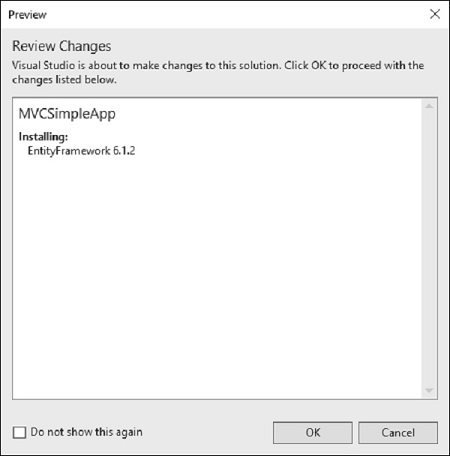
Click Ok to continue.
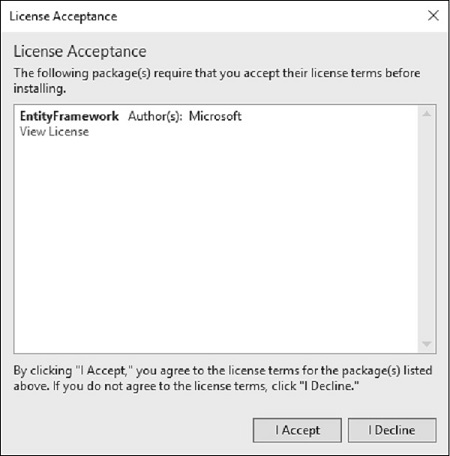
Click the ‘I Accept’ button to start installation.

Once the Entity Framework is installed you will see the message in out window as seen in the above screenshot.
Add DBContext
We need to add another class to the Employee Model, which will communicate with Entity Framework to retrieve and save the data using the following code.
using System;
using System.Collections.Generic;
using System.Data.Entity;
using System.Linq;

using System.Web;

namespace MVCSimpleApp.Models{
   public class Employee{
      public int ID { get; set; }
      public string Name { get; set; }
      public DateTime JoiningDate { get; set; }
      public int Age { get; set; }
   }

   public class EmpDBContext : DbContext{
      public EmpDBContext()
      { }
      public DbSet<Employee> Employees { get; set; }
   }
}
As seen above, EmpDBContext is derived from an EF class known as DbContext. In this class, we have one property with the name DbSet, which basically represents the entity you want to query and save.
Connection String
We need to specify the connection string under <configuration> tag for our database in the Web.config file.
<connectionStrings>
   <add name = "EmpDBContext" connectionString = "Data
   Source = (LocalDb)\v14.0;AttachDbFilename = |DataDirectory|\EmpDB.mdf;Initial
   Catalog = EmployeeDB;Integrated Security = SSPI;"
   providerName = "System.Data.SqlClient"/>
</connectionStrings>
You don't actually need to add the EmpDBContext connection string. If you don't specify a connection string, Entity Framework will create localDB database in the user’s directory with the fully qualified name of the DbContext class. For this demo, we will not add the connection string to make things simple.
Now we need to update the EmployeeController.cs file so that we can actually save and retrieve data from the database instead of using hardcoded data.
First we add create a private EmpDBContext class object and then update the Index, Create and Edit action methods as shown in the following code.
using MVCSimpleApp.Models;
using System.Linq;
using System.Web.Mvc;

namespace MVCSimpleApp.Controllers {
   public class EmployeeController : Controller{
      private EmpDBContext db = new EmpDBContext();
      // GET: Employee

      public ActionResult Index(){
         var employees = from e in db.Employees
         orderby e.ID
         select e;
         return View(employees);
      }

      // GET: Employee/Create
      public ActionResult Create(){
         return View();
      }

      // POST: Employee/Create
      [HttpPost]
      public ActionResult Create(Employee emp){
         try{
            db.Employees.Add(emp);
            db.SaveChanges();
            return RedirectToAction("Index");
         }catch{
            return View();
         }
      }

      // GET: Employee/Edit/5
      public ActionResult Edit(int id){
         var employee = db.Employees.Single(m => m.ID == id);
         return View(employee);
      }

      // POST: Employee/Edit/5
      [HttpPost]
      public ActionResult Edit(int id, FormCollection collection){
         try{
            var employee = db.Employees.Single(m => m.ID == id);
            if (TryUpdateModel(employee)){
               //To Do:- database code
               db.SaveChanges();
               return RedirectToAction("Index");
            }
            return View(employee);
         }catch{
            return View();
         }
      }
   }
}
Then we run this application with the following URL http://localhost:63004/Employee. You will see the following output.
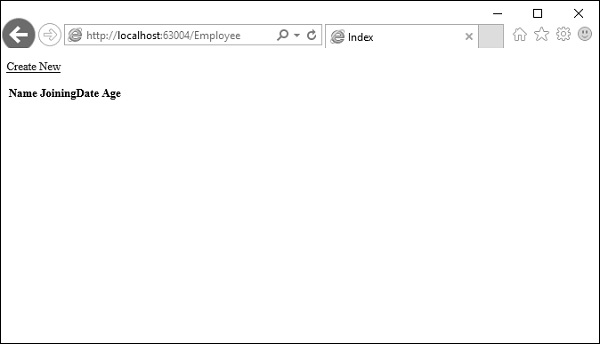
As you can see that there is no data on the view, this is because we have not added any records in our database, which is created by Visual Studio.
Let’s go to the SQL Server Object Explorer, you will see the database is created with the same name as we have in our DBContext class.
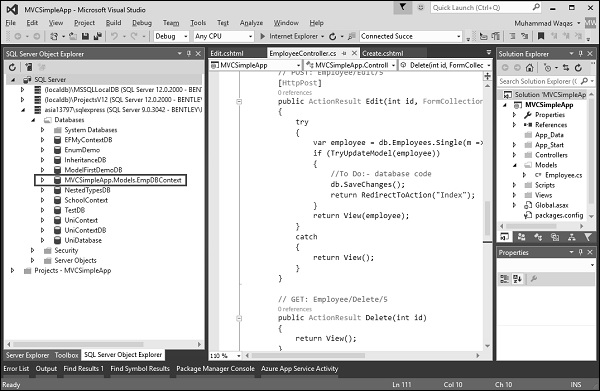
Let’s expand this database and you will see that it has one table which contains all the fields we have in our Employee model class.
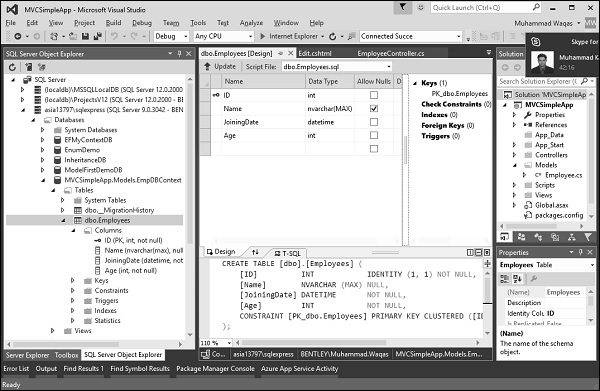
To see the data in this table, right-click on the Employees table and select View Data.
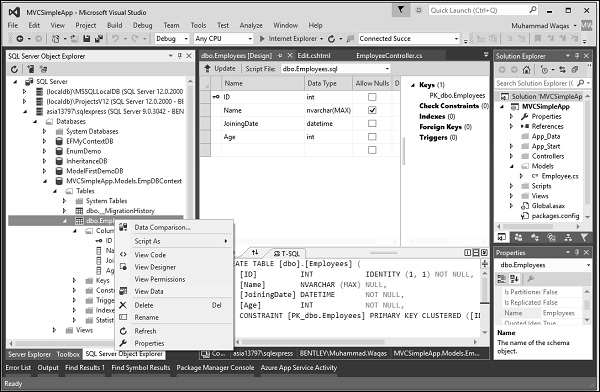
You will see that we have no records at the moment.
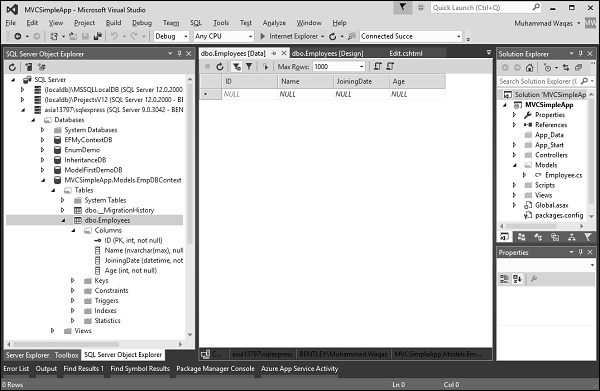
Let’s add some records in the database directly as shown in the following screenshot.

Refresh the browser and you will see that data is now updated to the view from the database.

Let’s add one record from the browser by clicking the ‘Create New’ link. It will display the Create view.
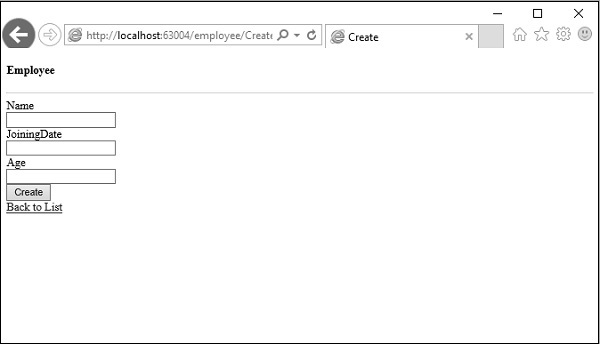
Let’s add some data in the following field.
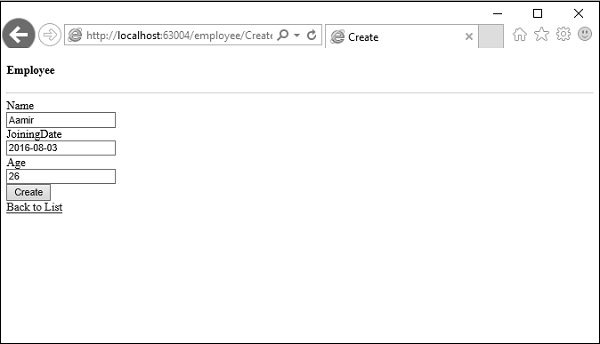
Click on the Create button and it will update the Index view as well add this new record to the database.
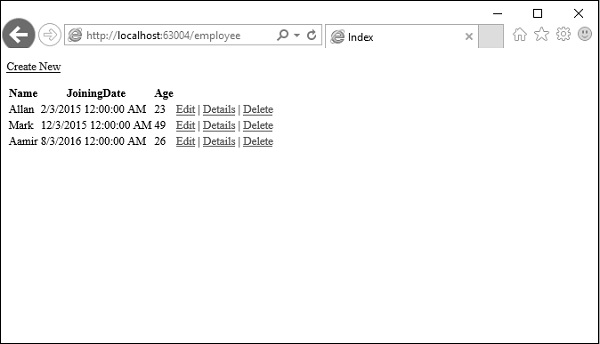
Now let’s go the SQL Server Object Explorer and refresh the database. Right-click on the Employees table and select the View data menu option. You will see that the record is added in the database.
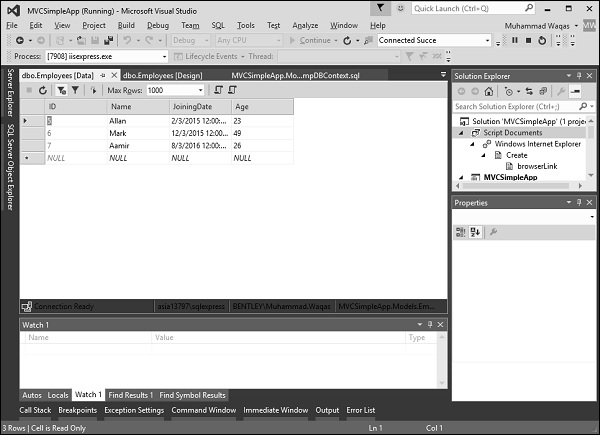
ASP.NET MVC - Validation
Validation is an important aspect in ASP.NET MVC applications. It is used to check whether the user input is valid. ASP.NET MVC provides a set of validation that is easy-to-use and at the same time, it is also a powerful way to check for errors and, if necessary, display messages to the user.
DRY
DRY stands for Don't Repeat Yourself and is one of the core design principles of ASP.NET MVC. From the development point of view, it is encouraged to specify functionality or behavior only at one place and then it is used in the entire application from that one place.
This reduces the amount of code you need to write and makes the code you do write less error prone and easier to maintain.
Adding Validation to Model
Let’s take a look at a simple example of validation in our project from the last chapter. In this example, we will add data annotations to our model class, which provides some builtin set of validation attributes that can be applied to any model class or property directly in your application, such as Required, StringLength, RegularExpression, and Range validation attributes.
It also contains formatting attributes like DataType that help with formatting and don't provide any validation. The validation attributes specify behavior that you want to enforce on the model properties they are applied to.
The Required and MinimumLength attributes indicates that a property must have a value; but nothing prevents a user from entering white space to satisfy this validation. The RegularExpression attribute is used to limit what characters can be input.
Let’s update Employee class by adding different annotation attributes as shown in the following code.
using System;
using System.ComponentModel.DataAnnotations;
using System.Data.Entity;

namespace MVCSimpleApp.Models {
   public class Employee{
      public int ID { get; set; }
      [StringLength(60, MinimumLength = 3)]

      public string Name { get; set; }
      [Display(Name = "Joining Date")]
      [DataType(DataType.Date)]
      [DisplayFormat(DataFormatString = "{0:yyyy-MM-dd}",

      ApplyFormatInEditMode = true)]
      public DateTime JoiningDate { get; set; }
      [Range(22, 60)]
      public int Age { get; set; }
   }
}
Now we also need to set limits to the database. However, the database in SQL Server Object Explorer shows the name property is set to NVARCHAR (MAX) as seen in the following screenshot.
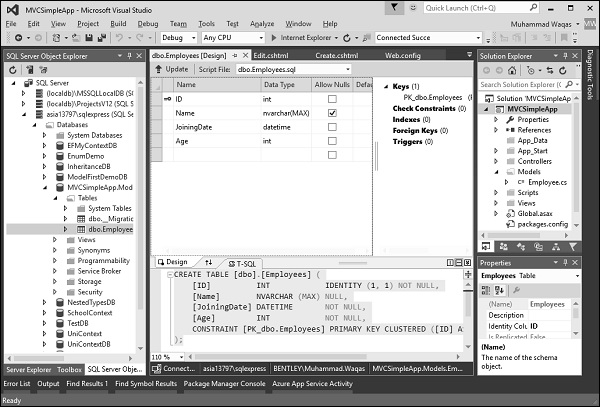
To set this limitation on the database, we will use migrations to update the schema.
Open the Package Manager Console window from Tools → NuGet Package Manager → Package Manager Console.
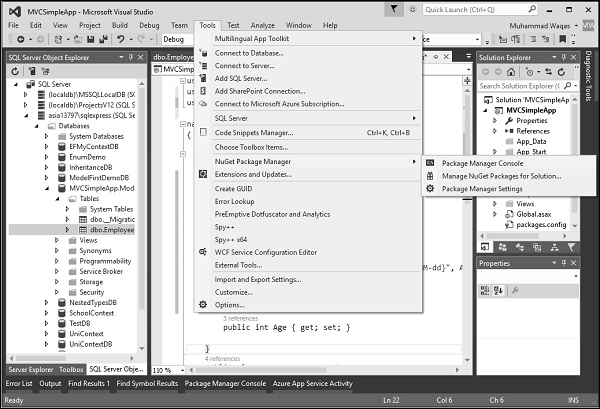
Enter the following commands one by one in the Package Manager Console window.
Enable-Migrations
add-migration DataAnnotations
update-database
Following is the log after executing these commands in Package Manager Console window.
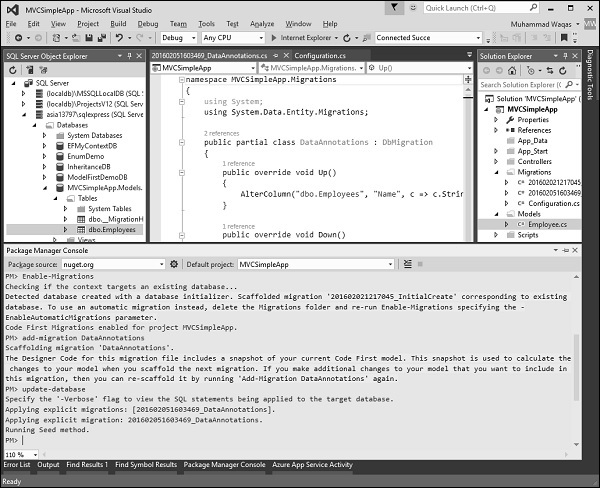
Visual Studio will also open the class which is derived from the DbMIgration class in which you can see the code that updates the schema constraints in Up method.
namespace MVCSimpleApp.Migrations {
   using System;
   using System.Data.Entity.Migrations;

   public partial class DataAnnotations : DbMigration{
      public override void Up(){
         AlterColumn("dbo.Employees", "Name", c => c.String(maxLength: 60));
      }

      public override void Down(){
         AlterColumn("dbo.Employees", "Name", c => c.String());
      }
   }
}
The Name field has a maximum length of 60, which is the new length limits in the database as shown in the following snapshot.
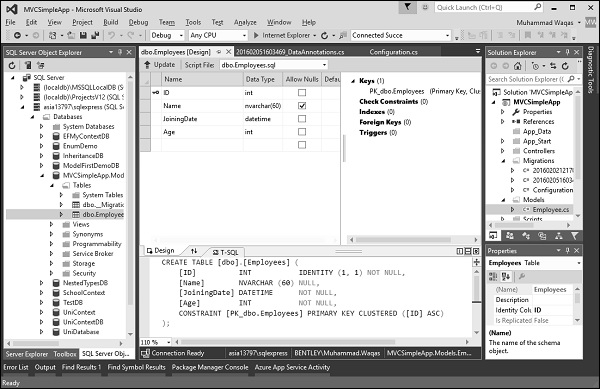
Run this application and go to Create view by specifying the following URL http://localhost:63004/Employees/Create
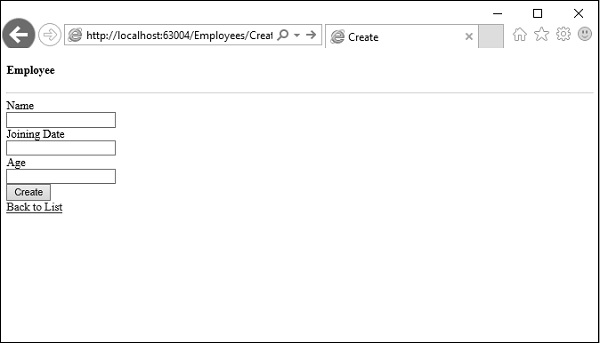
Let’s enter some invalid data in these fields and click Create Button as shown in the following screenshot.

You will see that jQuery client side validation detects the error, and it also displays an error message.
ASP.NET MVC - Security
In this chapter, we will discuss how to implement security features in the application. We will also look at the new membership features included with ASP.NET and available for use from ASP.NET MVC. In the latest release of ASP.NET, we can manage user identities with the following −
- Cloud
- SQL database
- Local Windows active directory
In this chapter, we will also take a look at the new identity components that is a part of ASP.NET and see how to customize membership for our users and roles.
Authentication
Authentication of user means verifying the identity of the user. This is really important. You might need to present your application only to the authenticated users for obvious reasons.
Let’s create a new ASP.Net MVC application.
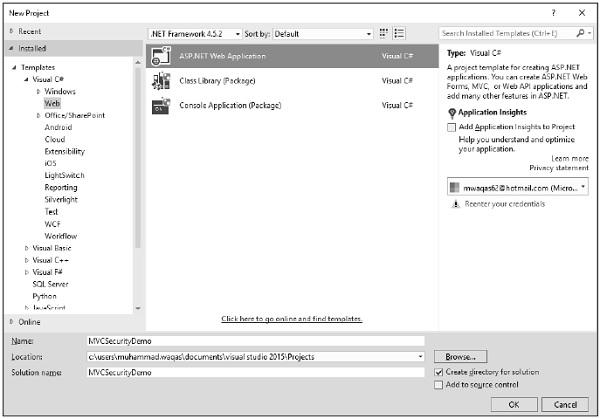
Click OK to continue.
When you start a new ASP.NET application, one of the steps in the process is configuring the authentication services for application needs.
Select MVC template and you will see that the Change Authentication button is now enabled.

This is done with the Change Authentication button that appears in the New Project dialog. The default authentication is, Individual User Accounts.
Authentication Options
When you click the Change button, you will see a dialog with four options, which are as follows.
No Authentication
The first option is No Authentication and this option is used when you want to build a website that doesn't care who the visitors are.
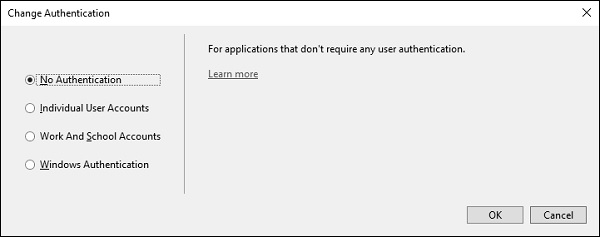
It is open to anyone and every person connects as every single page. You can always change that later, but the No Authentication option means there will not be any features to identify users coming to the website.
Individual User Accounts
The second option is Individual User Accounts and this is the traditional forms-based authentication where users can visit a website. They can register, create a login, and by default their username is stored in a SQL Server database using some new ASP.NET identity features, which we'll look at.
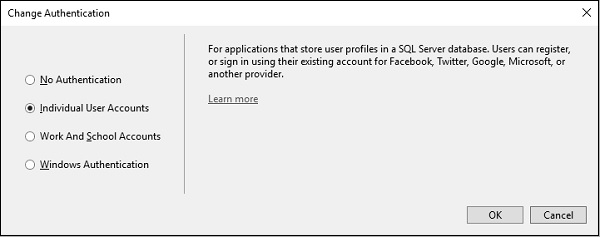
The password is also stored in the database, but it is hashed first. Since the password is hashed, you don't have to worry about plain-text passwords sitting in a database.
This option is typically used for internet sites where you want to establish the identity of a user. In addition to letting a user create a local login with a password for your site, you can also enable logins from third parties like Microsoft, Google, Facebook, and Twitter.
This allows a user to log into your site using their Live account or their Twitter account and they can select a local username, but you don't need to store any passwords.
This is the option that we'll spend some time with in this module; the individual user accounts option.
Work and School Accounts
The third option is to use organizational accounts and this is typically used for business applications where you will be using active directory federation services.
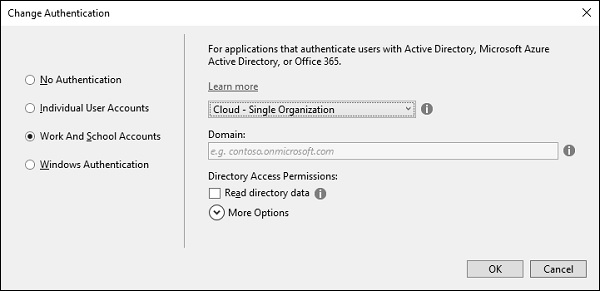
You will either set up Office 365 or use Azure Active Directory Services, and you have a single sign-on for internal apps and Cloud apps.
You will also need to provide an app ID so your app will need to be registered with the Windows Azure management portal if this is Azure based, and the app ID will uniquely identify this application amongst all the applications that might be registered.
Windows Authentication
The fourth option is Windows authentication, which works well for intranet applications.
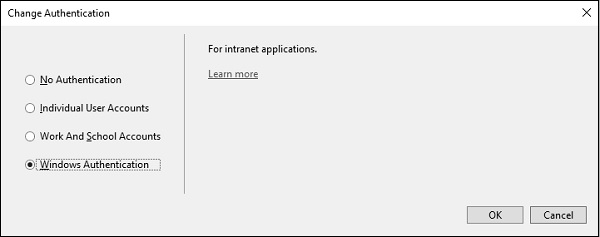
A user logs into Windows desktop and can launch a browser to the application that sits inside the same firewall. ASP.NET can automatically pick up the user's identity, the one that was established by active directory. This option does not allow any anonymous access to the site, but again that is a configuration setting that can be changed.
Let's take a look into the forms-based authentication, the one that goes by the name, Individual User Accounts. This application will store usernames and passwords, old passwords in a local SQL Server database, and when this project is created, Visual Studio will also add NuGet packages.
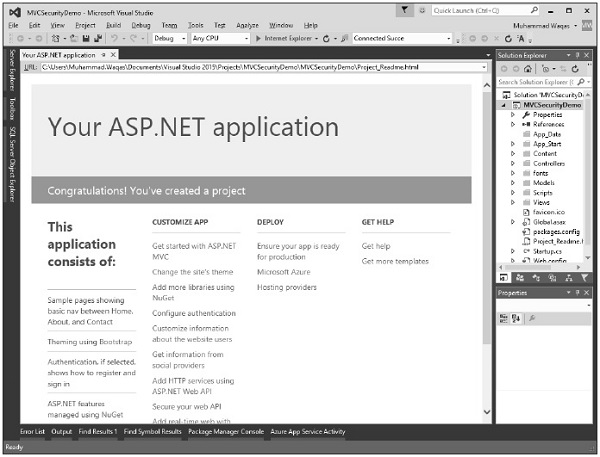
Now run this application and when you first come to this application you will be an anonymous user.
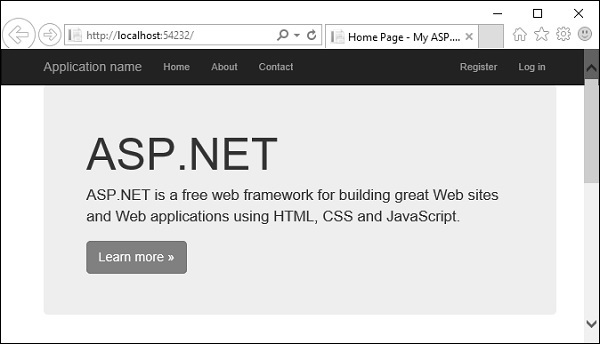
You won't have an account that you can log into yet so you will need to register on this site.
Click on the Register link and you will see the following view.
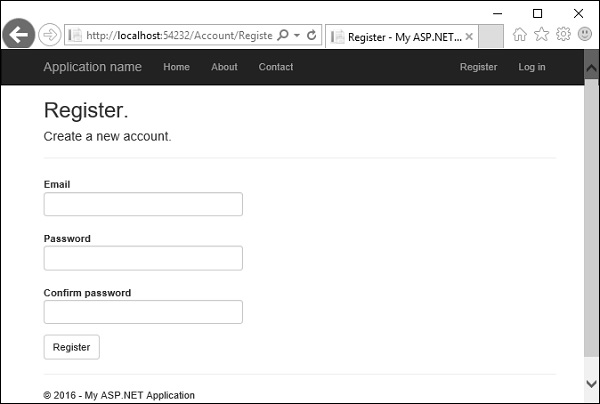
Enter your email id and password.
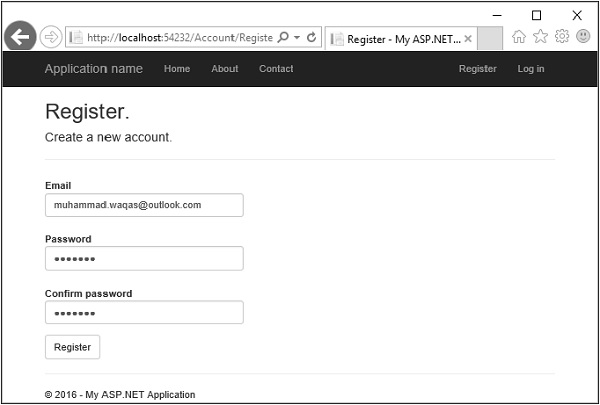
Click Register. Now, the application will recognize you.
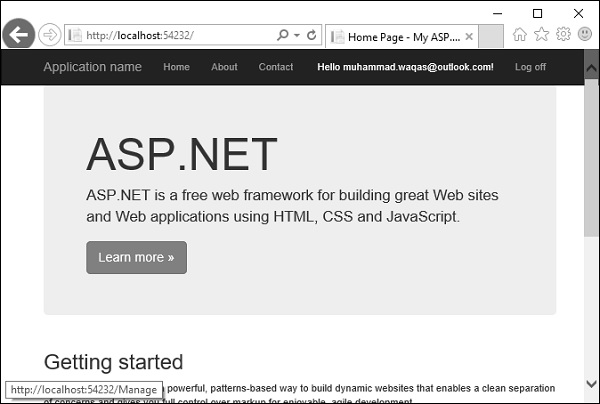
It will be able to display your name. In the following screenshot, you can see Hello, muhammad.waqas@outlook.com! is displayed. You can click on that and it's a link to a page where you can change the password.
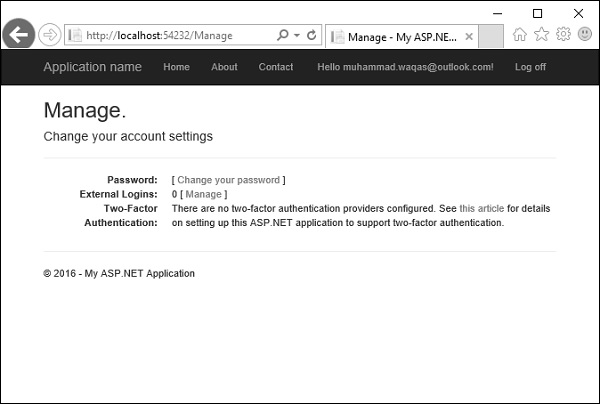
You can also log off, shut down, reboot, come back a week later, and you should be able to log in with the credentials that you used earlier. Now click on the log off button and it will display the following page.

Click again on the Log in link and you will go to the following page.
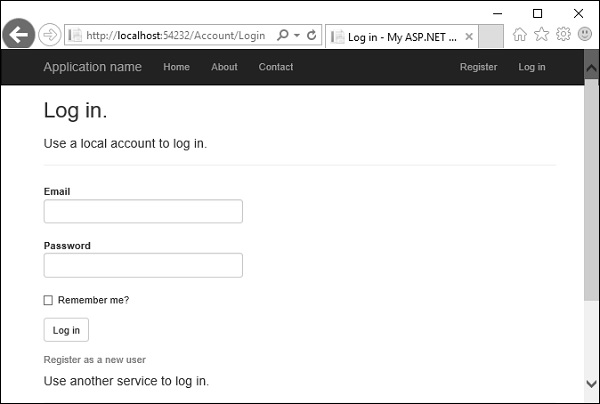
You can login again with the same credentials.
A lot of work goes on behind the scene to get to this point. However, what we want to do is examine each of the features and see how this UI is built. What is managing the logoff and the login process? Where is this information sorted in the database?
Let's just start with a couple of simple basics. First we will see how is this username displayed. Open the _Layout.cshtml from the View/Shared folder in the Solution explorer.
<!DOCTYPE html>
<html>
   <head>
      <meta charset = "utf-8" />
      <meta name = "viewport" content = "width = device-width, initial-scale = 1.0">
      <title>@ViewBag.Title - My ASP.NET Application</title>
      @Styles.Render("~/Content/css")
      @Scripts.Render("~/bundles/modernizr")
   </head>

   <body>
      <div class = "navbar navbar-inverse navbar-fixed-top">
         <div class = "container">

            <div class = "navbar-header">
               <button type = "button" class = "navbar-toggle" datatoggle = "collapse"
                  data-target = ".navbar-collapse">
                     <span class = "icon-bar"></span>
                     <span class = "icon-bar"></span>
                     <span class = "icon-bar"></span>
               </button>

               @Html.ActionLink("Application name", "Index", "Home", new
               { area = "" }, new { @class = "navbar-brand" })
            </div>

            <div class = "navbar-collapse collapse">
               <ul class = "nav navbar-nav">
                  <li>@Html.ActionLink("Home", "Index", "Home")</li>
                  <li>@Html.ActionLink("About", "About", "Home")</li>
                  <li>@Html.ActionLink("Contact", "Contact", "Home")</li>
               </ul>

               @Html.Partial("_LoginPartial")
            </div>

         </div>

      </div>
      <div class = "container body-content">
         @RenderBody()
         <hr />
         <footer>
            <p>© @DateTime.Now.Year - My ASP.NET Application</p>
         </footer>
      </div>

      @Scripts.Render("~/bundles/jquery")
      @Scripts.Render("~/bundles/bootstrap")
      @RenderSection("scripts", required: false)

   </body>
</html>
There is a common navigation bar, the application name, the menu, and there is a partial view that's being rendered called _loginpartial. That's actually the view that displays the username or the register and login name. So _loginpartial.cshtml is also in the shared folder.
@using Microsoft.AspNet.Identity
@if (Request.IsAuthenticated) {
   using (Html.BeginForm("LogOff", "Account", FormMethod.Post,
      new { id = "logoutForm", @class = "navbar-right" })){
         @Html.AntiForgeryToken()
         <ul class = "nav navbar-nav navbar-right">
            <li>
               @Html.ActionLink("Hello " + User.Identity.GetUserName() + "!",
               "Index", "Manage", routeValues: null, htmlAttributes: new { title = "Manage" })
            </li>

            <li>
               <a href = "javascript:document.getElementById('logoutForm').submit()">Logoff</a>
            </li>

         </ul>
      }
}else{
   <ul class = "nav navbar-nav navbar-right">
      <li>@Html.ActionLink("Register", "Register", "Account", routeValues:
         null, htmlAttributes: new { id = "registerLink" })</li>

      <li>@Html.ActionLink("Log in", "Login", "Account", routeValues: null,
         htmlAttributes: new { id = "loginLink" })</li>
   </ul>
}
As you can see above, there are if/else statements. If we do not know who the user is, because the request is not authenticated, this view will display register and login links. The user can click on the link to log in or register. All this is done by the account controller.
For now, we want to see how to get the username, and that's inside Request.IsAuthenticated. You can see a call to User.Identity.GetUserName. That will retrieve the username, which in this case is ‘muhammad.waqas@outlook.com’
Authorization
Let's suppose that we have some sort of information which we want to protect from unauthenticated users. So let’s create a new controller to display that information, but only when a user is logged in.
Right-click on the controller folder and select Add → Controller.

Select an MVC 5 controller - Empty controller and click ‘Add’.
Enter the name SecretController and click ‘Add’ button.
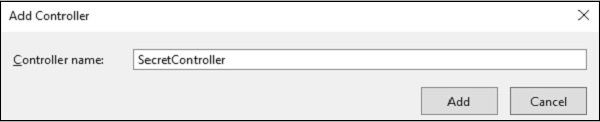
It will have two actions inside as shown in the following code.
using System.Web.Mvc;

namespace MVCSecurityDemo.Controllers{
   public class SecretController : Controller{
      // GET: Secret
      public ContentResult Secret(){
         return Content("Secret informations here");
      }

      public ContentResult PublicInfo(){
         return Content("Public informations here");
      }
   }
}
When you run this application, you can access this information without any authentication as shown in the following screenshot.
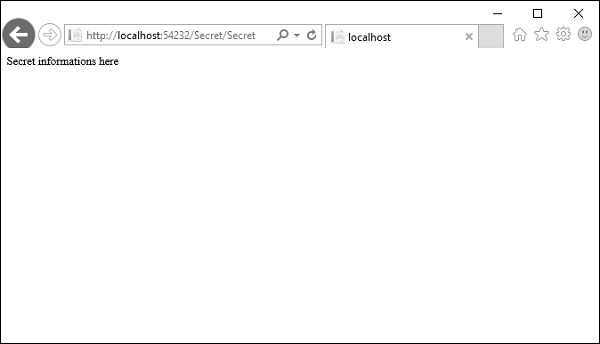
So only authenticated users should be able to get to Secret action method and the PublicInfo can be used by anyone without any authentication.
To protect this particular action and keep unauthenticated users from arriving here, you can use the Authorize attribute. The Authorize attribute without any other parameters will make sure that the identity of the user is known and they're not an anonymous user.
// GET: Secret
[Authorize]
public ContentResult Secret(){
   return Content("Secret informations here");
}
Now run this application again and specify the same URL http://localhost:54232/Secret/Secret. The MVC application will detect that you do not have access to that particular area of the application and it will redirect you automatically to the login page, where it will give you a chance to log in and try to get back to that area of the application where you were denied.
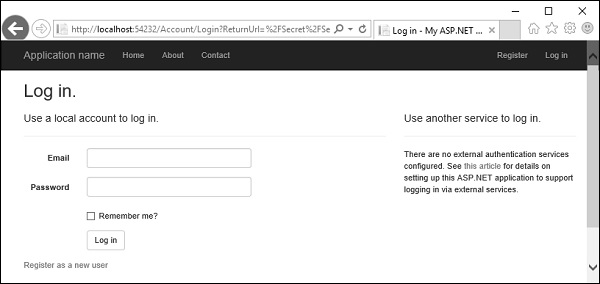
You can see that it is specified in the return URL, which essentially tells this page that if the user logs in successfully, redirect them back to /secret/secret.
Enter your credentials and click ‘Log in’ button. You will see that it goes directly to that page.
If you come back to the home page and log off, you cannot get to the secret page. You will be asked again to log in, but if go to /Secret/PublicInfo, you can see that page, even when you are not authenticated.

So, when you don't want to be placing authorization on every action when you're inside a controller where pretty much everything requires authorization. In that case you can always apply this filter to the controller itself and now every action inside of this controller will require the user to be authenticated.
using System.Web.Mvc;

namespace MVCSecurityDemo.Controllers{
   [Authorize]
   public class SecretController : Controller{
      // GET: Secret
      public ContentResult Secret(){
         return Content("Secret informations here");
      }

      public ContentResult PublicInfo(){
         return Content("Public informations here");
      }
   }
}
But if you really want any action to be open, you can come override this authorization rule with another attribute, which is, AllowAnonymous.
using System.Web.Mvc;

namespace MVCSecurityDemo.Controllers{
   [Authorize]
   public class SecretController : Controller{
      // GET: Secret
      public ContentResult Secret(){
         return Content("Secret informations here");
      }

      [AllowAnonymous]
      public ContentResult PublicInfo(){
         return Content("Public informations here");
      }
   }
}
Run this application and you can access the /Secret/PublicInfo with logging in but other action will require authentication.
It will allow anonymous users into this one action only.
With the Authorize attribute, you can also specify some parameters, like allow some specific users into this action.
using System.Web.Mvc;

namespace MVCSecurityDemo.Controllers{
   [Authorize(Users = "ali.khan@outlook.com")]
   public class SecretController : Controller{
      // GET: Secret
      public ContentResult Secret(){
         return Content("Secret informations here");
      }

      [AllowAnonymous]
      public ContentResult PublicInfo(){
         return Content("Public informations here");
      }
   }
}
When you run this application and go to /secret/secret, it will ask you to log in because it is not the proper user for this controller.
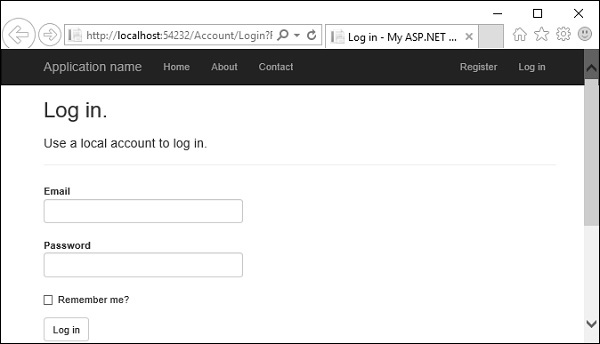
ASP.NET MVC - Caching
In this chapter, we will be focusing on one of the most common ASP.NET techniques like Caching to improve the performance of the application. Caching means to store something in memory that is being used frequently to provide better performance. We will see how you can dramatically improve the performance of an ASP.NET MVC application by taking advantage of the output cache.
In ASP.NET MVC, there is an OutputCache filter attribute that you can apply and this is the same concept as output caching in web forms. The output cache enables you to cache the content returned by a controller action.
Output caching basically allows you to store the output of a particular controller in the memory. Hence, any future request coming for the same action in that controller will be returned from the cached result. That way, the same content does not need to be generated each and every time the same controller action is invoked.
Why Caching?
We need caching in many different scenarios to improve the performance of an application. For example, you have an ASP.NET MVC application, which displays a list employees. Now when these records are retrieved from the database by executing a database query each and every time a user invokes the controller action it returns the Index view.
Hence you can take advantage of the output cache to avoid executing a database query every time a user invokes the same controller action. In this case, the view will be retrieved from the cache instead of being regenerated from the controller action.
Caching enables you to avoid performing redundant work on the server.
Let’s take a look at a simple example of caching in our project.
[OutputCache(Duration = 60)]
public ActionResult Index(){
   var employees = from e in db.Employees
   orderby e.ID
   select e;
   return View(employees);
}
As you can see, we have added “OutputCache” attribute on the index action of the EmployeeController. Now to understand this concept, let us run this application in debugger mode and also insert a breakpoint in the Index action method.
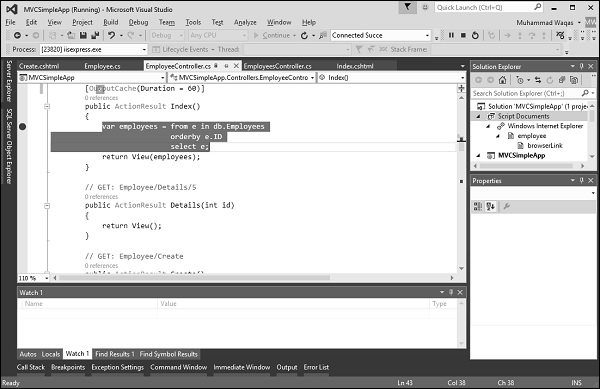
Specify the following URL http://localhost:63004/employee, and press ‘Enter’. You will see that the breakpoint is hit in the Index action method.
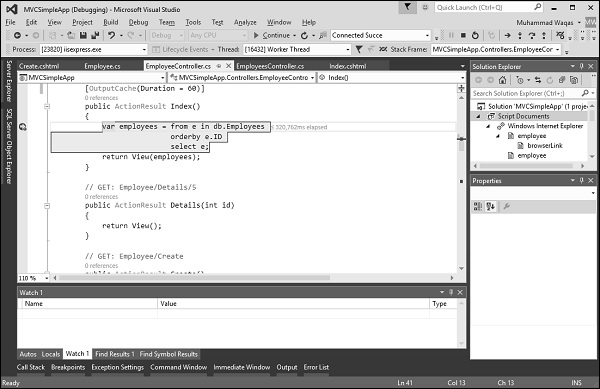
Press ‘F5’ button to continue and you will see the list of employees on your view, which are retrieved from the database.
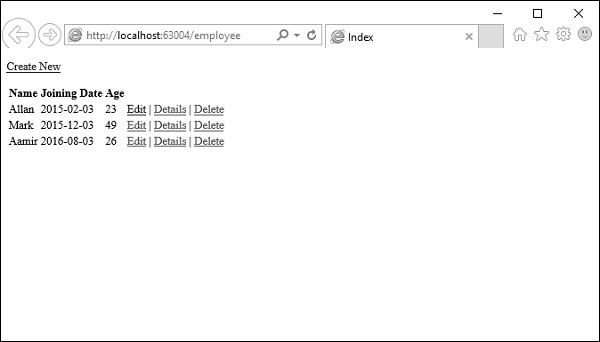
Refresh the browser again within 60 seconds and you will see that the breakpoint is not hit this time. This is because we have used output cache with duration of seconds. So it will cache this result for 60 seconds and when you refresh the browser, it will get the result from the cache, and it won’t load the content from the database server.
In addition to duration parameter, there are other settings options as well which you can use with output cache. These settings are not only for MVC framework but it is inherited from ASP.Net Caching.
Varying the Output Cache
In some cases, you might want different cached versions, such as, when you create a detail page, then when you click on the detailed link you will get details for the selected employee.
But first we need to create the detail view. For this, right-click on the Details action method from the EmployeeController and select Add View…
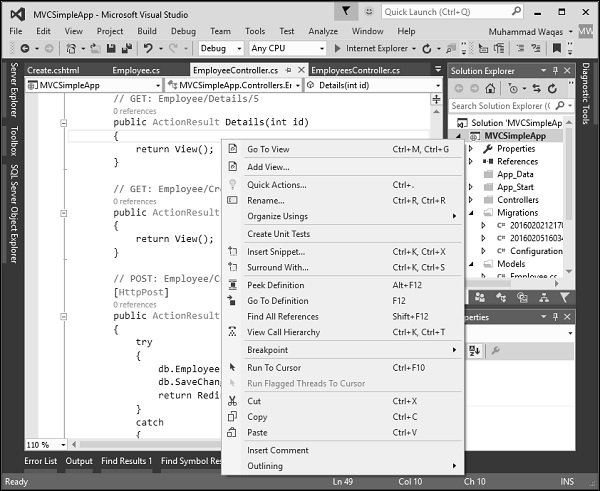
You will see the Details name is selected by default. Now select Details from the Template dropdown and Employee from the Model class dropdown.
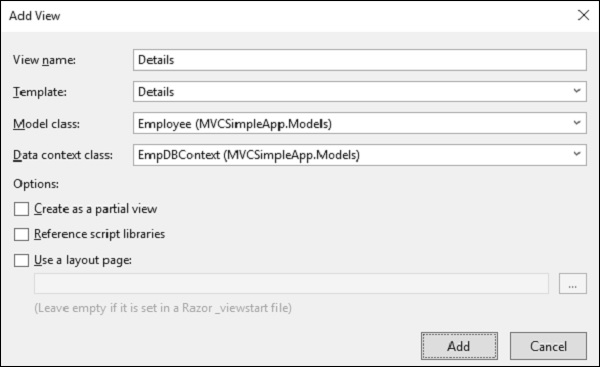
Click ‘Add’ to continue and you will see the Details.cshtml.
@model MVCSimpleApp.Models.Employee
@{
   Layout = null;
}

<!DOCTYPE html>
<html>
   <head>
      <meta name = "viewport" content = "width = device-width" />
      <title>Details</title>
   </head>

   <body>
      <div>
         <h4>Employee</h4>
         <hr />
         <dl class = "dl-horizontal">
            <dt>
               @Html.DisplayNameFor(model => model.Name)
            </dt>

            <dd>
               @Html.DisplayFor(model => model.Name)
            </dd>

            <dt>
               @Html.DisplayNameFor(model => model.JoiningDate)
            </dt>

            <dd>
               @Html.DisplayFor(model => model.JoiningDate)
            </dd>

            <dt>
               @Html.DisplayNameFor(model => model.Age)
            </dt>

            <dd>
               @Html.DisplayFor(model => model.Age)
            </dd>

         </dl>
      </div>

      <p>
         @Html.ActionLink("Edit", "Edit", new { id = Model.ID }) |
         @Html.ActionLink("Back to List", "Index")
      </p>

   </body>
</html>
You can take advantage of the VaryByParam property of the [OutputCache] attribute. This property enables you to create different cached versions of the very same content when a form parameter or query string parameter varies. Following is the implementation of Details action.
// GET: Employee/Details/5
[OutputCache(Duration = int.MaxValue, VaryByParam = "id")]

public ActionResult Details(int id){
   var employee = db.Employees.SingleOrDefault(e => e.ID == id);
   return View(employee);
}
When the above code is compiled and executed, you will receive the following output by specifying the URL http://localhost:63004/employee.

Click on the Details link of any link and you will see the details view of that particular employee.
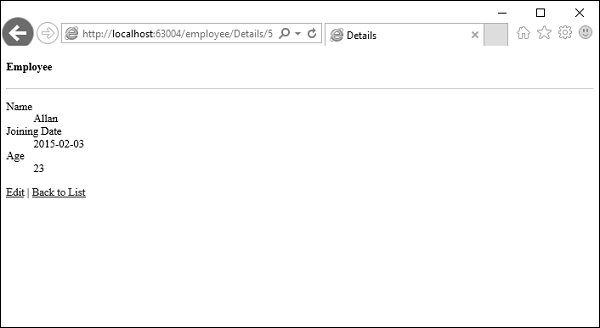
The Details() action includes a VaryByParam property with the value “Id”. When different values of the Id parameter are passed to the controller action, different cached versions of the Details view are generated.
It is important to understand that using the VaryByParam property results in more caching. A different cached version of the Details view is created for each different version of the Id parameter.
Cache Profile
You can create a cache profile in the web.config file. It is an alternative to configuring output cache properties by modifying properties of the [OutputCache] attribute. It offers a couple of important advantages which are as follows.
Controls how controller actions cache content in one central location.
Creates one cache profile and apply the profile to several controllers or controller actions.
Modifies the web configuration file without recompiling your application.
Disables caching for an application that has already been deployed to production.
Let’s take a look at a simple example of cache profile by creating the cache profile in web.config file. The <caching> section must appear within the <system.web> section.
<caching>
   <outputCacheSettings>
      <outputCacheProfiles>
         <add name = "Cache10Min" duration = "600" varyByParam = "none"/>
      </outputCacheProfiles>
   </outputCacheSettings>
</caching>
You can apply the Cache10Min profile to a controller action with the [OutputCache] attribute which is as follows.
[OutputCache(CacheProfile = "Cache10Min")]

public ActionResult Index(){
   var employees = from e in db.Employees
   orderby e.ID
   select e;
   return View(employees);
}
Run this application and specify the following URL http://localhost:63004/employee
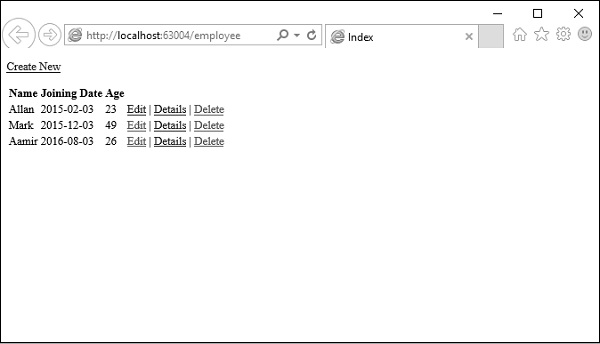
If you invoke the Index() action as shown above then the same time will be returned for 10 Min.
ASP.NET MVC - Razor
In this chapter, we will look at the Razor view engine in ASP.NET MVC applications and some of the reasons why Razor exists. Razor is a markup syntax that lets you embed server-based code into web pages using C# and VB.Net. It is not a programming language. It is a server side markup language.
Razor has no ties to ASP.NET MVC because Razor is a general-purpose templating engine. You can use it anywhere to generate output like HTML. It's just that ASP.NET MVC has implemented a view engine that allows us to use Razor inside of an MVC application to produce HTML.

You will have a template file that's a mix of some literal text and some blocks of code. You combine that template with some data or a specific model where the template specifies where the data is supposed to appear, and then you execute the template to generate your output.
Razor Vs ASPX
Razor is very similar to how ASPX files work. ASPX files are templates, which contain literal text and some C# code that specifies where your data should appear. We execute those to generate the HTML for our application.
ASPX files have a dependency on the ASP.NET runtime to be available to parse and execute those ASPX files. Razor has no such dependencies.
Unlike ASPX files, Razor has some different design goals.
Goals
Microsoft wanted Razor to be easy to use and easy to learn, and work inside of tools like Visual Studio so that IntelliSense is available, the debugger is available, but they wanted Razor to have no ties to a specific technology, like ASP.NET or ASP.NET MVC.
If you're familiar with the life cycle of an ASPX file, then you're probably aware that there's a dependency on the ASP.NET runtime to be available to parse and execute those ASPX files. Microsoft wanted Razor to be smart, to make a developer's job easier.
Let’s take a look at a sample code from an ASPX file, which contains some literal text. This is our HTML markup. It also contains little bits of C# code.
<% foreach (var item in Model) { %>
   <tr>
      <td>
         <%: Html.ActionLink("Edit", "Edit", new { id = item.ID })%> |
         <%: Html.ActionLink("Details", "Details", new { id = item.ID }) %>|
         <%: Html.ActionLink("Delete", "Delete", new { id = item.ID })%>
      </td>

      <td>
         <%: item.Name %>
      </td>

      <td>
         <%: String.Format("{0,g}", item.JoiningDate) %>
      </td>

   </tr>
<%}%>
But these Web forms were basically repurposed by Microsoft to work with the earlier releases of MVC, meaning ASPX files were never a perfect match for MVC.
The syntax is a bit clunky when you need to transition from C# code back to HTML and from HTML code back into C# code. You are also prompted by IntelliSense to do things that just don't make sense in an MVC project, like add directives for output caching and user controls into an ASPX view.
Now look at this code which produces the same output, the difference being it is using the Razor syntax.
@foreach (var item in Model) {
   <tr>
      <td>
         @Html.ActionLink("Edit", "Edit", new { id = item.ID }) |
         @Html.ActionLink("Details", "Details", new { id = item.ID }) |
         @Html.ActionLink("Delete", "Delete", new { id = item.ID })
      </td>

      <td>
         @item.Name
      </td>

      <td>
         @String.Format("{0,g}", item.JoiningDate)
      </td>
   </tr>
}
With Razor syntax you can begin a bit of C# code by using the ‘@’ sign and the Razor parse will automatically switch into parsing this statement, this foreach statement, as a bit of C# code.
But when we're finished with the foreach statement and we have our opening curly brace, we can transition from C# code into HTML without putting an explicit token in there, like the percent in the angle bracket signs.
The Razor parser is smart enough to switch between C# code and HTML and again, from HTML back into C# code when we need to place our closing curly brace here. If you compare these two blocks of code, I think you'll agree that the Razor version is easier to read and easier to write.
Creating a View Using Razor
Let's create a new ASP.Net MVC project.
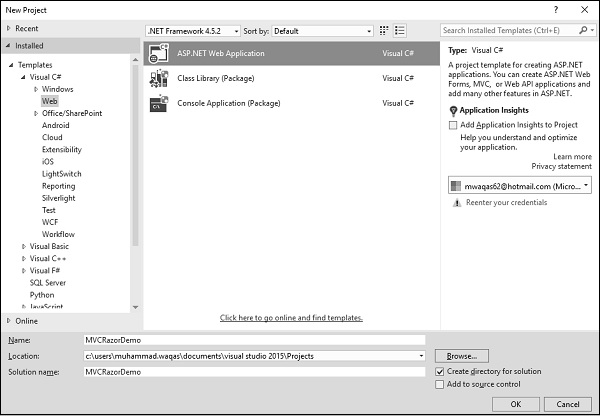
Enter the name of project in the name field and click Ok.

To keep things simple, select the Empty option and check the MVC checkbox in the ‘Add folders and core references for’ section and click Ok. It will create a basic MVC project with minimal predefined content.
Once the project is created by Visual Studio, you will see a number of files and folders displayed in the Solution Explorer window. As we have created ASP.Net MVC project from an empty project template, so at the moment the application does not contain anything to run. Since we start with an empty application and don't even have a single controller, let’s add a HomeController.
To add a controller right-click on the controller folder in the solution explorer and select Add → Controller. It will display the Add Scaffold dialog.

Select the MVC 5 Controller – Empty option and click Add button and then the Add Controller dialog will appear.
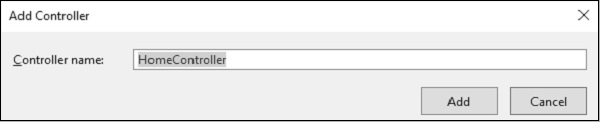
Set the name to HomeController and click ‘Add’ button. You will see a new C# file ‘HomeController.cs’ in the Controllers folder, which is open for editing in Visual Studio as well.
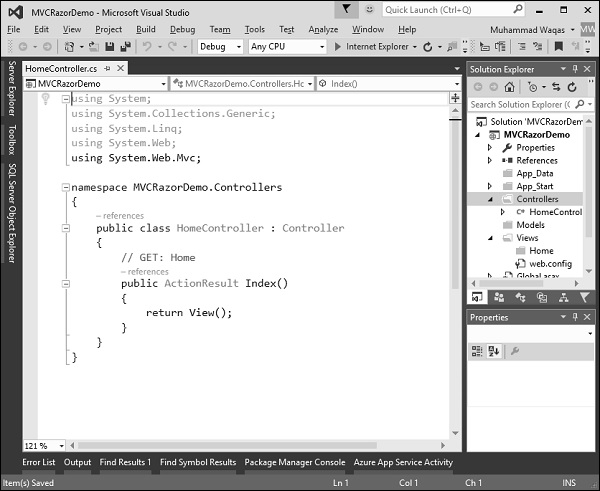
Right-click on the Index action and select Add View…

Select Empty from the Template dropdown and click Add button. Visual Studio will create an Index.cshtml file inside the View/Home folder.

Notice that Razor view has a cshtml extension. If you're building your MVC application using Visual Basic it will be a VBHTML extension. At the top of this file is a code block that is explicitly setting this Layout property to null.
When you run this application you will see the blank webpage because we have created a View from an Empty template.

Let's add some C# code to make things more interesting. To write some C# code inside a Razor view, the first thing we will do is type the ‘@’ symbol that tells the parser that it is going to be doing something in code.
Let's create a FOR loop specify ‘@i’ inside the curly braces, which is essentially telling Razor to put the value of i.
@{
   Layout = null;
}

<!DOCTYPE html>
<html>
   <head>
      <meta name = "viewport" content = "width = device-width" />
      <title>Index</title>
   </head>

   <body>
      <div>
         @for (int index = 0; index < 12; index++){
            <div>@index </div>
         }
      </div>
   </body>

</html>
Run this application and you will see the following output.
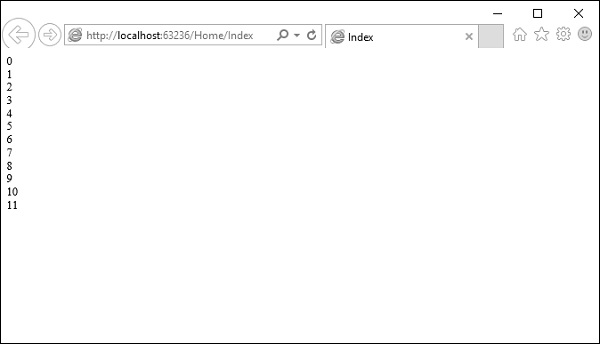
ASP.NET MVC - Data Annotations
DataAnnotations is used to configure your model classes, which will highlight the most commonly needed configurations. DataAnnotations are also understood by a number of .NET applications, such as ASP.NET MVC, which allows these applications to leverage the same annotations for client-side validations. DataAnnotation attributes override default Code-First conventions.
System.ComponentModel.DataAnnotations includes the following attributes that impacts the nullability or size of the column.
- Key
- Timestamp
- ConcurrencyCheck
- Required
- MinLength
- MaxLength
- StringLength
System.ComponentModel.DataAnnotations.Schema namespace includes the following attributes that impacts the schema of the database.
- Table
- Column
- Index
- ForeignKey
- NotMapped
- InverseProperty
Key
Entity Framework relies on every entity having a key value that it uses for tracking entities. One of the conventions that Code First depends on is how it implies which property is the key in each of the Code First classes.
The convention is to look for a property named “Id” or one that combines the class name and “Id”, such as “StudentId”. The property will map to a primary key column in the database. The Student, Course and Enrollment classes follow this convention.
Now let’s suppose Student class used the name StdntID instead of ID. When Code First does not find a property that matches this convention it will throw an exception because of Entity Framework’s requirement that you must have a key property.
You can use the key annotation to specify which property is to be used as the EntityKey.
Let’s take a look at the Student class which contains StdntID. It doesn’t follow the default Code First convention so to handle this, Key attribute is added, which will make it a primary key.
public class Student{
   [Key]
   public int StdntID { get; set; }
   public string LastName { get; set; }
   public string FirstMidName { get; set; }
   public DateTime EnrollmentDate { get; set; }

   public virtual ICollection<Enrollment> Enrollments { get; set; }
}
When you run the application and look into the database in SQL Server Explorer, you will see that the primary key is now StdntID in Students table.
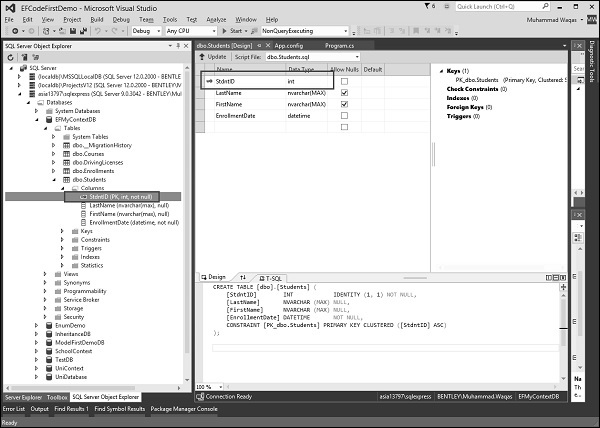
Entity Framework also supports composite keys. Composite keys are primary keys that consist of more than one property. For example, you have a DrivingLicense class whose primary key is a combination of LicenseNumber and IssuingCountry.
public class DrivingLicense{
   [Key, Column(Order = 1)]
   public int LicenseNumber { get; set; }

   [Key, Column(Order = 2)]
   public string IssuingCountry { get; set; }
   public DateTime Issued { get; set; }
   public DateTime Expires { get; set; }
}
When you have composite keys, Entity Framework requires you to define an order of the key properties. You can do this using the Column annotation to specify an order.
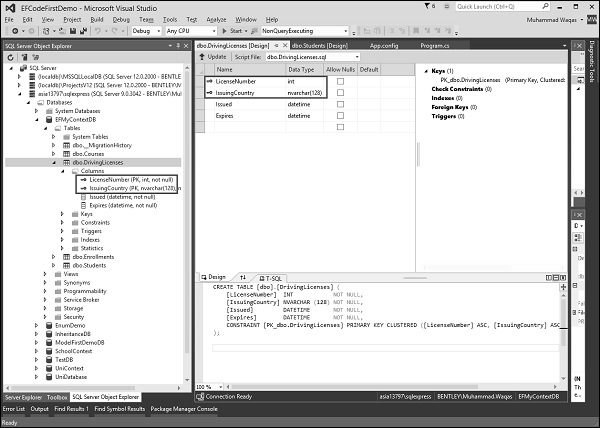
Timestamp
Code First will treat Timestamp properties the same as ConcurrencyCheck properties, but it will also ensure that the database field generated by Code First is non-nullable.
It's more common to use rowversion or timestamp fields for concurrency checking. But rather than using the ConcurrencyCheck annotation, you can use the more specific TimeStamp annotation as long as the type of the property is byte array. You can only have one timestamp property in a given class.
Let’s take a look at a simple example by adding the TimeStamp property to the Course class.
public class Course{
   public int CourseID { get; set; }
   public string Title { get; set; }
   public int Credits { get; set; }
   [Timestamp]
   public byte[] TStamp { get; set; }

   public virtual ICollection<Enrollment> Enrollments { get; set; }
}
As you can see in the above example, Timestamp attribute is applied to Byte[] property of the Course class. So, Code First will create a timestamp column TStamp in the Courses table.
ConcurrencyCheck
The ConcurrencyCheck annotation allows you to flag one or more properties to be used for concurrency checking in the database, when a user edits or deletes an entity. If you've been working with the EF Designer, this aligns with setting a property's ConcurrencyMode to Fixed.
Let’s take a look at a simple example and see how ConcurrencyCheck works by adding it to the Title property in Course class.
public class Course{
   public int CourseID { get; set; }

   [ConcurrencyCheck]
   public string Title { get; set; }
   public int Credits { get; set; }

   [Timestamp, DataType("timestamp")]
   public byte[] TimeStamp { get; set; }

   public virtual ICollection<Enrollment> Enrollments { get; set; }
}
In the above Course class, ConcurrencyCheck attribute is applied to the existing Title property. Code First will include Title column in update command to check for optimistic concurrency as shown in the following code.
exec sp_executesql N'UPDATE [dbo].[Courses]
   SET [Title] = @0
   WHERE (([CourseID] = @1) AND ([Title] = @2))
   ',N'@0 nvarchar(max) ,@1 int,@2 nvarchar(max)
',@0 = N'Maths',@1 = 1,@2 = N'Calculus'
go
Required
The Required annotation tells EF that a particular property is required. Let’s have a look at the following Student class in which Required id is added to the FirstMidName property. Required attribute will force EF to ensure that the property has data in it.
public class Student{
   [Key]
   public int StdntID { get; set; }

   [Required]
   public string LastName { get; set; }

   [Required]
   public string FirstMidName { get; set; }
   public DateTime EnrollmentDate { get; set; }

   public virtual ICollection<Enrollment> Enrollments { get; set; }
}
You can see in the above example of Student class Required attribute is applied to FirstMidName and LastName. So, Code First will create a NOT NULL FirstMidName and LastName column in the Students table as shown in the following screenshot.
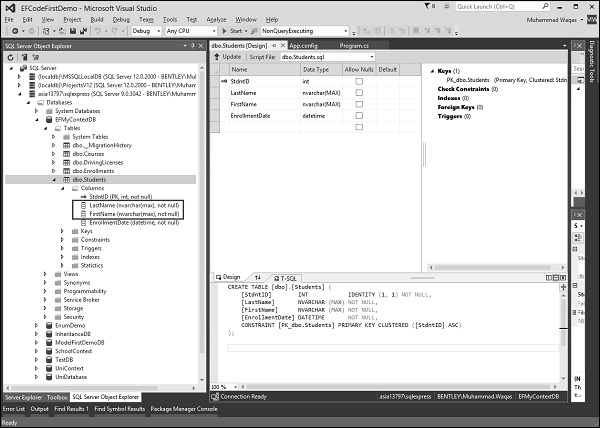
MaxLength
The MaxLength attribute allows you to specify additional property validations. It can be applied to a string or array type property of a domain class. EF Code First will set the size of a column as specified in MaxLength attribute.
Let’s take a look at the following Course class in which MaxLength(24) attribute is applied to Title property.
public class Course{
   public int CourseID { get; set; }
   [ConcurrencyCheck]
   [MaxLength(24)]

   public string Title { get; set; }
   public int Credits { get; set; }

   public virtual ICollection<Enrollment> Enrollments { get; set; }
}
When you run the above application, Code-First will create a nvarchar(24) column Title in the Coursed table as shown in the following screenshot.
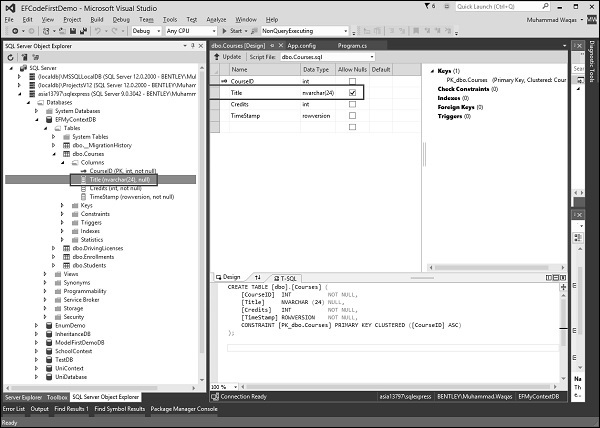
Now when the user sets the Title which contains more than 24 characters, EF will throw EntityValidationError.
MinLength
The MinLength attribute allows you to specify additional property validations, just as you did with MaxLength. MinLength attribute can also be used with MaxLength attribute as shown in the following code.
public class Course{
   public int CourseID { get; set; }
   [ConcurrencyCheck]
   [MaxLength(24) , MinLength(5)]
   public string Title { get; set; }
   public int Credits { get; set; }

   public virtual ICollection<Enrollment> Enrollments { get; set; }
}
EF will throw EntityValidationError, if you set a value of Title property less than the specified length in MinLength attribute or greater than the specified length in MaxLength attribute.
StringLength
StringLength also allows you to specify additional property validations like MaxLength. The difference being StringLength attribute can only be applied to a string type property of Domain classes.
public class Course{
   public int CourseID { get; set; }
   [StringLength (24)]
   public string Title { get; set; }
   public int Credits { get; set; }

   public virtual ICollection<Enrollment> Enrollments { get; set; }
}
Entity Framework also validates the value of a property for StringLength attribute. Now, if the user sets the Title, which contains more than 24 characters, then EF will throw EntityValidationError.
Table
Default Code First convention creates a table name same as the class name. If you are letting Code First create the database, you can also change the name of the tables it is creating. You can use Code First with an existing database. But it's not always the case that the names of the classes match the names of the tables in your database.
Table attribute overrides this default convention. EF Code First will create a table with a specified name in Table attribute for a given domain class.
Let’s take a look at an example in which the class is named Student, and by convention, Code First presumes this will map to a table named Students. If that's not the case you can specify the name of the table with the Table attribute as shown in the following code.
[Table("StudentsInfo")]
public class Student{
   [Key]
   public int StdntID { get; set; }

   [Required]
   public string LastName { get; set; }

   [Required]
   public string FirstMidName { get; set; }
   public DateTime EnrollmentDate { get; set; }

   public virtual ICollection<Enrollment> Enrollments { get; set; }
}
You can now see that the Table attribute specifies the table as StudentsInfo. When the table is generated, you will see the table name StudentsInfo as shown in the following screenshot.
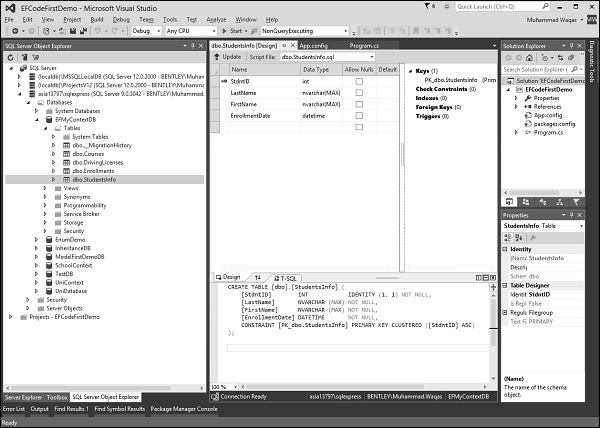
You cannot only specify the table name but you can also specify a schema for the table using the Table attribute using the following code.
[Table("StudentsInfo", Schema = "Admin")]

public class Student{
   [Key]
   public int StdntID { get; set; }

   [Required]
   public string LastName { get; set; }

   [Required]
   public string FirstMidName { get; set; }
   public DateTime EnrollmentDate { get; set; }

   public virtual ICollection<Enrollment> Enrollments { get; set; }
}
In the above example, the table is specified with admin schema. Now Code First will create StudentsInfo table in Admin schema as shown in the following screenshot.
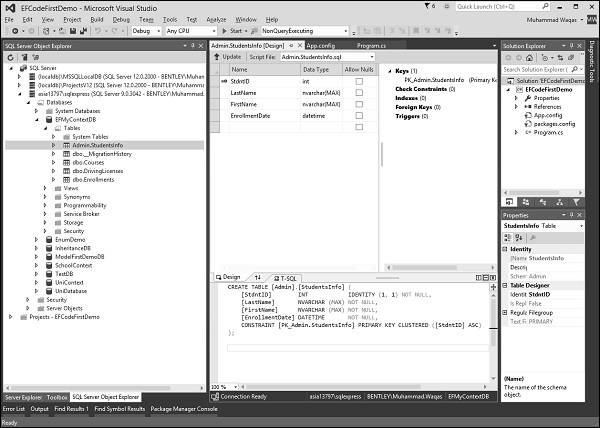
Column
It is also the same as Table attribute, but Table attribute overrides the table behavior while Column attribute overrides the column behavior. Default Code First convention creates a column name same as the property name.
If you are letting Code First create the database, and you also want to change the name of the columns in your tables. Column attribute overrides this default convention. EF Code First will create a column with a specified name in the Column attribute for a given property.
Let’s take a look at the following example again in which the property is named FirstMidName, and by convention, Code First presumes this will map to a column named FirstMidName. If that's not the case, you can specify the name of the column with the Column attribute as shown in the following code.
public class Student{
   public int ID { get; set; }
   public string LastName { get; set; }

   [Column("FirstName")]
   public string FirstMidName { get; set; }
   public DateTime EnrollmentDate { get; set; }

   public virtual ICollection<Enrollment> Enrollments { get; set; }
}
You can now see that the Column attribute specifies the column as FirstName. When the table is generated, you will see the column name FirstName as shown in the following screenshot.
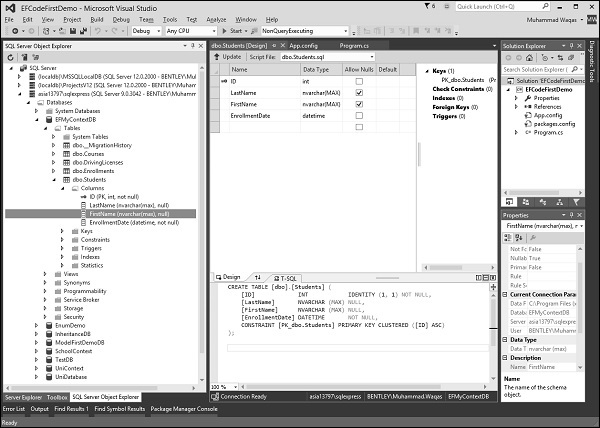
Index
The Index attribute was introduced in Entity Framework 6.1. Note − If you are using an earlier version, the information in this section does not apply.
You can create an index on one or more columns using the IndexAttribute. Adding the attribute to one or more properties will cause EF to create the corresponding index in the database when it creates the database.
Indexes make the retrieval of data faster and efficient, in most cases. However, overloading a table or view with indexes could unpleasantly affect the performance of other operations such as inserts or updates.
Indexing is the new feature in Entity Framework where you can improve the performance of your Code First application by reducing the time required to query data from the database.
You can add indexes to your database using the Index attribute, and override the default Unique and Clustered settings to get the index best suited to your scenario. By default, the index will be named IX_<property name>
Let’s take a look at the following code in which Index attribute is added in Course class for Credits.
public class Cours{
   public int CourseID { get; set; }
   public string Title { get; set; }
   [Index]
   public int Credits { get; set; }

   public virtual ICollection<Enrollment> Enrollments { get; set; }
}
You can see that the Index attribute is applied to the Credits property. Now when the table is generated, you will see IX_Credits in Indexes.
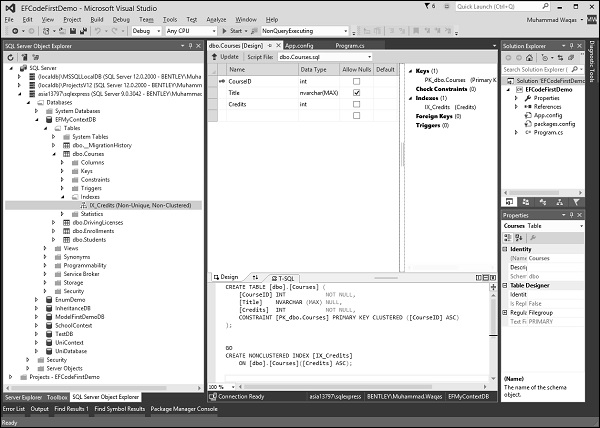
By default, indexes are non-unique, but you can use the IsUnique named parameter to specify that an index should be unique. The following example introduces a unique index as shown in the following code.
public class Course{
   public int CourseID { get; set; }
   [Index(IsUnique = true)]

   public string Title { get; set; }
   [Index]

   public int Credits { get; set; }

   public virtual ICollection<Enrollment> Enrollments { get; set; }
}
ForeignKey
Code First convention will take care of the most common relationships in your model, but there are some cases where it needs help. For example, by changing the name of the key property in the Student class created a problem with its relationship to Enrollment class.
public class Enrollment{
   public int EnrollmentID { get; set; }
   public int CourseID { get; set; }
   public int StudentID { get; set; }
   public Grade? Grade { get; set; }
   public virtual Course Course { get; set; }
   public virtual Student Student { get; set; }
}

public class Student{
   [Key]
   public int StdntID { get; set; }
   public string LastName { get; set; }
   public string FirstMidName { get; set; }
   public DateTime EnrollmentDate { get; set; }

   public virtual ICollection<Enrollment> Enrollments { get; set; }
}
While generating the database, Code First sees the StudentID property in the Enrollment class and recognizes it, by the convention that it matches a class name plus “ID”, as a foreign key to the Student class. But there is no StudentID property in the Student class, rather it is StdntID property in Student class.
The solution for this is to create a navigation property in the Enrollment and use the ForeignKey DataAnnotation to help Code First understand how to build the relationship between the two classes as shown in the following code.
public class Enrollment{
   public int EnrollmentID { get; set; }
   public int CourseID { get; set; }
   public int StudentID { get; set; }
   public Grade? Grade { get; set; }
   public virtual Course Course { get; set; }

   [ForeignKey("StudentID")]
   public virtual Student Student { get; set; }
}
You can see now that the ForeignKey attribute is applied to navigation property.
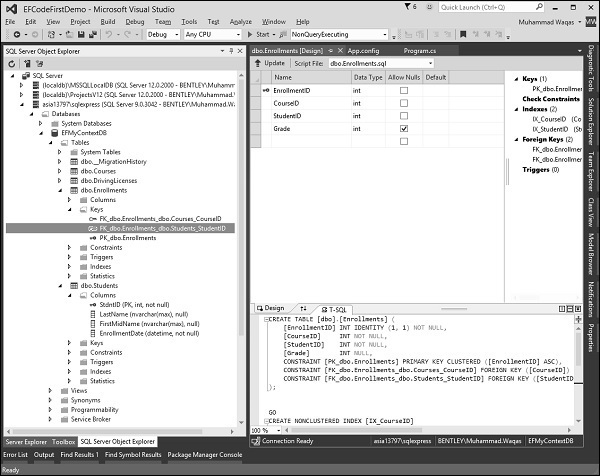
NotMapped
By default conventions of Code First, every property that is of a supported data type and which includes getters and setters are represented in the database. But this isn’t always the case in applications. NotMapped attribute overrides this default convention. For example, you might have a property in the Student class such as FatherName, but it does not need to be stored. You can apply NotMapped attribute to a FatherName property, which you do not want to create a column in a database. Following is the code.
public class Student{
   [Key]
   public int StdntID { get; set; }
   public string LastName { get; set; }
   public string FirstMidName { get; set; }
   public DateTime EnrollmentDate { get; set; }
   [NotMapped]
   public int FatherName { get; set; }

   public virtual ICollection<Enrollment> Enrollments { get; set; }
}
You can see that NotMapped attribute is applied to the FatherName property. Now when the table is generated, you will see that FatherName column will not be created in a database, but it is present in Student class.
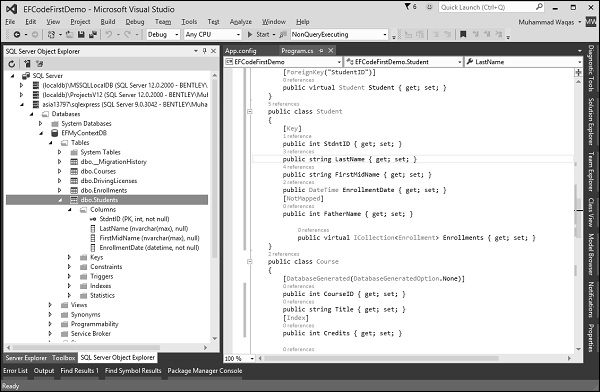
Code First will not create a column for a property which does not have either getters or setters.
InverseProperty
The InverseProperty is used when you have multiple relationships between classes. In the Enrollment class, you may want to keep track of who enrolled a Current Course and who enrolled a Previous Course.
Let’s add two navigation properties for the Enrollment class.
public class Enrollment{
   public int EnrollmentID { get; set; }
   public int CourseID { get; set; }
   public int StudentID { get; set; }
   public Grade? Grade { get; set; }

   public virtual Course CurrCourse { get; set; }
   public virtual Course PrevCourse { get; set; }
   public virtual Student Student { get; set; }
}
Similarly, you’ll also need to add in the Course class referenced by these properties. The Course class has navigation properties back to the Enrollment class, which contains all the current and previous enrollments.
public class Course{
   public int CourseID { get; set; }
   public string Title { get; set; }
   [Index]

   public int Credits { get; set; }
   public virtual ICollection<Enrollment> CurrEnrollments { get; set; }
   public virtual ICollection<Enrollment> PrevEnrollments { get; set; }
}
Code First creates {Class Name}_{Primary Key} foreign key column if the foreign key property is not included in a particular class as shown in the above classes. When the database is generated you will see a number of foreign keys as seen in the following screenshot.
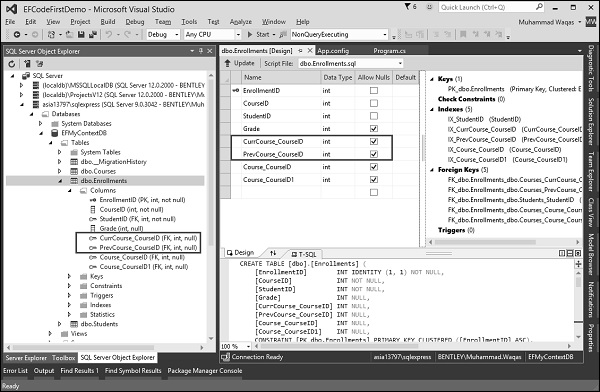
As you can see that Code First is not able to match up the properties in the two classes on its own. The database table for Enrollments should have one foreign key for the CurrCourse and one for the PrevCourse, but Code First will create four foreign key properties, i.e.
- CurrCourse_CourseID
- PrevCourse_CourseID
- Course_CourseID
- Course_CourseID1
To fix these problems, you can use the InverseProperty annotation to specify the alignment of the properties.
public class Course{
   public int CourseID { get; set; }
   public string Title { get; set; }

   [Index]
   public int Credits { get; set; }

   [InverseProperty("CurrCourse")]
   public virtual ICollection<Enrollment> CurrEnrollments { get; set; }

   [InverseProperty("PrevCourse")]
   public virtual ICollection<Enrollment> PrevEnrollments { get; set; }
}
As you can see now, when InverseProperty attribute is applied in the above Course class by specifying which reference property of Enrollment class it belongs to, Code First will generate database and create only two foreign key columns in Enrollments table as shown in the following screenshot.
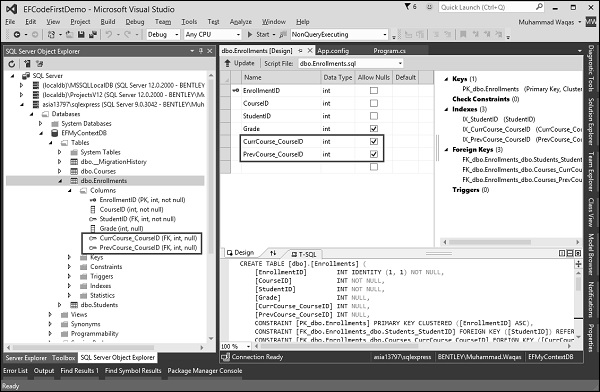
We recommend you to execute the above example for better understanding.
ASP.NET MVC - NuGet Package Management
In this chapter, we will talk about NuGet which is a package manager for .NET and Visual Studio. NuGet can be used to find and install packages, that is, software pieces and assemblies and things that you want to use in your project.
NuGet is not a tool that is specific to ASP.NET MVC projects. This is a tool that you can use inside of Visual Studio for console applications, WPF applications, Azure applications, any types of application.
Package Management
NuGet is a package manager, and is responsible for downloading, installing, updating, and configuring software in your system. From the term software we don’t mean end users software like Microsoft Word or Notepad 2, etc. but pieces of software, which you want to use in your project, assembly references.
For example, assemblies you want to use might be mock, for mock object unit testing, or NHibernate for data access, and components you use when building your application. The above-mentioned components are open source software, but some NuGet packages you find are closed source software. Some of the packages you'll find are even produced by Microsoft.
The common theme along all the packages mentioned above, like mock and NHibernate, and Microsoft packages like a preview for the Entity Framework, is that they don't come with Visual Studio by default.
Without NuGet
To install any of these components without NuGet, you will need the following steps.
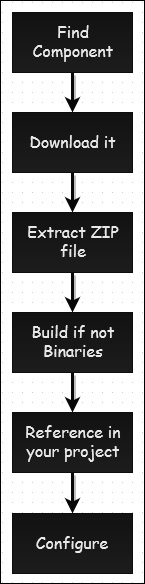
If you want to use one of those components, you need to find the home page for some particular project and look for a download link. Then once the project is downloaded, it's typically in a ZIP format so you will need to extract it.
If you didn't download binaries, then you will first need to build the software and then reference it in your project. And many components at that point still require some configuration to get up and running.
Using NuGet
NuGet replaces all of the steps discussed earlier and you just need to say Add Package. NuGet knows where to download the latest version, it knows how to extract it, how to establish a reference to that component, and even configure it. This leaves you more time to just build the software.
Let’s take a look at a simple example in which we will add support for Entity framework in our ASP.NET MVC project using NuGet.
Step 1 − Install the Entity Framework. Right-click on the project and select NuGet Package Manager → Manage NuGet Packages for Solution…
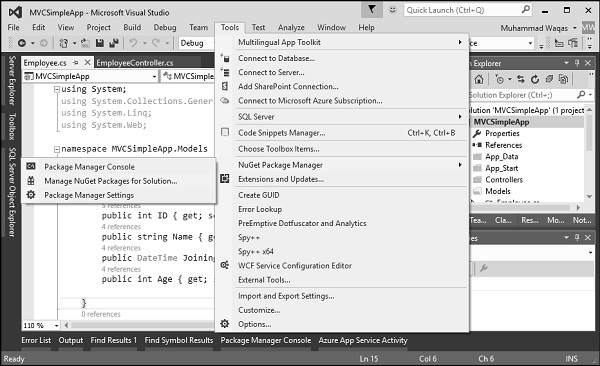
It will open the NuGet Package Manager.
Step 2 − Search for Entity framework in the search box.
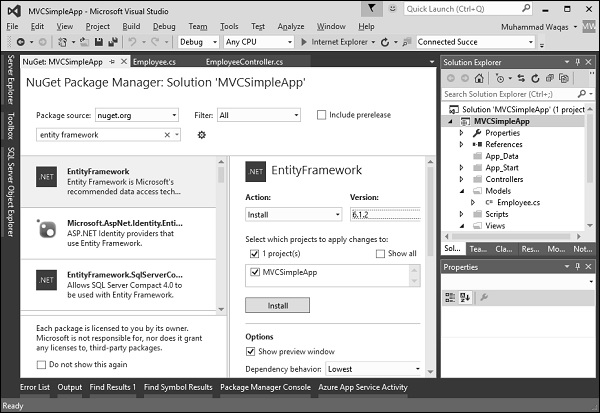
Step 3 − Select the Entity Framework and click ‘Install’ button. It will open the Preview dialog.
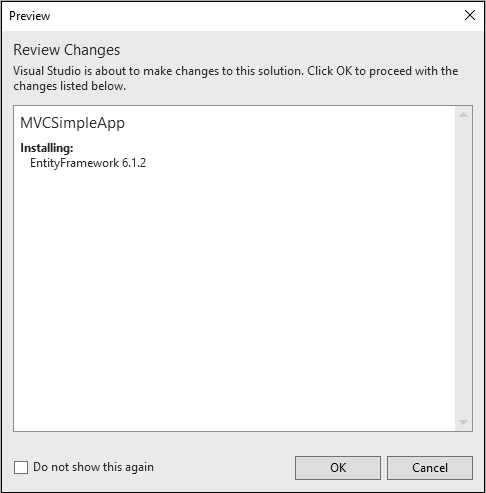
Step 4 − Click Ok to continue.
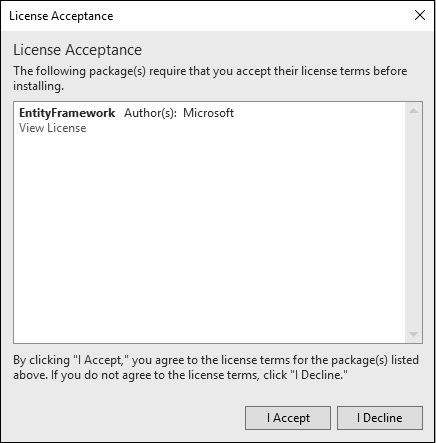
Step 5 − Click the ‘I Accept’ button to start the installation.

Once the Entity Framework is installed you will see the message in out window as shown above.
When you install a package with NuGet, you will see a new packages directory in the same folder as the solution file hosting your project. This package directory contains all the packages that you have installed for any of the projects in that solution.
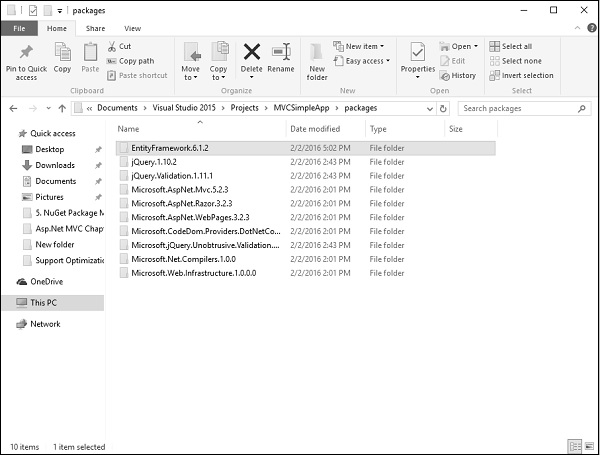
In other words, NuGet is not downloading packages into a central location, it's storing them on a per solution basis.
ASP.NET MVC - Web API
ASP.NET Web API is a framework that makes it easy to build HTTP services that reach a broad range of clients, including browsers and mobile devices. ASP.NET Web API is an ideal platform for building RESTful applications on the .NET Framework.
When you're building APIs on the Web, there are several ways you can build APIs on the Web. These include HTTP/RPC, and what this means is using HTTP in Remote Procedure Call to call into things, like Methods, across the Web.
The verbs themselves are included in the APIs, like Get Customers, Insert Invoice, Delete Customer, and that each of these endpoints end up being a separate URI.
Let’s take a look at a simple example of Web API by creating a new ASP.NET Web Application.
Step 1 − Open the Visual Studio and click File → New → Project menu option.
A new Project dialog opens.
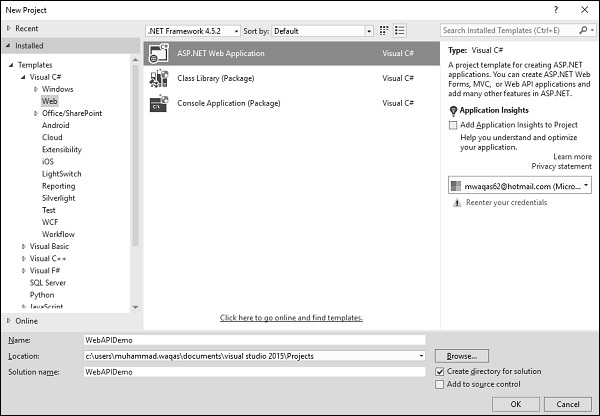
Step 2 − From the left pane, select Templates → Visual C# → Web.
Step 3 − In the middle pane, select ASP.NET Web Application
Enter project name WebAPIDemo in the Name field and click Ok to continue. You will see the following dialog, which asks you to set the initial content for the ASP.NET project.
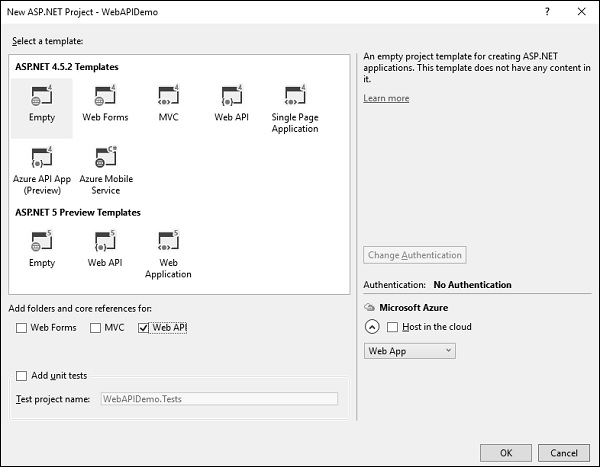
Step 4 − To keep things simple, select the Empty option and check the Web API checkbox in the ‘Add folders and core references for’ section and click Ok.
Step 5 − It will create a basic MVC project with minimal predefined content.
Once the project is created by Visual Studio, you will see a number of files and folders displayed in the Solution Explorer window.
Step 6 − Now we need to add a model. Right-click on the Models folder in the solution explorer and select Add → Class.
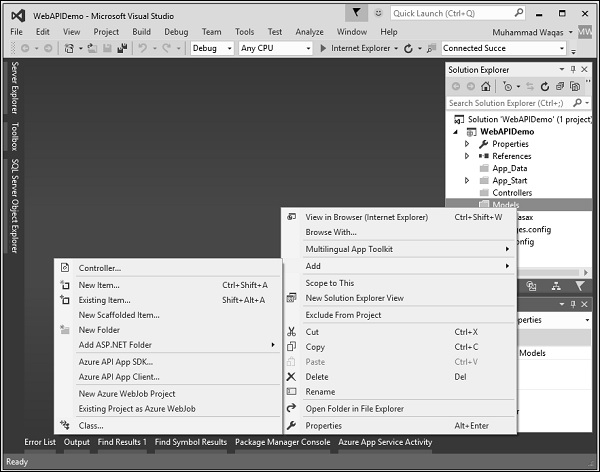
You will now see the Add New Item dialog.

Step 7 − Select Class in the middle pan and enter Employee.cs in the name field.
Step 8 − Add some properties to Employee class using the following code.
using System;
using System.Collections.Generic;
using System.Linq;
using System.Web;

namespace WebAPIDemo.Models {
   public class Employee{
      public int ID { get; set; }
      public string Name { get; set; }
      public DateTime JoiningDate { get; set; }
      public int Age { get; set; }
   }
}
Step 9 − Let’s add the controller. Right-click on the controller folder in the solution explorer and select Add → Controller.
It will display the Add Scaffold dialog.
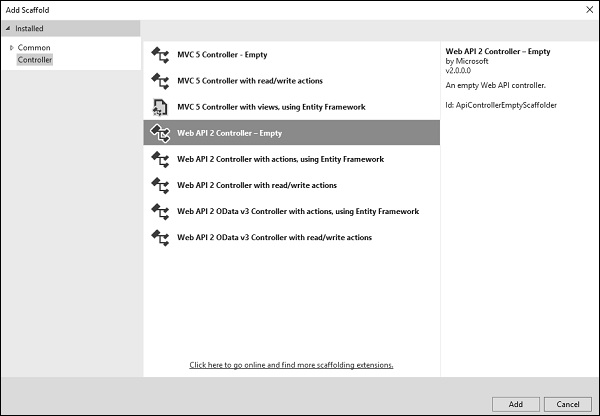
Step 10 − Select the Web API 2 Controller - Empty option. This template will create an Index method with default action for controller.
Step 11 − Click ‘Add’ button and the Add Controller dialog will appear.
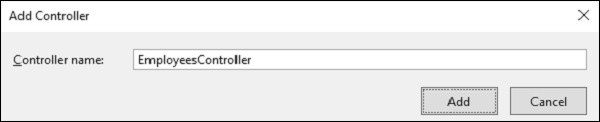
Step 12 − Set the name to EmployeesController and click ‘Add’ button.
You will see a new C# file ‘EmployeeController.cs’ in the Controllers folder, which is open for editing in Visual Studio with some default actions.
using System;
using System.Collections.Generic;
using System.Linq;

using System.Web.Http;
using WebAPIDemo.Models;

namespace WebAPIDemo.Controllers{
   public class EmployeesController : ApiController{
      Employee[] employees = new Employee[]{
         new Employee { ID = 1, Name = "Mark", JoiningDate =
            DateTime.Parse(DateTime.Today.ToString()), Age = 30 },
         new Employee { ID = 2, Name = "Allan", JoiningDate =
            DateTime.Parse(DateTime.Today.ToString()), Age = 35 },
         new Employee { ID = 3, Name = "Johny", JoiningDate =
            DateTime.Parse(DateTime.Today.ToString()), Age = 21 }
      };

      public IEnumerable<Employee> GetAllEmployees(){
         return employees;
      }

      public IHttpActionResult GetEmployee(int id){
         var employee = employees.FirstOrDefault((p) => p.ID == id);
         if (employee == null){
            return NotFound();
         }
         return Ok(employee);
      }
   }
}
Step 13 − Run this application and specify /api/employees/ at the end of the URL and press ‘Enter’. You will see the following output.
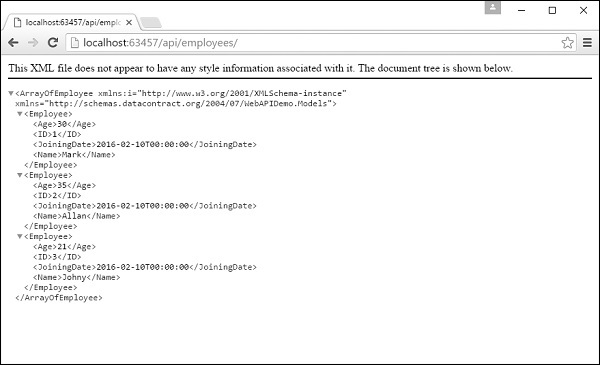
Step 14 − Let us specify the following URL http://localhost:63457/api/employees/1 and you will see the following output.
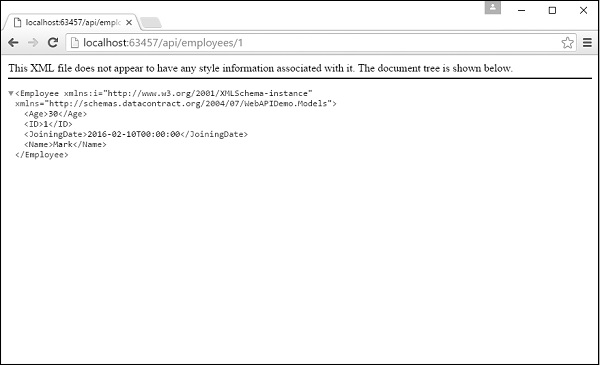
ASP.NET MVC - Scaffolding
ASP.NET Scaffolding is a code generation framework for ASP.NET Web applications. Visual Studio 2013 includes pre-installed code generators for MVC and Web API projects. You add scaffolding to your project when you want to quickly add code that interacts with data models. Using scaffolding can reduce the amount of time to develop standard data operations in your project.
As you have seen that we have created the views for Index, Create, Edit actions and also need to update the actions methods as well. But ASP.Net MVC provides an easier way to create all these Views and action methods using scaffolding.
Let’s take a look at a simple example. We will create the same example which contains a model class Employee, but this time we will use scaffolding.
Step 1 − Open the Visual Studio and click on File → New → Project menu option.
A new Project dialog opens.

Step 2 − From the left pane, select Templates → Visual C# → Web.
Step 3 − In the middle pane, select ASP.NET Web Application.
Step 4 − Enter the project name ‘MVCScaffoldingDemo’ in the Name field and click Ok to continue. You will see the following dialog which asks you to set the initial content for the ASP.NET project.

Step 5 − To keep things simple, select the Empty option and check the MVC checkbox in the ‘Add folders and core references for’section and click Ok.
It will create a basic MVC project with minimal predefined content.
Once the project is created by Visual Studio, you will see a number of files and folders displayed in the Solution Explorer window.
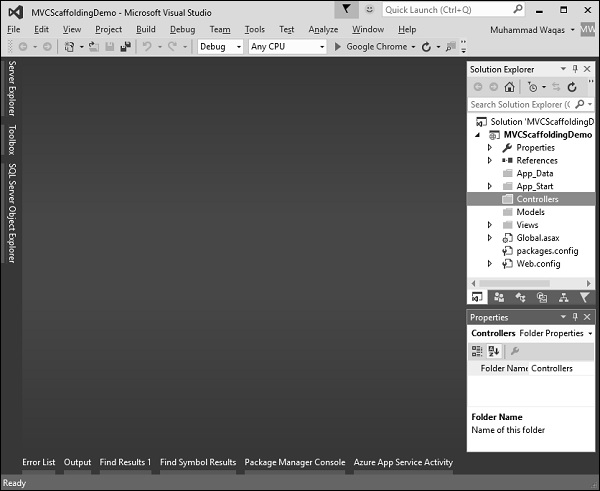
Add Entity Framework Support
First step is to install the Entity Framework. Right-click on the project and select NuGet Package Manager → Manage NuGet Packages for Solution…
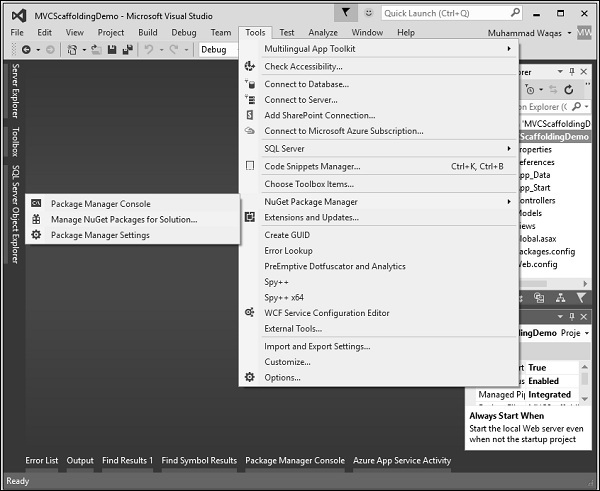
It will open the ‘NuGet Package Manager’. Search for Entity framework in the search box.
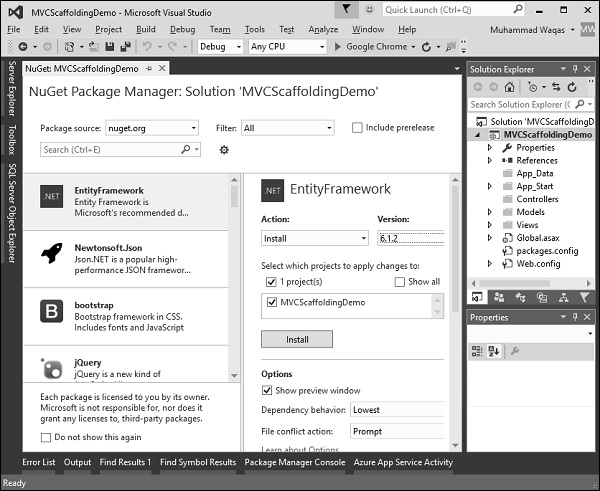
Select the Entity Framework and click ‘Install’ button. It will open the Preview dialog.
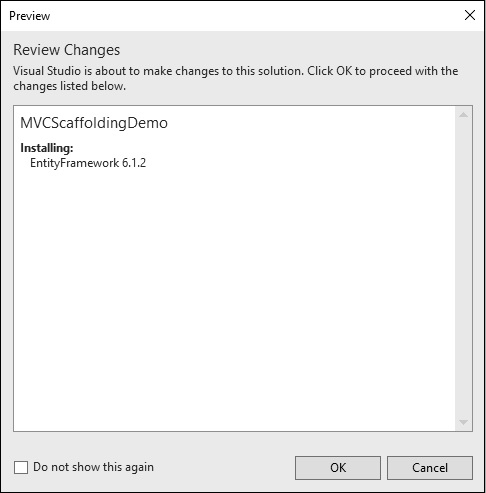
Click Ok to continue.
Click ‘I Accept’ button to start installation.
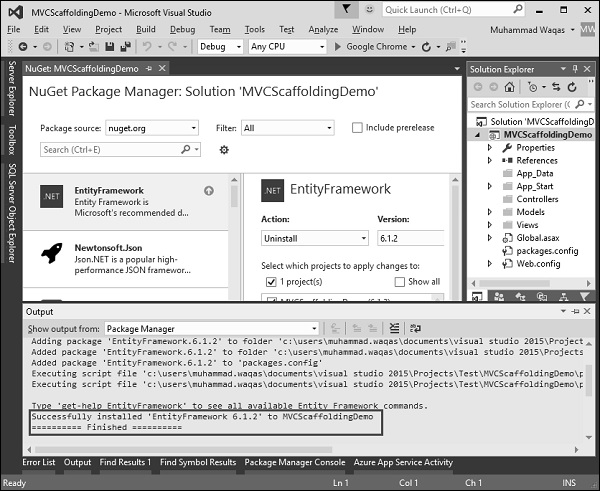
Once the Entity Framework is installed you will see the message in the out window as shown in the above screenshot.
Add Model
To add a model, right-click on the Models folder in the solution explorer and select Add → Class. You will see the ‘Add New Item’ dialog.
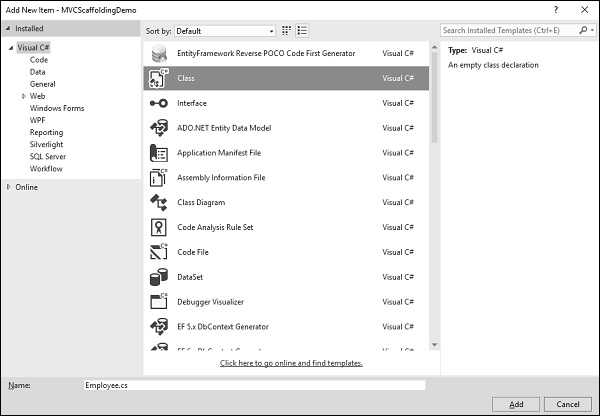
Select Class in the middle pan and enter Employee.cs in the name field.
Add some properties to Employee class using the following code.
using System;

namespace MVCScaffoldingDemo.Models {
   public class Employee{
      public int ID { get; set; }
      public string Name { get; set; }
      public DateTime JoiningDate { get; set; }
      public int Age { get; set; }
   }
}
Add DBContext
We have an Employee Model, now we need to add another class, which will communicate with Entity Framework to retrieve and save the data. Following is the complete code in Employee.cs file.
using System;
using System.Data.Entity;

namespace MVCScaffoldingDemo.Models{
   public class Employee{
      public int ID { get; set; }
      public string Name { get; set; }
      public DateTime JoiningDate { get; set; }
      public int Age { get; set; }
   }

   public class EmpDBContext : DbContext{
      public DbSet<Employee> Employees { get; set; }
   }
}
As you can see ‘EmpDBContext’ is derived from an EF class known as ‘DbContext’. In this class, we have one property with the name DbSet, which basically represents the entity which you want to query and save.
Now let’s build a solution and you will see the message when the project is successfully build.

Add a Scaffolded Item
To add a scaffold, right-click on Controllers folder in the Solution Explorer and select Add → New Scaffolded Item.
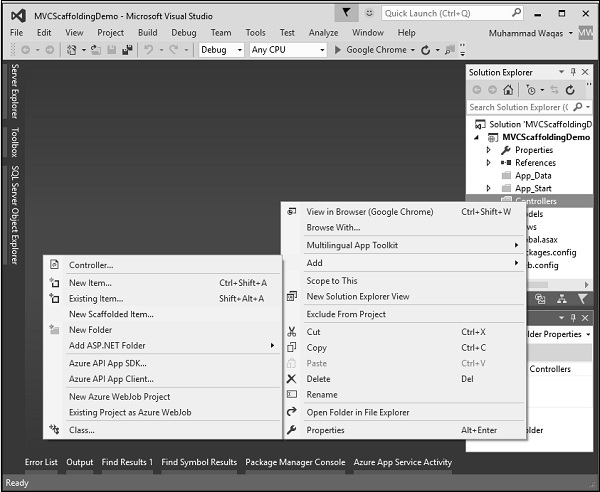
It will display the Add Scaffold dialog.
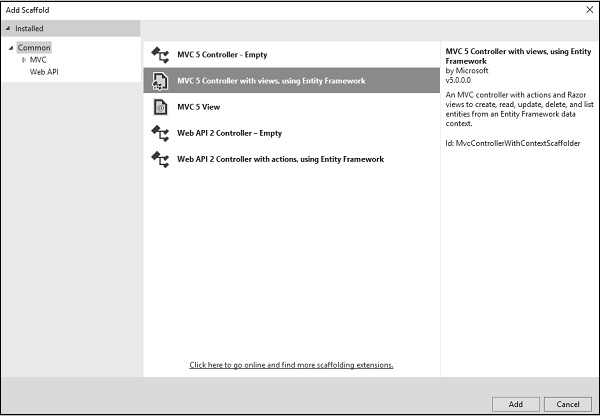
Select MVC 5 Controller with views, using Entity Framework in the middle pane and click ‘Add’ button, which will display the Add Controller dialog.
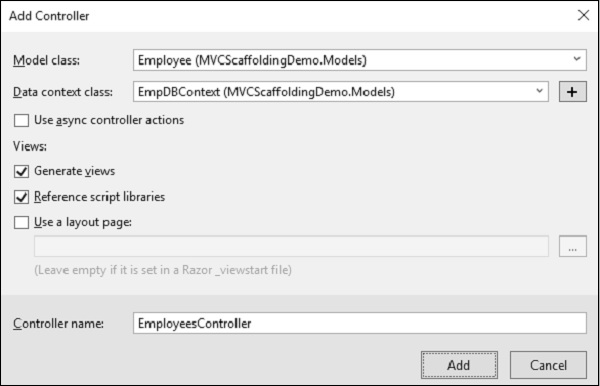
Select Employee from the Model class dropdown and EmpDBContext from the Data context class dropdown. You will also see that the controller name is selected by default.
Click ‘Add’ button to continue and you will see the following code in the EmployeesController, which is created by Visual Studio using Scaffolding.
using System.Data.Entity;
using System.Linq;
using System.Net;
using System.Web.Mvc;
using MVCScaffoldingDemo.Models;

namespace MVCScaffoldingDemo.Controllers {
   public class EmployeesController : Controller{
      private EmpDBContext db = new EmpDBContext();

      // GET: Employees
      public ActionResult Index(){
         return View(db.Employees.ToList());
      }

      // GET: Employees/Details/5
      public ActionResult Details(int? id){
         if (id == null){
            return new HttpStatusCodeResult(HttpStatusCode.BadRequest);
         }

         Employee employee = db.Employees.Find(id);

         if (employee == null){
            return HttpNotFound();
         }
         return View(employee);
      }

      // GET: Employees/Create
      public ActionResult Create(){
         return View();
      }

      // POST: Employees/Create
      // To protect from overposting attacks, please enable the specific
      properties you want to bind to, for
      // more details see http://go.microsoft.com/fwlink/?LinkId=317598.
      [HttpPost]
      [ValidateAntiForgeryToken]

      public ActionResult Create([Bind(Include = "ID,Name,JoiningDate,Age")]
      Employee employee){
         if (ModelState.IsValid){
            db.Employees.Add(employee);
            db.SaveChanges();
            return RedirectToAction("Index");
         }
         return View(employee);
      }

      // GET: Employees/Edit/5
      public ActionResult Edit(int? id){
         if (id == null){
            return new HttpStatusCodeResult(HttpStatusCode.BadRequest);
         }

         Employee employee = db.Employees.Find(id);

         if (employee == null){
            return HttpNotFound();
         }
         return View(employee);
      }

      // POST: Employees/Edit/5
      // To protect from overposting attacks, please enable the specific
      properties you want to bind to, for
      // more details see http://go.microsoft.com/fwlink/?LinkId=317598.
      [HttpPost]
      [ValidateAntiForgeryToken]
      public ActionResult Edit([Bind(Include = "ID,Name,JoiningDate,Age")]Employee employee){
         if (ModelState.IsValid){
            db.Entry(employee).State = EntityState.Modified;
            db.SaveChanges();
            return RedirectToAction("Index");
         }
         return View(employee);
      }

      // GET: Employees/Delete/5
      public ActionResult Delete(int? id){
         if (id == null){
            return new HttpStatusCodeResult(HttpStatusCode.BadRequest);
         }

         Employee employee = db.Employees.Find(id);

         if (employee == null){
            return HttpNotFound();
         }
         return View(employee);
      }

      // POST: Employees/Delete/5
      [HttpPost, ActionName("Delete")]
      [ValidateAntiForgeryToken]

      public ActionResult DeleteConfirmed(int id){
         Employee employee = db.Employees.Find(id);
         db.Employees.Remove(employee);
         db.SaveChanges();
         return RedirectToAction("Index");
      }

      protected override void Dispose(bool disposing){
         if (disposing){
            db.Dispose();
         }

         base.Dispose(disposing);
      }
   }
}
Run your application and specify the following URL http://localhost:59359/employees. You will see the following output.

You can see there is no data in the View, because we have not added any records to the database, which is created by Visual Studio.
Let’s add one record from the browser by clicking the ‘Create New’ link, it will display the Create view.
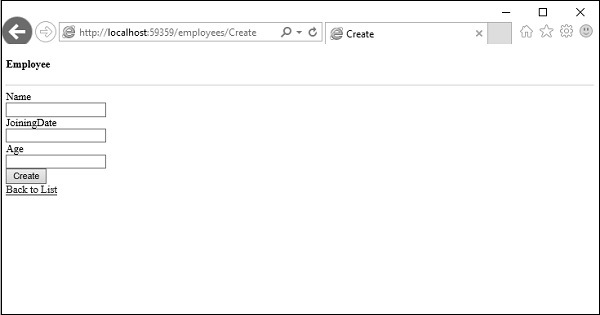
Let’s add some data in the following field.

Click the ‘Create’ button and it will update the Index view.
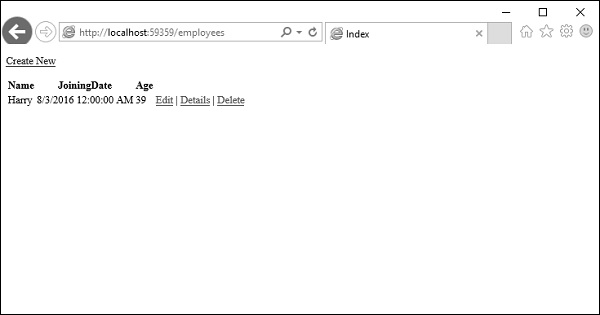
You can see that the new record is also added to the database.
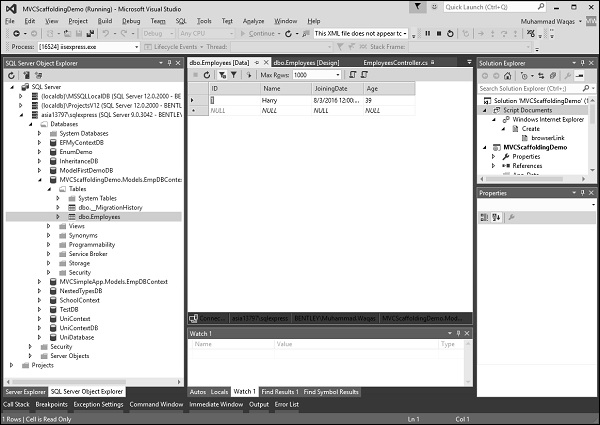
As you can see that we have implemented the same example by using Scaffolding, which is a much easier way to create your Views and Action methods from your model class.
ASP.NET MVC - Bootstrap
In this chapter, we will look at Bootstrap which is a front-end framework now included with ASP.NET and MVC. It is a popular front-end tool kit for web applications, and will help you build a user interface with HTML, CSS, and JavaScript.
It was originally created by web developers at Twitter for personal use, however, it is now an open source and has become popular with designers and developers because of its flexiblility and ease of use.
You can use Bootstrap to create an interface that looks good on everything from large desktop displays to small mobile screens. In this chapter, we will also look at how Bootstrap can work with your layout views to structure the look of an application.
Bootstrap provides all the pieces you need for layout, buttons, forms, menus, widgets, picture carousels, labels, badges, typography, and all sorts of features. Since Bootstrap is all HTML, CSS and JavaScript, all open standards, you can use it with any framework including ASP.NET MVC. When you start a new MVC project, Bootstrap will be present, meaning you'll find Bootstrap.css and Bootstrap.js in your project.
Let’s create a new ASP.NET Web Application.
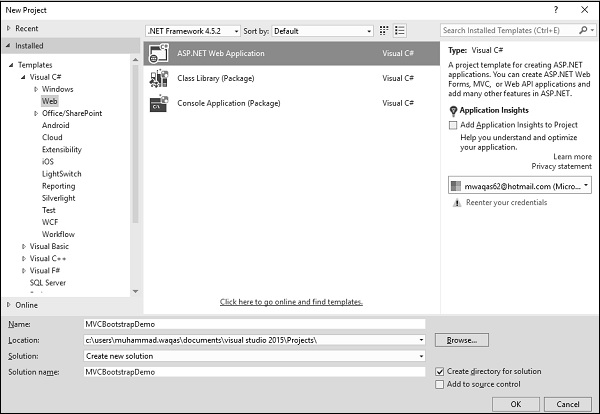
Enter the name of the project, let’s say ‘MVCBootstrap’ and click Ok. You will see the following dialog.

In this dialog, if you select the empty template, you will get an empty web application and there will be no Bootstrap present. There won't be any controllers or any other script files either.
Now select the MVC template and click Ok. When Visual Studio creates this solution, one of the packages that it will download and install into the project will be the Bootstrap NuGet package. You can verify by going to packages.config and you can see the Bootstrap version 3 package.
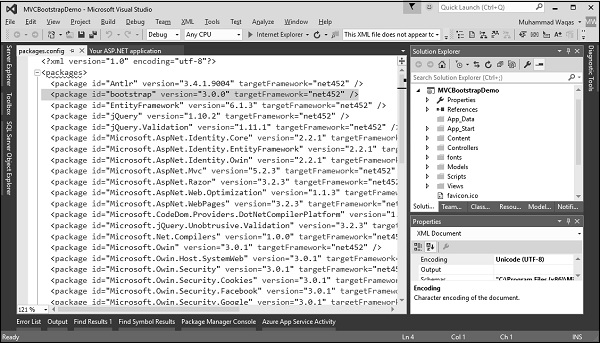
You can also see the Content folder which contains different css files.

Run this application and you will see the following page.
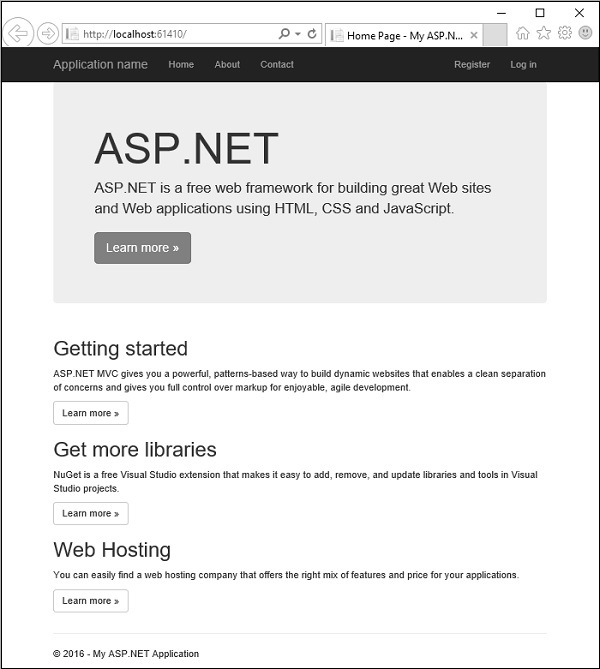
When this page appears, most of the layout and styling that you see is layout and styling that has been applied by Bootstrap. It includes the navigation bar at the top with the links as well as the display that is advertising ASP.NET. It also includes all of these pieces down about getting started and getting more libraries and web hosting.
If you expand the browser just a little bit more, those will actually lay out side by side and that's part of Bootstrap's responsive design features.

If you look under the content folder, you will find the Bootstrap.css file.
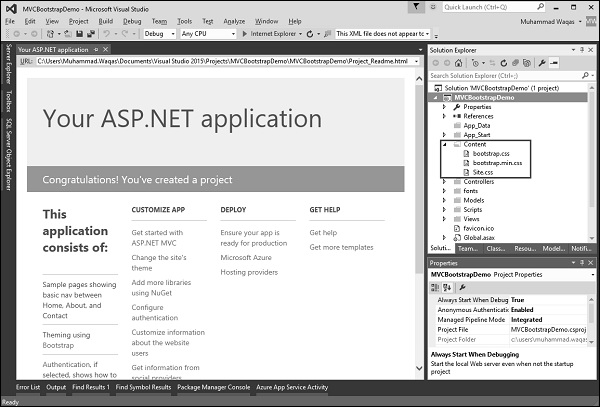
The NuGet package also gives a minified version of that file that's a little bit smaller. Under scripts, you will find Bootstrap.js, that's required for some of the components of Bootstrap.
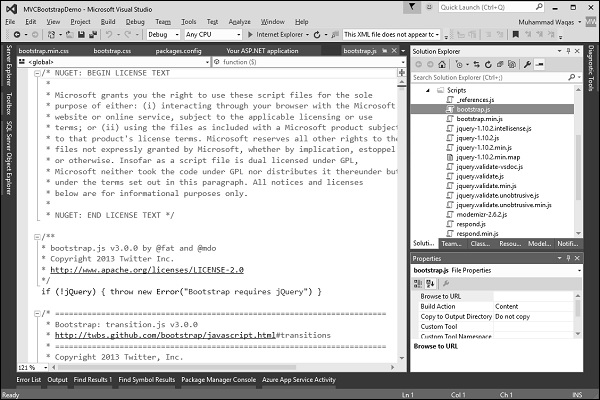
It does have a dependency on jQuery and fortunately jQuery is also installed in this project and there's a minified version of the Bootstrap JavaScript file.
Now the question is, where are all these added in the application? You might expect, that it would be in the layout template, the layout view for this project which is under View/Shared/_layout.cshtml.
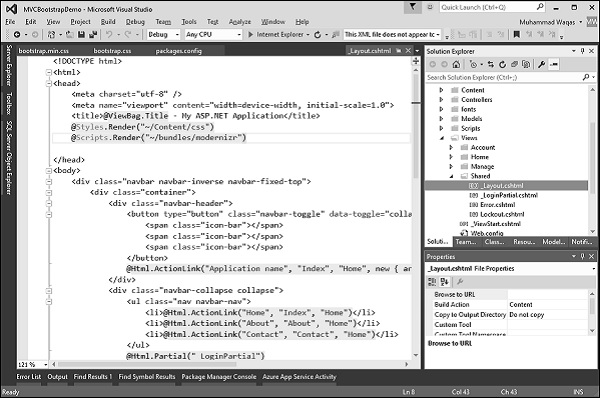
The layout view controls the structure of the UI. Following is the complete code in _layout.cshtml file.
<!DOCTYPE html>
<html>
   <head>
      <meta charset = "utf-8" />
      <meta name = "viewport" content = "width = device-width, initial-scale = 1.0">
      <title>@ViewBag.Title - My ASP.NET Application</title>
      @Styles.Render("~/Content/css")
      @Scripts.Render("~/bundles/modernizr")
   </head>

   <body>
      <div class = "navbar navbar-inverse navbar-fixed-top">
         <div class = "container">

            <div class = "navbar-header">
               <button type = "button" class = "navbar-toggle" datatoggle =
                  "collapse" data-target = ".navbar-collapse">
                  <span class = "icon-bar"></span>
                  <span class = "icon-bar"></span>
                  <span class = "icon-bar"></span>
               </button>

               @Html.ActionLink("Application name", "Index", "Home", new
                  { area = "" }, new { @class = "navbar-brand" })
            </div>

            <div class = "navbar-collapse collapse">
               <ul class = "nav navbar-nav">
                  <li>@Html.ActionLink("Home", "Index", "Home")</li>
                  <li>@Html.ActionLink("About", "About", "Home")</li>
                  <li>@Html.ActionLink("Contact", "Contact", "Home")</li>
               </ul>

               @Html.Partial("_LoginPartial")
            </div>

         </div>

      </div>
      <div class = "container body-content">
         @RenderBody()
         <hr />
         <footer>
            <p>© @DateTime.Now.Year - My ASP.NET Application</p>
         </footer>
      </div>

      @Scripts.Render("~/bundles/jquery")
      @Scripts.Render("~/bundles/bootstrap")
      @RenderSection("scripts", required: false)

   </body>
</html>
In the above code there are two things to note. First at the top, after <title> you will see the following line of code.
@Styles.Render("~/Content/css")
The Styles.Render for Content/css is actually where the Bootstrap.css file is going to be included, and at the bottom, you will see the following line of code.
@Scripts.Render("~/bundles/bootstrap")
It is rendering the Bootstrap script. So in order to find out what exactly is inside of these bundles, we'll have to go into the BundleConfig file, which is in App_Start folder.
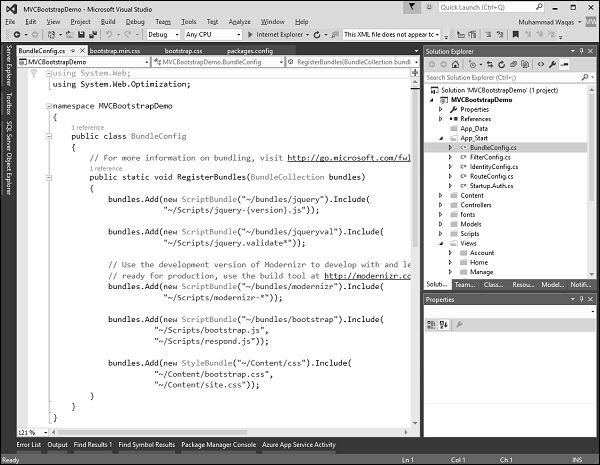
In BundleConfig, you can see at the bottom that the CSS bundle includes both Bootstrap.css and our custom site.css.
bundles.Add(new StyleBundle("~/Content/css").Include(
   "~/Content/bootstrap.css",
   "~/Content/site.css"));
It is a place where we can add our own style sheets to customize the look of the application. You can also see the Bootstrap bundle that appears before the CSS bundle that includes Bootstrap.js, and another JavaScript file, respond.js.
bundles.Add(new ScriptBundle("~/bundles/bootstrap").Include(
   "~/Scripts/bootstrap.js",
   "~/Scripts/respond.js"));
Let’s comment Bootstrap.css as shown in the following code.
bundles.Add(new StyleBundle("~/Content/css").Include(
   //"~/Content/bootstrap.css",
   "~/Content/site.css"));
Run this application again, just to give you an idea of what Bootstrap is doing, because now the only styles that are available are the styles that are in site.css.
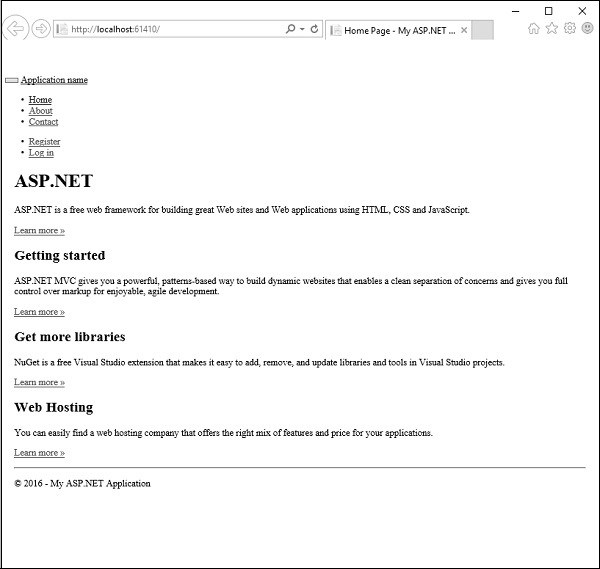
As you can see we lost the layout, the navigation bar at the top of the page. Now everything looks ordinary and boring.
Let us now see what Bootstrap is all about. There's a couple of things that Bootstrap just does automatically and there's a couple of things that Bootstrap can do for you when you add classes and have the right HTML structure. If you look at the _layout.cshtml file, you will see the navbar class as shown in the following code.
<div class = "navbar navbar-inverse navbar-fixed-top">
   <div class = "container">

      <div class = "navbar-header">
         <button type = "button" class = "navbar-toggle" datatoggle =
            "collapse" data-target = ".navbar-collapse">
            <span class = "icon-bar"></span>
            <span class = "icon-bar"></span>
            <span class = "icon-bar"></span>
         </button>
         <a class = "navbar-brand" href = "/">Application name</a>
      </div>

      <div class = "navbar-collapse collapse">
         <ul class = "nav navbar-nav">
            <li><a href = "/">Home</a></li>
            <li><a href = "/Home/About">About</a></li>
            <li><a href = "/Home/Contact">Contact</a></li>
         </ul>

         <ul class = "nav navbar-nav navbar-right">
            <li><a href = "/Account/Register" id = "registerLink">Register</a></li>
            <li><a href = "/Account/Login" id = "loginLink">Log in</a></li>
         </ul>

      </div>

   </div>

</div>
It is CSS classes from Bootstrap like navbar, navbar inverse, and navbar fixed top. If you remove a few of these classes like navbar inverse, navbar fixed top and also uncomment the Bootstrap.css and then run your application again, you will see the following output.
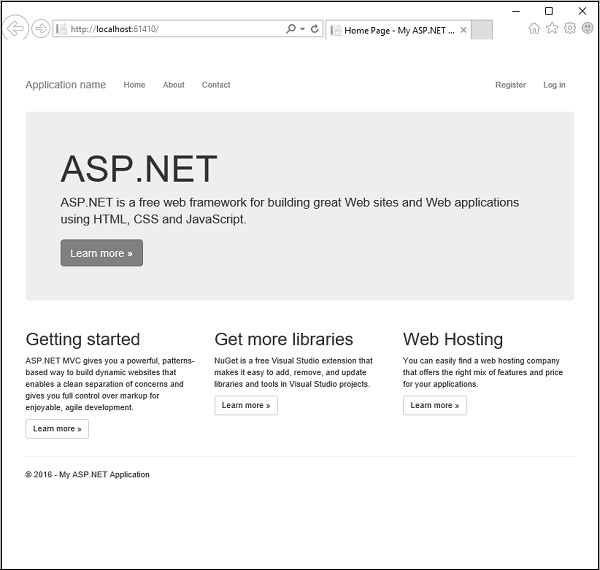
You will see that we still have a navbar, but now it's not using inverse colors so it's white. It also doesn't stick to the top of the page. When you scroll down, the navigation bar scrolls off the top and you can no longer see it again.
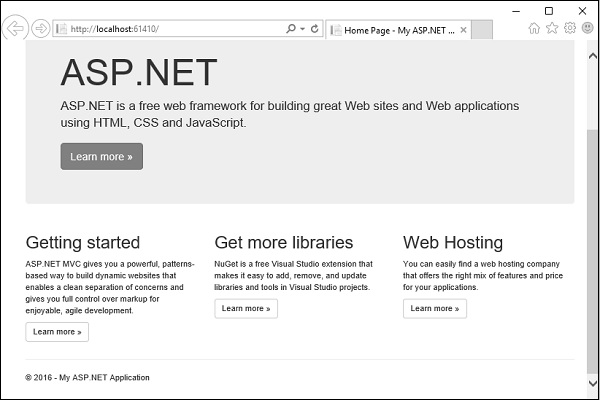
ASP.NET MVC - Unit Testing
In computer programming, unit testing is a software testing method by which individual units of source code are tested to determine whether they are fit for use. In other words, it is a software development process in which the smallest testable parts of an application, called units, are individually and independently scrutinized for proper operation.
In procedural programming, a unit could be an entire module, but it is more commonly an individual function or procedure. In object-oriented programming, a unit is often an entire interface, such as a class, but could be an individual method.
Unit testing is often automated but it can also be done manually.
Goals of Unit Testing
The primary goal of unit testing is to take the smallest piece of testable software in the application and determine whether it behaves exactly as you expect. Each unit is tested separately before integrating them into modules to test the interfaces between modules.
Let’s take a look at a simple example of unit testing in which we create a new ASP.NET MVC application with Unit Testing.
Step 1 − Open the Visual Studio and click File → New → Project menu option.
A new Project dialog opens.
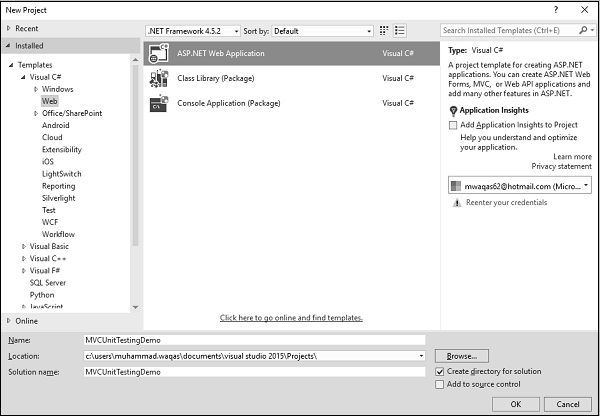
Step 2 − From the left pane, select Templates > Visual C# > Web.
Step 3 − In the middle pane, select ASP.NET Web Application.
Step 4 − Enter the project name ‘MVCUnitTestingDemo’ in the Name field and click Ok to continue. You will see the following dialog which asks you to set the initial content for the ASP.NET project.
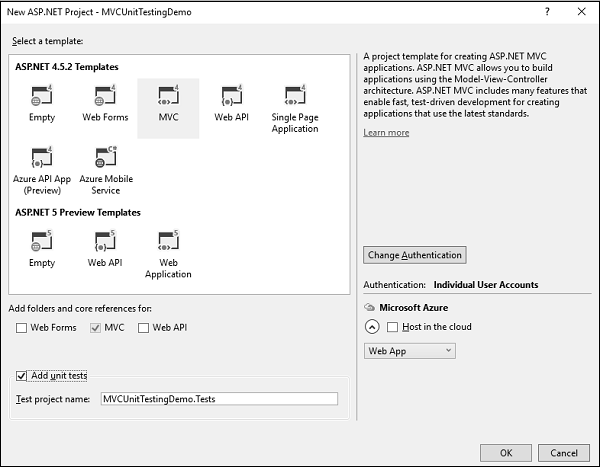
Step 5 − Select the MVC as template and don’t forget to check the Add unit tests checkbox which is at the bottom of dialog. You can also change the test project name as well, but in this example we leave it as is since it is the default name.
Once the project is created by Visual Studio, you will see a number of files and folders displayed in the Solution Explorer window.
Step 6 − You can see that two projects are there in the solution explorer. One is the ASP.NET Web project and the other is the unit testing project.
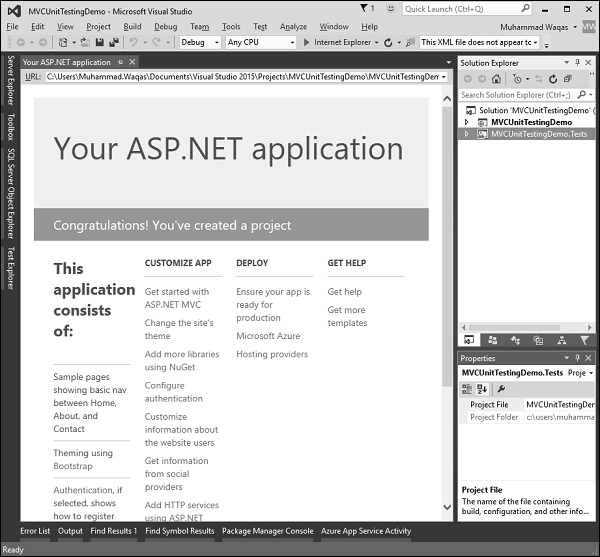
Step 7 − Run this application and you will see the following output.
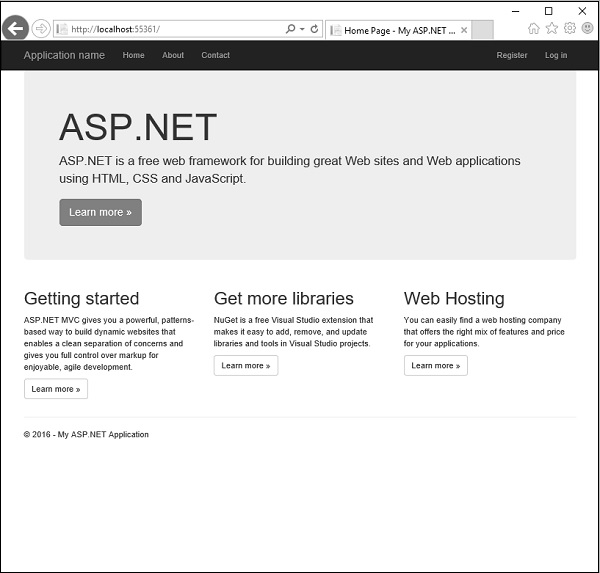
As seen in the above screenshot, there are Home, About and Contact buttons on the navigation bar. Let’s select ‘About’ and you will see the following view.
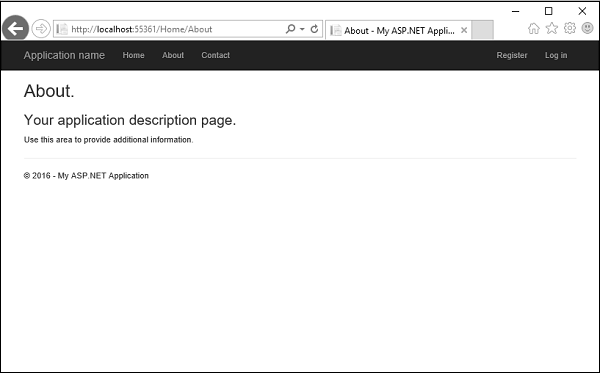
Let’s select Contact and the following screen pops up.
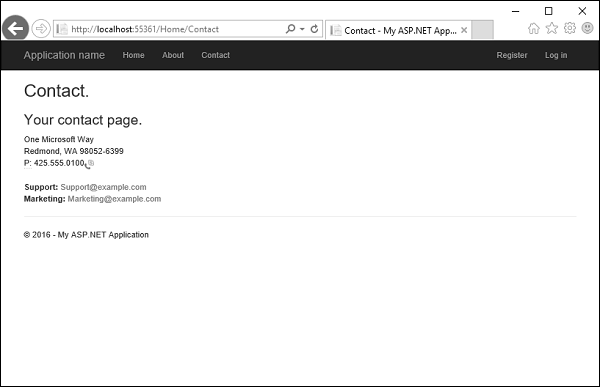
Now let’s expand the ‘MVCUnitTestingDemo’ project and you will see the HomeController.cs file under the Controllers folder.
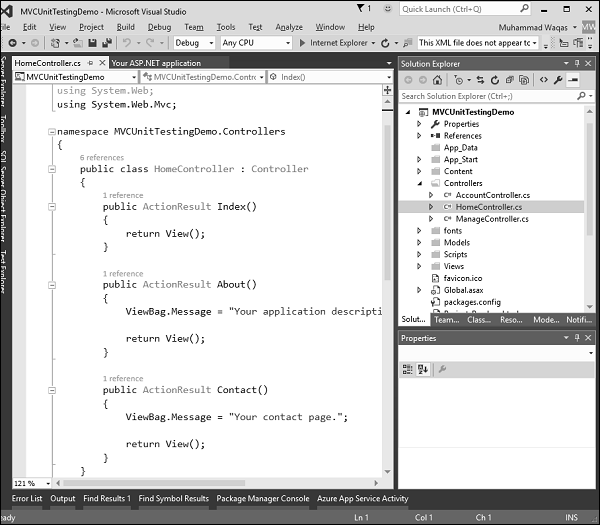
The HomeController contains three action methods as shown in the following code.
using System;
using System.Collections.Generic;
using System.Linq;

using System.Web;
using System.Web.Mvc;

namespace MVCUnitTestingDemo.Controllers {
   public class HomeController : Controller{
      public ActionResult Index(){
         return View();
      }

      public ActionResult About(){
         ViewBag.Message = "Your application description page.";
         return View();
      }

      public ActionResult Contact(){
         ViewBag.Message = "Your contact page.";
         return View();
      }
   }
}
Let’s expand the MVCUnitTestingDemo.Tests project and you will see the HomeControllerTest.cs file under the Controllers folder.
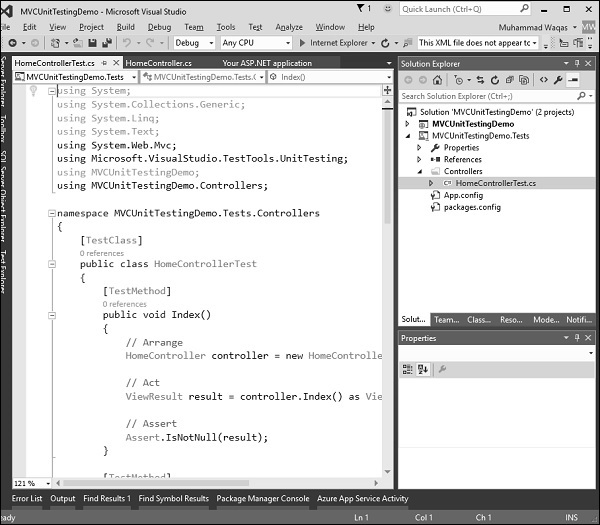
In this HomeControllerTest class, you will see three methods as shown in the following code.
using System;
using System.Collections.Generic;
using System.Linq;
using System.Text;

using System.Web.Mvc;
using Microsoft.VisualStudio.TestTools.UnitTesting;

using MVCUnitTestingDemo;
using MVCUnitTestingDemo.Controllers;

namespace MVCUnitTestingDemo.Tests.Controllers{
   [TestClass]
   public class HomeControllerTest{

      [TestMethod]
      public void Index(){
         // Arrange
         HomeController controller = new HomeController();
         // Act
         ViewResult result = controller.Index() as ViewResult;
         // Assert
         Assert.IsNotNull(result);
      }

      [TestMethod]
      public void About(){
         // Arrange
         HomeController controller = new HomeController();
         // Act
         ViewResult result = controller.About() as ViewResult;
         // Assert
         Assert.AreEqual("Your application description page.", result.ViewBag.Message);
      }

      [TestMethod]
      public void Contact(){
         // Arrange
         HomeController controller = new HomeController();
         // Act
         ViewResult result = controller.Contact() as ViewResult;
         // Assert
         Assert.IsNotNull(result);
      }
   }
}
These three methods will test whether the Index, About and Contact action methods are working properly. To test these three action methods, go to the Test menu.
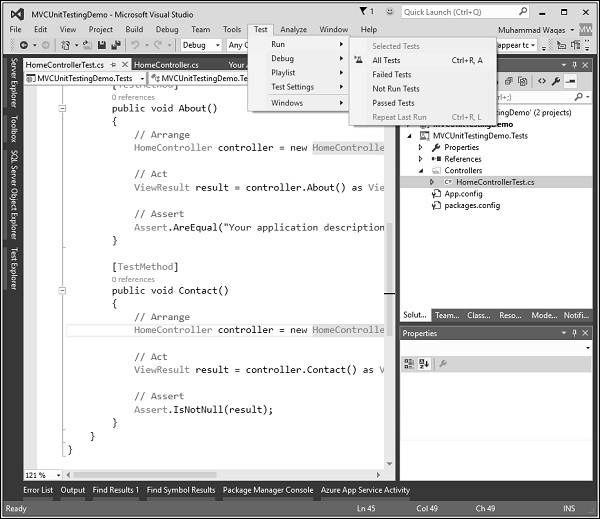
Select Run → All Tests to test these action methods.
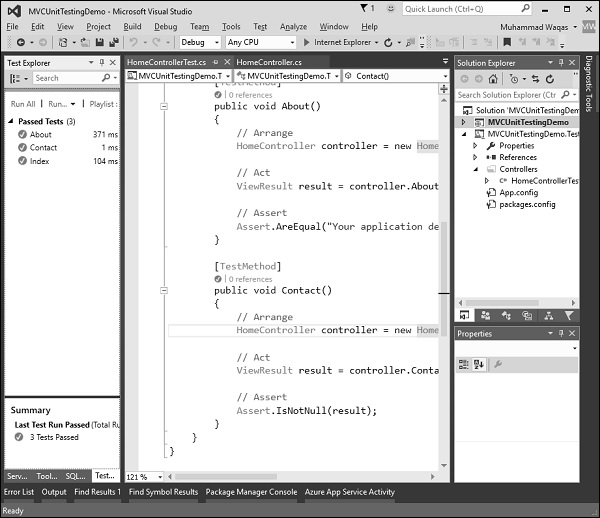
Now you will see the Test Explorer on the left side in which you can see that all the tests are passed. Let us add one more action method, which will list all the employees. First we need to add an employee class in the Models folder.
Following is the Employee class implementation.
using System;
using System.Collections.Generic;
using System.Linq;

using System.Web;

namespace MVCUnitTestingDemo.Models{
   public class Employee{
      public int ID { get; set; }
      public string Name { get; set; }
      public DateTime JoiningDate { get; set; }
      public int Age { get; set; }
   }
}
We need to add EmployeeController. Right-click on the controller folder in the solution explorer and select Add → Controller.
It will display the Add Scaffold dialog.

Select the MVC 5 Controller – Empty option and click ‘Add’ button and the Add Controller dialog will appear.
Set the name to EmployeeController and click ‘Add’ button.
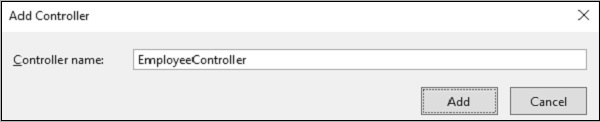
You will see a new C# file ‘EmployeeController.cs’ in the Controllers folder which is open for editing in Visual Studio. Let’s update the EmployeeController using the following code.
using MVCUnitTestingDemo.Models;
using System;
using System.Collections.Generic;
using System.Linq;

using System.Web;
using System.Web.Mvc;

namespace MVCUnitTestingDemo.Controllers {
   public class EmployeeController : Controller{
      [NonAction]

      public List<Employee> GetEmployeeList(){
         return new List<Employee>{
            new Employee{
               ID = 1,
               Name = "Allan",
               JoiningDate = DateTime.Parse(DateTime.Today.ToString()),
               Age = 23
            },

            new Employee{
               ID = 2,
               Name = "Carson",
               JoiningDate = DateTime.Parse(DateTime.Today.ToString()),
               Age = 45
            },

            new Employee{
               ID = 3,
               Name = "Carson",
               JoiningDate = DateTime.Parse(DateTime.Today.ToString()),
               Age = 37
            },

            new Employee{
               ID = 4,
               Name = "Laura",
               JoiningDate = DateTime.Parse(DateTime.Today.ToString()),
               Age = 26
            },
         };
      }

      // GET: Employee
      public ActionResult Index(){
         return View();
      }

      public ActionResult Employees(){
         var employees = from e in GetEmployeeList()
         orderby e.ID
         select e;
         return View(employees);
      }
   }
}
To add View for Employees action method, right-click on Employees action and select Add View…
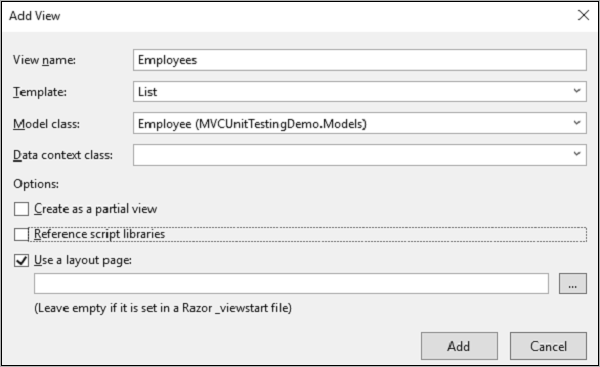
You will see the default name for view. Select ‘List’ from the Template dropdown and ‘Employee’ from the Model class dropdown and click Ok.
Now we need to add the link Employees list, let’s open the _layout.cshtml file which is under Views/Shared folder and add the link for employees list below the Contact link.
<li>@Html.ActionLink("Employees List", "Employees", "Employee")</li>
Following is the complete implementation of _layout.cshtml.
<!DOCTYPE html>
<html>
   <head>
      <meta charset = "utf-8" />
      <meta name = "viewport" content = "width = device-width, initial-scale = 1.0">
      <title>@ViewBag.Title - My ASP.NET Application</title>
      @Styles.Render("~/Content/css")
      @Scripts.Render("~/bundles/modernizr")
   </head>

   <body>
      <div class = "navbar navbar-inverse navbar-fixed-top">
         <div class = "container">

            <div class = "navbar-header">
               <button type = "button" class = "navbar-toggle" datatoggle =
                  "collapse" data-target = ".navbar-collapse">
                  <span class = "icon-bar"></span>
                  <span class = "icon-bar"></span>
                  <span class = "icon-bar"></span>
               </button>

               @Html.ActionLink("Application name", "Index", "Home", new
                  { area = "" }, new { @class = "navbar-brand" })
            </div>

            <div class = "navbar-collapse collapse">
               <ul class = "nav navbar-nav">
                  <li>@Html.ActionLink("Home", "Index", "Home")</li>
                  <li>@Html.ActionLink("About", "About", "Home")</li>
                  <li>@Html.ActionLink("Contact", "Contact", "Home")</li>
                  <li>@Html.ActionLink("Employees List", "Employees", "Employee")</li>
               </ul>

               @Html.Partial("_LoginPartial")
            </div>

         </div>

      </div>

      <div class = "container body-content">
         @RenderBody()
         <hr />
         <footer>
            <p>© @DateTime.Now.Year - My ASP.NET Application</p>
         </footer>
      </div>

      @Scripts.Render("~/bundles/jquery")
      @Scripts.Render("~/bundles/bootstrap")
      @RenderSection("scripts", required: false)

   </body>
</html>
To test Employees action method from the Employee controller, we need to add another test method in our unit testing project. Following s the EmployeeControllerTest class in which we will test the Employees action method.
[TestClass]
public class EmployeeControllerTest{
   [TestMethod]
   public void Employees(){
      // Arrange
      EmployeeController controller = new EmployeeController();

      // Act
      ViewResult result = controller.Index() as ViewResult;

      // Assert
      Assert.IsNotNull(result);
   }
}
Select Run → All Tests from the Test menu to test these action methods.
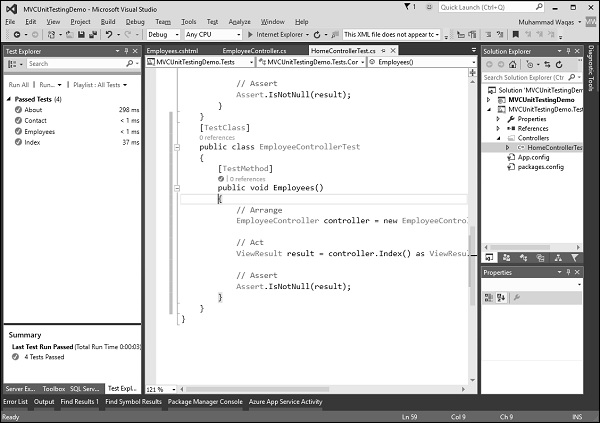
You can see that the Employees test method is also passed now. When you run the application, you will see the following output.

Click ‘Employees List’ option in the navigation bar and you will see the list of employees.
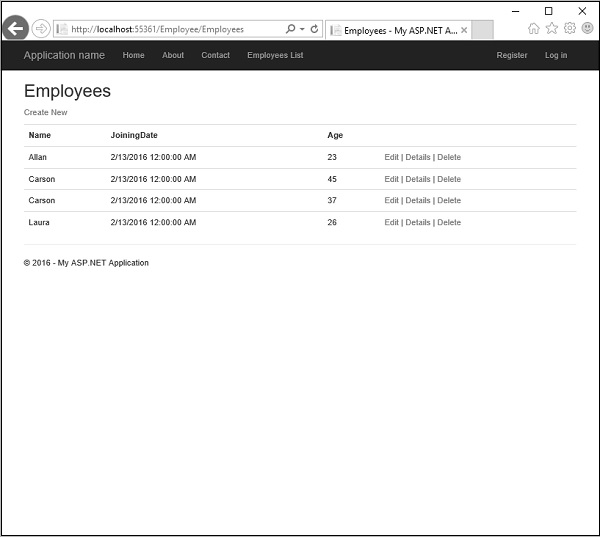
ASP.NET MVC - Deployment
In this chapter, we will be covering how to deploy ASP.NET MVC application. After understating different concepts in ASP.NET MVC applications, now it’s time to understand the deployment process. So, whenever we are building any MVC application we are basically producing a dll file associated for the same with all the application settings and logic inside and these dlls are in the bin directory of the project as shown in the following screenshot.
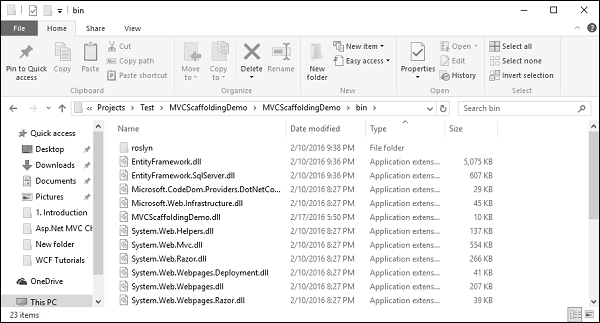
Publishing to Microsoft Azure
Let’s take a look at a simple example in which we will deploy our example to Microsoft Azure.
Step 1 − Right-click on the project in the Solution Explorer and select Publish as shown in the following screenshot.
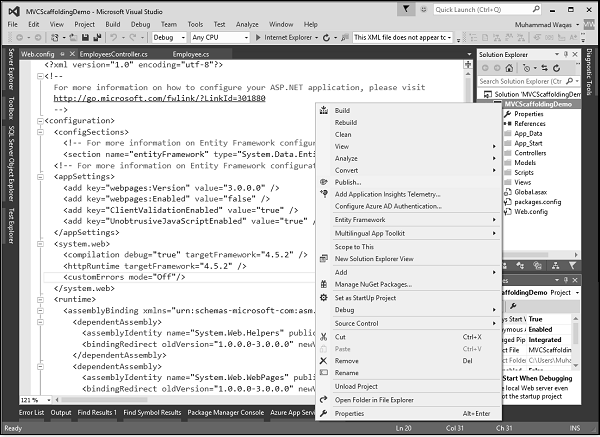
Step 2 − You will see the Publish Web dialog. Click on the Microsoft Azure Web Apps.
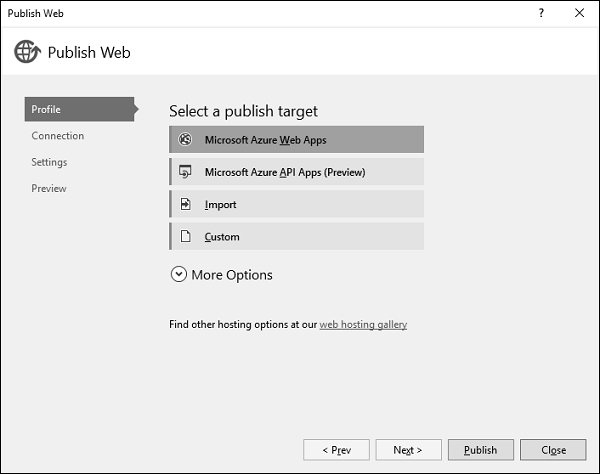
It will display the ‘Sign in’ page.
Step 3 − Enter credentials for the Microsoft Azure Subscription.
Once you’re successfully connected to your Azure account, you will see the following dialog.
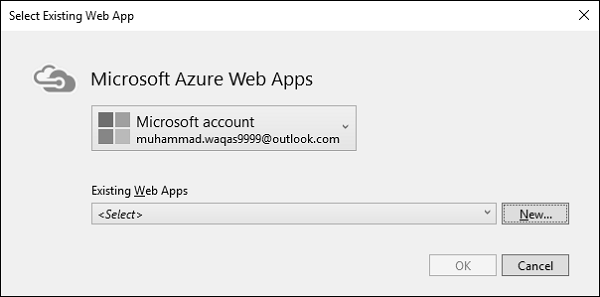
Step 4 − Click ‘New’ button.
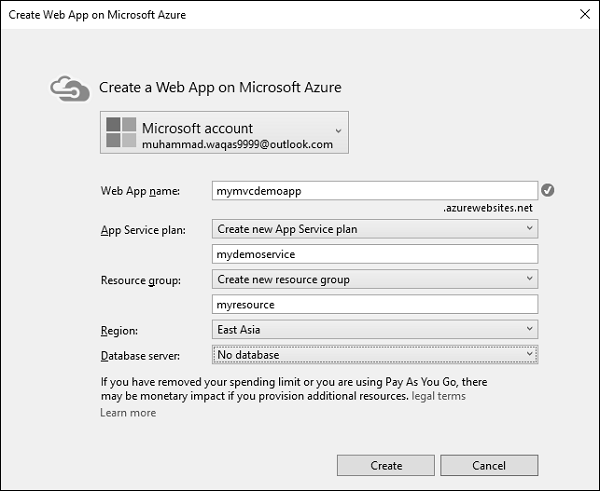
Step 5 − Enter the desired information on the above dialog such as Web App name, which must be a unique name. You will also need to enter App service plan, resource group, and then select your region.
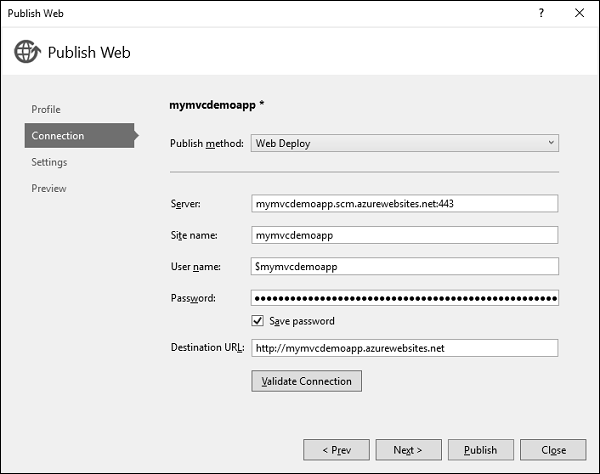
Step 6 − Click ‘Next’ button to continue.
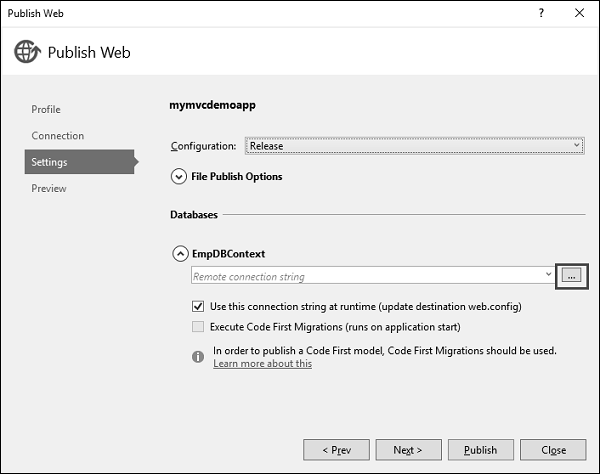
Step 7 − Click the ellipsis mark ‘…’ to select the connection string.
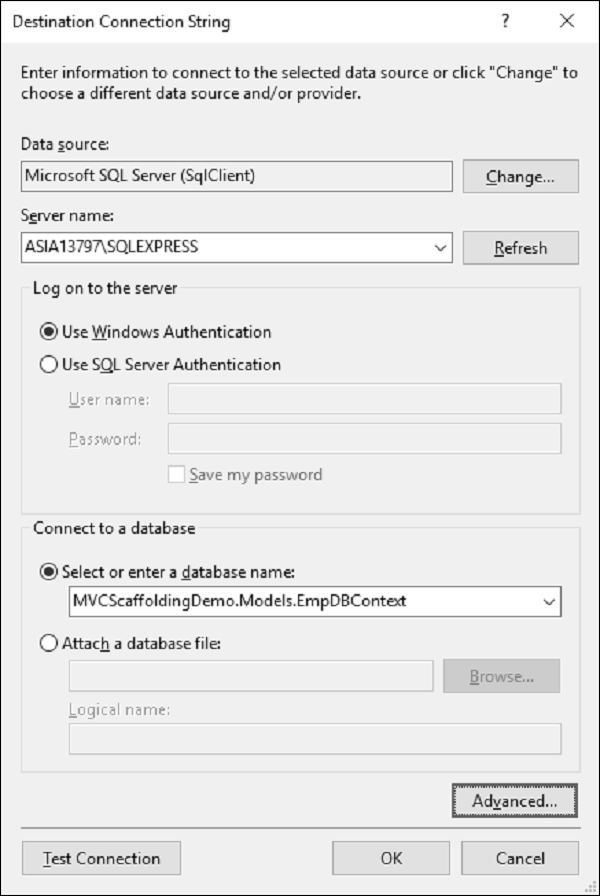
Step 8 − Select the server name and then choose the Windows Authentication option. Select the database name as well. Now you will see that the connection string is generated for you.

Step 9 − Click ‘Next’ to continue.
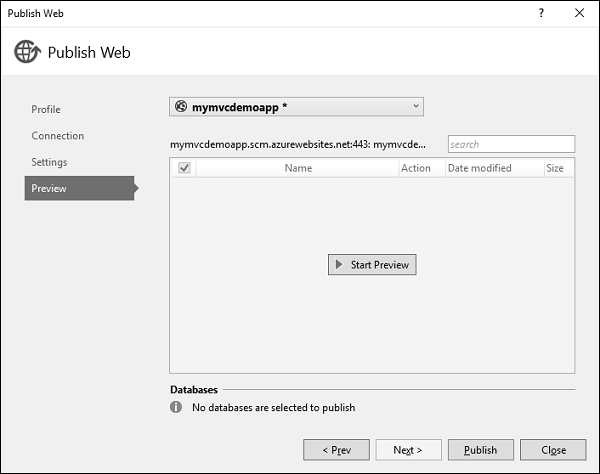
Step 10 − To check all the files and dlls which we will be publishing to Azure, click the Start Preview. Click ‘Publish’ button to publish your application.
Once the application is successfully published to Azure, you will see the message in the output window.

Step 11 − Now open your browser and enter the following URL ‘http://mymvcdemoapp.azurewebsites.net/employees’ and you will see the list of employees.

Step 12 − Now if you go to your Azure portal and click ‘App Services’, then you see that your application is deployed to Azure.
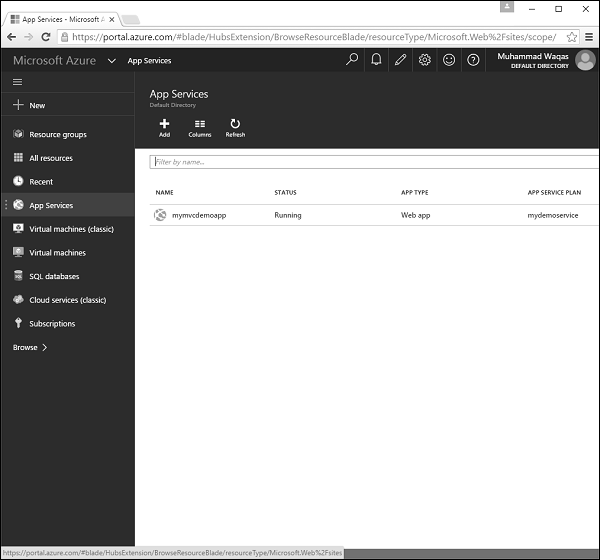
Step 13 − Click the name of your app and you will see the information related to that application such as URL, Status, Location, etc.
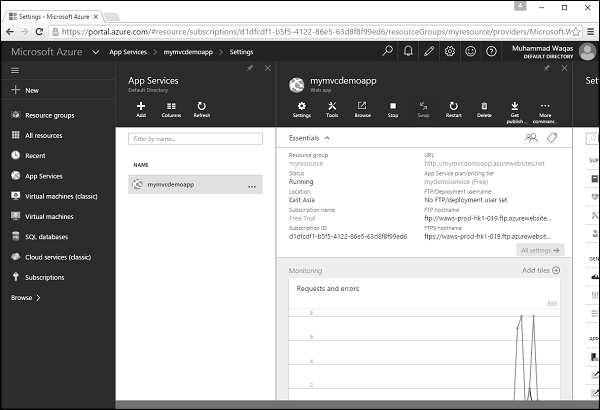
We have seen so far how to publish a web application to Azure app, after the application is created. You can also create an application, which will be deployed to Azure.
Let’s create a new ASP.NET MVC application.
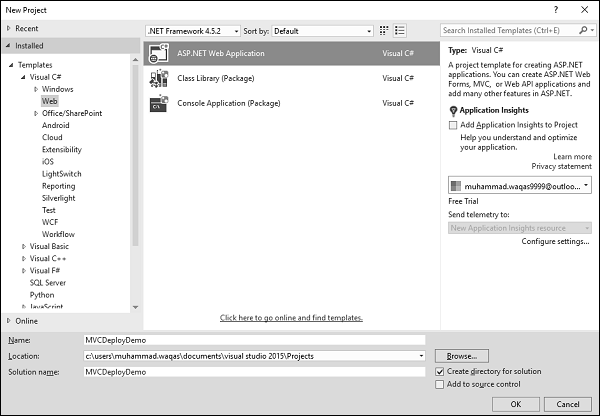
Step 1 − Click Ok and you will see the following dialog.
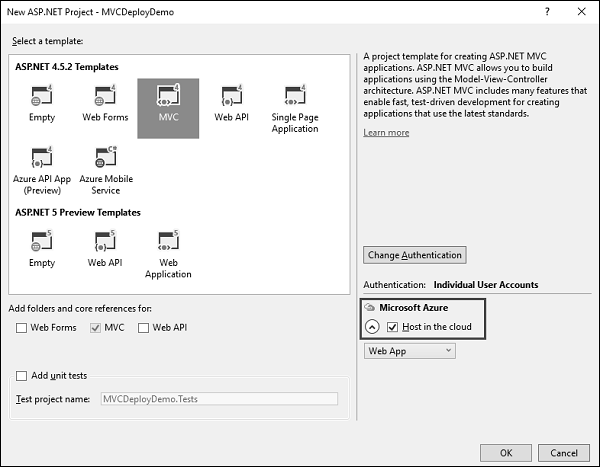
Step 2 − Select MVC template and also check Host in the Cloud checkbox. Click Ok.
When the Configure Microsoft Azure Web App Settings dialog appears, make sure that you are signed in to Azure.
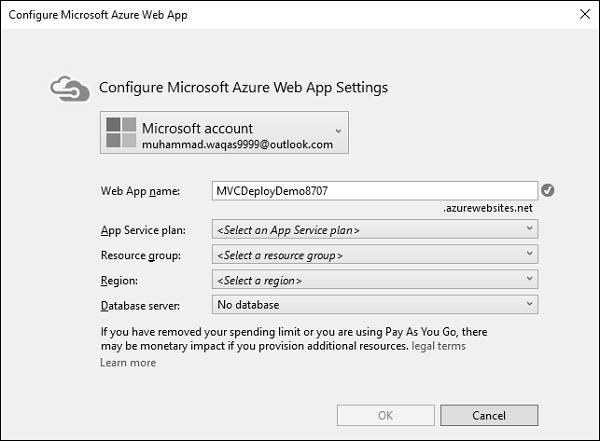
You can see the default name, but you can also change the Web App name.
Step 3 − Enter the desired information as shown in the following screenshot.
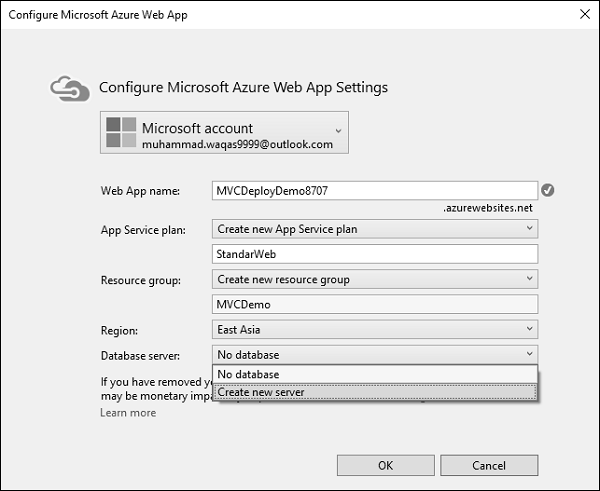
Step 4 − Select the ‘Create new server’ from the Database server dropdown and you will see the additional field.
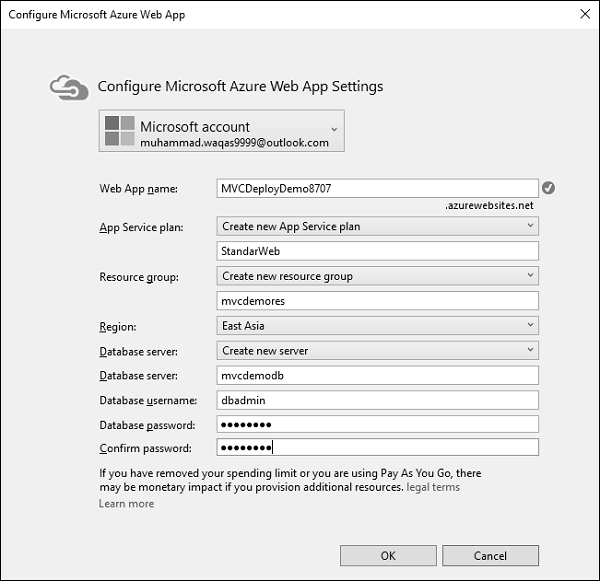
Step 5 − Enter the Database server, username, and password. Click Ok.
Step 6 − Once the project is created, run the application and you will see that it is running on the localhost.
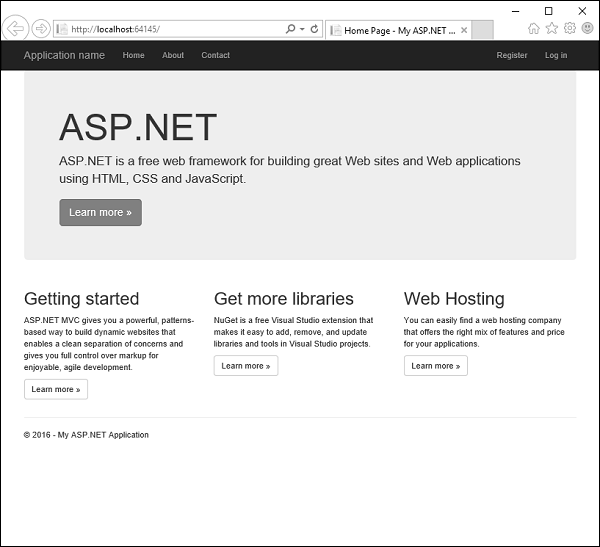
Step 7 − To deploy these applications to Azure, right-click on the project in the solution explorer and select ‘Publish’.
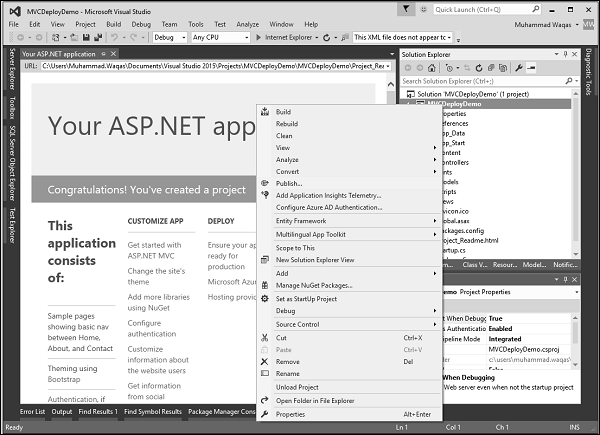
You will see the following dialog.
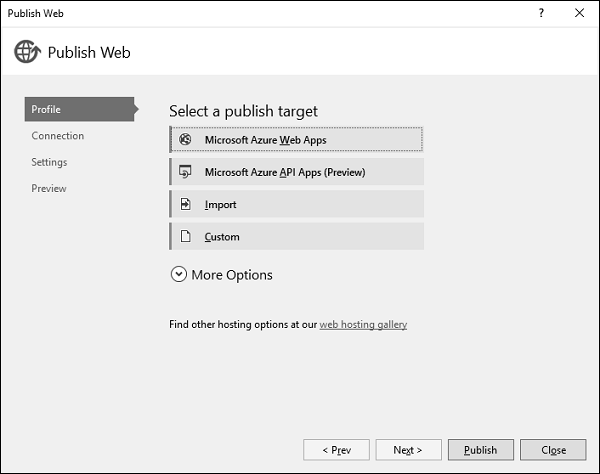
Step 8 − Click the ‘Microsoft Azure Web Apps’.
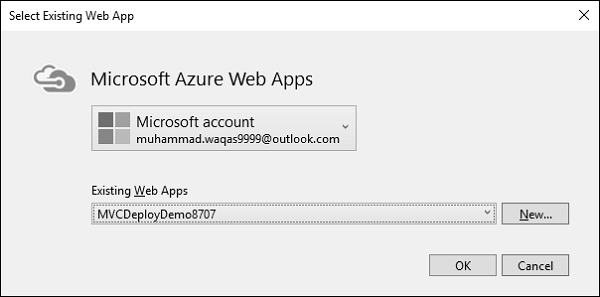
Step 9 − Select your application name from the Existing Web Apps and click Ok.
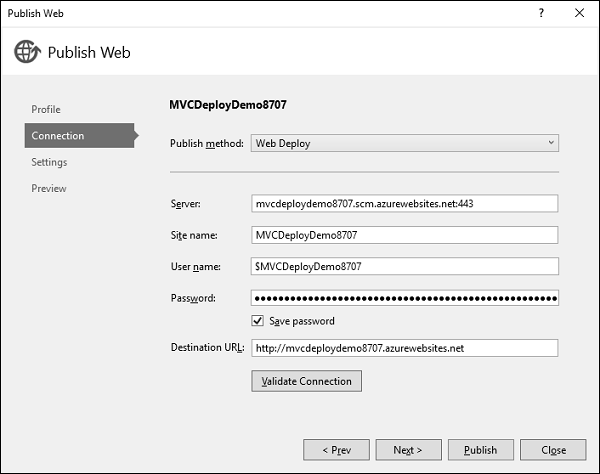
Step 10 − Click the ‘Validate Connection’ button to check for the connection on Azure.

Step 11 − Click ‘Next’ to continue.
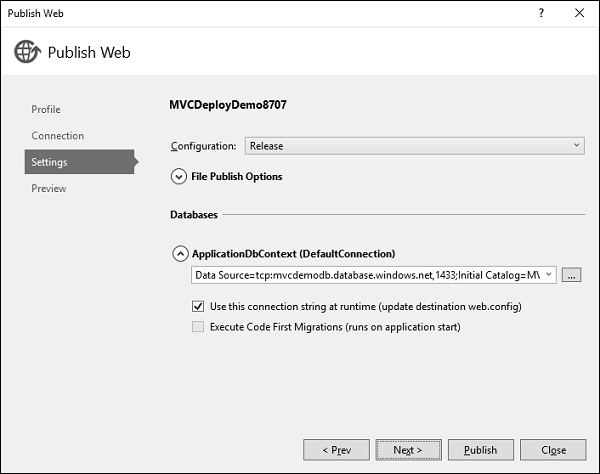
Now you will see that the connection string is already generated by default.
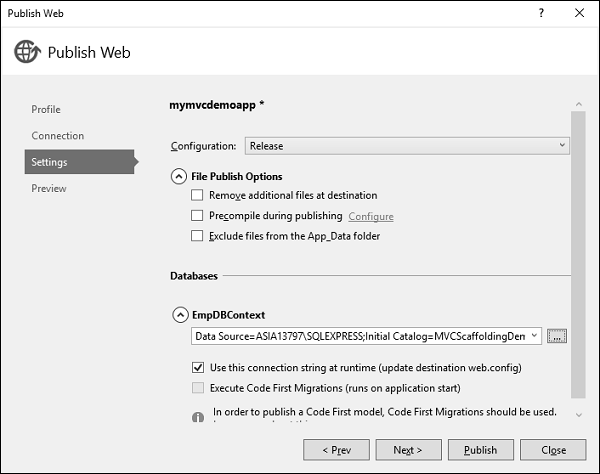
Step 12 − Click ‘Next’ to continue.
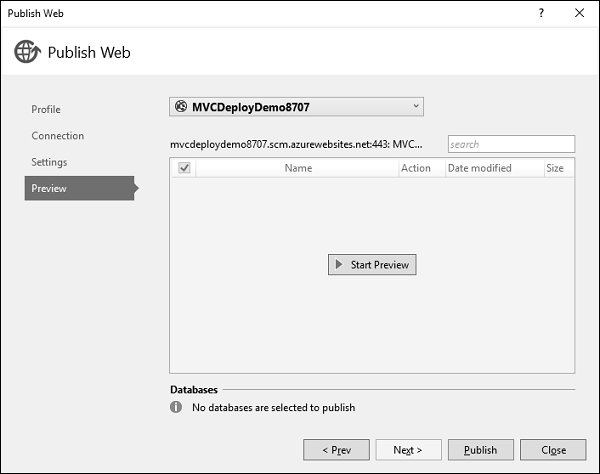
Step 13 − To check all the files and dlls which will be published to Azure, click the ‘Start Preview’.
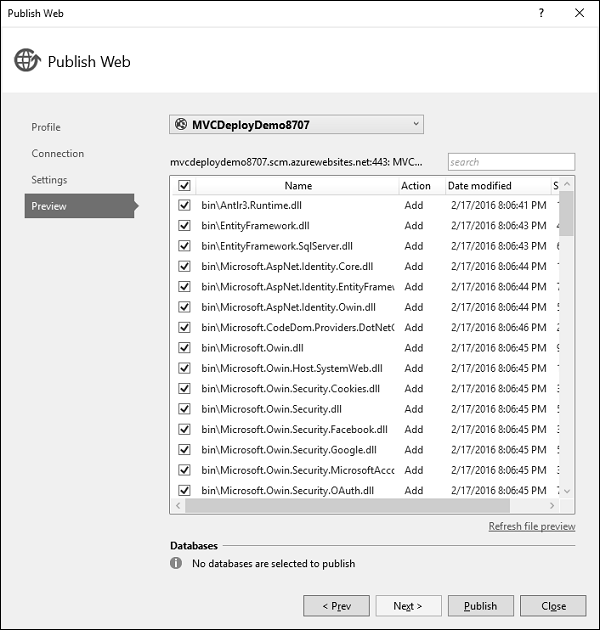
Step 14 − Click ‘Publish’ button to publish your application. Once the application is successfully published to Azure, you will see the message in the output window.
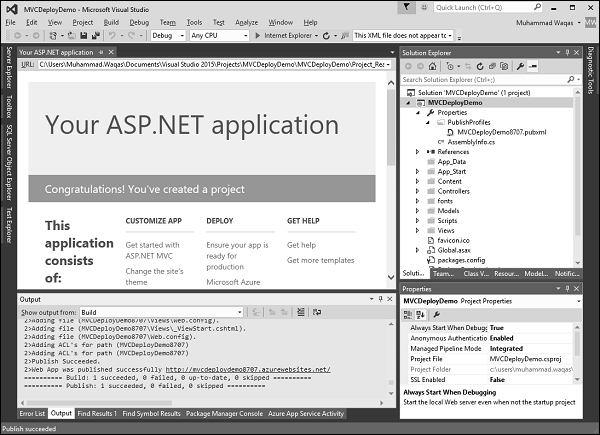
You will also see that the application is now running from the cloud.
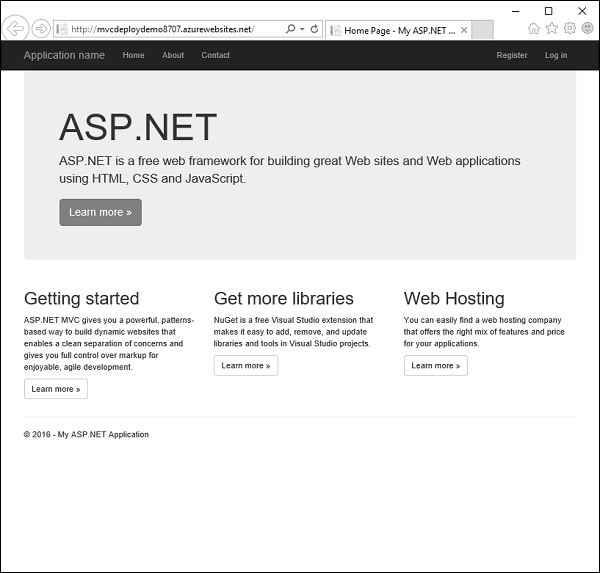
Let’s go to Azure portal again. You will see the app here as well.
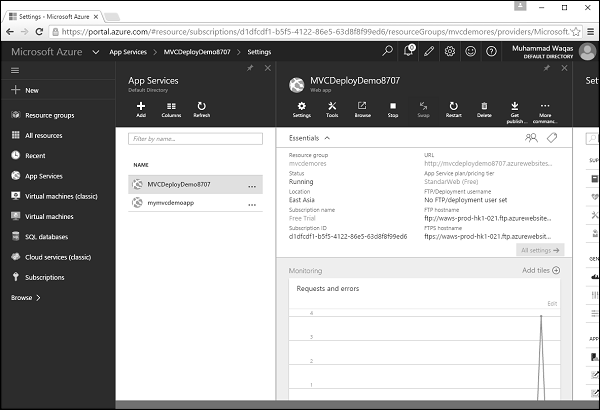
ASP.NET MVC - Self-hosting
In this chapter, we will cover Self-Hosting. Self-Hosting creates a runtime environment for the application to run in any environment say MAC, or in Linux box, etc. Self-Hosting also means it will have a mini CLR version.
Deploy using File System
Let’s take a look at a simple example of self-hosting.
Step 1 − Once your ASP.NET MVC application is completed and you want to use selfhosting, right-click on the Project in the solution explorer.
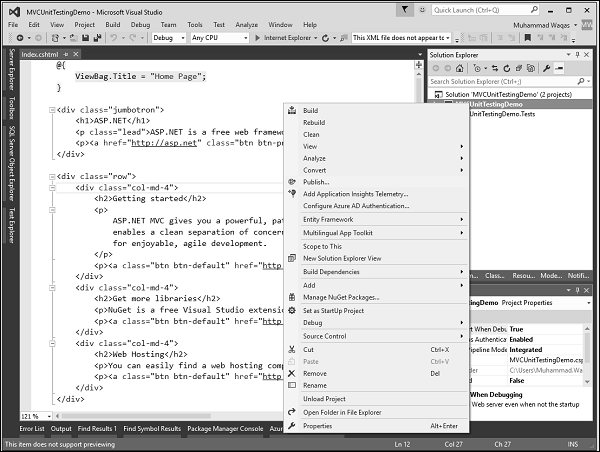
You will see the following dialog.
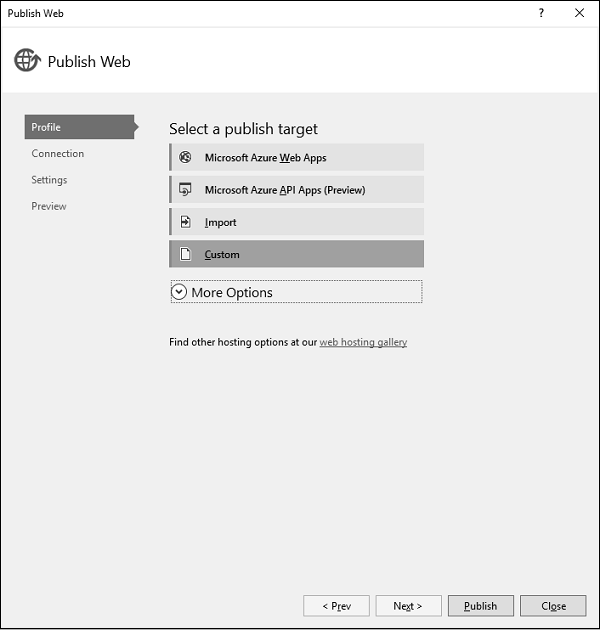
Step 2 − Click the ‘Custom’ option, which will display the New Custom Profile dialog.
Step 3 − Enter the profile name and click Ok.
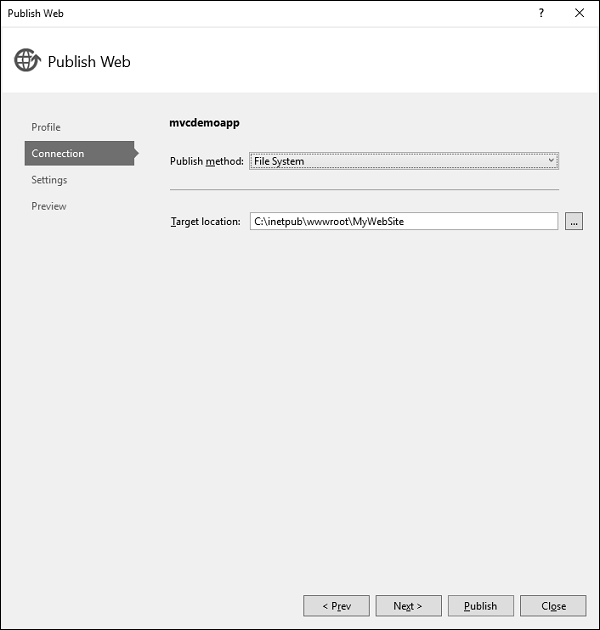
Step 4 − Select the File System from the Publish method dropdown list and also specify the target location. Click ‘Next’ button.
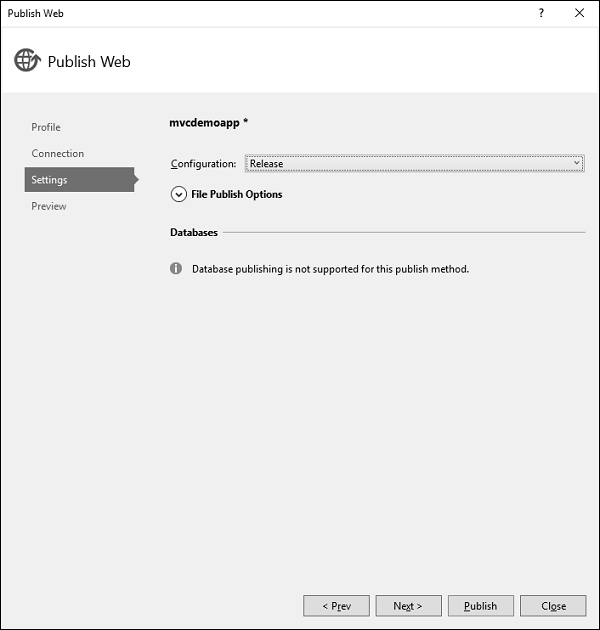
Step 5 − Expand the File Publish Options.
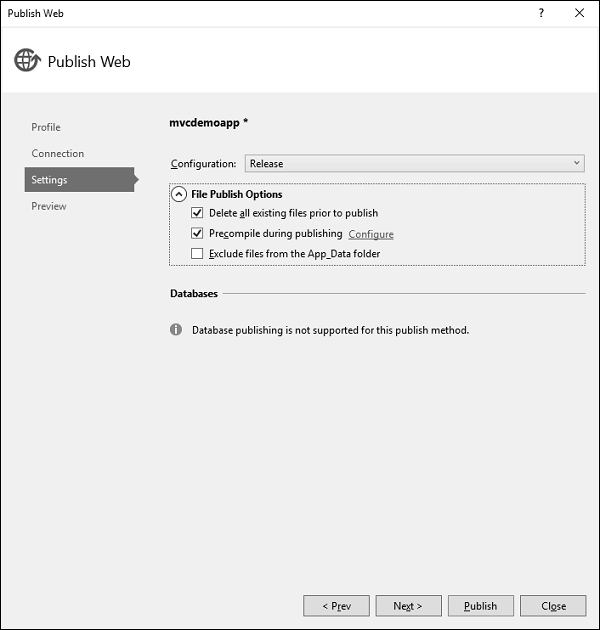
Step 6 − Check the ‘Delete all existing files prior to publish’ and ‘Precompile during publishing’ checkboxes and click ‘Next’ to continue.
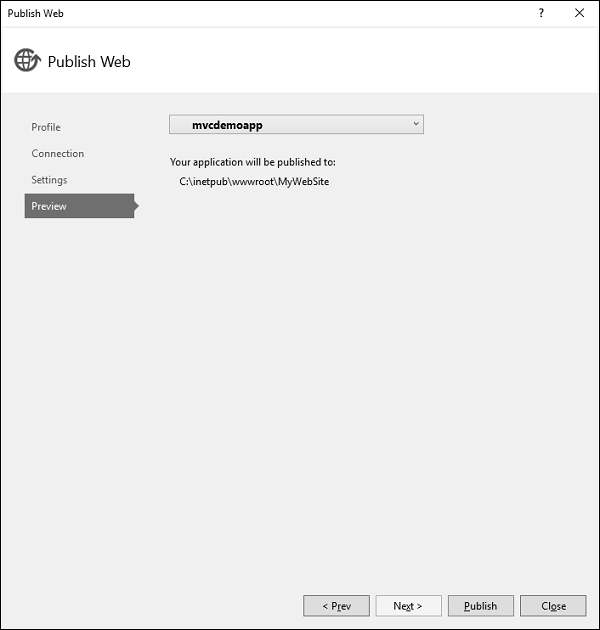
Step 7 − Click ‘Publish’ button, it will publish the files at the desired location.
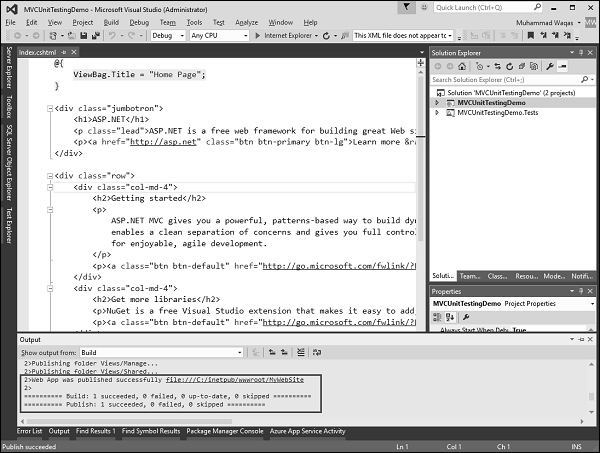
You will see all the files and folders in the target location on your system.
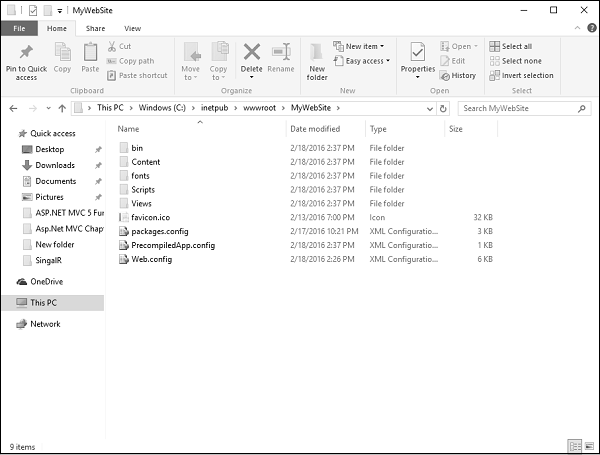
It will have all the files required to get deployed on the localhost.
Step 8 − Now open the Turn Windows Feature on or off and Expand Internet Information Services → World Wide Web Services → Application Development Features.
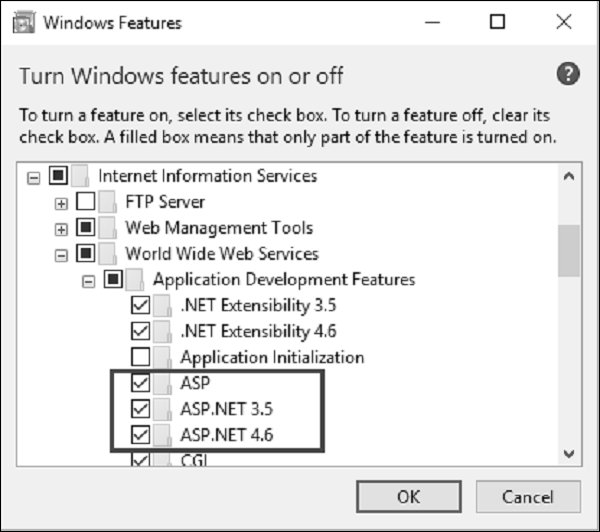
Step 9 − Check the checkboxes as shown in the above screenshot and click Ok.
Step 10 − Let’s open the IIS Manager as shown in the following screenshot.
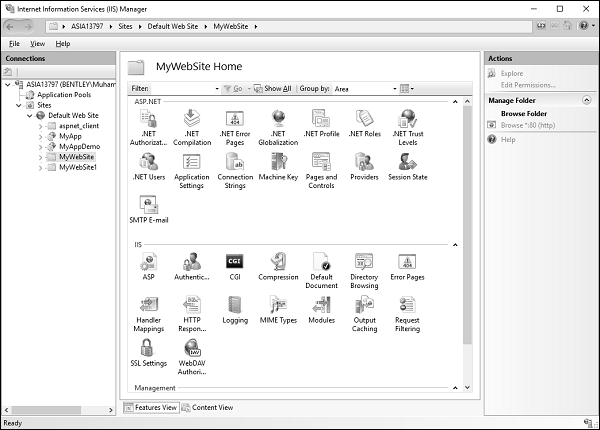
Step 11 − You will see different connections on the left side of the screen, right-click on MyWebSite.
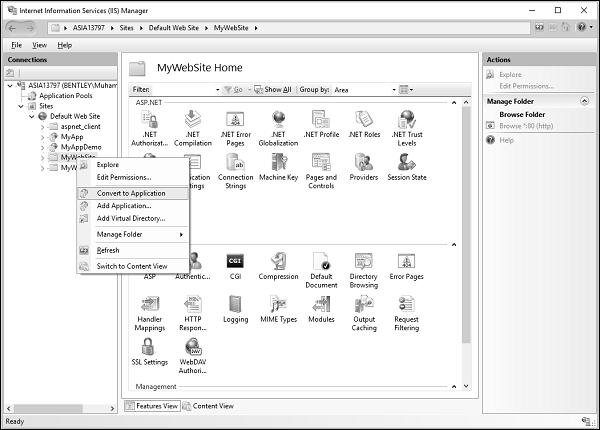
Step 12 − Select the ‘Convert to Application’ option.
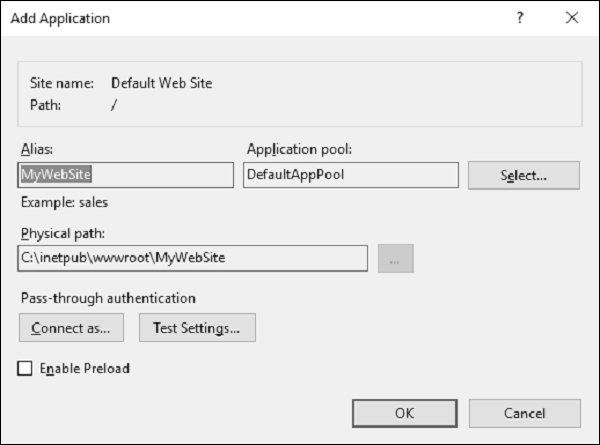
As you can see, its physical path is the same as we have mentioned above while publishing, using the File system.
Step 13 − Click Ok to continue.
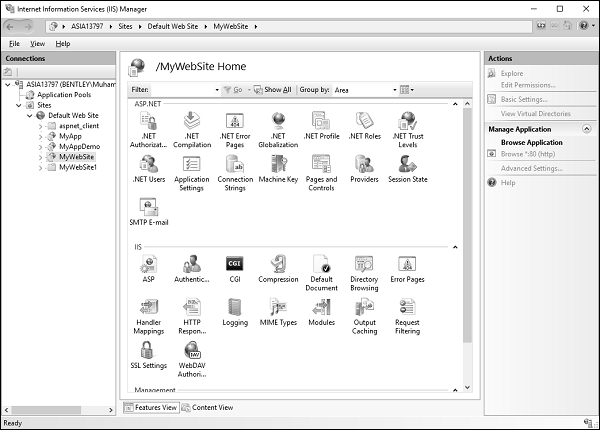
Now you can see that its icon has changed.
Step 14 − Open your browser and specify the following URL http://localhost/MyWebSite

You can see that it is running from the folder which we have specified during deployment.