- ASP.NET MVC Tutorial
- ASP.NET MVC - Home
- ASP.NET MVC - Overview
- ASP.NET MVC - Pattern
- ASP.NET MVC - Environment Setup
- ASP.NET MVC - Getting Started
- ASP.NET MVC - Life Cycle
- ASP.NET MVC - Routing
- ASP.NET MVC - Controllers
- ASP.NET MVC - Actions
- ASP.NET MVC - Filters
- ASP.NET MVC - Selectors
- ASP.NET MVC - Views
- ASP.NET MVC - Data Model
- ASP.NET MVC - Helpers
- ASP.NET MVC - Model Binding
- ASP.NET MVC - Databases
- ASP.NET MVC - Validation
- ASP.NET MVC - Security
- ASP.NET MVC - Caching
- ASP.NET MVC - Razor
- ASP.NET MVC - Data Annotations
- Nuget Package Management
- ASP.NET MVC - Web API
- ASP.NET MVC - Scaffolding
- ASP.NET MVC - Bootstrap
- ASP.NET MVC - Unit Testing
- ASP.NET MVC - Deployment
- ASP.NET MVC - Self-hosting
- ASP.NET MVC Useful Resources
- ASP.NET MVC - Quick Guide
- ASP.NET MVC - Useful Resources
- ASP.NET MVC - Discussion
ASP.NET MVC - Data Model
In this chapter, we will discuss about building models in an ASP.NET MVC Framework application. A model stores data that is retrieved according to the commands from the Controller and displayed in the View.
Model is a collection of classes wherein you will be working with data and business logic. Hence, basically models are business domain-specific containers. It is used to interact with database. It can also be used to manipulate the data to implement the business logic.
Let’s take a look at a simple example of Model by creating a new ASP.Net MVC project.
Step 1 − Open the Visual Studio. Click File → New → Project menu option.
A new Project dialog opens.
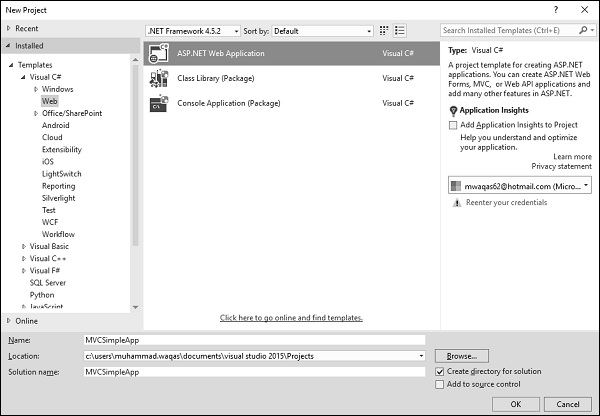
Step 2 − From the left pane, select Templates → Visual C# → Web.
Step 3 − In the middle pane, select ASP.NET Web Application.
Step 4 − Enter the project name ‘MVCSimpleApp’ in the Name field and click Ok to continue. You will see the following dialog which asks you to set the initial content for the ASP.NET project.
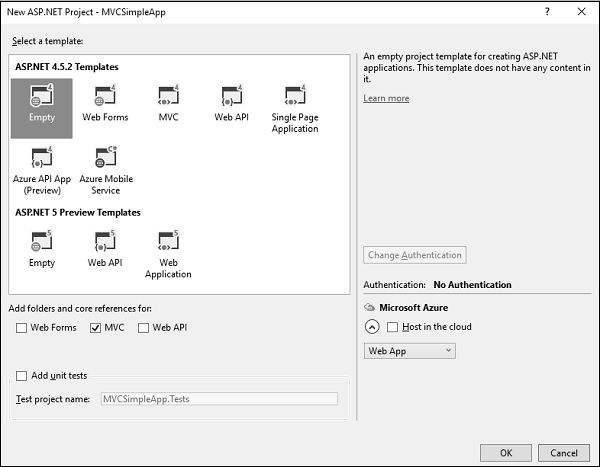
Step 5 − To keep things simple, select the Empty option and check the MVC checkbox in the ‘Add folders and core references for’ section and click Ok.
It will create a basic MVC project with minimal predefined content.
We need to add a controller now.
Step 6 − Right-click on the controller folder in the solution explorer and select Add → Controller.
It will display the Add Scaffold dialog.
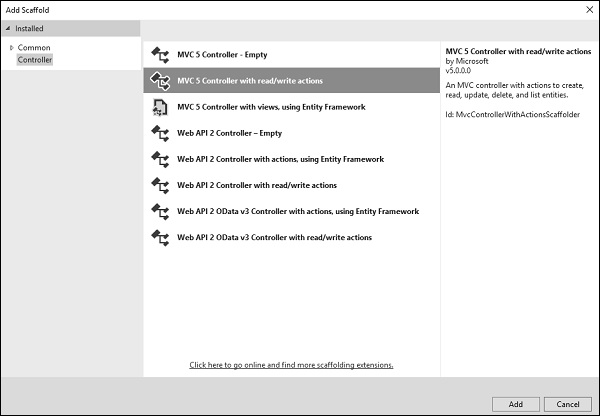
Step 7 − Select the MVC 5 Controller – with read/write actions option. This template will create an Index method with default action for Controller. This will also list other methods like Edit/Delete/Create as well.
Step 8 − Click ‘Add’ button and Add Controller dialog will appear.

Step 9 − Set the name to EmployeeController and click the ‘Add’ button.
Step 10 − You will see a new C# file ‘EmployeeController.cs’ in the Controllers folder, which is open for editing in Visual Studio with some default actions.
using System;
using System.Collections.Generic;
using System.Linq;

using System.Web;
using System.Web.Mvc;

namespace MVCSimpleApp.Controllers {
   public class EmployeeController : Controller{
      // GET: Employee
      public ActionResult Index(){
         return View();
      }

      // GET: Employee/Details/5
      public ActionResult Details(int id){
         return View();
      }

      // GET: Employee/Create
      public ActionResult Create(){
         return View();
      }

      // POST: Employee/Create
      [HttpPost]
      public ActionResult Create(FormCollection collection){
         try{
            // TODO: Add insert logic here
            return RedirectToAction("Index");
         }catch{
            return View();
         }
      }

      // GET: Employee/Edit/5
      public ActionResult Edit(int id){
         return View();
      }

      // POST: Employee/Edit/5
      [HttpPost]
      public ActionResult Edit(int id, FormCollection collection){
         try{
            // TODO: Add update logic here
            return RedirectToAction("Index");
         }catch{
            return View();
         }
      }

      // GET: Employee/Delete/5
      public ActionResult Delete(int id){
         return View();
      }

      // POST: Employee/Delete/5
      [HttpPost]
      public ActionResult Delete(int id, FormCollection collection){
         try{
            // TODO: Add delete logic here
            return RedirectToAction("Index");
         }catch{
            return View();
         }
      }
   }
}
Let’s add a model.
Step 11 − Right-click on the Models folder in the solution explorer and select Add → Class.
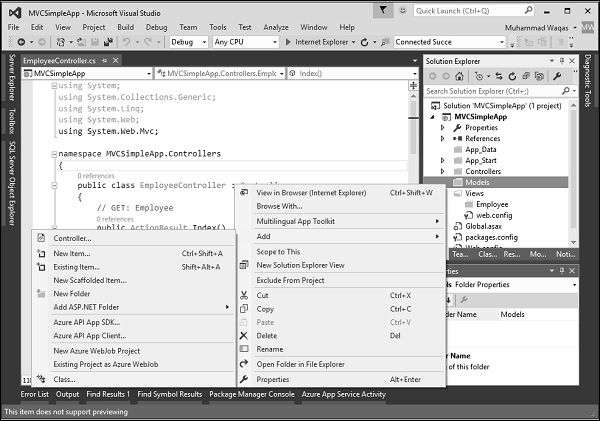
You will see the Add New Item dialog.
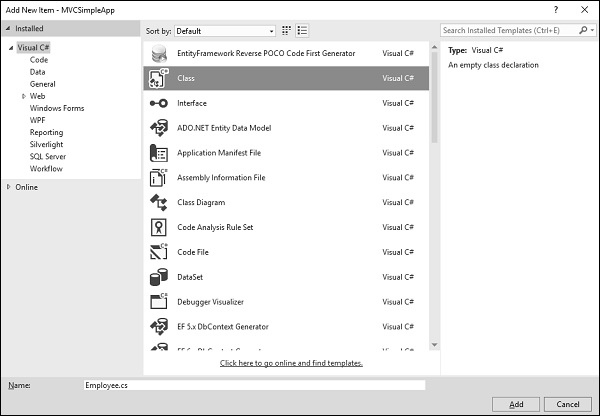
Step 12 − Select Class in the middle pan and enter Employee.cs in the name field.
Step 13 − Add some properties to Employee class using the following code.
using System;
using System.Collections.Generic;
using System.Linq;
using System.Web;

namespace MVCSimpleApp.Models {
   public class Employee{
      public int ID { get; set; }
      public string Name { get; set; }
      public DateTime JoiningDate { get; set; }
      public int Age { get; set; }
   }
}
Let’s update the EmployeeController.cs file by adding one more method, which will return the list of employee.
[NonAction]
public List<Employee> GetEmployeeList(){
   return new List<Employee>{
      new Employee{
         ID = 1,
         Name = "Allan",
         JoiningDate = DateTime.Parse(DateTime.Today.ToString()),
         Age = 23
      },

      new Employee{
         ID = 2,
         Name = "Carson",
         JoiningDate = DateTime.Parse(DateTime.Today.ToString()),
         Age = 45
      },

      new Employee{
         ID = 3,
         Name = "Carson",
         JoiningDate = DateTime.Parse(DateTime.Today.ToString()),
         Age = 37
      },

      new Employee{
         ID = 4,
         Name = "Laura",
         JoiningDate = DateTime.Parse(DateTime.Today.ToString()),
         Age = 26
      },
   };
}
Step 14 − Update the index action method as shown in the following code.
public ActionResult Index(){
   var employees = from e in GetEmployeeList()
   orderby e.ID
   select e;
   return View(employees);
}
Step 15 − Run this application and append /employee to the URL in the browser and press Enter. You will see the following output.
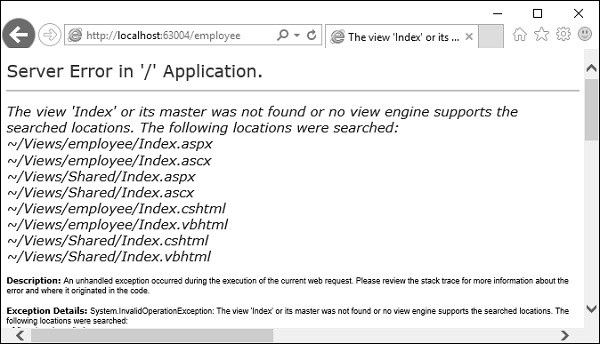
As seen in the above screenshot, there is an error and this error is actually quite descriptive which tells us it can't find the Index view.
Step 16 − Hence to add a view, right-click inside the Index action and select Add view.
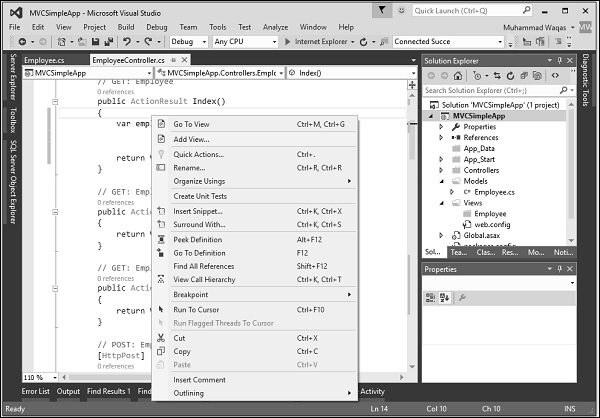
It will display the Add View dialog and it is going to add the default name.
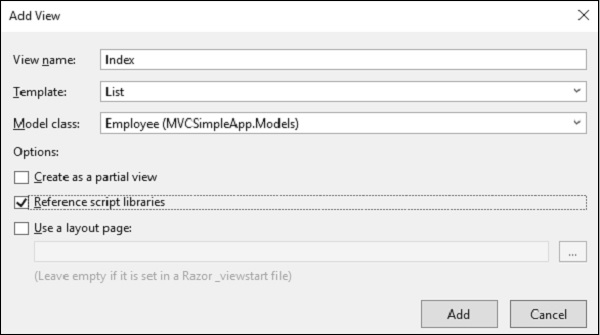
Step 17 − Select the List from the Template dropdown and Employee in Model class dropdown and also uncheck the ‘Use a layout page’ checkbox and click ‘Add’ button.
It will add some default code for you in this view.
@model IEnumerable<MVCSimpleApp.Models.Employee>
@{
   Layout = null;
}

<!DOCTYPE html>
<html>
   <head>
      <meta name = "viewport" content = "width = device-width" />
      <title>Index</title>
   </head>

   <body>
      <p>@Html.ActionLink("Create New", "Create")</p>
         <table class = "table">
         <tr>
            <th>
               @Html.DisplayNameFor(model => model.Name)
            </th>

            <th>
               @Html.DisplayNameFor(model => model.JoiningDate)
            </th>

            <th>
               @Html.DisplayNameFor(model => model.Age)
            </th>

            <th></th>
         </tr>

         @foreach (var item in Model) {
            <tr>
               <td>
                  @Html.DisplayFor(modelItem => item.Name)
               </td>

               <td>
                  @Html.DisplayFor(modelItem => item.JoiningDate)
               </td>

               <td>
                  @Html.DisplayFor(modelItem => item.Age)
               </td>

               <td>
                  @Html.ActionLink("Edit", "Edit", new { id = item.ID }) |
                  @Html.ActionLink("Details", "Details", new { id = item.ID }) |
                  @Html.ActionLink("Delete", "Delete", new { id = item.ID })
               </td>

            </tr>
         }

      </table>
   </body>
</html>
Step 18 − Run this application and you will receive the following output.
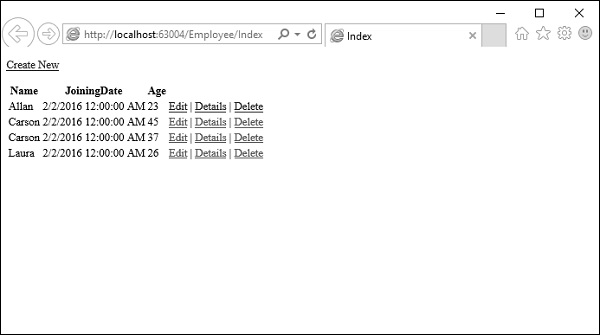
A list of employees will be displayed.