- ASP.NET Core Tutorial
- ASP.NET Core - Home
- ASP.NET Core - Overview
- ASP.NET Core - Environment Setup
- ASP.NET Core - New Project
- ASP.NET Core - Project Layout
- ASP.NET Core - Project.Json
- ASP.NET Core - Configuration
- ASP.NET Core - Middleware
- ASP.NET Core - Exceptions
- ASP.NET Core - Static Files
- ASP.NET Core - Setup MVC
- ASP.NET Core - MVC Design Pattern
- ASP.NET Core - Routing
- ASP.NET Core - Attribute Routes
- ASP.NET Core - Action Results
- ASP.NET Core - Views
- Setup Entity Framework
- ASP.NET Core - DBContext
- ASP.NET Core - Razor Layout Views
- ASP.NET Core - Razor View Start
- ASP.NET Core - Razor View Import
- ASP.NET Core - Razor Tag Helpers
- ASP.NET Core - Razor Edit Form
- ASP.NET Core - Identity Overview
- ASP.NET Core - Authorize Attribute
- Identity Configuration
- ASP.NET Core - Identity Migrations
- ASP.NET Core - User Registration
- ASP.NET Core - Create a User
- ASP.NET Core - Log In and Log Out
- ASP.NET Core Useful Resources
- ASP.NET Core - Quick Guide
- ASP.NET Core - Useful Resources
- ASP.NET Core - Discussion
ASP.NET Core - Log In and Log Out
In this chapter, we will discuss the login and logout feature. Logout is rather simple to implement as compared to login. Let us proceed with the Layout view because we want to build a UI that has some links. This will allow a signed in user to log out and also display the username.
<!DOCTYPE html>
<html>
   <head>
      <meta name = "viewport" content = "width = device-width" />
       <title>@ViewBag.Title</title>
   </head>

   <body>
      <div>
         @DateTime.Now
      </div>

      <div>
         @RenderBody()
      </div>

   </body>
</html>
For an anonymous user, we will show a login link.
All the information you need to build this UI is available from the Razor view context.
First, let us add the namespace System.Security.Claims in your layout view.
@using System.Security.Claims
<!DOCTYPE html>
<html>

   <head>
      <meta name = "viewport" content = "width = device-width" />
      <title>@ViewBag.Title</title>
   </head>

   <body>
      <div>
         @if (User.IsSignedIn()) {
            <div>@User.GetUserName()</div>
            <form method = "post" asp-controller = "Account" aspcontroller = "Logout">
               <input type = "submit" value = "Logout"/>
            </form>
         } else {
            <a asp-controller = "Account" asp-action = "Login">Login</a>
            <a asp-controller = "Account" asp-action = "Register">Register</a>
         }
      </div>

      <div>
         @DateTime.Now
      </div>

      <div>
         @RenderBody()
      </div>

   </body>
</html>
There is a User property that is available inside every Razor view and we want to build a UI that will display the logged in user's name. An extension method IsSignedIn is also available here.
We can invoke this method and if it returns true, this is where we can place some markup to display the username, display a logout button.
Now if the user is signed in, we can display the user's username using the helper method GetUserName.
We will have to build a logout button inside a form, which will be posted to the web server. This has to be done as it will create certain unsavory conditions, if you allow a simple GET REQUEST to allow a user out.
We will force this to be a post, and when the user submits this form, all we need to do is hit on the Logout action, which we will implement through the AccountController, and logout the user.
If the user is not signed in and we have an anonymous user, then we need to show a link that will go to the AccountController, specifically to the Login action, and it can display the text Login.
We also need to add a link for new users to register and go directly to the Register page.
Let us now go to the AccountController and implement the logout action first as in the following program.
[HttpPost]
public async Task<IActionResult> Logout() {
   await _signManager.SignOutAsync();
   return RedirectToAction("Index", "Home");
}
This action responds only to the HttpPost. This is an async action. We will have to call another asynchronous method on the Identity framework.
We can return a task of IActionResult and the action is named Logout.
All we need to do to logout is to await the SignInManager's SignOutAsyncmethod.
The user context has changed now; we now have an anonymous user. The view will be redirected to the home page and we will go back to the list of employees.
Let us now proceed and build our Login feature. Here, we will need a pair of actions, one that responds to an HttpGet request and displays the form that we can use to log in, and one that responds to an HttpPost request.
To begin with, we will need a new ViewModel to pull the login data because logging in is very different from registering. So, let us add a new class and call it LoginViewModel.
public class LoginViewModel {
   public string Username { get; set; }

   [DataType(DataType.Password)]
   public string Password { get; set; }

   [Display(Name ="Remember Me")]
   public bool RememberMe { get; set; }
   public string ReturnUrl { get; set; }

}
When the users log in, they have to provide some information like the username, password.
The third piece of information must be login UIs. These come with a little checkbox that says — “Do you want to remember me”. This is the choice between do we want a session cookie, or do we want a more permanent cookie.
To allow this feature we have added a Boolean property RememberMe and we have used a Display annotation. Now when we build a label, the text Remember Me gets displayed with a space.
The last information that we actually want as part of this ViewModel is to have a property that will store the ReturnUrl.
Let us now add the Login action that will respond to the Get request as shown in the following program.
[HttpGet]
public IActionResult Login(string returnUrl = "") {
   var model = new LoginViewModel { ReturnUrl = returnUrl };
   return View(model);
}
We will take the returnUrl as a parameter that is in the query string.
The returnUrl might not always be there. Let us have an empty string as the default.
We will now have a new view by adding a new MVC View Page in the Views → Account folder.
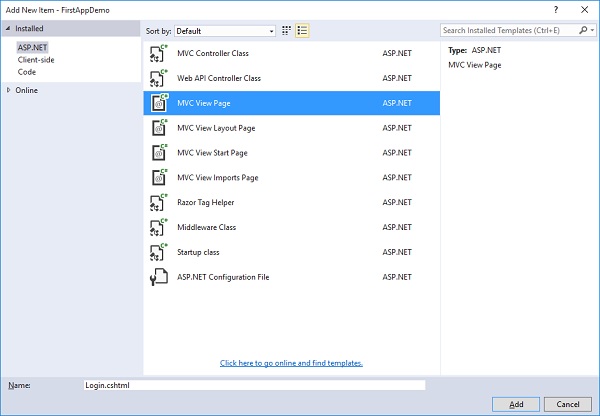
In the middle pane, select the MVC View Page and call it Login.cshtml and then Click on the Add button. Let us add the following code in the Login.cshtml file.
@model LoginViewModel
@{
   ViewBag.Title = "Login";
}
<h2>Login</h2>

<form method = "post" asp-controller = "Account" asp-action = "Login"
   asp-route-returnurl = "@Model.ReturnUrl">
      <div asp-validation-summary = "ValidationSummary.ModelOnly"></div>

      <div>
         <label asp-for = "Username"></label>
         <input asp-for = "Username" />
         <span asp-validation-for = "Username"></span>
      </div>

      <div>
         <label asp-for = "Password"></label>
         <input asp-for = "Password" />
         <span asp-validation-for = "Password"></span>
      </div>

      <div>
         <label asp-for = "RememberMe"></label>
         <input asp-for = "RememberMe" />
         <span asp-validation-for = "RememberMe"></span>
      </div>
   <input type = "submit" value = "Login" />
</form>
In this login view, we have set the title of the page to Login and then we have a form that will post to the AccountLogin action.
We need to use a tag helper, asp-route-returnurl, to make sure that the ReturnUrl is there in the URL that the form posts back to.
We need to send that ReturnUrl back to the server so that if the user does successfully log in, we can send it over to the place they were trying to get to.
Anything that you add after asp-route-, id or returnurl, whatever you have there, that will go into the request somewhere, either into the URL path or as a query string parameter.
We have our ValidationSummary and inputs for Username, Password, and RememberMe, and then we have a Submit button.
`AccountController, and implement the Post action. This action that responds to HttpPost. This will be an Async method because we will need to call into the Identity framework and return a task or IActionResult.
[HttpPost]
public async Task<IActionResult> Login(LoginViewModel model) {
   if (ModelState.IsValid) {
      var result = await _signManager.PasswordSignInAsync(model.Username,
         model.Password, model.RememberMe,false);

      if (result.Succeeded) {
         if (!string.IsNullOrEmpty(model.ReturnUrl) && Url.IsLocalUrl(model.ReturnUrl)) {
            return Redirect(model.ReturnUrl);
         } else {
            return RedirectToAction("Index", "Home");
         }
      }
   }
   ModelState.AddModelError("","Invalid login attempt");
   return View(model);
}
We call this Login, and now we expect to receive a LoginViewModel.
We need to to check if the ModelState is valid. If it is valid, then sign in the user by calling an API on the SignInManager.
The PasswordSignInAsync method will return a result and if the result succeeded, we know the user has logged in successfully.
We also have a return URL. If it is a valid local Url, we will be redirected to the return URL.
If the user has just logged in and does not have any specific place to go, we will redirect the user to the Index action of the HomeController.
We might be in a situation where the user provides an invalid password or an invalid username. We also need to add a model error that prompts if there is an Invalid login attempt. This helps the user to know if something went wrong.
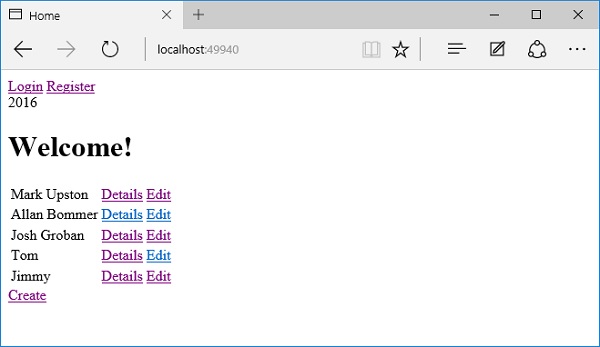
Let us now save everything and run the application.
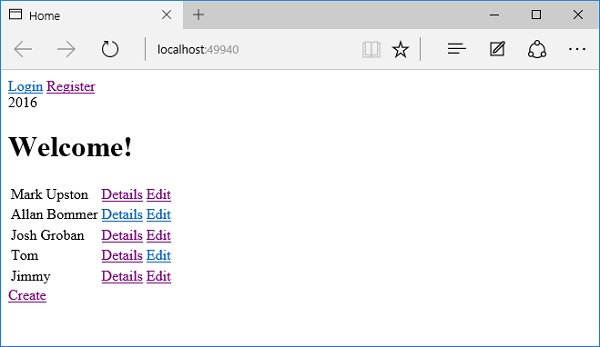
We now have Login and Register links. Let us click on the Login link.
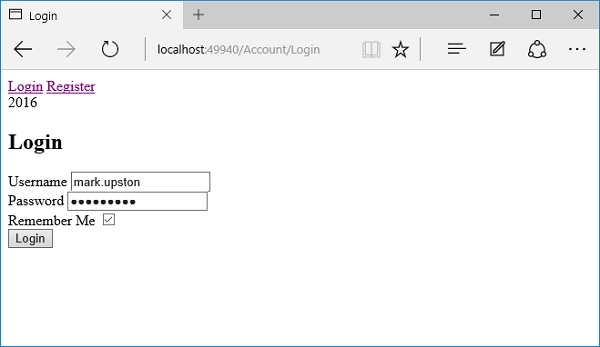
Let us login with the user that we created in the previous chapter by specifying the Username and Password and check the Remember Me check box.
When you click on the Login button, the browser will ask you if you would you like to save your password for the localhost. Let us click on the Yes button.
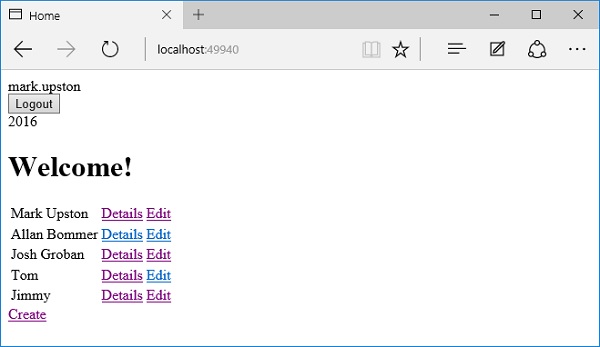
Now, let us logout by clicking on the Logout button.
As an anonymous user, let us go and try to edit employee details.
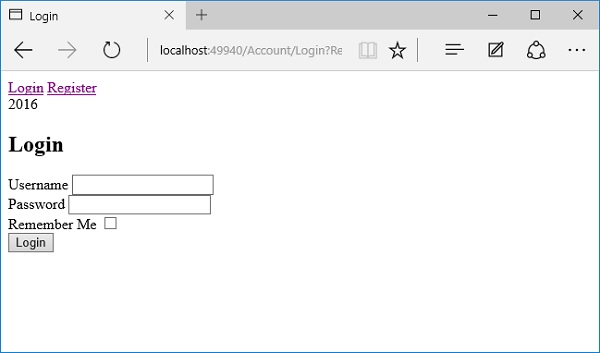
You can see now that we have been redirected to the Login view.
Let us log in with your username and password and check the Remember Me check box.
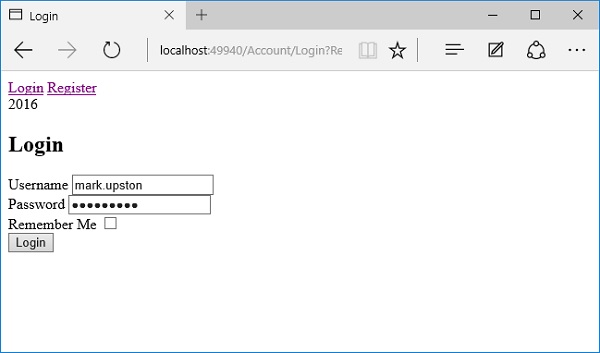
Now, click the Login button.
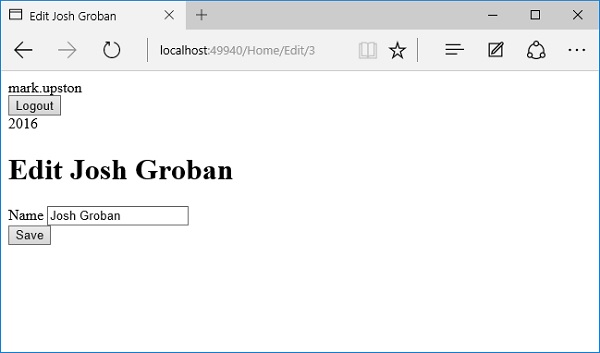
You can now see that we are directed to the URL that we want to edit. This is because we processed the return URL appropriately.