- Angular7 Tutorial
- Angular7 - Home
- Angular7 - Overview
- Angular7 - Environment Setup
- Angular7 - Project Setup
- Angular7 - Components
- Angular7 - Modules
- Angular7 - Data Binding
- Angular7 - Event Binding
- Angular7 - Templates
- Angular7 - Directives
- Angular7 - Pipes
- Angular7 - Routing
- Angular7 - Services
- Angular7 - Http Client
- Angular7 - CLI Prompts
- Angular7 - Forms
- Materials/CDK-Virtual Scrolling
- Angular7 - Materials/CDK-Drag & Drop
- Angular7 - Animations
- Angular7 - Materials
- Testing & Building Angular7 Project
- Angular7 Useful Resources
- Angular7 - Quick Guide
- Angular7 - Useful Resources
- Angular7 - Discussion
Angular7 - Components
Major part of the development with Angular 7 is done in the components. Components are basically classes that interact with the .html file of the component, which gets displayed on the browser. We have seen the file structure in one of our previous chapters.
The file structure has the app component and it consists of the following files −
- app.component.css
- app.component.html
- app.component.spec.ts
- app.component.ts
- app.module.ts
And if you have selected angular routing during your project setup, files related to routing will also get added and the files are as follows −
- app-routing.module.ts
The above files are created by default when we created new project using the angular-cli command.
If you open up the app.module.ts file, it has some libraries which are imported and also a declarative which is assigned the appcomponent as follows −
import { BrowserModule } from '@angular/platform-browser';
import { NgModule } from '@angular/core';
import { AppRoutingModule } from './app-routing.module';
import { AppComponent } from './app.component';

@NgModule({
   declarations: [
      AppComponent
   ],
   imports: [
      BrowserModule,
      AppRoutingModule
   ],
   providers: [],
   bootstrap: [AppComponent]
})
export class AppModule { }
The declarations include the AppComponent variable, which we have already imported. This becomes the parent component.
Now, angular-cli has a command to create your own component. However, the app component which is created by default will always remain the parent and the next components created will form the child components.
Let us now run the command to create the component with the below line of code −
ng g component new-cmp
When you run the above command in the command line, you will receive the following output −
C:\projectA7\angular7-app>ng g component new-cmp
CREATE src/app/new-cmp/new-cmp.component.html (26 bytes)
CREATE src/app/new-cmp/new-cmp.component.spec.ts (629 bytes)
CREATE src/app/new-cmp/new-cmp.component.ts (272 bytes)
CREATE src/app/new-cmp/new-cmp.component.css (0 bytes)
UPDATE src/app/app.module.ts (477 bytes)
Now, if we go and check the file structure, we will get the new-cmp new folder created under the src/app folder.
The following files are created in the new-cmp folder −
- new-cmp.component.css − css file for the new component is created.
- new-cmp.component.html − html file is created.
- new-cmp.component.spec.ts − this can be used for unit testing.
- new-cmp.component.ts − here, we can define the module, properties, etc.
Changes are added to the app.module.ts file as follows −
import { BrowserModule } from '@angular/platform-browser';
import { NgModule } from '@angular/core';
import { AppRoutingModule } from './app-routing.module';
import { AppComponent } from './app.component';
import { NewCmpComponent } from './new-cmp/new-cmp.component';

// includes the new-cmp component we created
@NgModule({
   declarations: [
      AppComponent,
      NewCmpComponent
      // here it is added in declarations and will behave as a child component
   ],
   imports: [
      BrowserModule,
      AppRoutingModule
   ],
   providers: [],
      bootstrap: [AppComponent]
      //for bootstrap the AppComponent the main app component is given.
})
export class AppModule { }
The new-cmp.component.ts file is generated as follows −,
import { Component, OnInit } from '@angular/core'; // here angular/core is imported.

@Component({
   // this is a declarator which starts with @ sign.
   // The component word marked in bold needs to be the same.
   selector: 'app-new-cmp', // selector to be used inside .html file.
   templateUrl: './new-cmp.component.html',
   // reference to the html file created in the new component.
   styleUrls: ['./new-cmp.component.css'] // reference to the style file.
})
export class NewCmpComponent implements OnInit {
   constructor() { }
   ngOnInit() { }
}
If you see the above new-cmp.component.ts file, it creates a new class called NewCmpComponent, which implements OnInit in which there is a constructor and a method called ngOnInit(). ngOnInit is called by default when the class is executed.
Let us check how the flow works. Now, the app component, which is created by default becomes the parent component. Any component added later becomes the child component.
When we hit the url in the "http://localhost:4200/" browser, it first executes the index.html file which is shown below −
<html lang = "en">

   <head>
      <meta charset = "utf-8">
      <title>Angular7App</title>
      <base href = "/">
      <meta name = "viewport" content = "width = device-width, initial-scale = 1">
      <link rel = "icon" type = "image/x-icon" href = "favicon.ico">
   </head>
   <body>
      <app-root></app-root>
   </body>

</html>
The above is the normal html file and we do not see anything that is printed in the browser. We shall take a look at the tag in the body section.
<app-root></app-root>
This is the root tag created by the Angular by default. This tag has the reference in the main.ts file.
import { enableProdMode } from '@angular/core';
import { platformBrowserDynamic } from '@angular/platform-browser-dynamic';
import { AppModule } from './app/app.module';
import { environment } from './environments/environment';

if (environment.production) {
   enableProdMode();
}
platformBrowserDynamic().bootstrapModule(AppModule).catch(err => console.error(err));
AppModule is imported from the app of the main parent module, and the same is given to the bootstrap Module, which makes the appmodule load.
Let us now see the app.module.ts file −
import { BrowserModule } from '@angular/platform-browser';
import { NgModule } from '@angular/core';
import { AppRoutingModule } from './app-routing.module';
import { AppComponent } from './app.component';
import { NewCmpComponent } from './new-cmp/new-cmp.component';

@NgModule({
   declarations: [
      AppComponent,
      NewCmpComponent
   ],
   imports: [
      BrowserModule,
      AppRoutingModule '
   ],
   providers: [],
   bootstrap: [AppComponent]
})
export class AppModule { }
Here, the AppComponent is the name given, i.e., the variable to store the reference of the app.component.ts and the same is given to the bootstrap. Let us now see the app.component.ts file.
import { Component } from '@angular/core';
@Component({
   selector: 'app-root',
   templateUrl: './app.component.html',
   styleUrls: ['./app.component.css']
})
export class AppComponent {
   title = 'Angular 7';
}
Angular core is imported and referred as the Component and the same is used in the Declarator as −
@Component({
   selector: 'app-root',
   templateUrl: './app.component.html',
   styleUrls: ['./app.component.css']
})
In the declarator reference to the selector, templateUrl and styleUrl are given. The selector here is nothing but the tag which is placed in the index.html file that we saw above.
The class AppComponent has a variable called title, which is displayed in the browser. The @Component uses the templateUrl called app.component.html which is as follows −
<!--The content below is only a placeholder and can be replaced.-->
<div style = "text-align:center">
   <h1> Welcome to {{ title }}! </h1>
</div>
It has just the html code and the variable title in curly brackets. It gets replaced with the value, which is present in the app.component.ts file. This is called binding. We will discuss the concept of binding in the subsequent chapter.
Now that we have created a new component called new-cmp. The same gets included in the app.module.ts file, when the command is run for creating a new component.
app.module.ts has a reference to the new component created.
Let us now check the new files created in new-cmp.
new-cmp.component.ts
import { Component, OnInit } from '@angular/core';
@Component({
   selector: 'app-new-cmp',
   templateUrl: './new-cmp.component.html',
   styleUrls: ['./new-cmp.component.css']
})
export class NewCmpComponent implements OnInit {
   constructor() { }
   ngOnInit() { }
}
Here, we have to import the core too. The reference of the component is used in the declarator.
The declarator has the selector called app-new-cmp and the templateUrl and styleUrl.
The .html called new-cmp.component.html is as follows−
<p>
   new-cmp works!
</p>
As seen above, we have the html code, i.e., the p tag. The style file is empty as we do not need any styling at present. But when we run the project, we do not see anything related to the new component getting displayed in the browser.
The browser displays the following screen −
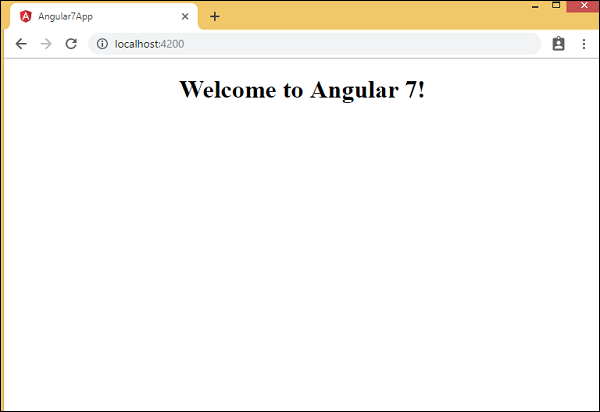
We do not see anything related to the new component being displayed. The new component created has a .html file with following details −
<p>
   new-cmp works!
<p>
But we are not getting the same in the browser. Let us now see the changes required to get the new components contents to get displayed in the browser.
The selector 'app-new-cmp' is created for new component from new-cmp.component.ts as shown below −
import { Component, OnInit } from '@angular/core';

@Component({
   selector: 'app-new-cmp',
   templateUrl: './new-cmp.component.html',
   styleUrls: ['./new-cmp.component.css']
})
export class NewCmpComponent implements OnInit {
   constructor() { }
   ngOnInit() { }
}
The selector, i.e., app-new-cmp needs to be added in the app.component.html, i.e., the main parent created by default as follows −
<!--The content below is only a placeholder and can be replaced.-->
<div style = "text-align:center">
<h1>
Welcome to {{ title }}!
</h1>
</div>
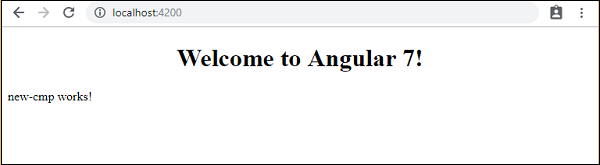
<app-new-cmp7></app-new-cmp>
When the <app-new-cmp></app-new-cmp> tag is added, all that is present in the .html file, i.e., new-cmp.component.html of the new component created will get displayed on the browser along with the parent component data.
Let us add some more details to the new component created and see the display in the browser.
new-cmp.component.ts
import { Component, OnInit } from '@angular/core';

@Component({
   selector: 'app-new-cmp',
   templateUrl: './new-cmp.component.html',
   styleUrls: ['./new-cmp.component.css']
})
export class NewCmpComponent implements OnInit {
   newcomponent = "Entered in new component created";
   constructor() { }
   ngOnInit() { }
}
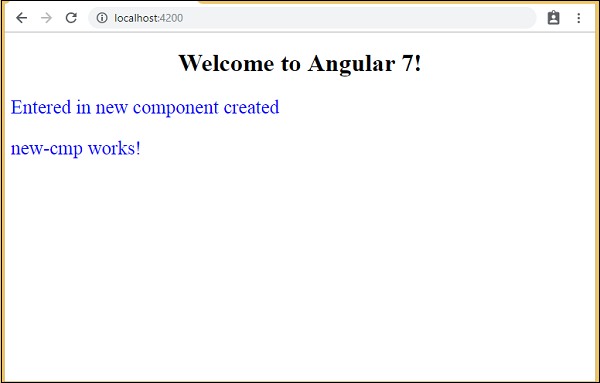
In the class, we have added one variable called newcomponent and the value is “Entered in new component created”.
The above variable is added in the new-cmp.component.html file as follows −
<p>
   {{newcomponent}}
</p>
<p>
   new-cmp works!
</p>
Now since we have included the <app-new-cmp></app-new-cmp>selector in the app.component.html which is the .html of the parent component, the content present in the new-cmp.component.html file gets displayed on the browser. We will also add some css for the new component in the new-cmp.component.css file as follows −
p {
   color: blue;
   font-size: 25px;
}
So we have added blue color and font-size as 25px for the p tags.
Following screen will be displayed in the browser −
Similarly, we can create components and link the same using selector in the app.component.html file as per our requirements.